This chapter describes how to work with timers in jBPM.
Upon events in the process, timers can be created. When a timer expires, an action can be executed or a transition can be taken.
The easiest way to specify a timer is by adding a timer element to the node.
<state name='catch crooks'>
  <timer name='reminder'
         duedate='3 business hours'
         repeat='10 business minutes'
         transition='time-out-transition' >
    <action class='the-remainder-action-class-name' />
  </timer>
</state>
A timer that is specified on a node, is not executed after the node is left. Both the transition and the action are optional. When a timer is executed, the following events occur in sequence :
- an event is fired of type timer
- if an action is specified, the action is executed.
- if a transition is specified, a signal will be sent to resume execution over the given transition.
Every timer must have a unique name. If no name is specified in the timer element, the name of the node is taken as the name of the timer.
The timer action can be any supported action element like e.g. action or script.
Timers are created and cancelled by actions. The 2 action-elements are create-timer and cancel-timer. Actually, the timer element shown above is just a short notation for a create-timer action on node-enter and a cancel-timer action on node-leave.
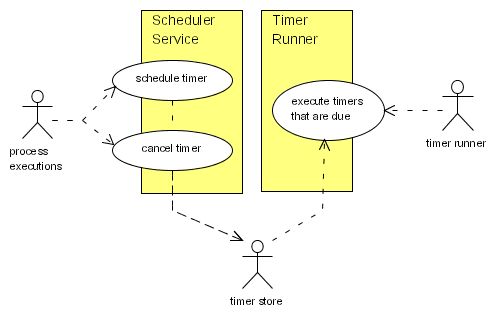
Process executions create and cancel timers. The timers are stored in a timer store. A separate timer runner must check the timer store and execute the timers when they are due.
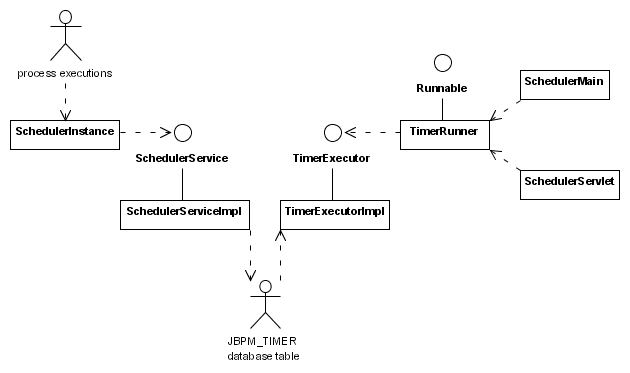
The following class diagram shows the classes that are involved in the scheduler deployment. The interfaces SchedulerService and TimerExecutor are specified to make the timer execution mechanism pluggable.

