Now, it’s time to reverse engineer the workshop database into a fully functioning Seam CRUD (Create Read Update Delete) application.
In JBoss Developer Studio, switch to the Seam perspective, and then right-click the project and select → .
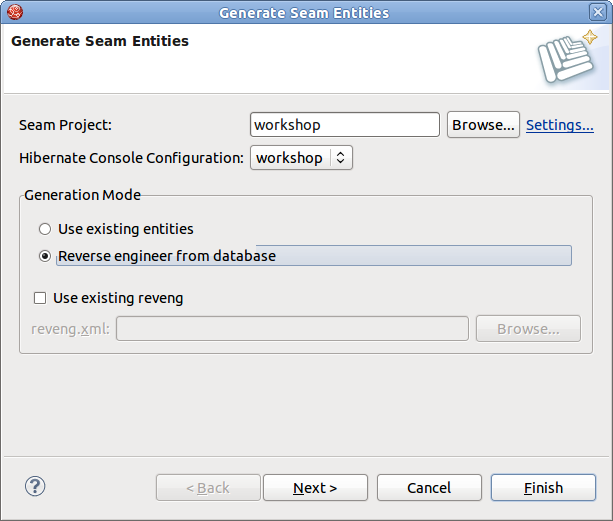
The "workshop" project in the Seam Generate Entities wizard will be selected automatically. There is no need to change something more, click the button to proceed to the next step.
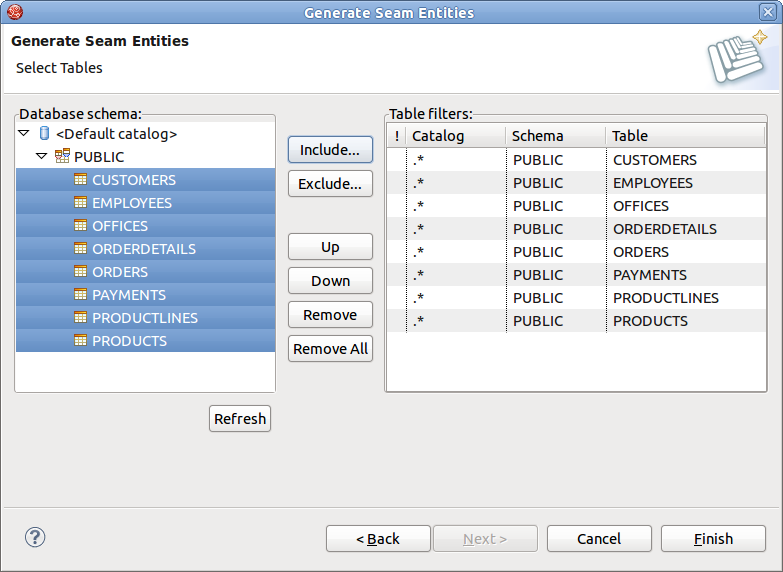
On the next page use the button to display the database, then click the button to include all the tables from the database, and finally click the button.
After running the Generate Entities action, you will see new org.domain.workshop.entity classes. These classes represent insert/update/delete/query logic.
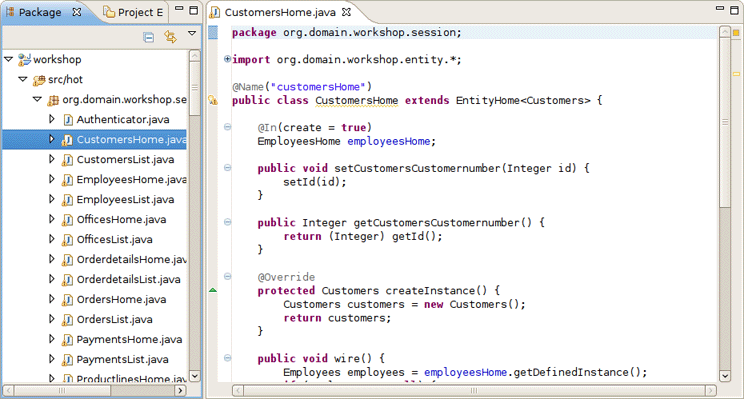
There is also the org.domain.workshop.entity package that contains the JPA classes. These are the entity beans that are mapped to database tables. Note that you can use Seam refactoring tools with Seam components. Read more about it in Seam refactoring tools chapter of Seam Dev Tools Reference Guide.
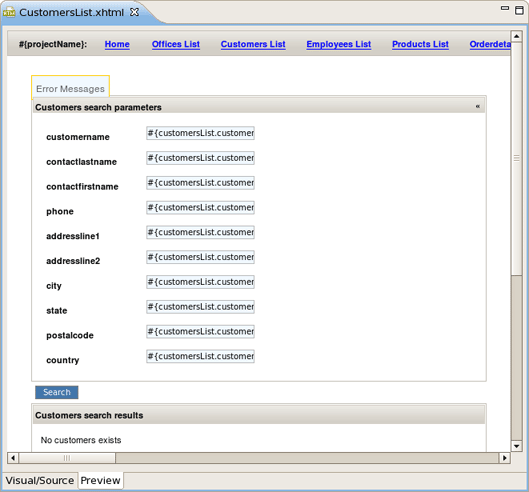
Last, but not least, there are facelets for all of the CRUD screens. The best way to get a feel for the generated code is to open a browser and play around with the application. Go to http://localhost:8080/workshop and insert/update/delete/query a few records. There is quite a bit of AJAX in this application, but we will explore that later on in the lab. For now, take note of the page tabs, required field logic and data table sorting in the list pages.
Tip
If you see the error java.lang.ClassNotFoundException: org.jboss.seam.servlet.SeamListener in the console output from the Application Server, you may need to copy the jboss-seam.jar file from the lib subdirectory in the Seam library (which can be downloaded from here) into the /server/default/deploy/workshop.war/WEB-INF/lib/ subdirectory in your Application Server (where "default" refers to the server profile that you are using).
Tip
If you see the error Could not instantiate Seam component: org.jboss.seam.security.ruleBasedPermissionResolver, copy the mvel2.jar file from the Seam library to the same destination directory mentioned in the tip above.
Congratulations! You now have a fully functioning CRUD application that is AJAX enabled.
Now, it's time to write some JPA queries using the Hibernate perspective in JBoss Developer Studio.
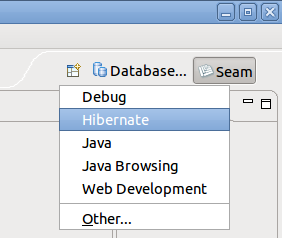
In the upper right corner of the workbench there is a small icon (see the figure below), click on it and select .
Look at the Hibernate Configurations view. In the "workshop" project, drill down on the Session Factory and notice that the JPA entities/attributes are listed in a nice tree view.
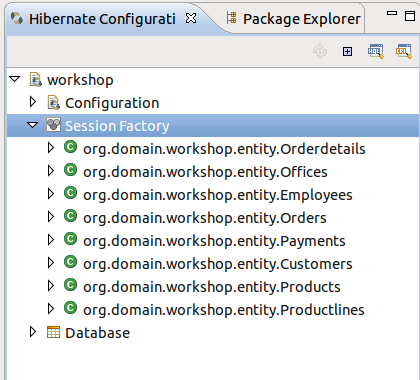
Right click on the Session Factory and select . This will open a JPA query scratch pad window.
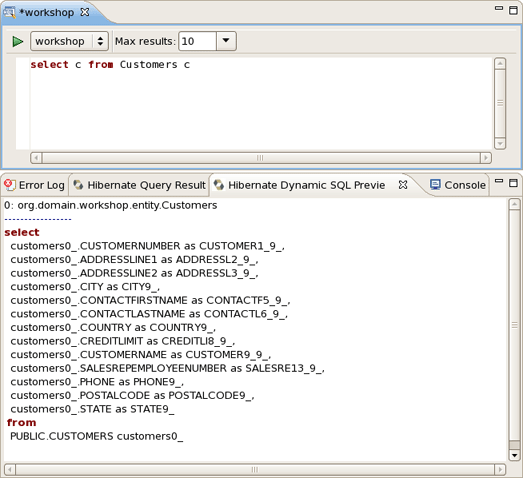
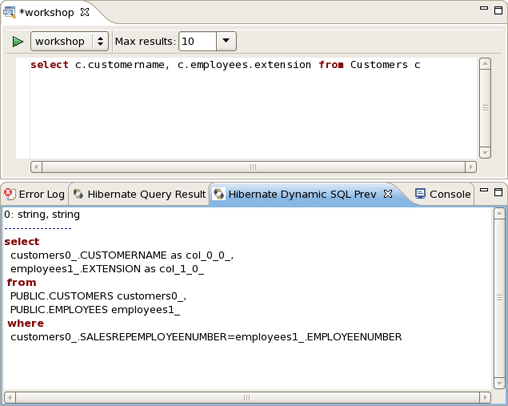
Write your query and click on the "Hibernate Dynamic SQL Preview" tab. You should see the SQL that will be executed if this JPA query is run.
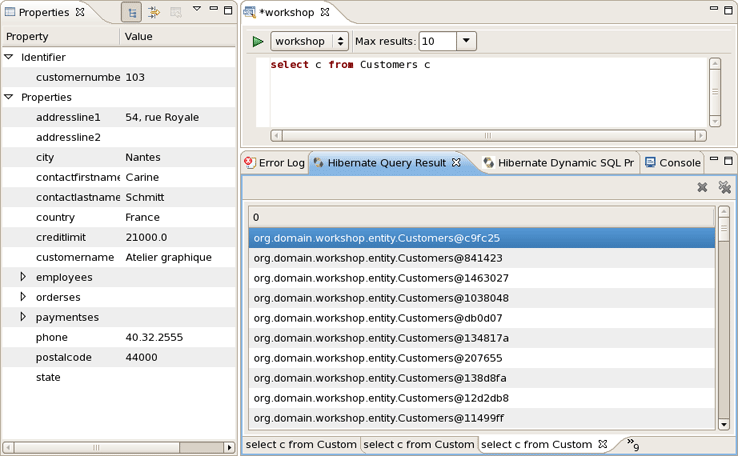
Run the query by clicking on the green run icon.
The results are listed in the "Hibernate Query Result" view. There is a "Properties" tab in the workbench that can be used to see a specific JPA result. These results represent the JPA objects because our query did not specify column names.
The query can be refined, and take note that there is nice code completion in the JPA query editor.

A refined query will return results that are more ResultSet oriented. Notice the join logic that JPA supports.
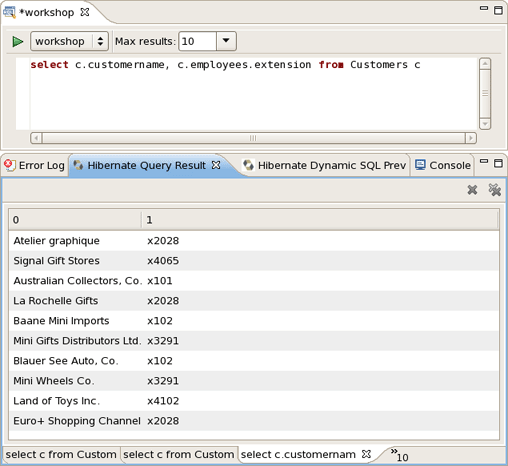
There was no need to specify an Employees table in the from part of the JPA query because JPA supports reference traversal via Java class attribute references. Not only are JPA and HQL queries fully supported, but Criteria based queries can also be written in the Criteria Editor. You should spend some time tinkering with different queries and possibly Criteria based queries, even though the instructions are not provided in this lab.
Now, it’s time to view the data model for the workshop database.
In the Hibernate Configurations view, select "workshop" project and expand the Configuration node. Select the Customers entity, right click on it, choose .
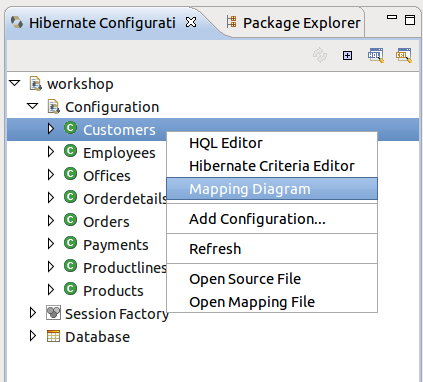
You see a Diagram tab for the CUSTOMERS table and any tables that have FK references. This is a handy way to view the data model and JPA mappings. Now, you’ve got access to something that the Erwin Data Modeler can’t do.
