- 8.1. Overview of OpenShift Tools
- 8.2. Features of OpenShift Tools
- 8.2.1. Features Overview
- 8.2.2. Create an OpenShift User Account
- 8.2.3. Connect to OpenShift
- 8.2.4. Manage a Connection
- 8.2.5. Generate and Upload SSH keys to OpenShift
- 8.2.6. Manage SSH Keys
- 8.2.7. Create a Domain
- 8.2.8. Manage a Domain
- 8.2.9. Create and Deploy an Application on OpenShift
- 8.2.10. Deploy an Existing Application on OpenShift
- 8.2.11. Import a Deployed OpenShift Application into the IDE
- 8.2.12. Generate a server adapter for an application
- 8.2.13. View a Deployed Application and Associated Information
- 8.2.14. Manage a Deployed Application
OpenShift is Red Hat's Platform as a Service (PaaS) for applications. It consists of an application platform in the cloud, enabling you to build, test and run applications in a cloud architecture. OpenShift provides disk space, CPU resources, network connectivity, and a runtime environment.
OpenShift has a number of key features to assist you in developing and deploying applications:
Unique domain names, or namespaces, support the hosting of your applications. A user account provides you with access to the domain, the latter having the potential to be associated with multiple applications.
Numerous cartridges give you access to popular language, database and management frameworks. OpenShift can also be customized, allowing you to add APIs of your choice.
Gears provide RAM and disk space for your applications and cartridges. OpenShift currently provides two gear sizes:
Small - 512MB of RAM, 100MB of swap space, and 1GB of disk space
Medium - 1GB of RAM, 100MB of swap space, and 1GB of disk space
You can use up to three small gears as part of OpenShift Online with Free Plan, a free OpenShift user account, and extend to more gears and bigger gears with OpenShift Online with Silver Plan or OpenShift Enterprise. OpenShift offers flexibility by letting you choose the number of gears to assign to your application.
Built-in administrative and stack management frees you up to focus on code development. OpenShift manages the intricate details of deploying your application to the stack and interfacing with middleware technologies for you.
Automatic or manual scaling of the resources supporting your applications ensure that application performance does not suffer as usage increases. OpenShift can create additional instances of your application and enable clustering.
OpenShift can be accessed via the web interface at https://www.openshift.com/ on the OpenShift website or via the OpenShift command line interface.
OpenShift Tools is tooling available within the IDE for OpenShift. It provides an alternative way of accessing OpenShift and managing the development of applications deployed there.
OpenShift Tools consists of a set of wizards and actions, which together provide core functionality for developing OpenShift applications:
The tools prepare you for working with OpenShift, by assisting you to create OpenShift user accounts and domains.
OpenShift Tools assists you with the essential tasks of setting up your system and the IDE for OpenShift interaction, such as creating connections and generating and uploading SSH keys.
When creating and developing OpenShift applications, OpenShift Tools provides wizards for creating new and importing existing OpenShift applications.
A variety of actions are available for managing deployed applications, for tasks such as restarting applications, uploading changes to applications, viewing OpenShift server output, and deleting applications.
The aim of this section is to guide you in using OpenShift Tools:
Create OpenShift user accounts and connect to OpenShift
Generate SSH keys and upload them to an OpenShift user account
Create and manage domains
Create new OpenShift applications from within the IDE
Deploy existing applications in the IDE to OpenShift and import existing OpenShift applications into the IDE
Manage deployed OpenShift applications and view information about them
To begin using OpenShift, you need to create an OpenShift user account. OpenShift Tools provides the ability to create a user account from within the IDE.
To create a user account, click the OpenShift Explorer tab. If the OpenShift Explorer tab is not visible, click →→.

Click the icon
 and click the link to sign up for an account. This opens https://openshift.redhat.com/app/account/new in a browser tab. Follow the instructions on the OpenShift web page to create an account. Once created, you can close the browser tab.
Management of your user account, such as changing or resetting your password, must be carried out through the OpenShift management console at https://openshift.redhat.com/app/login?redirectUrl=%2Fapp%2Fconsole.
Once you have an OpenShift user account, you can connect to OpenShift and then create a domain and applications. The procedure below guides you through setting up a connection to OpenShift using your user account information.
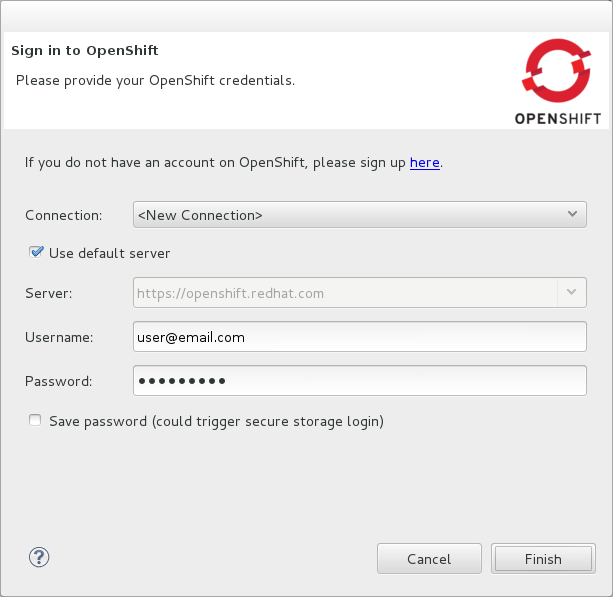
Procedure 8.1. Connect to OpenShift
Click the OpenShift Explorer tab and click the icon
.
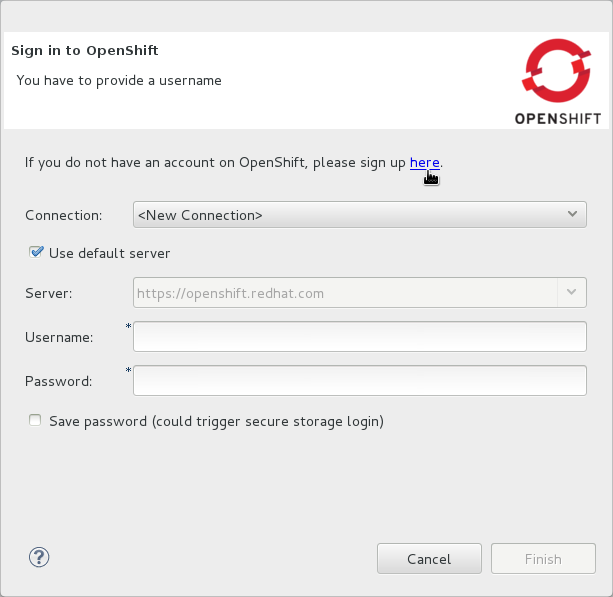
From the Connection list, select New Connection.
If you want to use a server other than the default at https://openshift.redhat.com, clear the Use default server check box and in the Server field type the address of the server.
Note
There are a number of OpenShift servers from which you can choose:
OpenShift Online is the public cloud offering and it is hosted at https://openshift.redhat.com.
OpenShift Enterprise is a private cloud, obtained through a subscription and hosted in a private data center.
OpenShift Origin is a local cloud, available to download and install locally for development and testing purposes.
In the Username and Password fields, type your OpenShift user account authentication information.
If you want the Password field to automatically populate for this connection in future, select the Save password check box.
Note
The password is retained in secure storage provided by the IDE. To manage the settings for secure storage, click →, expand General→Security and select Secure Storage.
Click for OpenShift Tools to connect to OpenShift.
If your credentials are incorrect, the Sign in to OpenShift wizard remains open for you to change your authentication information.
If you selected for your password to be saved, you are prompted to enter your secure storage password or, if this is your first use of secure storage, you are prompted to set a secure storage password.
Once your credentials are verified as correct, the wizard closes and a live OpenShift connection is listed in the OpenShift Explorer tab.

When you close the IDE, any live OpenShift connections will be disconnected but they can be easily reestablished. OpenShift Tools lists previous connections in the OpenShift Explorer tab until cleared by you. In the OpenShift Explorer tab, double-click or expand the appropriate connection to open an automatically completed connection wizard. Type your password or the master password, if using the saved password facility, and click .
Using OpenShift Tools, you can view and manage live OpenShift connections.
- View information about a connection
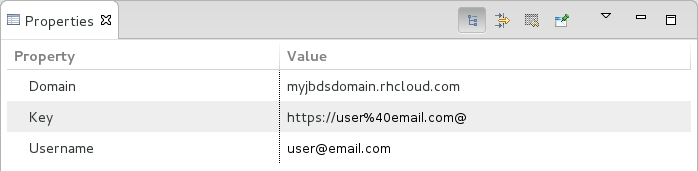
In the OpenShift Explorer tab, right-click the connection and click . The Properties tab opens and shows information about the associated domain, key and user account. The Key parameter is unique to the connection and it is used by the IDE for identification purposes.
- Refresh information about a connection
In the OpenShift Explorer tab, right-click the connection and click . Information is retrieved from OpenShift and the OpenShift Explorer tab updated as appropriate. This action is useful if you are simultaneously making changes to your domain and applications in the IDE and the OpenShift web interface or command line interface. Additionally, it may be used to recover from errors.
- Delete a connection
In the OpenShift Explorer tab, right-click the connection and click .
SSH keys are essential when working with OpenShift. They enable you to develop and access deployed applications. SSH keys are also used to control access of other contributors to your OpenShift applications. SSH keys must be uploaded to the OpenShift server and, as detailed in the procedure below, OpenShift Tools can assist with both the generation and uploading of SSH keys to OpenShift.
Procedure 8.2. Generate and Upload SSH Keys to OpenShift
In the OpenShift Explorer tab, right-click the connection and click .
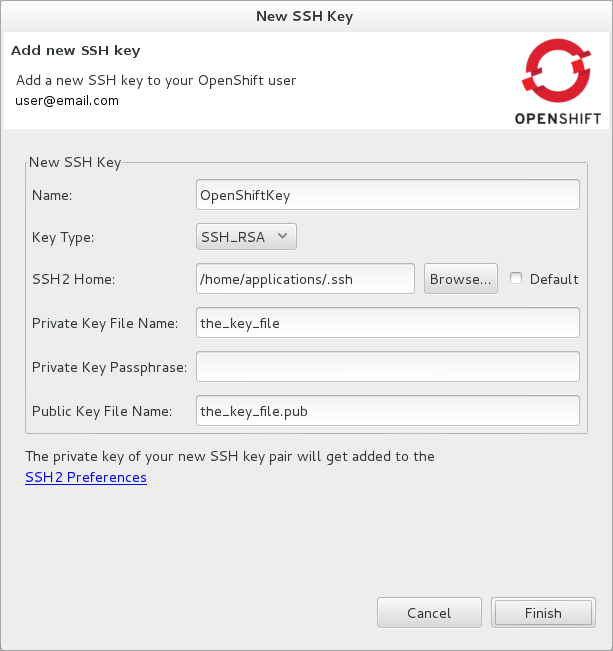
To create a new SSH private-public key pair, click .
In the Name field, type a name for the key pair that will be used by OpenShift to distinguish the key pair from others associated with your account.
From the Key Type list, select SSH_RSA.
Ensure the SSH2 Home field contains the location where you want to create the files associated with the key pair. To change the location, clear the Default check box and type the location in the SSH2 Home field or click to navigate to the desired location.
Note
The default location for creating SSH key files is determined by the SSH information for the IDE. The default location can be altered by clicking →, expanding General→Network Connections, selecting SSH2 and changing the location in the SSH2 home field of the General tab.
In the Private Key File Name field, type a name for the private key file.
In the Private Key Passphrase field, type a passphrase for use in accessing the private key. This field is not mandatory and can be left empty if you want.
In the Public Key File Name field, type a name for the public key file. Typically the file name of the public key is that of the private key with
.pubappended.Click . The SSH key pair will be generated and the public key automatically uploaded to OpenShift.
Click to close the Manage SSH Keys window.
OpenShift Tools provides actions for managing the SSH keys of your OpenShift account.
- Upload an existing public SSH key to OpenShift
In the OpenShift Explorer tab, right-click the connection and click . Click . In the Name field, type a name for the key that will be used by OpenShift to distinguish the key from others associated with your account. Click to navigate to the public key file. Click and click to close the Manage SSH Keys window.
- Remove a public SSH key from OpenShift
In the OpenShift Explorer tab, right-click the connection and click . From the SSH Public Keys table select the key you want to remove from your OpenShift account and click . At the prompt asking if you are sure you want to remove the key, click . Click to close the Manage SSH Keys window.
Note
only disassociates keys with your OpenShift account. The files associated with a 'removed' SSH public-private key pair still exist in the local location where they were generated and can be uploaded again to OpenShift using the action.
- Refresh the SSH key information associated with OpenShift
In the OpenShift Explorer tab, right-click the connection and click . Click and click to close the Manage SSH Keys window. It may be necessary to use this action if you make changes to your OpenShift SSH key settings through the OpenShift web interface while the IDE is open with a live OpenShift connection.
Once you have an OpenShift user account, you need to create a domain in which to host your applications. Each user account can be associated with one domain only. The procedure below guides you through creating a new domain but you first need a live connection. If you already have a domain associated with your user account then domain information will be automatically passed to the IDE when a live connection is started.
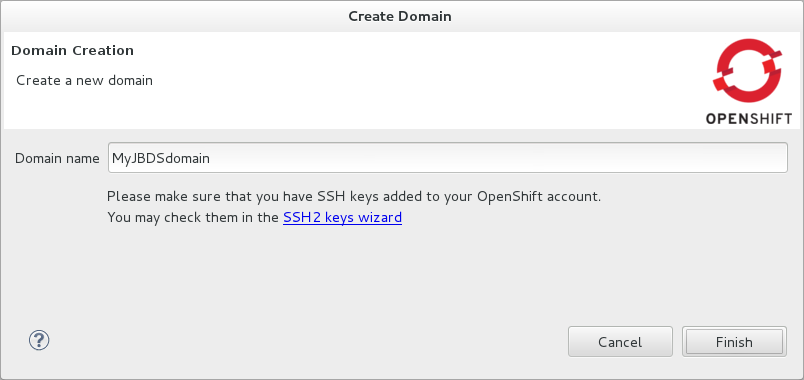
Procedure 8.3. Create a Domain
In the OpenShift Explorer tab, right-click the connection and click .
In the Domain Name field, type the name of the domain you would like to use and click . The name you provide will be appended with
.rhcloud.com. Domain names must be unique so if the name you have chosen is already in use you will see a warning. In this case, choose another name and try again until you have a unique one.
Note
There are restrictions on the name you can use for a domain. Names must consist only of letters and digits and can have a maximum length of 16 characters.
OpenShift Tools provides actions for managing the domain of your OpenShift account.
- View the name of the current domain
In the OpenShift Explorer tab, right-click the connection and click . The Properties tab will open, where the first row of the table contains the name of the domain.
- Rename a domain
In the OpenShift Explorer tab, right-click the connection and click . In the Domain Name field, type the new name of the domain and click . You cannot change the name of a domain which has associated applications.
Important
Renaming your domain changes the public URLs of applications you later create.
- Delete a domain
In the OpenShift Explorer tab, right-click the connection and click . You cannot delete a domain that has any applications associated with it unless, at the prompt, you check the Force applications deletion check box. Click to complete the deleting action.
Note
Forcing the deletion of applications results in the applications being deleted from the OpenShift server. The projects of applications will still be visible in the Project Explorer and Git Repositories tab as the local clone of the Git repository for projects is not deleted.
OpenShift Tools provides the OpenShift Application wizard to assist you in creating new applications and deploying them on OpenShift. OpenShift uses Git, a free and open source version control system. The wizard will also assist you in setting up linked remote and local Git repositories containing the original and clone of your project, respectively. To create an application, you must have a domain and, in the case that you do not have a domain already set up, the wizard will prompt and guide you in creating one first. The procedure below guides you through using the OpenShift Application wizard.
Important
You must have SSH keys set up first in order to successfully proceed with the OpenShift Application wizard.
Procedure 8.4. Create and Deploy an Application on OpenShift
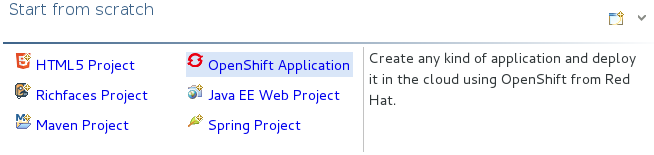
In the OpenShift Explorer tab, right-click the connection and click . Alternatively, in JBoss Central click OpenShift Application, after which you are prompted to select an OpenShift connection and provide your user authentication information.
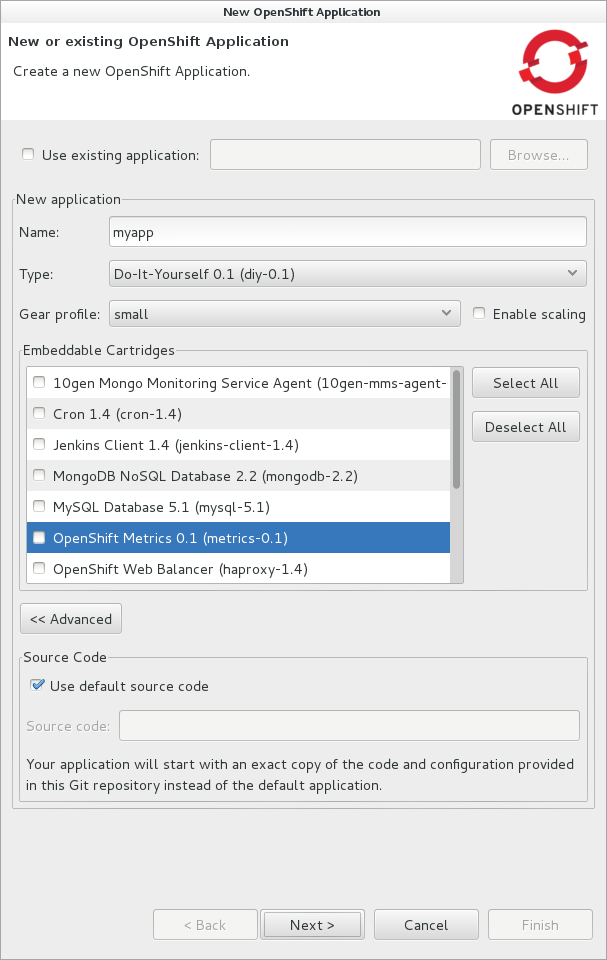
In the Name field, type a name for the new OpenShift application.
Note
There are restrictions on the name you can use for an application. Names must consist only of letters and digits.
From the Type list, select a runtime server. This will ensure the necessary core programming or technology cartridge is added to your application.
From the Gear profile list, select the gear size. This is RAM and disk space required by your applications and its cartridges. If you are using OpenShift Online with Free Plan, you have access to small gears only.
If you want OpenShift to automatically increase the instances of your application and enable clustering as usage increases, select the Enable scaling check box.
From the Embedded Cartridges list, select the functionality you want to enable in your application. This will add associated capabilities and support to your application.
To specify that the new application is to be based on source code from an existing Git repository, click and clear the Use default source code check box. In the Source code field, type the URL of the source code location. OpenShift clones the source code to the OpenShift git repository for your application, instead of using the default template.
Click .
Ensure the Create a new project and Create and set up a server for easy publishing check boxes are selected. The latter will automatically create an OpenShift server adapter for the application, enabling you to easily upload changes to the OpenShift server.
To disable Maven builds, check the Disable automatic Maven builds when pushing to OpenShift check box. This informs OpenShift not to launch the Maven build process when the Maven project is pushed to OpenShift but to put the deployment straight into the deployments folder. It is useful when you want to push applications already built for deployment rather than source code.
Click .
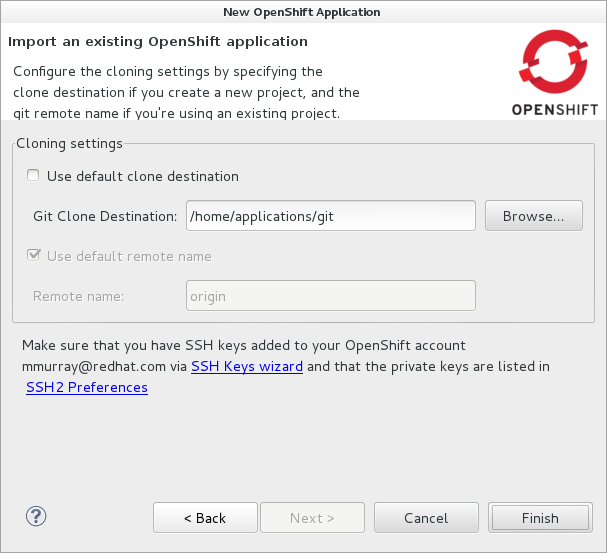
The Location field shows the location that will be used for the local Git repository. The location must already exist to be able to proceed with the wizard. To change the location, clear the Use default location check box and type the location in the Location field or click to navigate to the desired location.
Click . If you are prompted that the authenticity of the host cannot be established and asked whether you want to continue connecting, check that the host name matches that of your application and domain and click .
At the prompt asking if you want to publish committed changes to OpenShift, click . The progress of the application creation process is visible in the Console tab.
Once created, the application is listed under the connection in the OpenShift Explorer tab. The application type proceeds the application name. The project is also listed in the Project Explorer and Git Repositories tabs, where the details proceeding the application name indicate the current Git branch and status compared to the remote repository. Additionally, the server adapter for the application is visible in the Servers tab.
Note
To view the project in the Git Repositories tab, in the Project Explorer tab right-click the project name and click →. Alternatively, click →→, expand Git and select Git Repositories. Click to close the window.
OpenShift Tools can assist you to deploy existing workspace applications to OpenShift, as detailed in the procedure below. The procedure uses the OpenShift Application wizard, with the latter merging the existing project contents with the key metadata files from a new OpenShift application so that the application can be deployed on OpenShift. The wizard also enables git for the existing project, so that you can push project changes to OpenShift via git or allow the OpenShift Server Adapter do it for you.
Procedure 8.5. Deploy an Existing Application on OpenShift
In the OpenShift Explorer tab, right-click the connection and click . Alternatively, in JBoss Central click OpenShift Application, after which you are prompted to select an OpenShift connection and provide your user authentication information.
In the Name field, type a name for the new OpenShift application. For simplicity, you may choose this to be the same as the name of the workspace project.
Note
There are restrictions on the name you can use for an application. Names must consist only of letters and digits.
From the Type list, select a runtime server. This will ensure the necessary core programming or technology cartridge is added to your application.
From the Gear profile list, select the gear size. This is RAM and disk space required by your applications and its cartridges. If you are using OpenShift Online with Free Plan, you have access to small gears only.
If you want OpenShift to automatically increase the instances of your application and enable clustering as usage increases, select the Enable scaling check box.
From the Embedded Cartridges list, select the functionality you want to enable in your application. This will add associated capabilities and support to your application.
To specify that the new application is to be based on source code from an existing Git repository, click and clear the Use default source code check box. In the Source code field, type the URL of the source code location. OpenShift clones the source code to the OpenShift git repository for your application, instead of using the default template.
Click .
Clear the Create a new project check box and in the Use existing project field type the name of the project or click to locate the project.
Ensure the Create and set up a server for easy publishing check box is selected. This option automatically creates an OpenShift server adapter for the application, enabling you to easily upload changes to the OpenShift server.
To disable Maven builds, check the Disable automatic Maven builds when pushing to OpenShift check box. This informs OpenShift not to launch the Maven build process when the Maven project is pushed to OpenShift but to put the deployment straight into the deployments folder. It is useful when you want to push applications already built for deployment rather than source code.
Click .
The Location field shows the location that will be used for the local Git repository. The location must already exist to be able to proceed with the wizard. To change the location, clear the Use default location check box and type the location in the Location field or click to navigate to the desired location.
Click . If you are prompted that the authenticity of the host cannot be established and asked whether you want to continue connecting, check that the host name matches that of your application and domain and click .
At the prompt asking if you want to publish committed changes to OpenShift, click . The progress of the application creation process is visible in the Console tab.
All applications deployed on OpenShift are listed under live connections in the OpenShift Explorer tab. But only the project files of OpenShift applications created through the IDE will be immediately available in the Project Explorer and Git Repositories tabs. If you want to work on the project files associated with an application, you must first import the application. OpenShift Tools can assist you to import your deployed OpenShift applications into the IDE, as detailed in the procedure below.
Procedure 8.6. Import an OpenShift Application
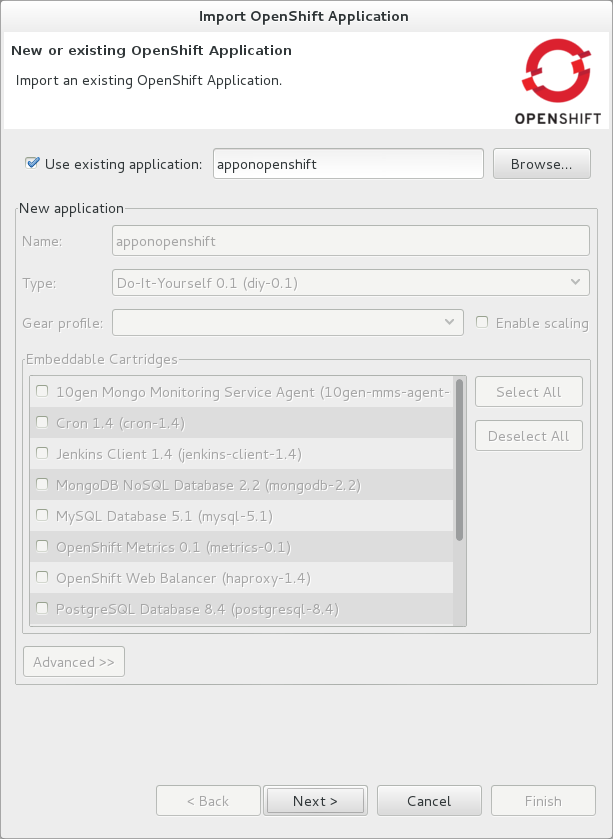
Click →, expand OpenShift, select Existing OpenShift Application and click . Alternatively, in the OpenShift Explorer tab, right-click the application and click .
Ensure the Use existing application check box is selected and type the name of the application in the text field. This field has an auto-completion feature to assist you in typing the application name or click to see a list of all of your applications associated with the connection.
Important
Project names in the IDE workspace must be unique. If the name of the application you want to import is identical to an existing project in the workspace, the OpenShift Tools will not complete the import. To work around this constraint, you can import the OpenShift application to another workspace or change the name of one of the conflicting projects and applications.
Click .
Ensure the Create a new project and Create and set up a server for easy publishing check boxes are selected. The latter will automatically create an OpenShift server adapter for the application, enabling you to easily upload changes to the OpenShift server.
To disable Maven builds, check the Disable automatic Maven builds when pushing to OpenShift check box. This informs OpenShift not to launch the Maven build process when the Maven project is pushed to OpenShift but to put the deployment straight into the deployments folder. It is useful when you want to push applications already built for deployment rather than source code.
Click .
The Location field shows the location that will be used for the local Git repository. The location must already exist to be able to proceed with the wizard. To change the location, clear the Use default location check box and type the location in the Location field or click to navigate to the desired location.
Click . If you are prompted that the authenticity of the host cannot be established and asked whether you want to continue connecting, check that the host name matches that of your application and domain and click .
OpenShift Tools modified the .gitignore file on importing the application. At the prompt asking if you want to publish committed changes to OpenShift, click . The progress of the import process is visible in the Console tab.
Once imported, the project is listed in the Project Explorer and Git Repositories tabs, where the details proceeding the application name indicate the current Git branch and status compared to the remote repository. Additionally, the server adapter for the application is visible in the Servers tab.
In order to easily publish changes to a deployed OpenShift application, each application needs a server adapter. The OpenShift Application wizard can automatically generate server adapters for new or imported OpenShift applications if you select the Create and set up a server for easy publishing check box. But OpenShift also provides an action to assist you in generating server adapters for OpenShift application that already exist in the IDE, as detailed in the procedure below. You can use this action if you need to regenerate a deleted server adapter for an OpenShift application or if you create or import an OpenShift application and do not select the Create and set up a server for easy publishing check box.
Procedure 8.7. Generate a server adapter for an application
In the OpenShift Explorer tab, expand the connection.
Right-click the application name and click .
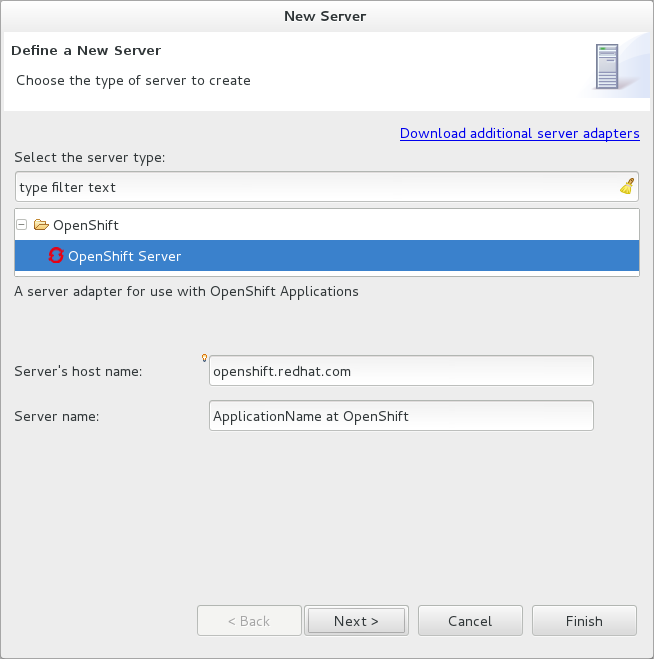
From the list of server types, expand OpenShift and select OpenShift Server.
The Server's host name and Server name field are automatically completed but you can change the contents of both as you need. The Server's host name field contains the host name of the server and the Server name field contains the name by which the server adapter is know in the Servers tab.
Once the fields are complete, click .
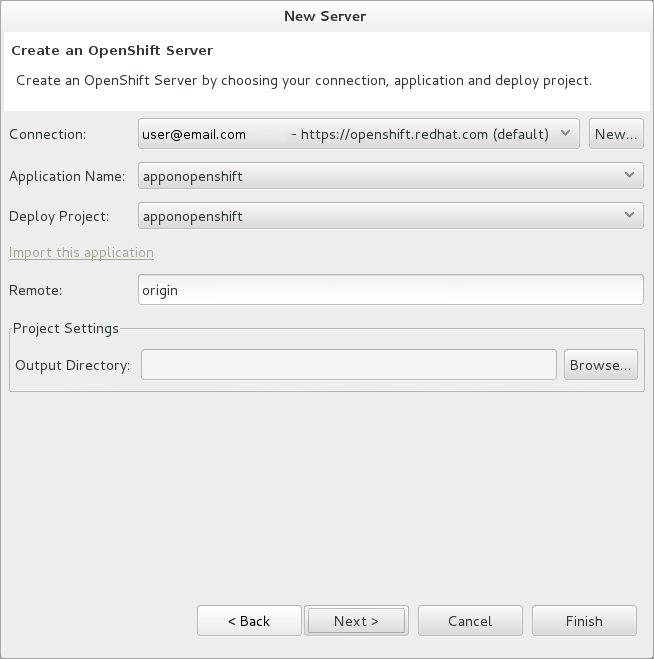
Ensure the Connection, Application Name and Deploy Project fields contain the correct information relating to the application for which you want to generate the server adapter.
In the Remote field, type the alias for the remote Git repository. For OpenShift applications created and imported by OpenShift Tools this is
origin.In the Output Directory field, type the location where archived projects for deployment should be stored or click to navigate to the desired location.
Click .
From the Available list, select the project for which the server adapter is being generated and click . The application is now listed under Configured.
Click for OpenShift Tools to generate the server adapter. Once generated, the server adapter is listed in the Servers tab.

OpenShift Tools provides actions for viewing deployed OpenShift applications and information about them.
- View a deployed application
In the OpenShift Explorer tab, expand the connection. Right-click the application name and click . A browser tab will open displaying your deployed application. Alternatively, in the Servers tab, right-click the server adapter for the application and click →.
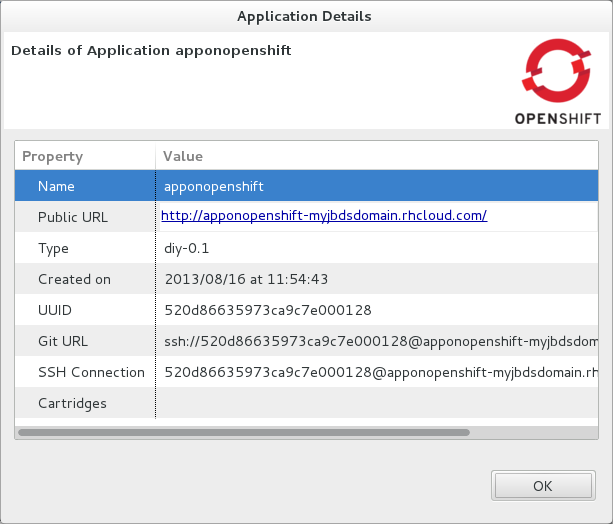
- View information about an application
In the OpenShift Explorer tab, expand the connection. Right-click the application name and click . The displayed information includes the public URL of the application, application type, and remote Git repository location. Click to close the Details window.
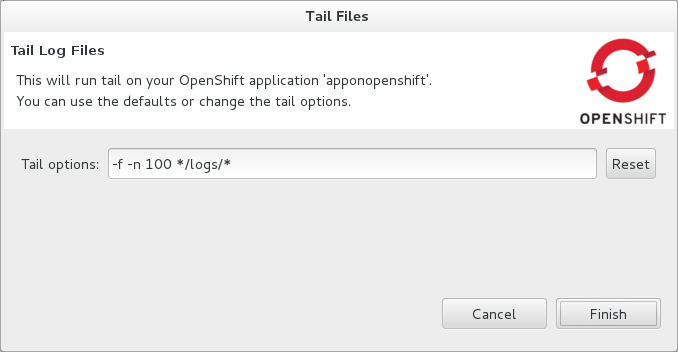
- View output from the OpenShift server
In the OpenShift Explorer tab, expand the connection. Right-click the application name and click . Alternatively, right-click the server adapter of the application in the Servers tab and click →. The Tail Log Files window opens, with the default retrieval syntax in the Tail options field. To change the retrieval command, in the Tail options field type the appropriate syntax. Click for OpenShift to retrieve the output, which is displayed in the Console tab.
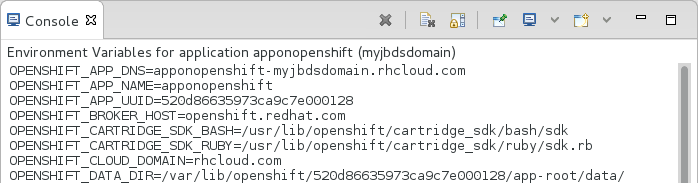
- View values of variables associated with an application
In the OpenShift Explorer tab, expand the connection. Right-click the application name and click . Variable names and values are listed in the Console tab. Alternatively, in the Servers tab, right-click the server adapter of the application and click →.
- View information about the server of an application
In the Servers tab, double-click the server adapter for the application. A Server Editor tab opens, enabling viewing and editing of server details. To save any changes, press Ctrl+S or click → or click the icon.
- Refresh information about an application
In the OpenShift Explorer tab, right-click the connection and click . Information is retrieved from OpenShift and the OpenShift Explorer tab updated as appropriate. This action is useful if you are simultaneously making changes in the IDE and the OpenShift web interface or command line interface to your domain and applications. Additionally, it may be used to recover from errors.
OpenShift Tools provides actions for developing and managing deployed OpenShift applications.
- Upload modifications to a deployed application
In the Severs tab, right-click the server adapter for the application and click . At the prompt asking if you want to publish to OpenShift by committing changes to Git, click . The commit message
Commit from JBoss Toolsis automatically generated and changes are pushed to the remote Git repository. Additionally, the application is automatically updated on the OpenShift server and the Console tab displays OpenShift server output.Note
To view a log of changes to the local git repository, in the Git Repositories tab, right-click a repository and click →. The History tab opens, showing a log of commits for the local Git repository.
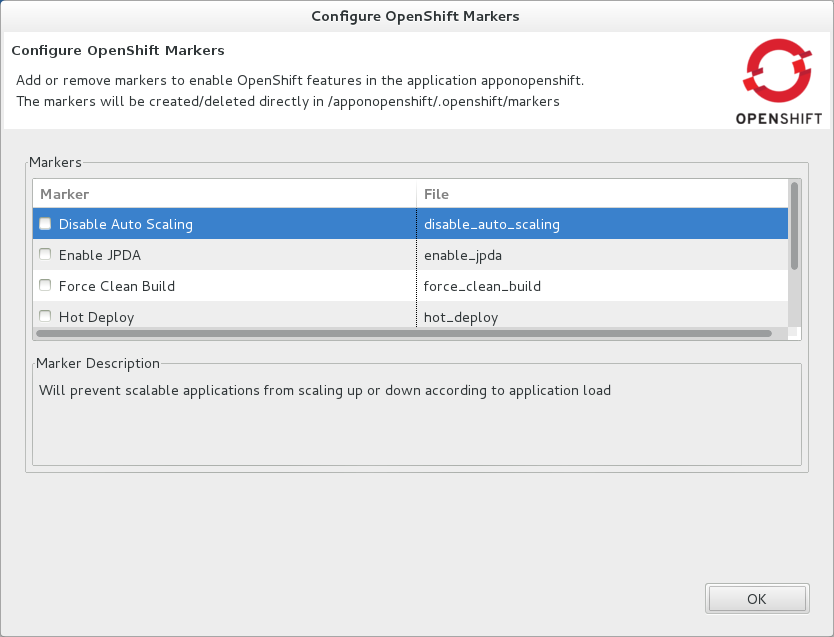
- Add or remove markers associated with an application
In the Project Explorer tab, right-click the application and click →. Select or clear the check boxes of markers as desired. Information about markers is given in the Marker Description section of the Configure OpenShift Markers Window. Click for your marker choice to be applied to the application.
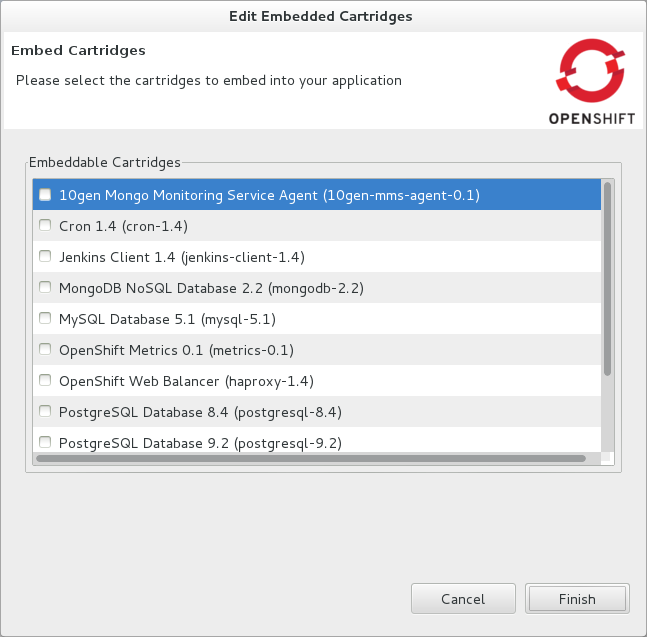
- Add or remove cartridges associated with an application
In the OpenShift Explorer tab, expand the connection. Right-click the application name and click . Select or clear the check boxes of cartridges as desired. Click for your cartridge choice to be applied to the application. You are prompted if the cartridges you have chosen to add or remove require further action, such as the addition of prerequisite cartridges or removal of conflicting cartridges. You can choose to ignore or apply the suggestions of the prompt.
- View properties of cartridges associated with an application
In the OpenShift Explorer tab, expand the connection and the application. Right-click the cartridge and click . The Properties tab opens and lists information about the cartridge.
- Restart an application
In the OpenShift Explorer tab, expand the connection. Right-click the application name and click . Alternatively, right-click the server adapter of the application in the Servers tab and click →.
- Forward remote ports
You can forward the remote ports of the OpenShift server to your workstation to enable access to various services, such as MySQL. Port forwarding is available for all OpenShift applications, including scalable ones.
Important
Your application must be running before attempting to configure port forwarding.
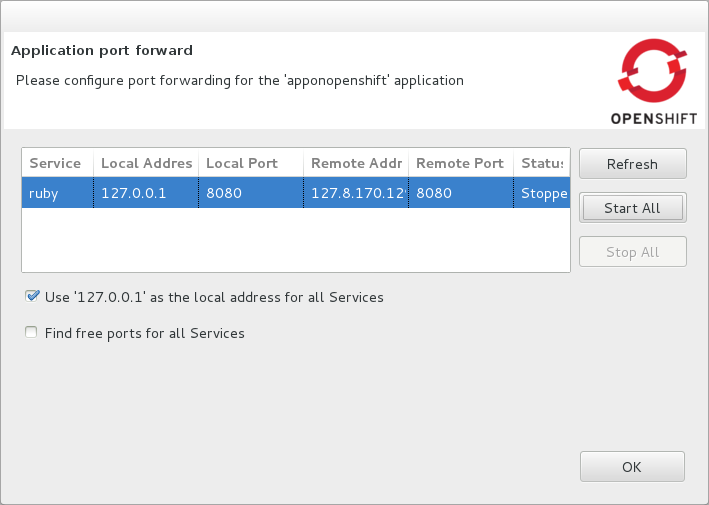
In the OpenShift Explorer tab, expand the connection. Right-click the application name and click . Alternatively, right-click the server adapter of the application in the Servers tab and click →.
After checking the authenticity of SSH keys, the Application port forward window opens. Before commencing port forwarding, there are a number of options you can set:
By default, the local address is 127.0.0.1. If this is unavailable, a random available address will be allocated. To set the local address to be the same as the remote address, clear the Use '127.0.0.1' as the local address for all Services check box.
By default, the local port numbers are the same as the remote port numbers. To set independent local port numbers, select the Find free ports for all Services check box.
To commence port forwarding, click . Click to close the Application port forward window.
- Delete a server adapter for an OpenShift application
In the Servers tab, right-click the server adapter for the application and click . At the prompt asking if you are sure you want to delete the server adapter, click . The progress of the deleting process is shown in the activity bar in the lower right of the IDE window. To open the Progress tab and view more detailed progress information or cancel the deleting process, double-click on the activity bar.
- Delete an application
In the OpenShift Explorer tab, expand the connection. Right-click the application name and click . At the prompt asking if you are sure you want to destroy the application, select .
Note
Deleting applications results in the applications being deleted from the OpenShift server. The projects of applications will still be visible in the Project Explorer and Git Repositories tab as the local Git repository copies of projects are not deleted. Additionally, any server adapters for deleted OpenShift applications are still listed in the Servers tab but they are invalid.