Weld SiteCommunity Documentation
CDI: Contexts and Dependency Injection for the Java EE platform
Copyright ©
- A note about naming and nomenclature
- I. Beans
- 1. Introduction
- 2. More about beans
- 3. JSF web application example
- 4. Dependency injection and programmatic lookup
- 4.1. Injection points
- 4.2. What gets injected
- 4.3. Qualifier annotations
- 4.4. The built-in qualifiers @Default and @Any
- 4.5. Qualifiers with members
- 4.6. Multiple qualifiers
- 4.7. Alternatives
- 4.8. Fixing unsatisfied and ambiguous dependencies
- 4.9. Client proxies
- 4.10. Obtaining a contextual instance by programmatic lookup
- 4.11. The InjectionPoint object
- 5. Scopes and contexts
- II. Getting Start with Weld, the CDI Reference Implementation
- III. Loose coupling with strong typing
- 8. Producer methods
- 9. Interceptors
- 9.1. Interceptor bindings
- 9.2. Implementing interceptors
- 9.3. Enabling interceptors
- 9.4. Interceptor bindings with members
- 9.5. Multiple interceptor binding annotations
- 9.6. Interceptor binding type inheritance
- 9.7. Use of @Interceptors
- 9.8. Enhanced version of javax.interceptor.InvocationContext
- 9.9. Loosening the limitations of InterceptionFactory
- 10. Decorators
- 11. Events
- 12. Stereotypes
- 13. Specialization, inheritance and alternatives
- 14. Java EE component environment resources
- IV. CDI and the Java EE ecosystem
- 15. Java EE integration
- 16. Portable extensions
- 16.1. Creating an Extension
- 16.2. Container lifecycle events
- 16.3. The BeanManager object
- 16.4. The CDI class
- 16.5. The InjectionTarget interface
- 16.6. The Bean interface
- 16.7. Registering a Bean
- 16.8. Configuring an AnnotatedType
- 16.9. Overriding attributes of a bean
- 16.10. Wrapping an InjectionTarget
- 16.11. Overriding InjectionPoint
- 16.12. Manipulating interceptors, decorators and alternatives enabled for an application
- 16.13. The Context and AlterableContext interfaces
- 17. Next steps
- V. Weld Reference Guide
- 18. Application servers and environments supported by Weld
- 19. Configuration
- 19.1. Weld configuration
- 19.1.1. Relaxed construction
- 19.1.2. Concurrent deployment configuration
- 19.1.3. Thread pool configuration
- 19.1.4. Non-portable mode during application initialization
- 19.1.5. Proxying classes with final methods
- 19.1.6. Bounding the cache size for resolved injection points
- 19.1.7. Debugging generated bytecode
- 19.1.8. Injectable reference lookup optimization
- 19.1.9. Bean identifier index optimization
- 19.1.10. Rolling upgrades ID delimiter
- 19.1.11. Development Mode
- 19.1.12. Conversation timeout and Conversation concurrent access timeout
- 19.1.13. Veto types without bean defining annotation
- 19.1.14. Memory consumption optimization - removing unused beans
- 19.2. Defining external configuration
- 19.3. Excluding classes from scanning and deployment
- 19.4. Mapping CDI contexts to HTTP requests
- 20. Logging
- 21. WeldManager interface
- 22. Development Mode
- 23. Context Management
- A. Integrating Weld into other environments
- A.1. The Weld SPI
- A.1.1. Deployment structure
- A.1.2. EJB descriptors
- A.1.3. EE resource injection and resolution services
- A.1.4. EJB services
- A.1.5. JPA services
- A.1.6. Transaction Services
- A.1.7. Resource Services
- A.1.8. Web Service Injection Services
- A.1.9. Injection Services
- A.1.10. Security Services
- A.1.11. Initialization and shutdown
- A.1.12. Resource loading
- A.1.13. ClassFileServices
- A.1.14. Registering services
- A.2. The contract with the container
- A.2.1. Classloader isolation
- A.2.2. Servlet
- A.2.3. CDI Conversation Filter
- A.2.4. JSF
- A.2.5. JSP
- A.2.6. Session Bean Interceptor
- A.2.7. The weld-core.jar
- A.2.8. Binding the manager in JNDI
- A.2.9. CDIProvider
- A.2.10. Performing CDI injection on Java EE component classes
- A.2.11. Around-construct interception
- A.2.12. Probe Development Tool (Optional)
- A.2.13. Optimized cleanup after bootstrap
- A.3. Migration notes
Throughout this document, mentions of JSR-299, JSR-346 and JSR-365 appear. JSR is a document of a proposed specification used in the Java Community Process (JCP). JSRs are somewhat analogous to RFCs used by IETF. JSR-299 and JSR-346 are the JCP specification names for the 1.0 and 1.1 versions of CDI, respectively. JSR-365 is the JCP specification name for the CDI 2.0 version.
Shortly before the final draft of JSR-299 was submitted, the specification changed its name from "Web Beans" to "Java Contexts and Dependency Injection for the Java EE platform", abbreviated CDI. For a brief period after the renaming, the reference implementation adopted the name "Web Beans". However, this ended up causing more confusion than it solved and Red Hat decided to change the name of the reference implementation to "Weld". You may still find other documentation, blogs, forum posts, etc. that use the old nomenclature. Please update any references you can. The naming game is over.
You’ll also find that some of the functionality that once existed in the specification is now missing, such as defining beans in XML. These features will be available as portable extensions.
Note that this reference guide was started while changes were still being made to the specification. We’ve done our best to update it for accuracy. If you discover a conflict between what is written in this guide and the specification, the specification is the authority—assume it is correct. If you believe you have found an error in the specification, please report it to the CDI EG.
The CDI specification defines a set of complementary services that help improve the structure of application code. CDI layers an enhanced lifecycle and interaction model over existing Java component types, including managed beans and Enterprise Java Beans. The CDI services provide:
- an improved lifecycle for stateful objects, bound to well-defined contexts,
- a typesafe approach to dependency injection,
- object interaction via an event notification facility,
- a better approach to binding interceptors to objects, along with a new kind of interceptor, called a decorator, that is more appropriate for use in solving business problems, and
- an SPI for developing portable extensions to the container.
The CDI services are a core aspect of the Java EE platform and include full support for Java EE modularity and the Java EE component architecture. But the specification does not limit the use of CDI to the Java EE environment. Starting with CDI 2.0, the specification covers the use of CDI in the Java SE environment as well. In Java SE, the services might be provided by a standalone CDI implementation like Weld (see Section 18.4.1, “CDI SE Module”), or even by a container that also implements the subset of EJB defined for embedded usage by the EJB 3.2 specification. CDI is especially useful in the context of web application development, but the problems it solves are general development concerns and it is therefore applicable to a wide variety of application.
An object bound to a lifecycle context is called a bean. CDI includes built-in support for several different kinds of bean, including the following Java EE component types:
- managed beans, and
- EJB session beans.
Both managed beans and EJB session beans may inject other beans. But some other objects, which are not themselves beans in the sense used here, may also have beans injected via CDI. In the Java EE platform, the following kinds of component may have beans injected:
- message-driven beans,
- interceptors,
- servlets, servlet filters and servlet event listeners,
- JAX-WS service endpoints and handlers,
- JAX-RS resources, providers and
javax.ws.rs.core.Applicationsubclasses, and - JSP tag handlers and tag library event listeners.
CDI relieves the user of an unfamiliar API of the need to answer the following questions:
- What is the lifecycle of this object?
- How many simultaneous clients can it have?
- Is it multithreaded?
- How do I get access to it from a client?
- Do I need to explicitly destroy it?
- Where should I keep the reference to it when I’m not currently using it?
- How can I define an alternative implementation, so that the implementation can vary at deployment time?
- How should I go about sharing this object between other objects?
CDI is more than a framework. It’s a whole, rich programming model. The theme of CDI is loose-coupling with strong typing. Let’s study what that phrase means.
A bean specifies only the type and semantics of other beans it depends upon. It need not be aware of the actual lifecycle, concrete implementation, threading model or other clients of any bean it interacts with. Even better, the concrete implementation, lifecycle and threading model of a bean may vary according to the deployment scenario, without affecting any client. This loose-coupling makes your code easier to maintain.
Events, interceptors and decorators enhance the loose-coupling inherent in this model:
- event notifications decouple event producers from event consumers,
- interceptors decouple technical concerns from business logic, and
- decorators allow business concerns to be compartmentalized.
What’s even more powerful (and comforting) is that CDI provides all these facilities in a typesafe way. CDI never relies on string-based identifiers to determine how collaborating objects fit together. Instead, CDI uses the typing information that is already available in the Java object model, augmented using a new programming pattern, called qualifier annotations, to wire together beans, their dependencies, their interceptors and decorators, and their event consumers. Usage of XML descriptors is minimized to truly deployment-specific information.
But CDI isn’t a restrictive programming model. It doesn’t tell you how you should to structure your application into layers, how you should handle persistence, or what web framework you have to use. You’ll have to decide those kinds of things for yourself.
CDI even provides a comprehensive SPI, allowing other kinds of object defined by future Java EE specifications or by third-party frameworks to be cleanly integrated with CDI, take advantage of the CDI services, and interact with any other kind of bean.
CDI was influenced by a number of existing Java frameworks, including Seam, Guice and Spring. However, CDI has its own, very distinct, character: more typesafe than Seam, more stateful and less XML-centric than Spring, more web and enterprise-application capable than Guice. But it couldn’t have been any of these without inspiration from the frameworks mentioned and lots of collaboration and hard work by the JSR-299 and JSR-346 Expert Groups (EG).
Finally, CDI is a Java Community Process (JCP) standard. Java EE 7 requires that all compliant application servers provide support for JSR-346 (even in the web profile).
Table of Contents
- 1. Introduction
- 2. More about beans
- 3. JSF web application example
- 4. Dependency injection and programmatic lookup
- 4.1. Injection points
- 4.2. What gets injected
- 4.3. Qualifier annotations
- 4.4. The built-in qualifiers @Default and @Any
- 4.5. Qualifiers with members
- 4.6. Multiple qualifiers
- 4.7. Alternatives
- 4.8. Fixing unsatisfied and ambiguous dependencies
- 4.9. Client proxies
- 4.10. Obtaining a contextual instance by programmatic lookup
- 4.11. The InjectionPoint object
- 5. Scopes and contexts
So you’re keen to get started writing your first bean? Or perhaps you’re skeptical, wondering what kinds of hoops the CDI specification will make you jump through! The good news is that you’ve probably already written and used hundreds, perhaps thousands of beans. CDI just makes it easier to actually use them to build an application!
A bean is exactly what you think it is. Only now, it has a true identity in the container environment.
Prior to Java EE 6, there was no clear definition of the term "bean" in the Java EE platform. Of course, we’ve been calling Java classes used in web and enterprise applications "beans" for years. There were even a couple of different kinds of things called "beans" in EE specifications, including EJB beans and JSF managed beans. Meanwhile, other third-party frameworks such as Spring and Seam introduced their own ideas of what it meant to be a "bean". What we’ve been missing is a common definition.
Java EE 6 finally laid down that common definition in the Managed Beans specification. Managed Beans are defined as container-managed objects with minimal programming restrictions, otherwise known by the acronym POJO (Plain Old Java Object). They support a small set of basic services, such as resource injection, lifecycle callbacks and interceptors. Companion specifications, such as EJB and CDI, build on this basic model. But, at last, there’s a uniform concept of a bean and a lightweight component model that’s aligned across the Java EE platform.
With very few exceptions, almost every concrete Java class that has a
constructor with no parameters (or a constructor designated with the
annotation @Inject) is a bean. This includes every JavaBean and every
EJB session bean. If you’ve already got some JavaBeans or session beans
lying around, they’re already beans—you won’t need any additional
special metadata.
The JavaBeans and EJBs you’ve been writing every day, up until now, have not been able to take advantage of the new services defined by the CDI specification. But you’ll be able to use every one of them with CDI—allowing the container to create and destroy instances of your beans and associate them with a designated context, injecting them into other beans, using them in EL expressions, specializing them with qualifier annotations, even adding interceptors and decorators to them—without modifying your existing code. At most, you’ll need to add some annotations.
Now let’s see how to create your first bean that actually uses CDI.
Suppose that we have two existing Java classes that we’ve been using for years in various applications. The first class parses a string into a list of sentences:
public class SentenceParser {

   public List<String> parse(String text) { ... }

}
The second existing class is a stateless session bean front-end for an external system that is able to translate sentences from one language to another:
@Stateless

public class SentenceTranslator implements Translator {

   public String translate(String sentence) { ... }

}
Where Translator is the EJB local interface:
@Local

public interface Translator {

   public String translate(String sentence);

}
Unfortunately, we don’t have a class that translates whole text documents. So let’s write a bean for this job:
public class TextTranslator {

   private SentenceParser sentenceParser;

   private Translator sentenceTranslator;


   @Inject

   TextTranslator(SentenceParser sentenceParser, Translator sentenceTranslator) {

      this.sentenceParser = sentenceParser;

      this.sentenceTranslator = sentenceTranslator;

   }


   public String translate(String text) {

      StringBuilder sb = new StringBuilder();

      for (String sentence: sentenceParser.parse(text)) {

          sb.append(sentenceTranslator.translate(sentence));

      }

      return sb.toString();

   }

}
But wait! TextTranslator does not have a constructor with no
parameters! Is it still a bean? If you remember, a class that does not
have a constructor with no parameters can still be a bean if it has a
constructor annotated @Inject.
As you’ve guessed, the @Inject annotation has something to do with
dependency injection! @Inject may be applied to a constructor or
method of a bean, and tells the container to call that constructor or
method when instantiating the bean. The container will inject other
beans into the parameters of the constructor or method.
We may obtain an instance of TextTranslator by injecting it into a
constructor, method or field of a bean, or a field or method of a Java
EE component class such as a servlet. The container chooses the object
to be injected based on the type of the injection point, not the name of
the field, method or parameter.
Let’s create a UI controller bean that uses field injection to obtain an
instance of the TextTranslator, translating the text entered by a
user:
@Named @RequestScoped

public class TranslateController {

   @Inject TextTranslator textTranslator;


   private String inputText;

   private String translation;


   // JSF action method, perhaps

   public void translate() {

      translation = textTranslator.translate(inputText);

   }


   public String getInputText() {

      return inputText;

   }


   public void setInputText(String text) {

      this.inputText = text;

   }


   public String getTranslation() {

      return translation;

   }

}
| Field injection of |
Tip
Notice the controller bean is request-scoped and named. Since this
combination is so common in web applications, there’s a built-in
annotation for it in CDI that we could have used as a shorthand. When
the (stereotype) annotation @Model is declared on a class, it creates
a request-scoped and named bean.
Alternatively, we may obtain an instance of TextTranslator
programmatically from an injected instance of Instance, parameterized
with the bean type:
import javax.enterprise.inject.Instance;

import javax.inject.Inject;


....


@Inject Instance<TextTranslator> textTranslatorInstance;

...

public void translate() {

   textTranslatorInstance.get().translate(inputText);

}
Notice that it isn’t necessary to create a getter or setter method to inject one bean into another. CDI can access an injected field directly (even if it’s private!), which sometimes helps eliminate some wasteful code. The name of the field is arbitrary. It’s the field’s type that determines what is injected.
At system initialization time, the container must validate that exactly
one bean exists which satisfies each injection point. In our example, if
no implementation of Translator is available—if the
SentenceTranslator EJB was not deployed—the container would inform us
of an unsatisfied dependency. If more than one implementation of
Translator were available, the container would inform us of the
ambiguous dependency.
Before we get too deep in the details, let’s pause and examine a bean’s anatomy. What aspects of the bean are significant, and what gives it its identity? Instead of just giving examples of beans, we’re going to define what makes something a bean.
A bean is usually an application class that contains business logic. It may be called directly from Java code, or it may be invoked via the Unified EL. A bean may access transactional resources. Dependencies between beans are managed automatically by the container. Most beans are stateful and contextual. The lifecycle of a bean is managed by the container.
Let’s back up a second. What does it really mean to be contextual? Since beans may be stateful, it matters which bean instance I have. Unlike a stateless component model (for example, stateless session beans) or a singleton component model (such as servlets, or singleton beans), different clients of a bean see the bean in different states. The client-visible state depends upon which instance of the bean the client has a reference to.
However, like a stateless or singleton model, but unlike stateful session beans, the client does not control the lifecycle of the instance by explicitly creating and destroying it. Instead, the scope of the bean determines:
- the lifecycle of each instance of the bean and
- which clients share a reference to a particular instance of the bean.
For a given thread in a CDI application, there may be an active context associated with the scope of the bean. This context may be unique to the thread (for example, if the bean is request scoped), or it may be shared with certain other threads (for example, if the bean is session scoped) or even all other threads (if it is application scoped).
Clients (for example, other beans) executing in the same context will see the same instance of the bean. But clients in a different context may see a different instance (depending on the relationship between the contexts).
One great advantage of the contextual model is that it allows stateful beans to be treated like services! The client need not concern itself with managing the lifecycle of the bean it’s using, nor does it even need to know what that lifecycle is. Beans interact by passing messages, and the bean implementations define the lifecycle of their own state. The beans are loosely coupled because:
- they interact via well-defined public APIs
- their lifecycles are completely decoupled
We can replace one bean with another different bean that implements the same interface and has a different lifecycle (a different scope) without affecting the other bean implementation. In fact, CDI defines a simple facility for overriding bean implementations at deployment time, as we will see in Section 4.7, “Alternatives”.
Note that not all clients of a bean are beans themselves. Other objects such as servlets or message-driven beans—which are by nature not injectable, contextual objects—may also obtain references to beans by injection.
Enough hand-waving. More formally, the anatomy of a bean, according to the spec:
A bean comprises the following attributes:
- A (nonempty) set of bean types
- A (nonempty) set of qualifiers
- A scope
- Optionally, a bean EL name
- A set of interceptor bindings
- A bean implementation
Furthermore, a bean may or may not be an alternative.
Let’s see what all this new terminology means.
Beans usually acquire references to other beans via dependency injection. Any injected attribute specifies a "contract" that must be satisfied by the bean to be injected. The contract is:
- a bean type, together with
- a set of qualifiers.
A bean type is a user-defined class or interface; a type that is
client-visible. If the bean is an EJB session bean, the bean type is the
@Local interface or bean-class local view. A bean may have multiple
bean types. For example, the following bean has four bean types:
public class BookShop

      extends Business

      implements Shop<Book> {

   ...

}
The bean types are BookShop, Business and Shop<Book>, as well as
the implicit type java.lang.Object. (Notice that a parameterized type
is a legal bean type).
Meanwhile, this session bean has only the local interfaces BookShop,
Auditable and java.lang.Object as bean types, since the bean class,
BookShopBean is not a client-visible type.
@Stateful

public class BookShopBean

      extends Business

      implements BookShop, Auditable {

   ...

}
Note
The bean types of a session bean include local interfaces and the bean class local view (if any). EJB remote interfaces are not considered bean types of a session bean. You can’t inject an EJB using its remote interface unless you define a resource, which we’ll meet in Chapter 14, Java EE component environment resources.
Bean types may be restricted to an explicit set by annotating the bean
with the @Typed annotation and listing the classes that should be bean
types. For instance, the bean types of this bean have been restricted to
Shop<Book>, together with java.lang.Object:
@Typed(Shop.class)

public class BookShop

      extends Business

      implements Shop<Book> {

   ...

}
Sometimes, a bean type alone does not provide enough information for the
container to know which bean to inject. For instance, suppose we have
two implementations of the PaymentProcessor interface:
CreditCardPaymentProcessor and DebitPaymentProcessor. Injecting a
field of type PaymentProcessor introduces an ambiguous condition. In
these cases, the client must specify some additional quality of the
implementation it is interested in. We model this kind of "quality"
using a qualifier.
A qualifier is a user-defined annotation that is itself annotated
@Qualifier. A qualifier annotation is an extension of the type system.
It lets us disambiguate a type without having to fall back to
string-based names. Here’s an example of a qualifier annotation:
@Qualifier

@Target({TYPE, METHOD, PARAMETER, FIELD})

@Retention(RUNTIME)

public @interface CreditCard {}
You may not be used to seeing the definition of an annotation. In fact, this might be the first time you’ve encountered one. With CDI, annotation definitions will become a familiar artifact as you’ll be creating them from time to time.
Note
Pay attention to the names of the built-in annotations in CDI and EJB. You’ll notice that they are often adjectives. We encourage you to follow this convention when creating your custom annotations, since they serve to describe the behaviors and roles of the class.
Now that we have defined a qualifier annotation, we can use it to
disambiguate an injection point. The following injection point has the
bean type PaymentProcessor and qualifier @CreditCard:
@Inject @CreditCard PaymentProcessor paymentProcessor
For each injection point, the container searches for a bean which satisfies the contract, one which has the bean type and all the qualifiers. If it finds exactly one matching bean, it injects an instance of that bean. If it doesn’t, it reports an error to the user.
How do we specify that qualifiers of a bean? By annotating the bean
class, of course! The following bean has the qualifier @CreditCard and
implements the bean type PaymentProcessor. Therefore, it satisfies our
qualified injection point:
@CreditCard

public class CreditCardPaymentProcessor

    implements PaymentProcessor { ... }
Note
If a bean or an injection point does not explicitly specify a qualifier,
it has the default qualifier, @Default.
That’s not quite the end of the story. CDI also defines a simple resolution rule that helps the container decide what to do if there is more than one bean that satisfies a particular contract. We’ll get into the details in Chapter 4, Dependency injection and programmatic lookup.
The scope of a bean defines the lifecycle and visibility of its instances. The CDI context model is extensible, accommodating arbitrary scopes. However, certain important scopes are built into the specification, and provided by the container. Each scope is represented by an annotation type.
For example, any web application may have session scoped bean:
public @SessionScoped

class ShoppingCart implements Serializable { ... }
An instance of a session-scoped bean is bound to a user session and is shared by all requests that execute in the context of that session.
Note
Keep in mind that once a bean is bound to a context, it remains in that context until the context is destroyed. There is no way to manually remove a bean from a context. If you don’t want the bean to sit in the session indefinitely, consider using another scope with a shorted lifespan, such as the request or conversation scope.
If a scope is not explicitly specified, then the bean belongs to a special scope called the dependent pseudo-scope. Beans with this scope live to serve the object into which they were injected, which means their lifecycle is bound to the lifecycle of that object.
We’ll talk more about scopes in Chapter 5, Scopes and contexts.
If you want to reference a bean in non-Java code that supports Unified EL expressions, for example, in a JSP or JSF page, you must assign the bean an EL name.
The EL name is specified using the @Named annotation, as shown here:
public @SessionScoped @Named("cart")

class ShoppingCart implements Serializable { ... }
Now we can easily use the bean in any JSF or JSP page:
<h:dataTable value="#{cart.lineItems}" var="item">

   ...

</h:dataTable>
Note
The @Named annotation is not what makes the class a bean. Most classes
in a bean archive are already recognized as beans. The @Named
annotation just makes it possible to reference the bean from the EL,
most commonly from a JSF view.
We can let CDI choose a name for us by leaving off the value of the
@Named annotation:
public @SessionScoped @Named

class ShoppingCart implements Serializable { ... }
The name defaults to the unqualified class name, decapitalized; in this
case, shoppingCart.
We’ve already seen how qualifiers let us choose between multiple
implementations of an interface at development time. But sometimes we
have an interface (or other bean type) whose implementation varies
depending upon the deployment environment. For example, we may want to
use a mock implementation in a testing environment. An alternative may
be declared by annotating the bean class with the @Alternative
annotation.
public @Alternative

class MockPaymentProcessor extends PaymentProcessorImpl { ... }
We normally annotate a bean @Alternative only when there is some other
implementation of an interface it implements (or of any of its bean
types). We can choose between alternatives at deployment time by
selecting an alternative in the CDI deployment descriptor
META-INF/beans.xml of the jar or Java EE module that uses it.
Different modules can specify that they use different alternatives.
The other way to enable an alternative is to annotate the bean with
@Priority annotation. This will enable it globally.
We cover alternatives in more detail in Section 4.7, “Alternatives”.
You might be familiar with the use of interceptors in EJB 3. Since Java EE 6, this functionality has been generalized to work with other managed beans. That’s right, you no longer have to make your bean an EJB just to intercept its methods. Holler. So what does CDI have to offer above and beyond that? Well, quite a lot actually. Let’s cover some background.
The way that interceptors were defined in Java EE 5 was
counter-intuitive. You were required to specify the implementation of
the interceptor directly on the implementation of the EJB, either in
the @Interceptors annotation or in the XML descriptor. You might as
well just put the interceptor code in the implementation! Furthermore, the
order in which the interceptors are applied is taken from the order in
which they are declared in the annotation or the XML descriptor. Perhaps
this isn’t so bad if you’re applying the interceptors to a single bean.
But, if you are applying them repeatedly, then there’s a good chance
that you’ll inadvertently define a different order for different beans.
Now that’s a problem.
CDI provides a new approach to binding interceptors to beans that introduces a level of indirection (and thus control). We must define an interceptor binding type to describe the behavior implemented by the interceptor.
An interceptor binding type is a user-defined annotation that is itself
annotated @InterceptorBinding. It lets us bind interceptor classes to
bean classes with no direct dependency between the two classes.
@InterceptorBinding

@Inherited

@Target( { TYPE, METHOD })

@Retention(RUNTIME)

public @interface Transactional {}
The interceptor that implements transaction management declares this annotation:
public @Transactional @Interceptor

class TransactionInterceptor { ... }
We can apply the interceptor to a bean by annotating the bean class with the same interceptor binding type:
public @SessionScoped @Transactional

class ShoppingCart implements Serializable { ... }
Notice that ShoppingCart and TransactionInterceptor don’t know
anything about each other.
Interceptors are deployment-specific. (We don’t need a
TransactionInterceptor in our unit tests!) By default, an interceptor
is disabled. We can enable an interceptor using the CDI deployment
descriptor META-INF/beans.xml of the jar or Java EE module. This is
also where we specify the interceptor ordering.
Better still, we can use @Priority annotation to enable the interceptor
and define it’s ordering at the same time.
We’ll discuss interceptors, and their cousins, decorators, in Chapter 9, Interceptors and Chapter 10, Decorators.
We’ve already seen two types of beans: JavaBeans and EJB session beans. Is that the whole story? Actually, it’s just the beginning. Let’s explore the various kinds of beans that CDI implementations must support out-of-the-box.
A managed bean is a Java class. The basic lifecycle and semantics of a
managed bean are defined by the Managed Beans specification. You can
explicitly declare a managed bean by annotating the bean class
@ManagedBean, but in CDI you don’t need to. According to the
specification, the CDI container treats any class that satisfies the
following conditions as a managed bean:
- It is not a non-static inner class.
- It is a concrete class, or is annotated
@Decorator. - It is not annotated with an EJB component-defining annotation or
declared as an EJB bean class in
ejb-jar.xml. - It does not implement
javax.enterprise.inject.spi.Extension. It has an appropriate constructor—either:
- the class has a constructor with no parameters, or
- the class declares a constructor annotated
@Inject.
Note
According to this definition, JPA entities are technically managed
beans. However, entities have their own special lifecycle, state and
identity model and are usually instantiated by JPA or using new.
Therefore we don’t recommend directly injecting an entity class. We
especially recommend against assigning a scope other than @Dependent
to an entity class, since JPA is not able to persist injected CDI
proxies.
The unrestricted set of bean types for a managed bean contains the bean class, every superclass and all interfaces it implements directly or indirectly.
If a managed bean has a public field, it must have the default scope
@Dependent.
Managed beans support the @PostConstruct and @PreDestroy lifecycle
callbacks.
Session beans are also, technically, managed beans. However, since they have their own special lifecycle and take advantage of additional enterprise services, the CDI specification considers them to be a different kind of bean.
Session beans belong to the EJB specification. They have a special lifecycle, state management and concurrency model that is different to other managed beans and non-managed Java objects. But session beans participate in CDI just like any other bean. You can inject one session bean into another session bean, a managed bean into a session bean, a session bean into a managed bean, have a managed bean observe an event raised by a session bean, and so on.
Note
Message-driven and entity beans are by nature non-contextual objects and may not be injected into other objects. However, message-driven beans can take advantage of some CDI functionality, such as dependency injection, interceptors and decorators. In fact, CDI will perform injection into any session or message-driven bean, even those which are not contextual instances.
The unrestricted set of bean types for a session bean contains all local
interfaces of the bean and their superinterfaces. If the session bean
has a bean class local view, the unrestricted set of bean types contains
the bean class and all superclasses. In addition, java.lang.Object is
a bean type of every session bean. But remote interfaces are not
included in the set of bean types.
There’s no reason to explicitly declare the scope of a stateless session
bean or singleton session bean. The EJB container controls the lifecycle
of these beans, according to the semantics of the @Stateless or
@Singleton declaration. On the other hand, a stateful session bean may
have any scope.
Stateful session beans may define a remove method, annotated
@Remove, that is used by the application to indicate that an instance
should be destroyed. However, for a contextual instance of the bean—an
instance under the control of CDI—this method may only be called by the
application if the bean has scope @Dependent. For beans with other
scopes, the application must let the container destroy the bean.
So, when should we use a session bean instead of a plain managed bean? Whenever we need the advanced enterprise services offered by EJB, such as:
- method-level transaction management and security,
- concurrency management,
- instance-level passivation for stateful session beans and instance-pooling for stateless session beans,
- remote or web service invocation, or
- timers and asynchronous methods,
When we don’t need any of these things, an ordinary managed bean will serve just fine.
Many beans (including any @SessionScoped or @ApplicationScoped
beans) are available for concurrent access. Therefore, the concurrency
management provided by EJB 3.2 is especially useful. Most session and
application scoped beans should be EJBs.
Beans which hold references to heavy-weight resources, or hold a lot of internal state benefit from the advanced container-managed lifecycle defined by the EJB stateless/stateful/singleton model, with its support for passivation and instance pooling.
Finally, it’s usually obvious when method-level transaction management, method-level security, timers, remote methods or asynchronous methods are needed.
The point we’re trying to make is: use a session bean when you need the
services it provides, not just because you want to use dependency
injection, lifecycle management, or interceptors. Java EE 7 provides a
graduated programming model. It’s usually easy to start with an ordinary
managed bean, and later turn it into an EJB just by adding one of the
following annotations: @Stateless, @Stateful or @Singleton.
On the other hand, don’t be scared to use session beans just because you’ve heard your friends say they’re "heavyweight". It’s nothing more than superstition to think that something is "heavier" just because it’s hosted natively within the Java EE container, instead of by a proprietary bean container or dependency injection framework that runs as an additional layer of obfuscation. And as a general principle, you should be skeptical of folks who use vaguely defined terminology like "heavyweight".
Not everything that needs to be injected can be boiled down to a bean
class instantiated by the container using new. There are plenty of
cases where we need additional control. What if we need to decide at
runtime which implementation of a type to instantiate and inject? What
if we need to inject an object that is obtained by querying a service or
transactional resource, for example by executing a JPA query?
A producer method is a method that acts as a source of bean instances. The method declaration itself describes the bean and the container invokes the method to obtain an instance of the bean when no instance exists in the specified context. A producer method lets the application take full control of the bean instantiation process.
A producer method is declared by annotating a method of a bean class
with the @Produces annotation.
import javax.enterprise.inject.Produces;


@ApplicationScoped

public class RandomNumberGenerator {


   private java.util.Random random = new java.util.Random(System.currentTimeMillis());


   @Produces @Named @Random int getRandomNumber() {

      return random.nextInt(100);

   }


}
We can’t write a bean class that is itself a random number. But we can
certainly write a method that returns a random number. By making the
method a producer method, we allow the return value of the method—in
this case an Integer—to be injected. We can even specify a
qualifier—in this case @Random, a scope—which in this case defaults to
@Dependent, and an EL name—which in this case defaults to
randomNumber according to the JavaBeans property name convention. Now
we can get a random number anywhere:
@Inject @Random int randomNumber;
Even in a Unified EL expression:
<p>Your raffle number is #{randomNumber}.</p>
A producer method must be a non-abstract method of a managed bean class or session bean class. A producer method may be either static or non-static. If the bean is a session bean, the producer method must be either a business method of the EJB or a static method of the bean class.
The bean types of a producer method depend upon the method return type:
- If the return type is an interface, the unrestricted set of bean types
contains the return type, all interfaces it extends directly or
indirectly and
java.lang.Object. - If a return type is primitive or is a Java array type, the
unrestricted set of bean types contains exactly two types: the method
return type and
java.lang.Object. - If the return type is a class, the unrestricted set of bean types contains the return type, every superclass and all interfaces it implements directly or indirectly.
Note
Producer methods and fields may have a primitive bean type. For the
purpose of resolving dependencies, primitive types are considered to be
identical to their corresponding wrapper types in java.lang.
If the producer method has method parameters, the container will look for a bean that satisfies the type and qualifiers of each parameter and pass it to the method automatically—another form of dependency injection.
@Produces Set<Roles> getRoles(User user) {

   return user.getRoles();

}
We’ll talk much more about producer methods in Chapter 8, Producer methods.
A producer field is a simpler alternative to a producer method. A
producer field is declared by annotating a field of a bean class with
the @Produces annotation—the same annotation used for producer
methods.
import javax.enterprise.inject.Produces;


public class Shop {

   @Produces PaymentProcessor paymentProcessor = ....;

   @Produces @Catalog List<Product> products = ....;

}
The rules for determining the bean types of a producer field parallel the rules for producer methods.
A producer field is really just a shortcut that lets us avoid writing a useless getter method. However, in addition to convenience, producer fields serve a specific purpose as an adaptor for Java EE component environment injection, but to learn more about that, you’ll have to wait until Chapter 14, Java EE component environment resources. Because we can’t wait to get to work on some examples.
Let’s illustrate these ideas with a full example. We’re going to implement user login/logout for an application that uses JSF. First, we’ll define a request-scoped bean to hold the username and password entered during login, with constraints defined using annotations from the Bean Validation specification:
@Named @RequestScoped

public class Credentials {

    private String username;

    private String password;


    @NotNull @Length(min=3, max=25)

    public String getUsername() { return username; }

    public void setUsername(String username) { this.username = username; }


    @NotNull @Length(min=6, max=20)

    public String getPassword() { return password; }

    public void setPassword(String password) { this.password = password; }

}
This bean is bound to the login prompt in the following JSF form:
<h:form>

   <h:panelGrid columns="2" rendered="#{!login.loggedIn}">

      <f:validateBean>

         <h:outputLabel for="username">Username:</h:outputLabel>

         <h:inputText id="username" value="#{credentials.username}"/>

         <h:outputLabel for="password">Password:</h:outputLabel>

         <h:inputSecret id="password" value="#{credentials.password}"/>

      </f:validateBean>

   </h:panelGrid>

   <h:commandButton value="Login" action="#{login.login}" rendered="#{!login.loggedIn}"/>

   <h:commandButton value="Logout" action="#{login.logout}" rendered="#{login.loggedIn}"/>

</h:form>
Users are represented by a JPA entity:
@Entity

public class User {

   private @NotNull @Length(min=3, max=25) @Id String username;

   private @NotNull @Length(min=6, max=20) String password;


   public String getUsername() { return username; }

   public void setUsername(String username) { this.username = username; }

   public String setPassword(String password) { this.password = password; }

}
(Note that we’re also going to need a persistence.xml file to
configure the JPA persistence unit containing User.)
The actual work is done by a session-scoped bean that maintains
information about the currently logged-in user and exposes the User
entity to other beans:
@SessionScoped @Named

public class Login implements Serializable {


   @Inject Credentials credentials;

   @Inject @UserDatabase EntityManager userDatabase;


   private User user;


   public void login() {

      List<User> results = userDatabase.createQuery(

         "select u from User u where u.username = :username and u.password = :password")

         .setParameter("username", credentials.getUsername())

         .setParameter("password", credentials.getPassword())

         .getResultList();


      if (!results.isEmpty()) {

         user = results.get(0);

      }

      else {

         // perhaps add code here to report a failed login

      }

   }


   public void logout() {

      user = null;

   }


   public boolean isLoggedIn() {

      return user != null;

   }


   @Produces @LoggedIn User getCurrentUser() {

      return user;

   }


}
@LoggedIn and @UserDatabase are custom qualifier annotations:
@Qualifier

@Retention(RUNTIME)

@Target({TYPE, METHOD, PARAMETER, FIELD})

public @interface LoggedIn {}
@Qualifier

@Retention(RUNTIME)

@Target({METHOD, PARAMETER, FIELD})

public @interface UserDatabase {}
We need an adaptor bean to expose our typesafe EntityManager:
class UserDatabaseProducer {

   @Produces @UserDatabase @PersistenceContext

   static EntityManager userDatabase;

}
Now DocumentEditor, or any other bean, can easily inject the current
user:
public class DocumentEditor {

   @Inject Document document;

   @Inject @LoggedIn User currentUser;

   @Inject @DocumentDatabase EntityManager docDatabase;


   public void save() {

      document.setCreatedBy(currentUser);

      docDatabase.persist(document);

   }

}
Or we can reference the current user in a JSF view:
<h:panelGroup rendered="#{login.loggedIn}">

   signed in as #{currentUser.username}

</h:panelGroup>
Hopefully, this example gave you a taste of the CDI programming model. In the next chapter, we’ll explore dependency injection in greater depth.
- 4.1. Injection points
- 4.2. What gets injected
- 4.3. Qualifier annotations
- 4.4. The built-in qualifiers @Default and @Any
- 4.5. Qualifiers with members
- 4.6. Multiple qualifiers
- 4.7. Alternatives
- 4.8. Fixing unsatisfied and ambiguous dependencies
- 4.9. Client proxies
- 4.10. Obtaining a contextual instance by programmatic lookup
- 4.11. The InjectionPoint object
One of the most significant features of CDI—certainly the most recognized—is dependency injection; excuse me, typesafe dependency injection.
The @Inject annotation lets us define an injection point that is
injected during bean instantiation. Injection can occur via three
different mechanisms.
Bean constructor parameter injection:
public class Checkout {


   private final ShoppingCart cart;


   @Inject

   public Checkout(ShoppingCart cart) {

      this.cart = cart;

   }


}
A bean can only have one injectable constructor.
Initializer method parameter injection:
public class Checkout {


   private ShoppingCart cart;


   @Inject

   void setShoppingCart(ShoppingCart cart) {

      this.cart = cart;

   }


}
Note
A bean can have multiple initializer methods. If the bean is a session bean, the initializer method is not required to be a business method of the session bean.
And direct field injection:
public class Checkout {


   private @Inject ShoppingCart cart;


}
Note
Getter and setter methods are not required for field injection to work (unlike with JSF managed beans).
Dependency injection always occurs when the bean instance is first instantiated by the container. Simplifying just a little, things happen in this order:
- First, the container calls the bean constructor (the default
constructor or the one annotated
@Inject), to obtain an instance of the bean. - Next, the container initializes the values of all injected fields of the bean.
- Next, the container calls all initializer methods of bean (the call order is not portable, don’t rely on it).
- Finally, the
@PostConstructmethod, if any, is called.
(The only complication is that the container might call initializer methods declared by a superclass before initializing injected fields declared by a subclass.)
Note
One major advantage of constructor injection is that it allows the bean to be immutable.
CDI also supports parameter injection for some other methods that are invoked by the container. For instance, parameter injection is supported for producer methods:
@Produces Checkout createCheckout(ShoppingCart cart) {

    return new Checkout(cart);

}
This is a case where the @Inject annotation is not required at the
injection point. The same is true for observer methods (which we’ll meet
in Chapter 11, Events) and disposer methods.
The CDI specification defines a procedure, called typesafe resolution, that the container follows when identifying the bean to inject to an injection point. This algorithm looks complex at first, but once you understand it, it’s really quite intuitive. Typesafe resolution is performed at system initialization time, which means that the container will inform the developer immediately if a bean’s dependencies cannot be satisfied.
The purpose of this algorithm is to allow multiple beans to implement the same bean type and either:
- allow the client to select which implementation it requires using a qualifier or
- allow the application deployer to select which implementation is appropriate for a particular deployment, without changes to the client, by enabling or disabling an alternative, or
- allow the beans to be isolated into separate modules.
Obviously, if you have exactly one bean of a given type, and an injection point with that same type, then bean A is going to go into slot A. That’s the simplest possible scenario. When you first start your application, you’ll likely have lots of those.
But then, things start to get complicated. Let’s explore how the container determines which bean to inject in more advanced cases. We’ll start by taking a closer look at qualifiers.
If we have more than one bean that implements a particular bean type,
the injection point can specify exactly which bean should be injected
using a qualifier annotation. For example, there might be two
implementations of PaymentProcessor:
@Synchronous

public class SynchronousPaymentProcessor implements PaymentProcessor {

   public void process(Payment payment) { ... }

}
@Asynchronous

public class AsynchronousPaymentProcessor implements PaymentProcessor {

   public void process(Payment payment) { ... }

}
Where @Synchronous and @Asynchronous are qualifier annotations:
@Qualifier

@Retention(RUNTIME)

@Target({TYPE, METHOD, FIELD, PARAMETER})

public @interface Synchronous {}
@Qualifier

@Retention(RUNTIME)

@Target({TYPE, METHOD, FIELD, PARAMETER})

public @interface Asynchronous {}
A client bean developer uses the qualifier annotation to specify exactly which bean should be injected.
Using field injection:
@Inject @Synchronous PaymentProcessor syncPaymentProcessor;

@Inject @Asynchronous PaymentProcessor asyncPaymentProcessor;
Using initializer method injection:
@Inject

public void setPaymentProcessors(@Synchronous PaymentProcessor syncPaymentProcessor,

                                 @Asynchronous PaymentProcessor asyncPaymentProcessor) {

   this.syncPaymentProcessor = syncPaymentProcessor;

   this.asyncPaymentProcessor = asyncPaymentProcessor;

}
Using constructor injection:
@Inject

public Checkout(@Synchronous PaymentProcessor syncPaymentProcessor,

                @Asynchronous PaymentProcessor asyncPaymentProcessor) {

   this.syncPaymentProcessor = syncPaymentProcessor;

   this.asyncPaymentProcessor = asyncPaymentProcessor;

}
Qualifier annotations can also qualify method arguments of producer, disposer and observer methods. Combining qualified arguments with producer methods is a good way to have an implementation of a bean type selected at runtime based on the state of the system:
@Produces

PaymentProcessor getPaymentProcessor(@Synchronous PaymentProcessor syncPaymentProcessor,

                                     @Asynchronous PaymentProcessor asyncPaymentProcessor) {

   return isSynchronous() ? syncPaymentProcessor : asyncPaymentProcessor;

}
If an injected field or a parameter of a bean constructor or initializer
method is not explicitly annotated with a qualifier, the default
qualifier,@Default, is assumed.
Now, you may be thinking, "What’s the different between using a
qualifier and just specifying the exact implementation class you want?"
It’s important to understand that a qualifier is like an extension of
the interface. It does not create a direct dependency to any particular
implementation. There may be multiple alternative implementations of
@Asynchronous PaymentProcessor!
Whenever a bean or injection point does not explicitly declare a
qualifier, the container assumes the qualifier @Default. From time to
time, you’ll need to declare an injection point without specifying a
qualifier. There’s a qualifier for that too. All beans have the
qualifier @Any. Therefore, by explicitly specifying @Any at an
injection point, you suppress the default qualifier, without otherwise
restricting the beans that are eligible for injection.
This is especially useful if you want to iterate over all beans with a certain bean type. For example:
import javax.enterprise.inject.Instance;


...


@Inject

void initServices(@Any Instance<Service> services) {

   for (Service service: services) {

      service.init();

   }

}
Java annotations can have members. We can use annotation members to further discriminate a qualifier. This prevents a potential explosion of new annotations. For example, instead of creating several qualifiers representing different payment methods, we could aggregate them into a single annotation with a member:
@Qualifier

@Retention(RUNTIME)

@Target({METHOD, FIELD, PARAMETER, TYPE})

public @interface PayBy {

   PaymentMethod value();

}
Then we select one of the possible member values when applying the qualifier:
private @Inject @PayBy(CHECK) PaymentProcessor checkPayment;
We can force the container to ignore a member of a qualifier type by
annotating the member @Nonbinding.
@Qualifier

@Retention(RUNTIME)

@Target({METHOD, FIELD, PARAMETER, TYPE})

public @interface PayBy {

   PaymentMethod value();

   @Nonbinding String comment() default "";

}
An injection point may specify multiple qualifiers:
@Inject @Synchronous @Reliable PaymentProcessor syncPaymentProcessor;
Then only a bean which has both qualifier annotations would be eligible for injection.
@Synchronous @Reliable

public class SynchronousReliablePaymentProcessor implements PaymentProcessor {

   public void process(Payment payment) { ... }

}
Alternatives are beans whose implementation is specific to a particular
client module or deployment scenario. This alternative defines a mock
implementation of both @Synchronous PaymentProcessor and
@Asynchronous PaymentProcessor, all in one:
@Alternative @Synchronous @Asynchronous

public class MockPaymentProcessor implements PaymentProcessor {

   public void process(Payment payment) { ... }

}
By default, @Alternative beans are disabled. We need to enable an
alternative in the beans.xml descriptor of a bean archive to make it
available for instantiation and injection. However, this activation only
applies to the beans in that archive.
<beans

   xmlns="http://xmlns.jcp.org/xml/ns/javaee"

   xmlns:xsi="http://www.w3.org/2001/XMLSchema-instance"

   xsi:schemaLocation="

      http://xmlns.jcp.org/xml/ns/javaee

      http://xmlns.jcp.org/xml/ns/javaee/beans_1_1.xsd">

   <alternatives>

         <class>org.mycompany.mock.MockPaymentProcessor</class>

   </alternatives>

</beans>
From CDI 1.1 onwards the alternative can be enabled for the whole application using @Priority annotation.
@Priority(100) @Alternative @Synchronous @Asynchronous

public class MockPaymentProcessor implements PaymentProcessor {

   public void process(Payment payment) { ... }

}
When an ambiguous dependency exists at an injection point, the container attempts to resolve the ambiguity by looking for an enabled alternative among the beans that could be injected. If there is exactly one enabled alternative, that’s the bean that will be injected. If there are more beans with priority, the one with the highest priority value is selected.
The typesafe resolution algorithm fails when, after considering the
qualifier annotations on all beans that implement the bean type of an
injection point and filtering out disabled beans (@Alternative beans
which are not explicitly enabled), the container is unable to identify
exactly one bean to inject. The container will abort deployment,
informing us of the unsatisfied or ambiguous dependency.
During the course of your development, you’re going to encounter this situation. Let’s learn how to resolve it.
To fix an unsatisfied dependency, either:
- create a bean which implements the bean type and has all the qualifier types of the injection point,
- make sure that the bean you already have is in the classpath of the module with the injection point, or
- explicitly enable an
@Alternativebean that implements the bean type and has the appropriate qualifier types, usingbeans.xml. - enable an
@Alternativebean that implements the bean type and has the appropriate qualifier types, using@Priorityannotation.
To fix an ambiguous dependency, either:
- introduce a qualifier to distinguish between the two implementations of the bean type,
- exclude one of the beans from discovery (either by means of
@Vetoed
or
beans.xml), - disable one of the beans by annotating it
@Alternative, - move one of the implementations to a module that is not in the classpath of the module with the injection point, or
- disable one of two
@Alternativebeans that are trying to occupy the same space, usingbeans.xml, - change priority value of one of two
@Alternativebeans with the@Priorityif they have the same highest priority value.
Just remember: "There can be only one."
On the other hand, if you really do have an optional or multivalued
injection point, you should change the type of your injection point to
Instance, as we’ll see in Section 4.10, “Obtaining a contextual instance by programmatic lookup”.
Now there’s one more issue you need to be aware of when using the dependency injection service.
Clients of an injected bean do not usually hold a direct reference to a
bean instance, unless the bean is a dependent object (scope
@Dependent).
Imagine that a bean bound to the application scope held a direct reference to a bean bound to the request scope. The application-scoped bean is shared between many different requests. However, each request should see a different instance of the request scoped bean—the current one!
Now imagine that a bean bound to the session scope holds a direct reference to a bean bound to the application scope. From time to time, the session context is serialized to disk in order to use memory more efficiently. However, the application scoped bean instance should not be serialized along with the session scoped bean! It can get that reference any time. No need to hoard it!
Therefore, unless a bean has the default scope @Dependent, the
container must indirect all injected references to the bean through a
proxy object. This client proxy is responsible for ensuring that the
bean instance that receives a method invocation is the instance that is
associated with the current context. The client proxy also allows beans
bound to contexts such as the session context to be serialized to disk
without recursively serializing other injected beans.
Unfortunately, due to limitations of the Java language, some Java types
cannot be proxied by the container. If an injection point declared with
one of these types resolves to a bean with any scope other than
@Dependent, the container will abort deployment, informing us of the
problem.
The following Java types cannot be proxied by the container:
- classes which don’t have a non-private constructor with no parameters, and
- classes which are declared
finalor have afinalmethod, - arrays and primitive types.
It’s usually very easy to fix an unproxyable dependency problem. If an
injection point of type X results in an unproxyable dependency,
simply:
- add a constructor with no parameters to
X, - change the type of the injection point to`Instance<X>`,
- introduce an interface
Y, implemented by the injected bean, and change the type of the injection point toY, or - if all else fails, change the scope of the injected bean to
@Dependent.
Note
Weld also supports a non-standard workaround for this limitation. See the Configuration chapter for more information.
In certain situations, injection is not the most convenient way to obtain a contextual reference. For example, it may not be used when:
- the bean type or qualifiers vary dynamically at runtime, or
- depending upon the deployment, there may be no bean which satisfies the type and qualifiers, or
- we would like to iterate over all beans of a certain type.
In these situations, the application may obtain an instance of the
interface Instance, parameterized for the bean type, by injection:
@Inject Instance<PaymentProcessor> paymentProcessorSource;
The get() method of Instance produces a contextual instance of the
bean.
PaymentProcessor p = paymentProcessorSource.get();
Qualifiers can be specified in one of two ways:
- by annotating the
Instanceinjection point, or - by passing qualifiers to the
select()ofEvent.
Specifying the qualifiers at the injection point is much, much easier:
@Inject @Asynchronous Instance<PaymentProcessor> paymentProcessorSource;
Now, the PaymentProcessor returned by get() will have the qualifier
@Asynchronous.
Alternatively, we can specify the qualifier dynamically. First, we add
the @Any qualifier to the injection point, to suppress the default
qualifier. (All beans have the qualifier @Any .)
import javax.enterprise.inject.Instance;


...


@Inject @Any Instance<PaymentProcessor> paymentProcessorSource;
Next, we need to obtain an instance of our qualifier type. Since
annotations are interfaces, we can’t just write new Asynchronous().
It’s also quite tedious to create a concrete implementation of an
annotation type from scratch. Instead, CDI lets us obtain a qualifier
instance by subclassing the helper class AnnotationLiteral.
class AsynchronousQualifier

extends AnnotationLiteral<Asynchronous> implements Asynchronous {}
In some cases, we can use an anonymous class:
PaymentProcessor p = paymentProcessorSource

   .select(new AnnotationLiteral<Asynchronous>() {});
However, we can’t use an anonymous class to implement a qualifier type with members.
Now, finally, we can pass the qualifier to the select() method
of Instance.
Annotation qualifier = synchronously ?

      new SynchronousQualifier() : new AsynchronousQualifier();

PaymentProcessor p = anyPaymentProcessor.select(qualifier).get().process(payment);
Note
Since CDI 2.0, most annotations from javax.enterprise package have their AnnotationLiteral implementations.
Therefore, in order to programmatically obtain (for instance) @Any annotation, you can simply do Any.Literal.INSTANCE.
Weld also provides org.jboss.weld.inject.WeldInstance - an enhanced version of javax.enterprise.inject.Instance.
There are three additional methods.
The first one - getHandler() - allows to obtain a contextual reference handler which not only holds the contextual reference but also allows to inspect the metadata of the relevant bean and to destroy the underlying contextual instance.
Moreover, the handler implements AutoCloseable:
import org.jboss.weld.inject.WeldInstance;


class Foo {


  @Inject

  WeldInstance<Bar> instance;


  void doWork() {

    try (Handler<Bar> barHandler = instance.getHandler()) {

        barHandler.get().doBusiness();

        // Note that Bar will be automatically destroyed at the end of the try-with-resources statement

    }

    Handler<Bar> barHandler = instance.getHandler()

    barHandler.get().doBusiness();

    // Calls Instance.destroy()

    barHandler.destroy();

  }


}
The next method - handlers() - returns an Iterable which allows to iterate over handlers for all the beans that have the required type and required qualifiers and are eligible for injection.
This might be useful if you need more control inside the loop:
@ApplicationScoped

class OrderService {


  @Inject

  @Any

  WeldInstance<OrderProcessor> instance;


  void create(Order order) {

    for (Handler<OrderProcessor> handler : instance.handlers()) {

            handler.get().process(order);

            if (Dependent.class.equals(handler.getBean().getScope()) {

                // Destroy only dependent processors

                handler.destroy();

            }

        }

    }

  }
Third method is a twist on the select() method, but it accepts java.lang.reflect.Type as parameter and optionally qualifier(s).
This allows for generic selection of instances which can be handy while dealing with third party beans through extensions.
However, in order to stay type-safe, this method has a limitation - it can only be invoked on WeldInstance<Object>.
Invocation on any other type than Object will result in an IllegalStateException.
Please note that the return value if such select will always be WeldInstance<Object> unless you specify it further using <SomeType> before invoking this select().
Let’s look at actual code:
class MyCustomExtension implements Extension {


  @Inject

  @Any

  WeldInstance<Object> instance;


  private Set<Type> allTypes = new HashSet<>();


  public void observe(@Observes ProcessBean<?> bean) {

    // gather all bean types, even those that we do not own

    allTypes.add(bean.getAnnotated().getBaseType());

  }


  public void doWorkWithBeans(@Observes AfterDeploymentValidation adv) {

    for (Type t : allTypes) {

      // now we can select based on Type once we are sure all beans are initialized

      instance.select(t).isResolvable() ? logValidBeanFound(t) : logInvalidBeanFound(t);

    }

  }
WeldInstance is automatically available in Weld SE and Weld Servlet where the Weld API is always on the class path.
It is also available in Weld-powered EE containers.
In this case, users would have to compile their application against the Weld API and exclude the Weld API artifact from the deployment (e.g. use provided scope in Maven).
There are certain kinds of dependent objects (beans with scope
@Dependent) that need to know something about the object or injection
point into which they are injected in order to be able to do what they
do. For example:
- The log category for a
Loggerdepends upon the class of the object that owns it. - Injection of a HTTP parameter or header value depends upon what parameter or header name was specified at the injection point.
- Injection of the result of an EL expression evaluation depends upon the expression that was specified at the injection point.
A bean with scope @Dependent may inject an instance of
InjectionPoint and access metadata relating to the injection point to
which it belongs.
Let’s look at an example. The following code is verbose, and vulnerable to refactoring problems:
Logger log = Logger.getLogger(MyClass.class.getName());
This clever little producer method lets you inject a JDK Logger
without explicitly specifying the log category:
import javax.enterprise.inject.spi.InjectionPoint;

import javax.enterprise.inject.Produces;


class LogFactory {


   @Produces Logger createLogger(InjectionPoint injectionPoint) {

      return Logger.getLogger(injectionPoint.getMember().getDeclaringClass().getName());

   }


}
We can now write:
@Inject Logger log;
Not convinced? Then here’s a second example. To inject HTTP parameters, we need to define a qualifier type:
@Qualifier

@Retention(RUNTIME)

@Target({TYPE, METHOD, FIELD, PARAMETER})

public @interface HttpParam {

   @Nonbinding public String value();

}
We would use this qualifier type at injection points as follows:
@HttpParam("username") @Inject String username;

@HttpParam("password") @Inject String password;
The following producer method does the work:
import javax.enterprise.inject.Produces;

import javax.enterprise.inject.spi.InjectionPoint;


class HttpParams


   @Produces @HttpParam("")

   String getParamValue(InjectionPoint ip) {

      ServletRequest request = (ServletRequest) FacesContext.getCurrentInstance().getExternalContext().getRequest();

      return request.getParameter(ip.getAnnotated().getAnnotation(HttpParam.class).value());

   }


}
Note that acquiring of the request in this example is JSF-centric. For a more generic solution you could write your own producer for the request and have it injected as a method parameter.
Note also that the value() member of the HttpParam annotation is
ignored by the container since it is annotated @Nonbinding.
The container provides a built-in bean that implements the
InjectionPoint interface:
public interface InjectionPoint {

   public Type getType();

   public Set<Annotation> getQualifiers();

   public Bean<?> getBean();

   public Member getMember();

   public Annotated getAnnotated();

   public boolean isDelegate();

   public boolean isTransient();

}
So far, we’ve seen a few examples of scope type annotations. The scope of a bean determines the lifecycle of instances of the bean. The scope also determines which clients refer to which instances of the bean. According to the CDI specification, a scope determines:
- When a new instance of any bean with that scope is created
- When an existing instance of any bean with that scope is destroyed
- Which injected references refer to any instance of a bean with that scope
For example, if we have a session-scoped bean, CurrentUser, all beans
that are called in the context of the same HttpSession will see the
same instance of CurrentUser. This instance will be automatically
created the first time a CurrentUser is needed in that session, and
automatically destroyed when the session ends.
Note
JPA entities aren’t a great fit for this model. Entities have their
whole own lifecycle and identity model which just doesn’t map naturally
to the model used in CDI. Therefore, we recommend against treating
entities as CDI beans. You’re certainly going to run into problems if
you try to give an entity a scope other than the default scope
@Dependent. The client proxy will get in the way if you try to pass an
injected instance to the JPA EntityManager.
CDI features an extensible context model. It’s possible to define new scopes by creating a new scope type annotation:
@ScopeType

@Retention(RUNTIME)

@Target({TYPE, METHOD})

public @interface ClusterScoped {}
Of course, that’s the easy part of the job. For this scope type to be
useful, we will also need to define a Context object that implements
the scope! Implementing a Context is usually a very technical task,
intended for framework development only.
We can apply a scope type annotation to a bean implementation class to specify the scope of the bean:
@ClusterScoped

public class SecondLevelCache { ... }
Usually, you’ll use one of CDI’s built-in scopes.
CDI defines four built-in scopes:
@RequestScoped@SessionScoped@ApplicationScoped@ConversationScoped
For a web application that uses CDI, any servlet request has access to active request, session and application scopes. Furthermore, since CDI 1.1 the conversation context is active during every servlet request.
The request and application scopes are also active:
- during invocations of EJB remote methods,
- during invocations of EJB asynchronous methods,
- during EJB timeouts,
- during message delivery to a message-driven bean,
- during web service invocations, and
- during
@PostConstructcallback of any bean
If the application tries to invoke a bean with a scope that does not
have an active context, a ContextNotActiveException is thrown by the
container at runtime.
Managed beans with scope @SessionScoped or @ConversationScoped must
be serializable, since the container passivates the HTTP session from
time to time.
Three of the four built-in scopes should be extremely familiar to every Java EE developer, so let’s not waste time discussing them here. One of the scopes, however, is new.
The conversation scope is a bit like the traditional session scope in that it holds state associated with a user of the system, and spans multiple requests to the server. However, unlike the session scope, the conversation scope:
- is demarcated explicitly by the application, and
- holds state associated with a particular web browser tab in a web application (browsers tend to share domain cookies, and hence the session cookie, between tabs, so this is not the case for the session scope).
A conversation represents a task—a unit of work from the point of view of the user. The conversation context holds state associated with what the user is currently working on. If the user is doing multiple things at the same time, there are multiple conversations.
The conversation context is active during any servlet request (since CDI 1.1). Most conversations are destroyed at the end of the request. If a conversation should hold state across multiple requests, it must be explicitly promoted to a long-running conversation.
CDI provides a built-in bean for controlling the lifecycle of conversations in a CDI application. This bean may be obtained by injection:
@Inject Conversation conversation;
To promote the conversation associated with the current request to a
long-running conversation, call the begin() method from application
code. To schedule the current long-running conversation context for
destruction at the end of the current request, call end().
In the following example, a conversation-scoped bean controls the conversation with which it is associated:
import javax.enterprise.inject.Produces;

import javax.inject.Inject;

import javax.persistence.PersistenceContextType.EXTENDED;


@ConversationScoped @Stateful

public class OrderBuilder {

   private Order order;

   private @Inject Conversation conversation;

   private @PersistenceContext(type = EXTENDED) EntityManager em;


   @Produces public Order getOrder() {

      return order;

   }


   public Order createOrder() {

      order = new Order();

      conversation.begin();

      return order;

   }


   public void addLineItem(Product product, int quantity) {

      order.add(new LineItem(product, quantity));

   }


   public void saveOrder(Order order) {

      em.persist(order);

      conversation.end();

   }


   @Remove

   public void destroy() {}

}
This bean is able to control its own lifecycle through use of the
Conversation API. But some other beans have a lifecycle which depends
completely upon another object.
The conversation context automatically propagates with any JSF faces request (JSF form submission) or redirect. It does not automatically propagate with non-faces requests, for example, navigation via a link.
We can force the conversation to propagate with a non-faces request by
including the unique identifier of the conversation as a request
parameter. The CDI specification reserves the request parameter named
cid for this use. The unique identifier of the conversation may be
obtained from the Conversation object, which has the EL bean name
javax.enterprise.context.conversation.
Therefore, the following link propagates the conversation:
<a href="/addProduct.jsp?cid=#{javax.enterprise.context.conversation.id}">Add Product</a>
It’s probably better to use one of the link components in JSF 2:
<h:link outcome="/addProduct.xhtml" value="Add Product">

   <f:param name="cid" value="#{javax.enterprise.context.conversation.id}"/>

</h:link>
Tip
The conversation context propagates across redirects, making it very easy to implement the common POST-then-redirect pattern, without resort to fragile constructs such as a "flash" object. The container automatically adds the conversation id to the redirect URL as a request parameter.
In certain scenarios it may be desired to suppress propagation of a
long-running conversation. The conversationPropagation request
parameter (introduced in CDI 1.1) may be used for this purpose. If the
conversationPropagation request parameter has the value none , the
container will not reassociate the existing conversation but will
instead associate the request with a new transient conversation even
though the conversation id was propagated.
The container is permitted to destroy a conversation and all state held in its context at any time in order to conserve resources. A CDI implementation will normally do this on the basis of some kind of timeout—though this is not required by the specification. The timeout is the period of inactivity before the conversation is destroyed (as opposed to the amount of time the conversation is active).
The Conversation object provides a method to set the timeout. This is
a hint to the container, which is free to ignore the setting.
conversation.setTimeout(timeoutInMillis);
Another option how to set conversation timeout is to provide configuration property defining the new time value. See Section 19.1.12, “Conversation timeout and Conversation concurrent access timeout”. However note that any conversation might be destroyed any time sooner when HTTP session invalidation or timeout occurs.
The conversation management is not always smooth. For example, if the
propagated conversation cannot be restored, the
javax.enterprise.context.NonexistentConversationException is thrown.
Or if there are concurrent requests for a one long-running conversation,
`javax.enterprise.context.BusyConversationException ` is thrown. For
such cases, developer has no opportunity to deal with the exception by
default, as the conversation associated with a Servlet request is
determined at the beginning of the request before calling any service()
method of any servlet in the web application, even before calling any of
the filters in the web application and before the container calls any
ServletRequestListener or AsyncListener in the web application.
To be allowed to handle the exceptions, a filter defined in the CDI 1.1 with the name ` CDI Conversation Filter ` can be used. By mapping the ` CDI Conversation Filter ` in the web.xml just after some other filters, we are able to catch the exceptions in them since the ordering in the web.xml specifies the ordering in which the filters will be called (described in the servlet specification).
In the following example, a filter MyFilter checks for the BusyConversationException thrown during the conversation association. In the web.xml example, the filter is mapped before the CDI Conversation Filter.
public class MyFilter implements Filter {

...


@Override

    public void doFilter(ServletRequest request, ServletResponse response, FilterChain chain)

      throws IOException, ServletException {

        try {

            chain.doFilter(request, response);

        } catch (BusyConversationException e) {

            response.setContentType("text/plain");

            response.getWriter().print("BusyConversationException");

        }

    }


...
To make it work, we need to map our MyFilter before the CDI Conversation Filter in the web.xml file.
<filter-mapping>

      <filter-name>My Filter</filter-name>

      <url-pattern>/*</url-pattern>

   </filter-mapping>


   <filter-mapping>

      <filter-name>CDI Conversation Filter</filter-name>

      <url-pattern>/*</url-pattern>

   </filter-mapping>
Tip
The mapping of the CDI Conversation Filter determines when Weld reads
the cid request parameter. This process forces request body parsing.
If your application relies on setting a custom character encoding for
the request or parsing the request body itself by reading an
InputStream or Reader, make sure that this is performed in a filter
that executes before the CDI Conversation Filter is executed. See
this FAQ page for details.
Alternatively, the lazy conversation context initialization (see below)
may be used.
Conversation context may be initialized lazily or eagerly.
When initialized lazily, the conversation context (no matter if
transient or long-running) is only initialized when a
@ConversationScoped bean is accessed for the first time. At that
point, the cid parameter is read and the conversation is restored. The
conversation context may not be initialized at all throughout the
request processing if no conversation state is accessed. Note that if a
problem occurs during this delayed initialization, the conversation
state access (bean method invocation) may result in
BusyConversationException or NonexistentConversationException being
thrown.
When initialized eagerly, the conversation context is initialized at a
predefined time. Either at the beginning of the request processing
before any listener, filter or servlet is invoked or, if the
CDI Conversation Filter is mapped, during execution of this filter.
Conversation context initialization mode may be configured using the
org.jboss.weld.context.conversation.lazy init parameter.
<context-param>

   <param-name>org.jboss.weld.context.conversation.lazy</param-name>

   <param-value>true</param-value>

</context-param>
If the init parameter is not set, the following default behavior applies:
- If the
CDI Conversation Filteris mapped, the conversation context is initialized eagerly within this filter - Otherwise, the conversation context is initialized lazily
In addition to the four built-in scopes, CDI also supports two
pseudo-scopes. The first is the singleton pseudo-scope, which we
specify using the annotation @Singleton.
Note
Unlike the other scopes, which belong to the package
javax.enterprise.context, the @Singleton annotation is defined in
the package javax.inject.
You can guess what "singleton" means here. It means a bean that is
instantiated once. Unfortunately, there’s a little problem with this
pseudo-scope. Beans with scope @Singleton don’t have a proxy object.
Clients hold a direct reference to the singleton instance. So we need to
consider the case of a client that can be serialized, for example, any
bean with scope @SessionScoped or @ConversationScoped, any dependent
object of a bean with scope @SessionScoped or @ConversationScoped,
or any stateful session bean.
Now, if the singleton instance is a simple, immutable, serializable object like a string, a number or a date, we probably don’t mind too much if it gets duplicated via serialization. However, that makes it stop being a true singleton, and we may as well have just declared it with the default scope.
There are several ways to ensure that the singleton bean remains a singleton when its client gets serialized:
- have the singleton bean implement
writeResolve()andreadReplace()(as defined by the Java serialization specification), - make sure the client keeps only a transient reference to the singleton bean, or
- give the client a reference of type
Instance<X>whereXis the bean type of the singleton bean.
A fourth, better solution is to instead use @ApplicationScoped,
allowing the container to proxy the bean, and take care of serialization
problems automatically.
Finally, CDI features the so-called dependent pseudo-scope. This is the default scope for a bean which does not explicitly declare a scope type.
For example, this bean has the scope type @Dependent:
public class Calculator { ... }
An instance of a dependent bean is never shared between different clients or different injection points. It is strictly a dependent object of some other object. It is instantiated when the object it belongs to is created, and destroyed when the object it belongs to is destroyed.
If a Unified EL expression refers to a dependent bean by EL name, an instance of the bean is instantiated every time the expression is evaluated. The instance is not reused during any other expression evaluation.
Note
If you need to access a bean directly by EL name in a JSF page, you
probably need to give it a scope other than @Dependent. Otherwise, any
value that gets set to the bean by a JSF input will be lost immediately.
That’s why CDI features the @Model stereotype; it lets you give a bean
a name, and set its scope to @RequestScoped in one stroke. If you need
to access a bean that really has to have the scope @Dependent from a
JSF page, inject it into a different bean, and expose it to EL via a
getter method.
Beans with scope @Dependent don’t need a proxy object. The client
holds a direct reference to its instance.
CDI makes it easy to obtain a dependent instance of a bean, even if the bean is already declared as a bean with some other scope type.
Weld, the CDI Reference Implementation (RI), can be downloaded from the download page. Information about the Weld source code repository and instructions about how to obtain and build the source can be found on the same page.
Weld provides a complete SPI allowing Java EE containers such as WildFly, GlassFish and WebLogic to use Weld as their built-in CDI implementation. Weld also runs in servlet engines like Tomcat and Jetty, or even in a plain Java SE environment.
Weld comes with an extensive library of examples, which are a great starting point from which to learn CDI. In addition, a number of quickstarts featuring CDI can be found at the JBoss Developer site
Weld comes with a number of examples. We recommend you start with
examples/jsf/numberguess and examples/jsf/translator. Numberguess is
a web (war) example containing only non-transactional managed beans.
This example can be run on a wide range of servers, including WildFly,
GlassFish, Apache Tomcat, Jetty, and any compliant
Java EE 8 container. Translator is an enterprise (ear) example that
contains session beans. This example must be run on WildFly 14 or better,
GlassFish 5.1 or better, or any compliant Java EE 8 container.
Both examples use JSF 2.3 as the web framework and, as such, can be
found in the examples/jsf directory of the Weld distribution.
To run the examples with the provided build scripts, you’ll need the following:
- the latest release of Weld, which contains the examples
- Maven 3, to build and deploy the examples
optionally, a supported runtime environment (minimum versions shown)
- WildFly 14 (14.0.1.Final recommended),
- GlassFish 5.1.0 or better,
- Apache Tomcat 9 or better (war example only), or
- Jetty 9 or better (war example only)
In the next few sections, you’ll be using the Maven command (mvn) to
invoke the Maven project file in each example to compile, assemble and
deploy the example to WildFly and, for the war example, Apache Tomcat.
You can also deploy the generated artifact (war or ear) to any other
container that supports Java EE 8, such as GlassFish 5.
The sections below cover the steps for deploying with Maven in detail.
If you simply want to run the numberguess example without the requirement of a specific runtime you can start with the following commands:
$> cd examples/jsf/numberguess
$> mvn wildfly:run
The Maven WildFly plugin will run WildFly and deploy the example and the server will be automatically downloaded in the target directory.
The numberguess application is available at http://localhost:8080/weld-numberguess.
To deploy the examples to a WildFly instance, you’ll need to download WildFly first. The good news is that there are no additional modifications you have to make to the server. It’s ready to go!
After you have downloaded WildFly, extract it. You can move the extracted folder anywhere you
like. Wherever it lays to rest, that’s what we’ll call the WildFly
installation directory, or JBOSS_HOME.
$> unzip wildfly-14.0.1.Final.zip
$> mv wildfly-14.*/ wildfly-14
In order for the build scripts to know where to deploy the example, you
have to tell them where to find your WildFly installation. Set the
JBOSS_HOME environment variable to point to the WildFly installation,
e.g.:
$> export JBOSS_HOME=/path/to/wildfly-14
You’re now ready to run your first example!
Switch to the examples/jsf/numberguess directory and execute the Maven
deploy target:
$> cd examples/jsf/numberguess
$> mvn wildfly:deploy
Note
If you are using Eclipse, you should seriously consider installing the JBoss Tools add-ons, which include a wide variety of tooling for CDI and Java EE development, as well as an enhanced WildFly server view.
Wait a few seconds for the application to deploy (or the application server to start) and see if you can determine the most efficient approach to pinpoint the random number at the local URL http://localhost:8080/weld-numberguess.
Note
The Maven WildFly plugin includes additional goals for WildFly to deploy and undeploy the archive.
mvn wildfly:deploy- deploy the example to a running WildFly instancemvn wildfly:undeploy- undeploy the example from a running WildFly instancemvn wildfly:redeploy- redeploys the example
For more information on the WildFly Maven plugin see the plugin documentation.
You can also run functional tests to verify that the example works as expected. Run:
$> mvn verify -Darquillian=wildfly-managed
You should see the following output:
Tests run: 2, Failures: 0, Errors: 0, Skipped: 0
The second starter example, weld-translator, will translate your text
into Latin. (Well, not really, but the stub is there for you to
implement, at least. Good luck!) To try it out, switch to the translator
example directory and execute the deploy target:
$> cd examples/jsf/translator/ear
$> mvn wildfly:run
Note
The translator uses session beans, which are packaged in an EJB module within an ear. Java EE 8 allows session beans to be deployed in war modules, but that’s a topic for a later chapter.
Again, wait a few seconds for the application to deploy (if you’re really bored, read the log messages), and visit http://localhost:8080/weld-translator to begin pseudo-translating.
Again, functional tests can be running by executing:
$> cd examples/jsf/translator/ftest
$> mvn verify -Darquillian=wildfly-managed
Deploying to GlassFish should be easy and familiar, right? After all, it’s the Java EE 8 reference implementation and Weld is the CDI reference implementation, meaning Weld gets bundled with GlassFish. So yes, it’s all quite easy and familiar.
To deploy the examples to GlassFish, you’ll need a GlassFish 5.1.0 release. Extract
the zip to a directory of your choice and set the GLASSFISH_HOME environment
variable. Switch to the GLASSFISH_HOME directory and start the server:
$> ./bin/asadmin start-domain
Now you can deploy the example.
$> ./bin/asadmin deploy /path/examples/jsf/numberguess/target/weld-numberguess.war
Once the command completes the application is available at http://localhost:8080/weld-numberguess
The reason the same artifact can be deployed to both WildFly and GlassFish, without any modifications, is because all of the features being used are part of the standard platform. And what a capable platform it has become!
Servlet containers are not required to support Java EE services like CDI. However, you can use CDI in a servlet container like Tomcat by embedding a standalone CDI implementation such as Weld.
Weld comes with servlet integration extension which bootstraps the CDI environment and provides injection into servlets components. Basically, it emulates some of the work done by the Java EE container, but you don’t get the enterprise features such as session beans and container-managed transactions.
Note
Note that due to limitations of servlet containers (e.g. read-only JNDI) your application might require some additional configuration as well (see Section 18.3.1, “Tomcat” and Section 18.3.2, “Jetty” for more info).
Let’s give the Weld servlet extension a spin on Apache Tomcat. First, you’ll need to download Tomcat 9.0.11 or later from tomcat.apache.org and extract it.
$> unzip apache-tomcat-9.0.11.zip
The Maven plugin communicates with Tomcat over HTTP, so it doesn’t care
where you have installed Tomcat. However, the plugin configuration
assumes you are running Tomcat in its default configuration, with a
hostname of localhost and port 8080. The readme.txt file in the
example directory has information about how to modify the Maven settings
to accommodate a different setup.
You can either start Tomcat from a Linux shell:
$> cd /path/to/apache-tomcat-9
$> ./bin/startup.sh
a Windows command window:
$> cd c:\path\to\apache-tomcat-9\bin
$> start
or you can start the server using an IDE, like Eclipse.
Change to the examples/jsf/numberguess directory again and run the
following Maven command:
$> cd examples/jsf/numberguess
$> mvn clean package -Ptomcat
Now you’re ready to deploy the numberguess example to Tomcat!
$> cp examples/jsf/numberguess/target/weld-numberguess.war apache-tomcat/webapps/
It’s time to pull the covers back and dive into the internals of Weld
example applications. Let’s start with the simpler of the two examples,
weld-numberguess.
In the numberguess application you get 10 attempts to guess a number between 1 and 100. After each attempt, you’re told whether your guess was too high or too low.
The numberguess example is comprised of a number of beans, configuration files and Facelets (JSF) views, packaged as a war module. Let’s start by examining the configuration files.
All the configuration files for this example are located in WEB-INF/,
which can be found in the src/main/webapp directory of the example.
First, we have the JSF 2.2 version of faces-config.xml. A standardized
version of Facelets is the default view handler in JSF 2.2, so there’s
really nothing that we have to configure. Thus, the configuration
consists of only the root element.
<faces-config version="2.2"

   xmlns="http://xmlns.jcp.org/xml/ns/javaee"

   xmlns:xsi="http://www.w3.org/2001/XMLSchema-instance"

   xsi:schemaLocation="

      http://xmlns.jcp.org/xml/ns/javaee

      http://xmlns.jcp.org/xml/ns/javaee/web-facesconfig_2_2.xsd">


      <name>numberguess</name>


</faces-config>
There’s also an empty beans.xml file, which tells the container to
look for beans in this archive and to activate the CDI services.
Finally, some of the supported servers also need a web.xml which is
located in src/main/webapp-[server]/WEB-INF.
Note
This demo uses JSF 2 as the view framework, but you can use Weld with any servlet-based web framework, such as JSF 1.2 or Wicket.
Let’s take a look at the main JSF view, src/main/webapp/home.xhtml.
<!DOCTYPE html PUBLIC "-//W3C//DTD XHTML 1.0 Transitional//EN"

   "http://www.w3.org/TR/xhtml1/DTD/xhtml1-transitional.dtd">

<html xmlns="http://www.w3.org/1999/xhtml"

   xmlns:ui="http://java.sun.com/jsf/facelets"

   xmlns:h="http://java.sun.com/jsf/html"

   xmlns:f="http://java.sun.com/jsf/core">


   <ui:composition template="/template.xhtml">


      <ui:define name="content">

         <h1>Guess a number...</h1>

         <h:form id="numberGuess">

            <div style="color: red">

               <h:messages id="messages" globalOnly="false"/>


               <h:outputText id="Higher" value="Higher!" rendered="#{game.guessLower}"/>

               <h:outputText id="Lower" value="Lower!" rendered="#{game.guessHigher}"/>

            </div>


            <div>

               I'm thinking of a number between

               <span id="numberGuess:smallest">#{game.smallest}</span>

               and <span id="numberGuess:biggest">#{game.biggest}</span>.

               You have #{game.remainingGuesses} guesses remaining.


            </div>


            <div>

               Your guess:

               <h:inputText id="inputGuess" value="#{game.guess}"

                  required="true" size="3" disabled="#{game.guessCorrect}"

                  validator="#{game.validateNumberRange}"/>


               <h:commandButton id="guessButton" value="Guess" action="#{game.check}"

               disabled="#{game.guessCorrect}"/>


            </div>

            <div>

               <h:commandButton id="restartButton" value="Reset" action="#{game.reset}" immediate="true"/>

            </div>

         </h:form>

      </ui:define>

   </ui:composition>

</html>
| Facelets is the built-in templating language for JSF. Here we are wrapping our page in a template which defines the layout. |
| There are a number of messages which can be sent to the user, "Higher!", "Lower!" and "Correct!" |
| As the user guesses, the range of numbers they can guess gets smaller - this sentence changes to make sure they know the number range of a valid guess. |
| This input field is bound to a bean property using a value expression. |
| A validator binding is used to make sure the user doesn’t accidentally input a number outside of the range in which they can guess - if the validator wasn’t here, the user might use up a guess on an out of bounds number. |
| And, of course, there must be a way for the user to send their guess to the server. Here we bind to an action method on the bean. |
The example consists of 4 classes, the first two of which are
qualifiers. First, there is the @Random qualifier, used for injecting
a random number:
@Qualifier

@Target( { TYPE, METHOD, PARAMETER, FIELD })

@Retention(RUNTIME)

public @interface Random {}
There is also the @MaxNumber qualifier, used for injecting the maximum
number that can be injected:
@Qualifier

@Target( { TYPE, METHOD, PARAMETER, FIELD })

@Retention(RUNTIME)

public @interface MaxNumber {}
The application-scoped Generator class is responsible for creating the
random number, via a producer method. It also exposes the maximum
possible number via a producer method:
@ApplicationScoped

public class Generator implements Serializable {


    private java.util.Random random = new java.util.Random(System.currentTimeMillis());


    private static final int MAX_NUMBER = 100;


    java.util.Random getRandom() {

        return random;

    }


    @Produces

    @Random

    int next() {

        //a number between 1 and 100

        return getRandom().nextInt(MAX_NUMBER - 1) + 1;

    }


    @Produces

    @MaxNumber

    int getMaxNumber() {

        return MAX_NUMBER;

    }

}
The Generator is application scoped, so we don’t get a different
random each time.
Note
The package declaration and imports have been excluded from these listings. The complete listing is available in the example source code.
The final bean in the application is the session-scoped Game class.
This is the primary entry point of the application. It’s responsible for
setting up or resetting the game, capturing and validating the user’s
guess and providing feedback to the user with a FacesMessage. We’ve
used the post-construct lifecycle method to initialize the game by
retrieving a random number from the @Random
Instance<Integer> bean.
You’ll notice that we’ve also added the @Named annotation to this
class. This annotation is only required when you want to make the bean
accessible to a JSF view via EL (i.e., #{game}).
import javax.enterprise.inject.Instance;


@Named

@SessionScoped

public class Game implements Serializable {


    private static final int DEFAULT_REMAINING_GUESSES = 10;


    private int number;

    private int guess;

    private int smallest;

    private int biggest;

    private int remainingGuesses;


    @Inject

    @MaxNumber

    private int maxNumber;


    @Inject

    @Random

    private Instance<Integer> randomNumber;


    public Game() {

    }


    public int getNumber() {

        return number;

    }


    public int getGuess() {

        return guess;

    }


    public void setGuess(int guess) {

        this.guess = guess;

    }


    public int getSmallest() {

        return smallest;

    }


    public int getBiggest() {

        return biggest;

    }


    public int getRemainingGuesses() {

        return remainingGuesses;

    }


    public void check() {

        if (guess > number) {

            biggest = guess - 1;

        } else if (guess < number) {

            smallest = guess + 1;

        } else if (guess == number) {

            FacesContext.getCurrentInstance().addMessage(null, new FacesMessage("Correct!"));

        }

        remainingGuesses--;

    }


    @PostConstruct

    public void reset() {

        this.smallest = 0;

        this.guess = 0;

        this.remainingGuesses = DEFAULT_REMAINING_GUESSES;

        this.biggest = maxNumber;

        this.number = randomNumber.get();

    }


    public void validateNumberRange(FacesContext context, UIComponent toValidate, Object value) {

        if (remainingGuesses <= 0) {

            FacesMessage message = new FacesMessage("No guesses left!");

            context.addMessage(toValidate.getClientId(context), message);

            ((UIInput) toValidate).setValid(false);

            return;

        }

        int input = (Integer) value;


        if (input < smallest || input > biggest) {

            ((UIInput) toValidate).setValid(false);


            FacesMessage message = new FacesMessage("Invalid guess");

            context.addMessage(toValidate.getClientId(context), message);

        }

    }


    public boolean isGuessHigher() {

        return guess != 0 && guess > number;

    }


    public boolean isGuessLower() {

        return guess != 0 && guess < number;

    }


    public boolean isGuessCorrect() {

        return guess == number;

    }

}
A couple of modifications must be made to the numberguess artifact in
order to deploy it to Tomcat or Jetty. First, Weld must be deployed as a
Web Application library under WEB-INF/lib since the servlet container
does not provide the CDI services. For your convenience we provide a
single jar suitable for running Weld in any servlet container (including
Jetty), weld-servlet-shaded.
Note
You must also include the jars for JSF, EL, and the common annotations
(jsr250-api.jar), all of which are provided by the Java EE platform (a
Java EE application server).
Second, we need to explicitly specify the servlet listener in web.xml,
again because the container isn’t doing this stuff for you. The servlet
listener boots Weld and controls it’s interaction with requests.
<listener>

   <listener-class>org.jboss.weld.environment.servlet.Listener</listener-class>

</listener>
When Weld boots, it places the
javax.enterprise.inject.spi.BeanManager, the portable SPI for
obtaining bean instances, in the ServletContext under a variable name
equal to the fully-qualified interface name. You generally don’t need to
access this interface, but Weld makes use of it.
This example shows how to use the Weld SE extension in a Java SE based
Swing application with no EJB or servlet dependencies. This example can
be found in the examples/se/numberguess folder of the Weld
distribution.
To use the Weld SE numberguess example in Eclipse, you can either import it as a Maven project if you have the m2eclipse plugin installed, or generate an Eclipse project and import it.
With m2eclipse installed, you can open any Maven project directly. From within Eclipse, select File -> Import… -> Existing Maven Projects. Then, browse to the location of the Weld SE numberguess example. You should see that Eclipse recognizes the Maven project.
Without m2eclipse plugin, you first have to generate an Eclipse project. Switch into the Weld SE numberguess example folder, then execute the Maven Eclipse plugin, as follows:
mvn eclipse:configure-workspace -Declipse.workspace=/path/to/your/eclipse/workspace
and then
mvn eclipse:eclipse
Then from within Eclipse, select File -> Import… -> Existing Projects into Workspace and browse to the location of the Weld SE numberguess example.
In both cases, you should now see a project in your workspace called
weld-se-numberguess.
It’s time to get the example running!
Disable m2eclipse’s Workspace Resolution, to make sure that Eclipse
can find StartMain. Right click on the project, and choose Properties
-> Maven, and uncheck Resolve dependencies from Workspace projects:
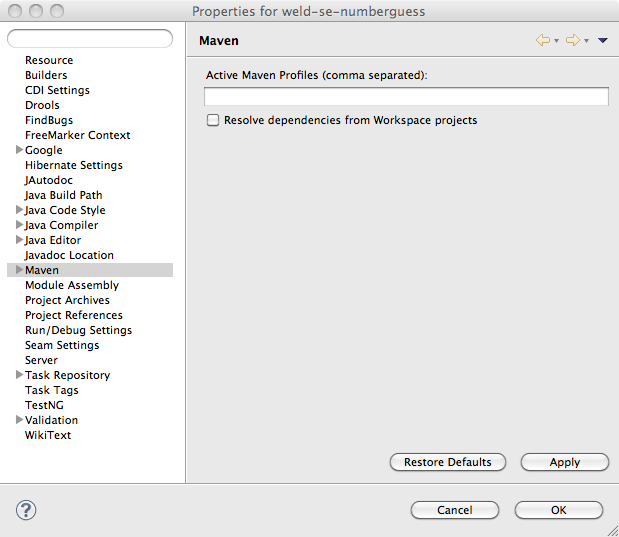
Right click on the project, and choose Run As -> Java Application:

Locate the StartMain class:
The application should now launch!
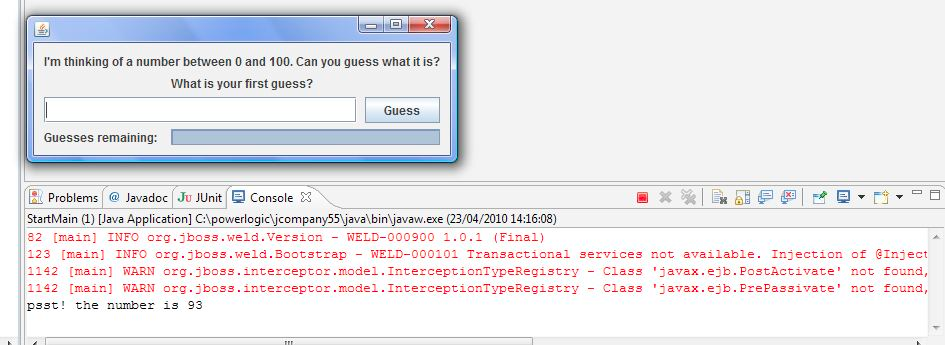
- Ensure that Maven 3 is installed and in your PATH
- Ensure that the
JAVA_HOMEenvironment variable is pointing to your JDK installation - Open a command line or terminal window in the
examples/se/numberguessdirectory Execute the following command
mvn -Drun
Let’s have a look at the significant code and configuration files that make up this example.
There is an empty beans.xml file in the root package
(src/main/resources/META-INF/beans.xml), which marks this application
as a CDI application.
Note
The beans.xml file is no longer required for CDI enablement as of CDI
1.1. CDI is automatically enabled for archives which don’t contain
beans.xml but contain one or more bean classes with a bean defining
annotation, as described in section Section 15.6.2, “Implicit bean archive”.
The game’s main logic is located in Game.java. Here is the code for
that class, highlighting the ways in which this differs from the web
application version:
@ApplicationScoped

public class Game {

    public static final int MAX_NUM_GUESSES = 10;


    private Integer number;

    private int guess = 0;

    private int smallest = 0;


    @Inject

    @MaxNumber

    private int maxNumber;


    private int biggest;

    private int remainingGuesses = MAX_NUM_GUESSES;

    private boolean validNumberRange = true;


    @Inject

    Generator rndGenerator;


    public Game() {

    }


    public int getNumber() {

        return number;

    }


    public int getGuess() {

        return guess;

    }


    public void setGuess(int guess) {

        this.guess = guess;

    }


    public int getSmallest() {

        return smallest;

    }


    public int getBiggest() {

        return biggest;

    }


    public int getRemainingGuesses() {

        return remainingGuesses;

    }


    public boolean isValidNumberRange() {

        return validNumberRange;

    }


    public boolean isGameWon() {

        return guess == number;

    }


    public boolean isGameLost() {

        return guess != number && remainingGuesses <= 0;

    }


    public boolean check() {

        boolean result = false;


        if (checkNewNumberRangeIsValid()) {

            if (guess > number) {

                biggest = guess - 1;

            }


            if (guess < number) {

                smallest = guess + 1;

            }


            if (guess == number) {

                result = true;

            }


            remainingGuesses--;

        }


        return result;

    }


    private boolean checkNewNumberRangeIsValid() {

        return validNumberRange = ((guess >= smallest) && (guess <= biggest));

    }


    @PostConstruct

    public void reset() {

        this.smallest = 0;

        this.guess = 0;

        this.remainingGuesses = 10;

        this.biggest = maxNumber;

        this.number = rndGenerator.next();

        System.out.println("psst! the number is " + this.number);

    }

}
| The bean is application scoped rather than session scoped, since an instance of a Swing application typically represents a single session. |
| Notice that the bean is not named, since it doesn’t need to be accessed via EL. |
| In Java SE there is no JSF
|
| Since there is no dedicated validation phase, validation of user input
is performed during the |
| The |
The MessageGenerator class depends on the current instance of Game
and queries its state in order to determine the appropriate messages to
provide as the prompt for the user’s next guess and the response to the
previous guess. The code for MessageGenerator is as follows:
public class MessageGenerator {

    @Inject

    private Game game;


    public String getChallengeMessage() {

        StringBuilder challengeMsg = new StringBuilder("I'm thinking of a number between ");

        challengeMsg.append(game.getSmallest());

        challengeMsg.append(" and ");

        challengeMsg.append(game.getBiggest());

        challengeMsg.append(". Can you guess what it is?");


        return challengeMsg.toString();

    }


    public String getResultMessage() {

        if (game.isGameWon()) {

            return "You guessed it! The number was " + game.getNumber();

        } else if (game.isGameLost()) {

            return "You are fail! The number was " + game.getNumber();

        } else if (!game.isValidNumberRange()) {

            return "Invalid number range!";

        } else if (game.getRemainingGuesses() == Game.MAX_NUM_GUESSES) {

            return "What is your first guess?";

        } else {

            String direction = null;


            if (game.getGuess() < game.getNumber()) {

                direction = "Higher";

            } else {

                direction = "Lower";

            }


            return direction + "! You have " + game.getRemainingGuesses() + " guesses left.";

        }

    }

}
| The instance of |
| The |
| … and again to determine whether to congratulate, console or encourage the user to continue. |
Finally we come to the NumberGuessFrame class which provides the Swing
front end to our guessing game.
import javax.enterprise.event.Observes;


public class NumberGuessFrame extends javax.swing.JFrame {

    @Inject

    private Game game;


    @Inject

    private MessageGenerator msgGenerator;


    public void start(@Observes ContainerInitialized event) {

        java.awt.EventQueue.invokeLater(new Runnable() {

            public void run() {

                initComponents();

                setVisible(true);

            }

        });

    }


    private void initComponents() {


        borderPanel = new javax.swing.JPanel();

        gamePanel = new javax.swing.JPanel();

        inputsPanel = new javax.swing.JPanel();

        buttonPanel = new javax.swing.JPanel();

        guessButton = new javax.swing.JButton();

        ...

        mainLabel.setText(msgGenerator.getChallengeMessage());

        mainMsgPanel.add(mainLabel);


        messageLabel.setText(msgGenerator.getResultMessage());

        mainMsgPanel.add(messageLabel);

        ...

    }


    private void guessButtonActionPerformed(java.awt.event.ActionEvent evt) {

        int guess = -1;


        try {

            guess = Integer.parseInt(guessText.getText());

        } catch (NumberFormatException nfe) {

            // noop

        }


        game.setGuess(guess);

        game.check();

        refreshUI();


        if (game.isGameWon() || game.isGameLost()) {

            switchButtons();

        }

    }


    private void replayBtnActionPerformed(java.awt.event.ActionEvent evt) {

        game.reset();

        refreshUI();

        switchButtons();

    }


    private void switchButtons() {

        CardLayout buttonLyt = (CardLayout) buttonPanel.getLayout();

        buttonLyt.next(buttonPanel);

    }


    private void refreshUI() {

        mainLabel.setText(msgGenerator.getChallengeMessage());

        messageLabel.setText(msgGenerator.getResultMessage());

        guessText.setText("");

        guessesLeftBar.setValue(game.getRemainingGuesses());

        guessText.requestFocus();

    }


    // swing components

    private javax.swing.JPanel borderPanel;

    ...

    private javax.swing.JButton replayBtn;


}
| The injected instance of the game (logic and state). |
| The injected message generator for UI messages. |
| This application is started in the prescribed Weld SE way, by observing
the |
| This method initializes all of the Swing components. Note the use of the
|
|
|
|
|
The translator example will take any sentences you enter, and translate them to Latin. (Well, not really, but the stub is there for you to implement, at least. Good luck!)
The translator example is built as an EAR and contains EJBs. As a result, it’s structure is more complex than the numberguess example.
Note
Java EE 7, which bundles EJB 3.2, allows you to package EJBs in a WAR, which will make this structure much simpler! Still, there are other advantages of using an EAR.
First, let’s take a look at the EAR aggregator project, which is located
in the example’s ear directory. Maven automatically generates the
application.xml for us from this plugin configuration:
<plugin>

   <groupId>org.apache.maven.plugins</groupId>

   <artifactId>maven-ear-plugin</artifactId>

   <configuration>

      <modules>

         <webModule>

            <groupId>org.jboss.weld.examples.jsf.translator</groupId>

            <artifactId>weld-jsf-translator-war</artifactId>

            <contextRoot>/weld-translator</contextRoot>

         </webModule>

      </modules>

   </configuration>

</plugin>
This configuration overrides the web context path, resulting in this application URL: http://localhost:8080/weld-translator.
Note
If you weren’t using Maven to generate these files, you would need
META-INF/application.xml:
<application version="7"

   xmlns="http://xmlns.jcp.org/xml/ns/javaee"

   xmlns:xsi="http://www.w3.org/2001/XMLSchema-instance"

   xsi:schemaLocation="

      http://xmlns.jcp.org/xml/ns/javaee

      http://xmlns.jcp.org/xml/ns/javaee/application_7.xsd">


  <display-name>weld-jsf-translator-ear</display-name>

  <description>The Weld JSF translator example (ear)</description>


  <module>

    <web>

      <web-uri>weld-translator.war</web-uri>

      <context-root>/weld-translator</context-root>

    </web>

  </module>

  <module>

    <ejb>weld-translator.jar</ejb>

  </module>

</application>
Next, let’s look at the WAR, which is located in the example’s war
directory. Just as in the numberguess example, we have a
faces-config.xml for JSF 2.2 and a web.xml (to activate JSF) under
WEB-INF, both sourced from src/main/webapp/WEB-INF.
More interesting is the JSF view used to translate text. Just as in the numberguess example we have a template, which surrounds the form (omitted here for brevity):
<h:form id="TranslatorMain">


   <table>

      <tr align="center" style="font-weight: bold">

         <td>

            Your text

         </td>

         <td>

            Translation

         </td>

      </tr>

      <tr>

         <td>

            <h:inputTextarea id="text" value="#{translator.text}" required="true" rows="5" cols="80"/>

         </td>

         <td>

            <h:outputText value="#{translator.translatedText}"/>

         </td>

      </tr>

   </table>

   <div>

      <h:commandButton id="button" value="Translate" action="#{translator.translate}"/>

   </div>


</h:form>
The user can enter some text in the left-hand text area, and hit the translate button to see the result to the right.
Finally, let’s look at the EJB module, which is located in the example’s
ejb directory. In src/main/resources/META-INF there is just an empty
beans.xml, used to mark the archive as containing beans.
Note
The beans.xml file is no longer required for CDI enablement as of CDI
1.1. CDI is automatically enabled for archives which don’t contain
beans.xml but contain one or more bean classes with a bean defining
annotation, as described in section Section 15.6.2, “Implicit bean archive”.
We’ve saved the most interesting bit for last, the code! The project has
two simple beans, SentenceParser and TextTranslator and two session
beans, TranslatorControllerBean and SentenceTranslator. You should
be getting quite familiar with what a bean looks like by now, so we’ll
just highlight the most interesting bits here.
Both SentenceParser and TextTranslator are dependent beans, and
TextTranslator uses constructor injection:
public class TextTranslator implements Serializable {


   private SentenceParser sentenceParser;


   @EJB private Translator translator;


   @Inject public TextTranslator(SentenceParser sentenceParser) {

      this.sentenceParser = sentenceParser;

   }


   public String translate(String text) {

      StringBuilder sb = new StringBuilder();

      for (String sentence: sentenceParser.parse(text)) {

         sb.append(translator.translate(sentence)).append(". ");

      }

      return sb.toString().trim();

   }


}
TextTranslator uses the simple bean (really just a plain Java class!)
SentenceParser to parse the sentence and then calls on the stateless
bean with the local business interface Translator to perform the
translation. That’s where the magic happens. Of course, we couldn’t
develop a full translator, but it’s convincing enough to anyone who
doesn’t understand Latin!
@Stateless

public class SentenceTranslator implements Translator {


   public String translate(String sentence) {

      return "Lorem ipsum dolor sit amet";

   }


}
Finally, there is UI orientated controller. This is a request scoped, named, stateful session bean, which injects the translator. It collects the text from the user and dispatches it to the translator. The bean also has getters and setters for all the fields on the page.
@Stateful

@RequestScoped

@Named("translator")

public class TranslatorControllerBean implements TranslatorController {


   @Inject private TextTranslator translator;


   private String inputText;


   private String translatedText;


   public void translate() {

      translatedText = translator.translate(inputText);

   }


   public String getText() {

      return inputText;

   }


   public void setText(String text) {

      this.inputText = text;

   }


   public String getTranslatedText() {

      return translatedText;

   }


   @Remove public void remove() {}


}
That concludes our short tour of the Weld starter examples. For more information on Weld, please visit http://weld.cdi-spec.org/.
The first major theme of CDI is loose coupling. We’ve already seen three means of achieving loose coupling:
- alternatives enable deployment time polymorphism,
- producer methods enable runtime polymorphism, and
- contextual lifecycle management decouples bean lifecycles.
These techniques serve to enable loose coupling of client and server. The client is no longer tightly bound to an implementation of an interface, nor is it required to manage the lifecycle of the implementation. This approach lets stateful objects interact as if they were services.
Loose coupling makes a system more dynamic. The system can respond to change in a well-defined manner. In the past, frameworks that attempted to provide the facilities listed above invariably did it by sacrificing type safety (most notably by using XML descriptors). CDI is the first technology, and certainly the first specification in the Java EE platform, that achieves this level of loose coupling in a typesafe way.
CDI provides three extra important facilities that further the goal of loose coupling:
- interceptors decouple technical concerns from business logic,
- decorators may be used to decouple some business concerns, and
- event notifications decouple event producers from event consumers.
The second major theme of CDI is strong typing. The information about the dependencies, interceptors and decorators of a bean, and the information about event consumers for an event producer, is contained in typesafe Java constructs that may be validated by the compiler.
You don’t see string-based identifiers in CDI code, not because the framework is hiding them from you using clever defaulting rules—so-called "configuration by convention"—but because there are simply no strings there to begin with!
The obvious benefit of this approach is that any IDE can provide autocompletion, validation and refactoring without the need for special tooling. But there is a second, less-immediately-obvious, benefit. It turns out that when you start thinking of identifying objects, events or interceptors via annotations instead of names, you have an opportunity to lift the semantic level of your code.
CDI encourages you develop annotations that model concepts, for example,
@Asynchronous,@Mock,@Secureor@Updated,
instead of using compound names like
asyncPaymentProcessor,mockPaymentProcessor,SecurityInterceptororDocumentUpdatedEvent.
The annotations are reusable. They help describe common qualities of disparate parts of the system. They help us categorize and understand our code. They help us deal with common concerns in a common way. They make our code more literate and more understandable.
CDI stereotypes take this idea a step further. A stereotype models a common role in your application architecture. It encapsulates various properties of the role, including scope, interceptor bindings, qualifiers, etc, into a single reusable package. (Of course, there is also the benefit of tucking some of those annotations away).
We’re now ready to meet some more advanced features of CDI. Bear in mind that these features exist to make our code both easier to validate and more understandable. Most of the time you don’t ever really need to use these features, but if you use them wisely, you’ll come to appreciate their power.
Table of Contents
- 8. Producer methods
- 9. Interceptors
- 9.1. Interceptor bindings
- 9.2. Implementing interceptors
- 9.3. Enabling interceptors
- 9.4. Interceptor bindings with members
- 9.5. Multiple interceptor binding annotations
- 9.6. Interceptor binding type inheritance
- 9.7. Use of @Interceptors
- 9.8. Enhanced version of javax.interceptor.InvocationContext
- 9.9. Loosening the limitations of InterceptionFactory
- 10. Decorators
- 11. Events
- 12. Stereotypes
- 13. Specialization, inheritance and alternatives
- 14. Java EE component environment resources
Producer methods let us overcome certain limitations that arise when a container, instead of the application, is responsible for instantiating objects. They’re also the easiest way to integrate objects which are not beans into the CDI environment.
According to the spec:
A producer method acts as a source of objects to be injected, where:
- the objects to be injected are not required to be instances of beans, or
- the concrete type of the objects to be injected may vary at runtime, or
- the objects require some custom initialization that is not performed by the bean constructor.
For example, producer methods let us:
- expose a JPA entity as a bean,
- expose any JDK class as a bean,
- define multiple beans, with different scopes or initialization, for the same implementation class, or
- vary the implementation of a bean type at runtime.
In particular, producer methods let us use runtime polymorphism with CDI. As we’ve seen, alternative beans are one solution to the problem of deployment-time polymorphism. But once the system is deployed, the CDI implementation is fixed. A producer method has no such limitation:
import javax.enterprise.inject.Produces;


@SessionScoped

public class Preferences implements Serializable {

   private PaymentStrategyType paymentStrategy;

   ...

   @Produces @Preferred

   public PaymentStrategy getPaymentStrategy() {

       switch (paymentStrategy) {

           case CREDIT_CARD: return new CreditCardPaymentStrategy();

           case CHECK: return new CheckPaymentStrategy();

           case PAYPAL: return new PayPalPaymentStrategy();

           default: return null;

       }

   }

}
Consider an injection point:
@Inject @Preferred PaymentStrategy paymentStrategy;
This injection point has the same type and qualifier annotations as the producer method, so it resolves to the producer method using the usual CDI injection rules. The producer method will be called by the container to obtain an instance to service this injection point.
The scope of the producer method defaults to @Dependent, and so it
will be called every time the container injects this field or any
other field that resolves to the same producer method. Thus, there could
be multiple instances of the PaymentStrategy object for each user
session.
To change this behavior, we can add a @SessionScoped annotation to the
method.
@Produces @Preferred @SessionScoped

public PaymentStrategy getPaymentStrategy() {

   ...

}
Now, when the producer method is called, the returned PaymentStrategy
will be bound to the session context. The producer method won’t be
called again in the same session.
Note
A producer method does not inherit the scope of the bean that declares the method. There are two different beans here: the producer method, and the bean which declares it. The scope of the producer method determines how often the method will be called, and the lifecycle of the objects returned by the method. The scope of the bean that declares the producer method determines the lifecycle of the object upon which the producer method is invoked.
There’s one potential problem with the code above. The implementations
of CreditCardPaymentStrategy are instantiated using the Java new
operator. Objects instantiated directly by the application can’t take
advantage of dependency injection and don’t have interceptors.
If this isn’t what we want, we can use dependency injection into the producer method to obtain bean instances:
@Produces @Preferred @SessionScoped

public PaymentStrategy getPaymentStrategy(CreditCardPaymentStrategy ccps,

                                          CheckPaymentStrategy cps,

                                          PayPalPaymentStrategy ppps) {

   switch (paymentStrategy) {

      case CREDIT_CARD: return ccps;

      case CHEQUE: return cps;

      case PAYPAL: return ppps;

      default: return null;

   }

}
Wait, what if CreditCardPaymentStrategy is a request-scoped bean? Then
the producer method has the effect of "promoting" the current request
scoped instance into session scope. This is almost certainly a bug! The
request scoped object will be destroyed by the container before the
session ends, but the reference to the object will be left "hanging" in
the session scope. This error will not be detected by the container,
so please take extra care when returning bean instances from producer
methods!
There are at least two ways we could go to fix this bug. We could
change the scope of the CreditCardPaymentStrategy implementation, but
this would affect other clients of that bean. A better option would be
to change the scope of the producer method to @Dependent or
@RequestScoped.
Some producer methods return objects that require explicit destruction. For example, somebody needs to close this JDBC connection:
@Produces @RequestScoped Connection connect(User user) {

   return createConnection(user.getId(), user.getPassword());

}
Destruction can be performed by a matching disposer method, defined by the same class as the producer method:
void close(@Disposes Connection connection) {

   connection.close();

}
The disposer method must have at least one parameter, annotated
@Disposes, with the same type and qualifiers as the producer method.
The disposer method is called automatically when the context ends (in
this case, at the end of the request), and this parameter receives the
object produced by the producer method. If the disposer method has
additional method parameters, the container will look for a bean that
satisfies the type and qualifiers of each parameter and pass it to the
method automatically.
Since CDI 1.1 disposer methods may be used for destroying not only objects produced by producer methods but also objects producer by producer fields.
- 9.1. Interceptor bindings
- 9.2. Implementing interceptors
- 9.3. Enabling interceptors
- 9.4. Interceptor bindings with members
- 9.5. Multiple interceptor binding annotations
- 9.6. Interceptor binding type inheritance
- 9.7. Use of @Interceptors
- 9.8. Enhanced version of javax.interceptor.InvocationContext
- 9.9. Loosening the limitations of InterceptionFactory
Interceptor functionality is defined in the Java Interceptors specification.
The Interceptors specification defines three kinds of interception points:
- business method interception,
- lifecycle callback interception, and
- timeout method interception (EJB only).
A business method interceptor applies to invocations of methods of the bean by clients of the bean:
public class TransactionInterceptor {

   @AroundInvoke

   public Object manageTransaction(InvocationContext ctx) throws Exception { ... }

}
A lifecycle callback interceptor applies to invocations of lifecycle callbacks by the container:
public class DependencyInjectionInterceptor {

   @PostConstruct

   public void injectDependencies(InvocationContext ctx) { ... }

}
An interceptor class may intercept both lifecycle callbacks and business methods.
A timeout method interceptor applies to invocations of EJB timeout methods by the container:
public class TimeoutInterceptor {

   @AroundTimeout

   public Object manageTransaction(InvocationContext ctx) throws Exception { ... }

}
Suppose we want to declare that some of our beans are transactional. The first thing we need is an interceptor binding type to specify exactly which beans we’re interested in:
@InterceptorBinding

@Target({METHOD, TYPE})

@Retention(RUNTIME)

public @interface Transactional {}
Now we can easily specify that our ShoppingCart is a transactional
object:
@Transactional

public class ShoppingCart { ... }
Or, if we prefer, we can specify that just one method is transactional:
public class ShoppingCart {

   @Transactional public void checkout() { ... }

}
That’s great, but somewhere along the line we’re going to have to
actually implement the interceptor that provides this transaction
management aspect. All we need to do is create a standard interceptor,
and annotate it @Interceptor and @Transactional.
@Transactional @Interceptor

public class TransactionInterceptor {

   @AroundInvoke

   public Object manageTransaction(InvocationContext ctx) throws Exception { ... }

}
Interceptors can take advantage of dependency injection:
@Transactional @Interceptor

public class TransactionInterceptor {


    @Resource UserTransaction transaction;


    @AroundInvoke

    public Object manageTransaction(InvocationContext ctx) throws Exception { ... }


}
Multiple interceptors may use the same interceptor binding type.
By default, all interceptors are disabled. We need to enable our
interceptor. We can do it using beans.xml descriptor of a bean
archive. However, this activation only applies to the beans in that
archive. From CDI 1.1 onwards the interceptor can be enabled for the
whole application using @Priority annotation.
<beans

   xmlns="http://xmlns.jcp.org/xml/ns/javaee"

   xmlns:xsi="http://www.w3.org/2001/XMLSchema-instance"

   xsi:schemaLocation="

      http://xmlns.jcp.org/xml/ns/javaee

      http://xmlns.jcp.org/xml/ns/javaee/beans_1_1.xsd">

   <interceptors>

      <class>org.mycompany.myapp.TransactionInterceptor</class>

   </interceptors>

</beans>
Whoah! Why the angle bracket stew?
Well, having the XML declaration is actually a good thing. It solves two problems:
- it enables us to specify an ordering for the interceptors in our system, ensuring deterministic behavior, and
- it lets us enable or disable interceptor classes at deployment time.
Having two interceptors without @Priority, we could specify that our
security interceptor runs before our transaction interceptor.
<beans

   xmlns="http://xmlns.jcp.org/xml/ns/javaee"

   xmlns:xsi="http://www.w3.org/2001/XMLSchema-instance"

   xsi:schemaLocation="

      http://xmlns.jcp.org/xml/ns/javaee

      http://xmlns.jcp.org/xml/ns/javaee/beans_1_1.xsd">

   <interceptors>

      <class>org.mycompany.myapp.SecurityInterceptor</class>

      <class>org.mycompany.myapp.TransactionInterceptor</class>

   </interceptors>

</beans>
Or we could turn them both off in our test environment by simply not
mentioning them in beans.xml! Ah, so simple.
It gets quite tricky when used along with interceptors annotated with
@Priority. Interceptors enabled using @Priority are called before
interceptors enabled using beans.xml, the lower priority values are
called first.
Note
An interceptor enabled by @Priority and in the same time listed in beans.xml is only invoked once in the @Priority part of the
invocation chain. E.g. the enablement via beans.xml will be ignored.
Suppose we want to add some extra information to our @Transactional
annotation:
@InterceptorBinding

@Target({METHOD, TYPE})

@Retention(RUNTIME)

public @interface Transactional {

   boolean requiresNew() default false;

}
CDI will use the value of requiresNew to choose between two different
interceptors, TransactionInterceptor and
RequiresNewTransactionInterceptor.
@Transactional(requiresNew = true) @Interceptor

public class RequiresNewTransactionInterceptor {

   @AroundInvoke

   public Object manageTransaction(InvocationContext ctx) throws Exception { ... }

}
Now we can use RequiresNewTransactionInterceptor like this:
@Transactional(requiresNew = true)

public class ShoppingCart { ... }
But what if we only have one interceptor and we want the container to
ignore the value of requiresNew when binding interceptors? Perhaps
this information is only useful for the interceptor implementation. We
can use the @Nonbinding annotation:
@InterceptorBinding

@Target({METHOD, TYPE})

@Retention(RUNTIME)

public @interface Secure {

   @Nonbinding String[] rolesAllowed() default {};

}
Usually we use combinations of interceptor bindings types to bind
multiple interceptors to a bean. For example, the following declaration
would be used to bind TransactionInterceptor and SecurityInterceptor
to the same bean:
@Secure(rolesAllowed="admin") @Transactional

public class ShoppingCart { ... }
However, in very complex cases, an interceptor itself may specify some combination of interceptor binding types:
@Transactional @Secure @Interceptor

public class TransactionalSecureInterceptor { ... }
Then this interceptor could be bound to the checkout() method using
any one of the following combinations:
public class ShoppingCart {

   @Transactional @Secure public void checkout() { ... }

}
@Secure

public class ShoppingCart {

   @Transactional public void checkout() { ... }

}
@Transactional

public class ShoppingCart {

   @Secure public void checkout() { ... }

}
@Transactional @Secure

public class ShoppingCart {

   public void checkout() { ... }

}
One limitation of the Java language support for annotations is the lack of annotation inheritance. Really, annotations should have reuse built in, to allow this kind of thing to work:
public @interface Action extends Transactional, Secure { ... }
Well, fortunately, CDI works around this missing feature of Java. We may annotate one interceptor binding type with other interceptor binding types (termed a meta-annotation). The interceptor bindings are transitive — any bean with the first interceptor binding inherits the interceptor bindings declared as meta-annotations.
@Transactional @Secure

@InterceptorBinding

@Target(TYPE)

@Retention(RUNTIME)

public @interface Action { ... }
Now, any bean annotated @Action will be bound to both
TransactionInterceptor and SecurityInterceptor. (And even
TransactionalSecureInterceptor, if it exists.)
The @Interceptors annotation defined by the Interceptors specification
(and used by the Managed Beans and EJB specifications) is still
supported in CDI.
@Interceptors({TransactionInterceptor.class, SecurityInterceptor.class})

public class ShoppingCart {

   public void checkout() { ... }

}
However, this approach suffers the following drawbacks:
- the interceptor implementation is hardcoded in business code,
- interceptors may not be easily disabled at deployment time, and
- the interceptor ordering is non-global — it is determined by the order in which interceptors are listed at the class level.
Therefore, we recommend the use of CDI-style interceptor bindings.
For even more control over interceptors, Weld offers enhanced version of javax.interceptor.InvocationContext - org.jboss.weld.interceptor.WeldInvocationContext.
It comes with two additional methods - getInterceptorBindings and getInterceptorBindingsByType(Class<T> annotationType).
You shouldn’t need this in most cases, but it comes handy when working with @Nonbinding values in interceptor binding annotations.
Assume you have the following interceptor binding:
@InterceptorBinding

@Inherited

@Target({ TYPE, METHOD, CONSTRUCTOR})

@Retention(RUNTIME)

public @interface FooBinding {


    @Nonbinding

    String secret() default "";


}
Then, in the interceptor class, you can retrieve the secret String in the following way:
@Priority(value = Interceptor.Priority.APPLICATION)

@Interceptor

@FooBinding(secret = "nonbinding")

public class AroundConstructInterceptor {


    @SuppressWarnings("unchecked")

    @AroundConstruct

    void intercept(InvocationContext ctx) throws Exception {

        if(ctx instanceof WeldInvocationContext) {

            Set<Annotation> bindings =  ((WeldInvocationContext)ctx).getInterceptorBindings();

        for (Annotation annotation : bindings) {

                if (annotation.annotationType().equals(FooBinding.class)) {

                    FooBinding fooBinding = (FooBinding) annotation;

                    String secret = fooBinding.secret();

                }

            }

        }

        ctx.proceed();

    }

}
WeldInvocationContext can be used with the following interceptor types:
@AroundConstruct@PostConstruct@AroundInvoke
Alternatively, you can gain access to these binding directly from InvocationContext as we store them there using a key org.jboss.weld.interceptor.bindings.
This key is easily accessible from WeldInvocationContext.INTERCEPTOR_BINDINGS_KEY.
Let’s alter the previous example to demonstrate this:
@Priority(value = Interceptor.Priority.APPLICATION)

@Interceptor

@FooBinding(secret = "nonbinding")

public class AroundConstructInterceptor {


    @SuppressWarnings("unchecked")

    @AroundConstruct

    void intercept(InvocationContext ctx) throws Exception {

        // retrieve data directly from InvocationContext

        Set<Annotation> bindings = (Set<Annotation>) ctx.getContextData().get(WeldInvocationContext.INTERCEPTOR_BINDINGS_KEY);

    if (bindings != null) {

            for (Annotation annotation : bindings) {

                if (annotation.annotationType().equals(FooBinding.class)) {

                    FooBinding fooBinding = (FooBinding) annotation;

                    String secret = fooBinding.secret();

                }

            }

        }

        ctx.proceed();

    }

}
Note
This is an experimental feature which goes beyond the scope of what CDI specification requires. While we aim to support this, the behaviour may slightly shift over time.
CDI 2.0 introduced the InterceptionFactory which can be used to intercept a bean created via producer method.
The specification only allows users to operate on Java classes and when it comes to interfaces, it states that unportable behaviour results.
Weld supports both ways as operating on interfaces effectively allows to bypass proxyability rules of implementation class.
This however comes with a price - only annotations added programatically through InterceptionFactory.configure() will be taken into consideration.
Let’s have SomeImpl class that is an implementation of interface SomeInterface and InterceptThis is an InterceptorBinding.
Let us also assume that we have secondary implementation of SomeInterface named SomeUnproxyableImpl that has a final method in it.
All of the following producer methods will work:
    @Produces

    @ApplicationScoped

    // proxyable implementation which is also the InterceptionFactory paramater

    public SomeImpl produceBeanBasedOnImplClass(InterceptionFactory<SomeImpl> interceptionFactory) {

        interceptionFactory.configure().add(InterceptThis.Literal.INSTANCE);

        return interceptionFactory.createInterceptedInstance(new SomeImpl());

    }


    @Produces

    @ApplicationScoped

    // proxyable implementation but operating on an interface type as InterceptionFactory parameter

    public SomeInterface produceBeanBasedOnInterface(InterceptionFactory<SomeInterface> interceptionFactory) {

        interceptionFactory.configure().add(InterceptThis.Literal.INSTANCE);

        return interceptionFactory.createInterceptedInstance(new SomeImpl());

    }


    @Produces

    @ApplicationScoped

    // unproxyable implementation and operating on an interface type as InterceptionFactory parameter

    public SomeInterface produceBeanBasedOnInterfaceWithUnproxyableImpl(InterceptionFactory<SomeInterface> interceptionFactory) {

        interceptionFactory.configure().add(InterceptThis.Literal.INSTANCE);

        return interceptionFactory.createInterceptedInstance(new SomeUnproxyableImpl());

    }
Interceptors are a powerful way to capture and separate concerns which are orthogonal to the application (and type system). Any interceptor is able to intercept invocations of any Java type. This makes them perfect for solving technical concerns such as transaction management, security and call logging. However, by nature, interceptors are unaware of the actual semantics of the events they intercept. Thus, interceptors aren’t an appropriate tool for separating business-related concerns.
The reverse is true of decorators. A decorator intercepts invocations only for a certain Java interface, and is therefore aware of all the semantics attached to that interface. Since decorators directly implement operations with business semantics, it makes them the perfect tool for modeling some kinds of business concerns. It also means that a decorator doesn’t have the generality of an interceptor. Decorators aren’t able to solve technical concerns that cut across many disparate types. Interceptors and decorators, though similar in many ways, are complementary. Let’s look at some cases where decorators fit the bill.
Suppose we have an interface that represents accounts:
public interface Account {

   public BigDecimal getBalance();

   public User getOwner();

   public void withdraw(BigDecimal amount);

   public void deposit(BigDecimal amount);

}
Several different beans in our system implement the Account interface.
However, we have a common legal requirement that; for any kind of
account, large transactions must be recorded by the system in a special
log. This is a perfect job for a decorator.
A decorator is a bean (possibly even an abstract class) that implements
the type it decorates and is annotated @Decorator.
@Decorator

public abstract class LargeTransactionDecorator

      implements Account {

   ...

}
The decorator implements the methods of the decorated type that it wants to intercept.
@Decorator

public abstract class LargeTransactionDecorator

      implements Account {

   @Inject @Delegate @Any Account account;


   @PersistenceContext EntityManager em;


   public void withdraw(BigDecimal amount) {

      ...

   }


   public void deposit(BigDecimal amount);

      ...

   }

}
Unlike other beans, a decorator may be an abstract class. Therefore, if there’s nothing special the decorator needs to do for a particular method of the decorated interface, you don’t need to implement that method.
Interceptors for a method are called before decorators that apply to the method.
Decorators have a special injection point, called the delegate
injection point, with the same type as the beans they decorate, and the
annotation @Delegate. There must be exactly one delegate injection
point, which can be a constructor parameter, initializer method
parameter or injected field.
@Decorator

public abstract class LargeTransactionDecorator

      implements Account {

   @Inject @Delegate @Any Account account;

   ...

}
A decorator is bound to any bean which:
- has the type of the delegate injection point as a bean type, and
- has all qualifiers that are declared at the delegate injection point.
This delegate injection point specifies that the decorator is bound to
all beans that implement Account:
@Inject @Delegate @Any Account account;
A delegate injection point may specify any number of qualifier annotations. The decorator will only be bound to beans with the same qualifiers.
@Inject @Delegate @Foreign Account account;
The decorator may invoke the delegate object, which has much the same
effect as calling InvocationContext.proceed() from an interceptor. The
main difference is that the decorator can invoke any business method
on the delegate object.
@Decorator

public abstract class LargeTransactionDecorator

      implements Account {

   @Inject @Delegate @Any Account account;


   @PersistenceContext EntityManager em;


   public void withdraw(BigDecimal amount) {

      account.withdraw(amount);

      if ( amount.compareTo(LARGE_AMOUNT)>0 ) {

         em.persist( new LoggedWithdrawl(amount) );

      }

   }


   public void deposit(BigDecimal amount);

      account.deposit(amount);

      if ( amount.compareTo(LARGE_AMOUNT)>0 ) {

         em.persist( new LoggedDeposit(amount) );

      }

   }

}
By default, all decorators are disabled. We need to enable our
decorator. We can do it using beans.xml descriptor of a bean archive.
However, this activation only applies to the beans in that archive. From
CDI 1.1 onwards the decorator can be enabled for the whole application
using @Priority annotation.
<beans

   xmlns="http://xmlns.jcp.org/xml/ns/javaee"

   xmlns:xsi="http://www.w3.org/2001/XMLSchema-instance"

   xsi:schemaLocation="

      http://xmlns.jcp.org/xml/ns/javaee

      http://xmlns.jcp.org/xml/ns/javaee/beans_1_1.xsd">

   <decorators>

         <class>org.mycompany.myapp.LargeTransactionDecorator</class>

   </decorators>

</beans>
This declaration serves the same purpose for decorators that the
<interceptors> declaration serves for interceptors:
- it enables us to specify an ordering for decorators in our system, ensuring deterministic behavior, and
- it lets us enable or disable decorator classes at deployment time.
Decorators enabled using @Priority are called before decorators
enabled using beans.xml, the lower priority values are called first.
Note
A decorator enabled by @Priority and in the same time listed in beans.xml is only invoked once in the @Priority part of the
invocation chain. E.g. the enablement via beans.xml will be ignored.
Dependency injection enables loose-coupling by allowing the implementation of the injected bean type to vary, either at deployment time or runtime. Events go one step further, allowing beans to interact with no compile time dependency at all. Event producers raise events that are delivered to event observers by the container.
This basic schema might sound like the familiar observer/observable pattern, but there are a couple of twists:
- not only are event producers decoupled from observers; observers are completely decoupled from producers,
- observers can specify a combination of "selectors" to narrow the set of event notifications they will receive, and
- observers can be notified immediately, or can specify that delivery of the event should be delayed until the end of the current transaction.
The CDI event notification facility uses more or less the same typesafe approach that we’ve already seen with the dependency injection service.
The event object carries state from producer to consumer. The event object is nothing more than an instance of a concrete Java class. (The only restriction is that an event type may not contain type variables). An event may be assigned qualifiers, which allows observers to distinguish it from other events of the same type. The qualifiers function like topic selectors, allowing an observer to narrow the set of events it observes.
An event qualifier is just a normal qualifier, defined using
@Qualifier. Here’s an example:
@Qualifier

@Target({METHOD, FIELD, PARAMETER, TYPE})

@Retention(RUNTIME)

public @interface Updated {}
An observer method is a method of a bean with a parameter annotated
@Observes or @ObservesAsync.
public void onAnyDocumentEvent(@Observes Document document) { ... }
or in asynchronous version
public void onAnyDocumentEvent(@ObservesAsync Document document) { ... }
The annotated parameter is called the event parameter. The type of the
event parameter is the observed event type, in this case Document.
The event parameter may also specify qualifiers.
public void afterDocumentUpdate(@Observes @Updated Document document) { ... }
An observer method need not specify any event qualifiers—in this case it is interested in every event whose type is assignable to the observed event type. Such observer will trigger on both events shown below:
@Inject @Any Event<Document> documentEvent;

@Inject @Updated Event<Document> anotherDocumentEvent;
If the observer does specify qualifiers, it will be notified of an event if the event object is assignable to the observed event type, and if the set of observed event qualifiers is a subset of all the event qualifiers of the event.
The observer method may have additional parameters, which are injection points:
public void afterDocumentUpdate(@Observes @Updated Document document, User user) { ... }
Event producers fire events either synchronously or asynchronously using an instance of the parameterized
Event interface. An instance of this interface is obtained by
injection:
@Inject @Any Event<Document> documentEvent;
A producer raises synchronous events by calling the fire() method of the Event
interface, passing the event object:
documentEvent.fire(document);
This particular event will only be delivered to synchronous observer method that:
- has an event parameter to which the event object (the
Document) is assignable, and - specifies no qualifiers.
The container simply calls all the synchronous observer methods, passing the event
object as the value of the event parameter. If any observer method
throws an exception, the container stops calling observer methods, and
the exception is rethrown by the fire() method.
A producer raises asynchronous events by calling the fireAsync() method of the Event
interface, passing the event object:
documentEvent.fireAsync(document);
This particular event will only be delivered to asynchronous observer method that:
- has an event parameter to which the event object (the
Document) is assignable, and - specifies no qualifiers.
fireAsync method returns immediately and all the resolved asynchronous observers are notified in one or more different threads.
If any observer method throws an exception, the container will suppress it and notify remaining observers.
The resulting CompletionStage will then finish exceptionally with CompletionException containing all previously suppressed exceptions.
The Event.fireAsync() method may be called with a NotificationOptions parameter to configure the notification of asynchronous observer methods , e.g. to specify an Executor object to be used for asynchronous delivery.
Weld defines the following non-portable notification options (see WeldNotificationOptions):
| Key | Value type | Description |
|---|---|---|
|
| The notification mode. Possible values are: |
|
| The notification timeout (in milliseconds) after which the returned completion stage must be completed. If the time expires the stage is completed exceptionally with a |
Note
It is also possible to use the key constants and static convenient methods declared on org.jboss.weld.events.WeldNotificationOptions from Weld API, e.g. WeldNotificationOptions.TIMEOUT or WeldNotificationOptions.withParallelMode().
Table 11.1. Notification modes
| Mode | Description |
|---|---|
| Asynchronous observers are notified serially in a single worker thread (default behavior). |
| Asynchronous observers are notified in parallel assuming that the |
Qualifiers can be applied to an event in one of two ways:
- by annotating the
Eventinjection point, or - by passing qualifiers to the
select()ofEvent.
Specifying the qualifiers at the injection point is far simpler:
@Inject @Updated Event<Document> documentUpdatedEvent;
Then, every event fired via this instance of Event has the event
qualifier @Updated. The event is delivered to every observer method
that:
- has an event parameter to which the event object is assignable, and
- does not have any event qualifier except for the event qualifiers
that match those specified at the
Eventinjection point.
The downside of annotating the injection point is that we can’t specify
the qualifier dynamically. CDI lets us obtain a qualifier instance by
subclassing the helper class AnnotationLiteral. That way, we can pass
the qualifier to the select() method of Event.
documentEvent.select(new AnnotationLiteral<Updated>(){}).fire(document);
Events can have multiple event qualifiers, assembled using any
combination of annotations at the Event injection point and qualifier
instances passed to the select() method.
By default, if there is no instance of an observer in the current context, the container will instantiate the observer in order to deliver an event to it. This behavior isn’t always desirable. We may want to deliver events only to instances of the observer that already exist in the current contexts.
A conditional observer is specified by adding receive = IF_EXISTS to
the @Observes annotation.
public void refreshOnDocumentUpdate(@Observes(receive = IF_EXISTS) @Updated Document d) { ... }
Note
A bean with scope @Dependent cannot be a conditional observer, since
it would never be called!
An event qualifier type may have annotation members:
@Qualifier

@Target({METHOD, FIELD, PARAMETER, TYPE})

@Retention(RUNTIME)

public @interface Role {

   RoleType value();

}
The member value is used to narrow the messages delivered to the observer:
public void adminLoggedIn(@Observes @Role(ADMIN) LoggedIn event) { ... }
Event qualifier type members may be specified statically by the event producer, via annotations at the event notifier injection point:
@Inject @Role(ADMIN) Event<LoggedIn> loggedInEvent;
Alternatively, the value of the event qualifier type member may be
determined dynamically by the event producer. We start by writing an
abstract subclass of AnnotationLiteral:
abstract class RoleBinding

   extends AnnotationLiteral<Role>

   implements Role {}
The event producer passes an instance of this class to select():
documentEvent.select(new RoleBinding() {

   public void value() { return user.getRole(); }

}).fire(document);
Event qualifiers may be combined, for example:
@Inject @Blog Event<Document> blogEvent;

...

if (document.isBlog()) blogEvent.select(new AnnotationLiteral<Updated>(){}).fire(document);
The above shown event is fired with two qualifiers - @Blog and @Updated.
An observer method is notified if the set of observer qualifiers is a subset of the fired event’s qualifiers.
Assume the following observers in this example:
public void afterBlogUpdate(@Observes @Updated @Blog Document document) { ... }
public void afterDocumentUpdate(@Observes @Updated Document document) { ... }
public void onAnyBlogEvent(@Observes @Blog Document document) { ... }
public void onAnyDocumentEvent(@Observes Document document) { ... }}}
All of these observer methods will be notified.
However, if there were also an observer method:
public void afterPersonalBlogUpdate(@Observes @Updated @Personal @Blog Document document) { ... }
It would not be notified, as @Personal is not a qualifier of the event being fired.
Or to put it more formally, @Updated and @Personal do not form a subset of @Blog and @Updated.
Transactional observers receive their event notifications during the
before or after completion phase of the transaction in which the event
was raised. For example, the following observer method needs to refresh
a query result set that is cached in the application context, but only
when transactions that update the Category tree succeed:
public void refreshCategoryTree(@Observes(during = AFTER_SUCCESS) CategoryUpdateEvent event) { ... }
There are five kinds of transactional observers:
IN_PROGRESSobservers are called immediately (default)AFTER_SUCCESSobservers are called during the after completion phase of the transaction, but only if the transaction completes successfullyAFTER_FAILUREobservers are called during the after completion phase of the transaction, but only if the transaction fails to complete successfullyAFTER_COMPLETIONobservers are called during the after completion phase of the transactionBEFORE_COMPLETIONobservers are called during the before completion phase of the transaction
Transactional observers are very important in a stateful object model because state is often held for longer than a single atomic transaction.
Imagine that we have cached a JPA query result set in the application scope:
import javax.ejb.Singleton;

import javax.enterprise.inject.Produces;


@ApplicationScoped @Singleton

public class Catalog {


   @PersistenceContext EntityManager em;


   List<Product> products;


   @Produces @Catalog

   List<Product> getCatalog() {

      if (products==null) {

         products = em.createQuery("select p from Product p where p.deleted = false")

            .getResultList();

      }

      return products;

   }


}
From time to time, a Product is created or deleted. When this occurs,
we need to refresh the Product catalog. But we should wait until
after the transaction completes successfully before performing this
refresh!
The bean that creates and deletes `Product`s could raise events, for example:
import javax.enterprise.event.Event;


@Stateless

public class ProductManager {

   @PersistenceContext EntityManager em;

   @Inject @Any Event<Product> productEvent;


   public void delete(Product product) {

      em.delete(product);

      productEvent.select(new AnnotationLiteral<Deleted>(){}).fire(product);

   }


   public void persist(Product product) {

      em.persist(product);

      productEvent.select(new AnnotationLiteral<Created>(){}).fire(product);

   }

   ...

}
And now Catalog can observe the events after successful completion of
the transaction:
import javax.ejb.Singleton;


@ApplicationScoped @Singleton

public class Catalog {

   ...

   void addProduct(@Observes(during = AFTER_SUCCESS) @Created Product product) {

      products.add(product);

   }


   void removeProduct(@Observes(during = AFTER_SUCCESS) @Deleted Product product) {

      products.remove(product);

   }

}
Weld API offers slight advantage when dealing with events - org.jboss.weld.events.WeldEvent, an augmented version of javax.enterprise.event.Event.
Currently there is only one additional method, select(Type type, Annotation... qualifiers).
This method allows to perform well-known selection with java.lang.reflect.Type as parameter which means things can get pretty generic.
While there are no limitations to what you can select, there are limitation to the WeldEvent instance you perform selection on.
In order to preserve type-safety, you have to invoke this method on WeldInstance<Object>.
Using any other parameter will result in IllegalStateException.
Usage looks just as you would except:
@Inject

WeldEvent<Object> event;


public void selectAndFireEventForType(Type type) {

  event.select(type).fire(new Payload());

}
The CDI specification defines a stereotype as follows:
In many systems, use of architectural patterns produces a set of recurring bean roles. A stereotype allows a framework developer to identify such a role and declare some common metadata for beans with that role in a central place.
A stereotype encapsulates any combination of:
- a default scope, and
- a set of interceptor bindings.
A stereotype may also specify that:
- all beans with the stereotype have defaulted bean names, or that
- all beans with the stereotype are alternatives.
A bean may declare zero, one or multiple stereotypes. Stereotype annotations may be applied to a bean class or producer method or field.
A stereotype is an annotation, annotated @Stereotype, that packages
several other annotations. For instance, the following stereotype
identifies action classes in some MVC framework:
@Stereotype

@Retention(RUNTIME)

@Target(TYPE)

...

public @interface Action {}
We use the stereotype by applying the annotation to a bean.
@Action

public class LoginAction { ... }
Of course, we need to apply some other annotations to our stereotype or else it wouldn’t be adding much value.
A stereotype may specify a default scope for beans annotated with the stereotype. For example:
@RequestScoped

@Stereotype

@Retention(RUNTIME)

@Target(TYPE)

public @interface Action {}
A particular action may still override this default if necessary:
@Dependent @Action

public class DependentScopedLoginAction { ... }
Naturally, overriding a single default isn’t much use. But remember, stereotypes can define more than just the default scope.
A stereotype may specify a set of interceptor bindings to be inherited by all beans with that stereotype.
@RequestScoped

@Transactional(requiresNew=true)

@Secure

@Stereotype

@Retention(RUNTIME)

@Target(TYPE)

public @interface Action {}
This helps us get technical concerns, like transactions and security, even further away from the business code!
We can specify that all beans with a certain stereotype have a defaulted
EL name when a name is not explicitly defined for that bean. All we need
to do is add an empty @Named annotation:
@RequestScoped

@Transactional(requiresNew=true)

@Secure

@Named

@Stereotype

@Retention(RUNTIME)

@Target(TYPE)

public @interface Action {}
Now, the LoginAction bean will have the defaulted name loginAction.
A stereotype can indicate that all beans to which it is applied are `@Alternative`s. An alternative stereotype lets us classify beans by deployment scenario.
@Alternative

@Stereotype

@Retention(RUNTIME)

@Target(TYPE)

public @interface Mock {}
We can apply an alternative stereotype to a whole set of beans, and
activate them all with one line of code in beans.xml.
@Mock

public class MockLoginAction extends LoginAction { ... }
<beans>

   <alternatives>

      <stereotype>org.mycompany.testing.Mock</stereotype>

   </alternatives>

</beans>
This may blow your mind a bit, but stereotypes may declare other stereotypes, which we’ll call stereotype stacking. You may want to do this if you have two distinct stereotypes which are meaningful on their own, but in other situation may be meaningful when combined.
Here’s an example that combines the @Action and @Auditable
stereotypes:
@Auditable

@Action

@Stereotype

@Target(TYPE)

@Retention(RUNTIME)

public @interface AuditableAction {}
CDI defines one standard stereotype, @Model, which is expected to be
used frequently in web applications:
@Named

@RequestScoped

@Stereotype

@Target({TYPE, METHOD, FIELD})

@Retention(RUNTIME)

public @interface Model {}
Instead of using JSF managed beans, just annotate a bean @Model, and
use it directly in your JSF view!
When you first start developing with CDI, you’ll likely be dealing only with a single bean implementation for each bean type. In this case, it’s easy to understand how beans get selected for injection. As the complexity of your application grows, multiple occurrences of the same bean type start appearing, either because you have multiple implementations or two beans share a common (Java) inheritance. That’s when you have to begin studying the specialization, inheritance and alternative rules to work through unsatisfied or ambiguous dependencies or to avoid certain beans from being called.
The CDI specification recognizes two distinct scenarios in which one bean extends another:
- The second bean specializes the first bean in certain deployment scenarios. In these deployments, the second bean completely replaces the first, fulfilling the same role in the system.
- The second bean is simply reusing the Java implementation, and otherwise bears no relation to the first bean. The first bean may not even have been designed for use as a contextual object.
The second case is the default assumed by CDI. It’s possible to have two beans in the system with the same part bean type (interface or parent class). As you’ve learned, you select between the two implementations using qualifiers.
The first case is the exception, and also requires more care. In any
given deployment, only one bean can fulfill a given role at a time. That
means one bean needs to be enabled and the other disabled. There are a
two modifiers involved: @Alternative and @Specializes. We’ll start
by looking at alternatives and then show the guarantees that
specialization adds.
CDI lets you override the implementation of a bean type at deployment
time using an alternative. For example, the following bean provides a
default implementation of the PaymentProcessor interface:
public class DefaultPaymentProcessor

      implements PaymentProcessor {

   ...

}
But in our staging environment, we don’t really want to submit payments
to the external system, so we override that implementation of
PaymentProcessor with a different bean:
public @Alternative

class StagingPaymentProcessor

      implements PaymentProcessor {

   ...

}
or
public @Alternative

class StagingPaymentProcessor

      extends DefaultPaymentProcessor {

   ...

}
We’ve already seen how we can enable this alternative by listing its
class in the beans.xml descriptor.
But suppose we have many alternatives in the staging environment. It
would be much more convenient to be able to enable them all at once. So
let’s make @Staging an @Alternative stereotype and annotate the
staging beans with this stereotype instead. You’ll see how this level of
indirection pays off. First, we create the stereotype:
@Alternative

@Stereotype

@Retention(RUNTIME)

@Target(TYPE)

public @interface Staging {}
Then we replace the @Alternative annotation on our bean with
@Staging:
@Staging

public class StagingPaymentProcessor

      implements PaymentProcessor {

   ...

}
Finally, we activate the @Staging stereotype in the beans.xml
descriptor:
<beans

   xmlns="http://xmlns.jcp.org/xml/ns/javaee"

   xmlns:xsi="http://www.w3.org/2001/XMLSchema-instance"

   xsi:schemaLocation="

      http://xmlns.jcp.org/xml/ns/javaee

      http://xmlns.jcp.org/xml/ns/javaee/beans_1_1.xsd">

   <alternatives>

         <stereotype>org.mycompany.myapp.Staging</stereotype>

   </alternatives>

</beans>
Now, no matter how many staging beans we have, they will all be enabled at once.
When we enable an alternative, does that mean the default implementation
is disabled? Well, not exactly. If the default implementation has a
qualifier, for instance @LargeTransaction, and the alternative does
not, you could still inject the default implementation.
@Inject @LargeTransaction PaymentProcessor paymentProcessor;
So we haven’t completely replaced the default implementation in this deployment of the system. The only way one bean can completely override a second bean at all injection points is if it implements all the bean types and declares all the qualifiers of the second bean. However, if the second bean declares a producer method or observer method, then even this is not enough to ensure that the second bean is never called! We need something extra.
CDI provides a special feature, called specialization, that helps the developer avoid these traps. Specialization is a way of informing the system of your intent to completely replace and disable an implementation of a bean.
When the goal is to replace one bean implementation with a second, to help prevent developer error, the first bean may:
- directly extend the bean class of the second bean, or
- directly override the producer method, in the case that the second bean is a producer method, and then
explicitly declare that it specializes the second bean:
@Specializes

public class MockCreditCardPaymentProcessor

      extends CreditCardPaymentProcessor {

   ...

}
When an enabled bean specializes another bean, the other bean is never instantiated or called by the container. Even if the other bean defines a producer or observer method, the method will never be called.
So why does specialization work, and what does it have to do with inheritance?
Since we’re informing the container that our alternative bean is meant
to stand in as a replacement for the default implementation, the
alternative implementation automatically inherits all qualifiers of the
default implementation. Thus, in our example,
MockCreditCardPaymentProcessor inherits the qualifiers @Default and
@CreditCard.
Furthermore, if the default implementation declares a bean EL name using
@Named, the name is inherited by the specializing alternative bean.
Java EE 5 already introduced some limited support for dependency injection, in the form of component environment injection. A component environment resource is a Java EE component, for example a JDBC datasource, JMS queue or topic, JPA persistence context, remote EJB or web service.
Naturally, there is now a slight mismatch with the new style of dependency injection in CDI. Most notably, component environment injection relies on string-based names to qualify ambiguous types, and there is no real consistency as to the nature of the names (sometimes a JNDI name, sometimes a persistence unit name, sometimes an EJB link, sometimes a non-portable "mapped name"). Producer fields turned out to be an elegant adaptor to reduce all this complexity to a common model and get component environment resources to participate in the CDI system just like any other kind of bean.
Fields have a duality in that they can both be the target of Java EE component environment injection and be declared as a CDI producer field. Therefore, they can define a mapping from a string-based name in the component environment, to a combination of type and qualifiers used in the world of typesafe injection. We call a producer field that represents a reference to an object in the Java EE component environment a resource.
The CDI specification uses the term resource to refer, generically, to any of the following kinds of object which might be available in the Java EE component environment:
- JDBC `Datasource`s, JMS `Queue`s, `Topic`s and `ConnectionFactory`s, JavaMail `Session`s and other transactional resources including JCA connectors,
- JPA `EntityManager`s and `EntityManagerFactory`s,
- remote EJBs, and
- web services.
We declare a resource by annotating a producer field with a component
environment injection annotation: @Resource, @EJB,
@PersistenceContext, @PersistenceUnit or @WebServiceRef.
@Produces @WebServiceRef(lookup="java:app/service/Catalog")

Catalog catalog;
@Produces @Resource(lookup="java:global/env/jdbc/CustomerDatasource")

@CustomerDatabase Datasource customerDatabase;
@Produces @PersistenceContext(unitName="CustomerDatabase")

@CustomerDatabase EntityManager customerDatabasePersistenceContext;
@Produces @PersistenceUnit(unitName="CustomerDatabase")

@CustomerDatabase EntityManagerFactory customerDatabasePersistenceUnit;
@Produces @EJB(ejbLink="../their.jar#PaymentService")

PaymentService paymentService;
The field may be static (but not final).
A resource declaration really contains two pieces of information:
- the JNDI name, EJB link, persistence unit name, or other metadata needed to obtain a reference to the resource from the component environment, and
- the type and qualifiers that we will use to inject the reference into our beans.
Note
It might feel strange to be declaring resources in Java code. Isn’t this
stuff that might be deployment-specific? Certainly, and that’s why it
makes sense to declare your resources in a class annotated
@Alternative.
These resources can now be injected in the usual way.
@Inject Catalog catalog;
@Inject @CustomerDatabase Datasource customerDatabase;
@Inject @CustomerDatabase EntityManager customerDatabaseEntityManager;
@Inject @CustomerDatabase EntityManagerFactory customerDatabaseEntityManagerFactory;
@Inject PaymentService paymentService;
The bean type and qualifiers of the resource are determined by the producer field declaration.
It might seem like a pain to have to write these extra producer field
declarations, just to gain an additional level of indirection. You could
just as well use component environment injection directly, right? But
remember that you’re going to be using resources like the
EntityManager in several different beans. Isn’t it nicer and more
typesafe to write
@Inject @CustomerDatabase EntityManager
instead of
@PersistenceContext(unitName="CustomerDatabase") EntityManager
all over the place?
The third theme of CDI is integration. We’ve already seen how CDI helps integrate EJB and JSF, allowing EJBs to be bound directly to JSF pages. That’s just the beginning. The CDI services are integrated into the very core of the Java EE platform. Even EJB session beans can take advantage of the dependency injection, event bus, and contextual lifecycle management that CDI provides.
CDI is also designed to work in concert with technologies outside of the platform by providing integration points into the Java EE platform via an SPI. This SPI positions CDI as the foundation for a new ecosystem of portable extensions and integration with existing frameworks and technologies. The CDI services will be able to reach a diverse collection of technologies, such as business process management (BPM) engines, existing web frameworks and de facto standard component models. Of course, The Java EE platform will never be able to standardize all the interesting technologies that are used in the world of Java application development, but CDI makes it easier to use the technologies which are not yet part of the platform seamlessly within the Java EE environment.
We’re about to see how to take full advantage of the Java EE platform in an application that uses CDI. We’ll also briefly meet a set of SPIs that are provided to support portable extensions to CDI. You might not ever need to use these SPIs directly, but don’t take them for granted. You will likely be using them indirectly, every time you use a third-party extension, such as DeltaSpike.
Table of Contents
- 15. Java EE integration
- 16. Portable extensions
- 16.1. Creating an Extension
- 16.2. Container lifecycle events
- 16.3. The BeanManager object
- 16.4. The CDI class
- 16.5. The InjectionTarget interface
- 16.6. The Bean interface
- 16.7. Registering a Bean
- 16.8. Configuring an AnnotatedType
- 16.9. Overriding attributes of a bean
- 16.10. Wrapping an InjectionTarget
- 16.11. Overriding InjectionPoint
- 16.12. Manipulating interceptors, decorators and alternatives enabled for an application
- 16.13. The Context and AlterableContext interfaces
- 17. Next steps
CDI is fully integrated into the Java EE environment. Beans have access to Java EE resources and JPA persistence contexts. They may be used in Unified EL expressions in JSF and JSP pages. They may even be injected into other platform components, such as servlets and message-driven Beans, which are not beans themselves.
In the Java EE environment, the container provides the following
built-in beans, all with the qualifier @Default:
- the current JTA
UserTransaction, - a
Principalrepresenting the current caller identity, - the default Bean Validation
ValidationFactory, - a
Validatorfor the defaultValidationFactory, HttpServletRequest,HttpSessionandServletContext
Note
The FacesContext is not injectable. You can get at it by calling
FacesContext.getCurrentInstance(). Alternatively you may define the
following producer method:
import javax.enterprise.inject.Produces;


class FacesContextProducer {

   @Produces @RequestScoped FacesContext getFacesContext() {

      return FacesContext.getCurrentInstance();

   }

}
All managed beans may take advantage of Java EE component environment
injection using @Resource, @EJB, @PersistenceContext,
@PersistenceUnit and @WebServiceRef. We’ve already seen a couple of
examples of this, though we didn’t pay much attention at the time:
@Transactional @Interceptor

public class TransactionInterceptor {

   @Resource UserTransaction transaction;


   @AroundInvoke public Object manageTransaction(InvocationContext ctx) throws Exception { ... }

}
@SessionScoped

public class Login implements Serializable {

   @Inject Credentials credentials;

   @PersistenceContext EntityManager userDatabase;

    ...

}
The Java EE @PostConstruct and @PreDestroy callbacks are also
supported for all managed beans. The @PostConstruct method is called
after all injection has been performed.
Of course, we advise that component environment injection be used to define CDI resources, and that typesafe injection be used in application code.
It’s easy to use a bean from a servlet in Java EE. Simply inject the bean using field or initializer method injection.
public class LoginServlet extends HttpServlet {

   @Inject Credentials credentials;

   @Inject Login login;


   @Override

   public void service(HttpServletRequest request, HttpServletResponse response)

      throws ServletException, IOException {

      credentials.setUsername(request.getParameter("username")):

      credentials.setPassword(request.getParameter("password")):

      login.login();

      if ( login.isLoggedIn() ) {

         response.sendRedirect("/home.jsp");

      }

      else {

         response.sendRedirect("/loginError.jsp");

      }

   }


}
Since instances of servlets are shared across all incoming threads, the
bean client proxy takes care of routing method invocations from the
servlet to the correct instances of Credentials and Login for the
current request and HTTP session.
CDI injection applies to all EJBs, even when they aren’t CDI beans. In particular, you can use CDI injection in message-driven beans, which are by nature not contextual objects.
You can even use interceptor bindings for message-driven Beans.
@Transactional @MessageDriven

public class ProcessOrder implements MessageListener {

   @Inject Inventory inventory;

   @PersistenceContext EntityManager em;


   public void onMessage(Message message) {

      ...

   }

}
Please note that there is no session or conversation context available
when a message is delivered to a message-driven bean. Only
@RequestScoped and @ApplicationScoped beans are available.
But how about beans which send JMS messages?
Sending messages using JMS can be quite complex, because of the number
of different objects you need to deal with. For queues we have Queue,
QueueConnectionFactory, QueueConnection, QueueSession and
QueueSender. For topics we have Topic, TopicConnectionFactory,
TopicConnection, TopicSession and TopicPublisher. Each of these
objects has its own lifecycle and threading model that we need to worry
about.
You can use producer fields and methods to prepare all of these resources for injection into a bean:
import javax.jms.ConnectionFactory;

import javax.jms.Queue;


public class OrderResources {

   @Resource(name="jms/ConnectionFactory")

   private ConnectionFactory connectionFactory;


   @Resource(name="jms/OrderQueue")

   private Queue orderQueue;


   @Produces @Order

   public Connection createOrderConnection() throws JMSException {

    return connectionFactory.createConnection();

   }


   public void closeOrderConnection(@Disposes @Order Connection connection)

         throws JMSException {

      connection.close();

   }


   @Produces @Order

   public Session createOrderSession(@Order Connection connection)

         throws JMSException {

      return connection.createSession(true, Session.AUTO_ACKNOWLEDGE);

   }


   public void closeOrderSession(@Disposes @Order Session session)

         throws JMSException {

      session.close();

   }


   @Produces @Order

   public MessageProducer createOrderMessageProducer(@Order Session session)

         throws JMSException {

      return session.createProducer(orderQueue);

   }


   public void closeOrderMessageProducer(@Disposes @Order MessageProducer producer)

         throws JMSException {

      producer.close();

   }

}
In this example, we can just inject the prepared MessageProducer,
Connection or QueueSession:
@Inject Order order;

@Inject @Order MessageProducer producer;

@Inject @Order Session orderSession;


public void sendMessage() {

   MapMessage msg = orderSession.createMapMessage();

   msg.setLong("orderId", order.getId());

   ...

   producer.send(msg);

}
The lifecycle of the injected JMS objects is completely controlled by the container.
CDI doesn’t define any special deployment archive. You can package CDI beans in JARs, EJB JARs or WARs—any deployment location in the application classpath. However, the archive must be a "bean archive".
Unlike CDI 1.0, the CDI 1.1 specification recognizes two types of bean archives. The type determines the way the container discovers CDI beans in the archive.
Note
CDI 1.1 makes use of a new XSD file for beans.xml descriptor: http://xmlns.jcp.org/xml/ns/javaee/beans_1_1.xsd
An explicit bean archive is an archive which contains a beans.xml
file:
- with a version number of 1.1 (or later), with the bean-discovery-mode
of
all, or, - like in CDI 1.0 – with no version number, or, that is an empty file.
It behaves just like a CDI 1.0 bean archive – i.e. Weld discovers each Java class, interface or enum in such an archive.
Note
The beans.xml file must be located at:
META-INF/beans.xml(for jar archives), or,WEB-INF/beans.xmlorWEB-INF/classes/META-INF/beans.xml(for WAR archives).
You should never place a beans.xml file in both of the WEB-INF and the
WEB-INF/classes/META-INF directories. Otherwise your application would
not be portable.
Optionally beans.xml file in explicit bean archive can include simple trim
element. This trimmed bean archive means that ProcessAnnotatedType event is
fired for every AnnotatedType, but only types which are annotated with a
bean defining annotation or any scope annotation will become beans.
An implicit bean archive is an archive which contains one or more bean
classes with a bean defining annotation, or one or more session beans.
It can also contain a beans.xml file with a version number of 1.1 (or
later), with the bean-discovery-mode of annotated. Weld only discovers
Java classes with a bean defining annotation within an implicit bean
archive.
Note
The set of bean defining annotations contains:
@ApplicationScoped,@SessionScoped,@ConversationScopedand@RequestScopedannotations,- all other normal scope types,
@Interceptorand@Decoratorannotations,- all stereotype annotations (i.e. annotations annotated with
@Stereotype), - and the
@Dependentscope annotation.
However, @Singleton is not a bean defining annotation.
See 2.5.1. Bean defining annotations to learn more.
Although quite obvious, let’s sum it up:
- an archive which contains neither a
beans.xmlfile nor any bean class with a bean defining annotation, - an archive which contains a
beans.xmlfile with the bean-discovery-mode ofnone.
Actually, there is one more special rule (designed to retain backward compatibility): an archive which contains a portable extension and no beans.xml is not a bean archive either.
However, this is not a very common use case.
Note
For compatibility with CDI 1.0, each Java EE product (WildFly,
GlassFish, etc.) must contain an option to cause an archive to be
ignored by the container when no beans.xml is present. Consult
specific Java EE product documentation to learn more about such option.
- 16.1. Creating an Extension
- 16.2. Container lifecycle events
- 16.3. The BeanManager object
- 16.4. The CDI class
- 16.5. The InjectionTarget interface
- 16.6. The Bean interface
- 16.7. Registering a Bean
- 16.8. Configuring an AnnotatedType
- 16.9. Overriding attributes of a bean
- 16.10. Wrapping an InjectionTarget
- 16.11. Overriding InjectionPoint
- 16.12. Manipulating interceptors, decorators and alternatives enabled for an application
- 16.13. The Context and AlterableContext interfaces
CDI is intended to be a foundation for frameworks, extensions and integration with other technologies. Therefore, CDI exposes a set of SPIs for the use of developers of portable extensions to CDI. For example, the following kinds of extensions were envisaged by the designers of CDI:
- integration with Business Process Management engines,
- integration with third-party frameworks such as Spring, Seam, GWT or Wicket, and
- new technology based upon the CDI programming model.
More formally, according to the spec:
A portable extension may integrate with the container by:
- Providing its own beans, interceptors and decorators to the container
- Injecting dependencies into its own objects using the dependency injection service
- Providing a context implementation for a custom scope
- Augmenting or overriding the annotation-based metadata with metadata from some other source
The first step in creating a portable extension is to write a class that
implements Extension. This marker interface does not define any
methods, but it’s needed to satisfy the requirements of Java SE’s
service provider architecture.
 import javax.enterprise.inject.spi.Extension;


class MyExtension implements Extension { ... }
Next, we need to register our extension as a service provider by
creating a file named
META-INF/services/javax.enterprise.inject.spi.Extension, which
contains the name of our extension class:
org.mydomain.extension.MyExtension
An extension is not a bean, exactly, since it is instantiated by the container during the initialization process, before any beans or contexts exist. However, it can be injected into other beans once the initialization process is complete.
@Inject

MyBean(MyExtension myExtension) {

   myExtension.doSomething();

}
And, like beans, extensions can have observer methods. Usually, the observer methods observe container lifecycle events.
Note
Weld SE allows to define so called synthetic container lifecycle event observers. Such observers do not belong to a particular extension. See also org.jboss.weld.environment.se.ContainerLifecycleObserver and Weld.addContainerLifecycleObserver().
During the initialization process, the container fires a series of events, including:
BeforeBeanDiscoveryProcessAnnotatedTypeandProcessSyntheticAnnotatedTypeAfterTypeDiscoveryProcessInjectionTargetandProcessProducerProcessInjectionPointProcessBeanAttributesProcessBean,ProcessManagedBean,ProcessSessionBean,ProcessProducerMethod,ProcessProducerFieldandProcessSyntheticBeanProcessObserverMethodandProcessSyntheticObserverMethodAfterBeanDiscoveryAfterDeploymentValidation
Extensions may observe these events:
import javax.enterprise.inject.spi.Extension;


class MyExtension implements Extension {


   void beforeBeanDiscovery(@Observes BeforeBeanDiscovery bbd) {

      Logger.global.debug("beginning the scanning process");

   }


   <T> void processAnnotatedType(@Observes ProcessAnnotatedType<T> pat) {

      Logger.global.debug("scanning type: " + pat.getAnnotatedType().getJavaClass().getName());

   }


   void afterBeanDiscovery(@Observes AfterBeanDiscovery abd) {

      Logger.global.debug("finished the scanning process");

   }


}
In fact, the extension can do a lot more than just observe. The extension is permitted to modify the container’s metamodel and more. Here’s a very simple example:
import javax.enterprise.inject.spi.Extension;


class MyExtension implements Extension {


   <T> void processAnnotatedType(@Observes @WithAnnotations({Ignore.class}) ProcessAnnotatedType<T> pat) {

      /* tell the container to ignore the type if it is annotated @Ignore */

      if ( pat.getAnnotatedType().isAnnotationPresent(Ignore.class) ) pat.veto();

   }


}
Note
The @WithAnnotations annotation causes the container to deliver the
ProcessAnnotatedType events only for the types which contain the
specified annotation.
Container lifecycle event observer methods may inject a BeanManager:
<T> void processAnnotatedType(@Observes ProcessAnnotatedType<T> pat, BeanManager beanManager) { ... }
An extension observer method is not allowed to inject any other object.
CDI 2.0 introduced the Configurators API - a new way to easily configure some parts of the SPI during container lifecycle event notification.
E.g. to add a qualifier to a bean, an extension can observe ProcessBeanAttributes, then obtain a configurator instance through ProcessBeanAttributes.configureBeanAttributes() and finally use BeanAttributesConfigurator.addQualifier(Annotation).
No need to wrap/delegate to the original BeanAttributes.
See also chapter Configurators interfaces of the CDI specification.
Apart from CDI-defined lifecycle events, Weld also offers enriched observable container lifecycle event - WeldAfterBeanDiscovery.
Compared to javax.enterprise.inject.spi.AfterBeanDiscovery, it adds one extra method - addInterceptor().
This method works in the same way as the aforementioned Section 16.2.1, “Configurators”; you get back an InterceptorConfigurator instance, where you can set all the desired data.
The interceptor is created automatically, once the methods exits and the configurator instance is not reusable.
But if you need to create several interceptors, you can simply request several configurator instances.
Here is a code snippet to demonstrate the idea:
public void afterBeanDiscovery(@Observes WeldAfterBeanDiscovery event) {


        // type level interceptor

        event.addInterceptor().intercept(InterceptionType.AROUND_INVOKE, (invocationContext) -> {

            try {

                getAnswerToLifeTheUniverseAndEverything();

                return invocationContext.proceed();

            } catch (Exception e) {

                e.printStackTrace();

            }

            return null;

        }).priority(2500).addBinding(MyTypeBinding.MyTypeBindingLiteral.INSTANCE);

}
The sample presents a simple interception use case where you supply java.util.function.Function as the interceptor body method.
For more complex cases, you may also choose to use interceptWithMetadata method which accepts java.util.function.BiFunction instead.
The second parameter of the BiFunction emulates @Inject @Intercepted Bean<?> allowing access to metadata.
The nerve center for extending CDI is the BeanManager object.
The BeanManager interface provides operations useful for portable extensions, e.g. lets us obtain beans, interceptors, decorators, observers and contexts programmatically.
Note that some of the methods may not be called before the AfterBeanDiscovery event is fired, e.g. BeanManager.getBeans().
Furthermore, the BeanManager.getReference() and BeanManager.getInjectableReference() methods may not be called before the AfterDeploymentValidation event is fired.
See also the javadoc for more details.
As already stated in Section 16.2, “Container lifecycle events”, any container lifecycle event observer method can obtain an injected BeanManager reference:
void afterBeanDiscovery(@Observes AfterBeanDiscovery event, BeanManager beanManager) { ... }
Furthermore, any bean or other Java EE component which supports injection can obtain
an instance of BeanManager via injection:
@Inject BeanManager beanManager;
Alternatively, a BeanManager reference may be obtained from CDI via a
static method call.
CDI.current().getBeanManager()
Java EE components may obtain an instance of BeanManager from JNDI by
looking up the name java:comp/BeanManager. Any operation of
BeanManager may be called at any time during the execution of the
application.
Let’s study some of the interfaces exposed by the BeanManager.
Application components which cannot obtain a BeanManager reference via
injection nor JNDI lookup can get the reference from the
javax.enterprise.inject.spi.CDI class via a static method call:
BeanManager manager = CDI.current().getBeanManager();
The CDI class can be used directly to programmatically lookup CDI
beans as described in Section 4.10, “Obtaining a contextual instance by programmatic lookup”
CDI.select(Foo.class).get()
The first thing that a framework developer is going to look for in the
portable extension SPI is a way to inject CDI beans into objects which
are not under the control of CDI. The InjectionTarget interface makes
this very easy.
Note
We recommend that frameworks let CDI take over the job of actually instantiating the framework-controlled objects. That way, the framework-controlled objects can take advantage of constructor injection. However, if the framework requires use of a constructor with a special signature, the framework will need to instantiate the object itself, and so only method and field injection will be supported.
import javax.enterprise.inject.spi.CDI;


...


//get the BeanManager

BeanManager beanManager = CDI.current().getBeanManager();


//CDI uses an AnnotatedType object to read the annotations of a class

AnnotatedType<SomeFrameworkComponent> type = beanManager.createAnnotatedType(SomeFrameworkComponent.class);


//The extension uses an InjectionTarget to delegate instantiation, dependency injection

//and lifecycle callbacks to the CDI container

InjectionTarget<SomeFrameworkComponent> it = beanManager.createInjectionTarget(type);


//each instance needs its own CDI CreationalContext

CreationalContext ctx = beanManager.createCreationalContext(null);


//instantiate the framework component and inject its dependencies

SomeFrameworkComponent instance = it.produce(ctx);  //call the constructor

it.inject(instance, ctx);  //call initializer methods and perform field injection

it.postConstruct(instance);  //call the @PostConstruct method


...


//destroy the framework component instance and clean up dependent objects

it.preDestroy(instance);  //call the @PreDestroy method

it.dispose(instance);  //it is now safe to discard the instance

ctx.release();  //clean up dependent objects
Instances of the interface Bean represent beans. There is an instance
of Bean registered with the BeanManager object for every bean in the
application. There are even Bean objects representing interceptors,
decorators and producer methods.
The BeanAttributes interface exposes all the interesting things we
discussed in Section 2.1, “The anatomy of a bean”.
public interface BeanAttributes<T> {

   public Set<Type> getTypes();

   public Set<Annotation> getQualifiers();

   public Class<? extends Annotation> getScope();

   public String getName();

   public Set<Class<? extends Annotation>> getStereotypes();

   public boolean isAlternative();

}
The Bean interface extends the BeanAttributes interface and defines
everything the container needs to manage instances of a certain bean.
public interface Bean<T> extends Contextual<T>, BeanAttributes<T> {

   public Class<?> getBeanClass();

   public Set<InjectionPoint> getInjectionPoints();

   public boolean isNullable();

}
There’s an easy way to find out what beans exist in the application:
Set<Bean<?>> allBeans = beanManager.getBeans(Object.class, new AnnotationLiteral<Any>() {});
The Bean interface makes it possible for a portable extension to
provide support for new kinds of beans, beyond those defined by the CDI
specification. For example, we could use the Bean interface to allow
objects managed by another framework to be injected into beans.
The most common kind of CDI portable extension registers a bean (or beans) with the container.
In this example, we make a framework class, SecurityManager available
for injection. To make things a bit more interesting, we’re going to
delegate back to the container’s InjectionTarget to perform
instantiation and injection upon the SecurityManager instance.
import javax.enterprise.inject.spi.Extension;

import javax.enterprise.event.Observes;

import java.lang.annotation.Annotation;

import java.lang.reflect.Type;

import javax.enterprise.inject.spi.InjectionPoint;

...


public class SecurityManagerExtension implements Extension {


    void afterBeanDiscovery(@Observes AfterBeanDiscovery event, BeanManager bm) {

        event.addBean()

           /* read annotations of the class and create an InjectionTarget used to instantiate the class and inject dependencies */

           .read(bm.createAnnotatedType(SecurityManager.class))

           .beanClass(SecurityManager.class)

           .scope(ApplicationScoped.class)

           .name("securityManager");

    }


}
But a portable extension can also mess with beans that are discovered automatically by the container.
One of the most interesting things that an extension class can do is process the annotations of a bean class before the container builds its metamodel.
Let’s start with an example of an extension that provides support for
the use of @Named at the package level. The package-level name is used
to qualify the EL names of all beans defined in that package. The
portable extension uses the ProcessAnnotatedType event to configure the
AnnotatedType object and override the value() of the @Named
annotation.
import java.lang.reflect.Type;

import javax.enterprise.inject.spi.Extension;

import java.lang.annotation.Annotation;

...


public class QualifiedNameExtension implements Extension {


    <X> void processAnnotatedType(@Observes ProcessAnnotatedType<X> event) {


        /* wrap this to override the annotations of the class */

        final AnnotatedType<X> at = event.getAnnotatedType();


        /* Only wrap AnnotatedTypes for classes with @Named packages */

        Package pkg = at.getJavaClass().getPackage();

        if (pkg == null || !pkg.isAnnotationPresent(Named.class) ) {

            return;

        }


        String unqualifiedName = "";

        if (at.isAnnotationPresent(Named.class)) {

            unqualifiedName = at.getAnnotation(Named.class).value();

        }

        if (unqualifiedName.isEmpty()) {

            unqualifiedName = Introspector.decapitalize(at.getJavaClass().getSimpleName());

        }

        final String qualifiedName = pkg.getAnnotation(Named.class).value()

                            + '_' + unqualifiedName;


        event.configureAnnotatedType().remove((a) -> a.annotationType().equals(Named.class)).add(NamedLiteral.of(qualifiedName));

    }


}
Here’s a second example, which adds the @Alternative annotation to any
class which implements a certain Service interface.
import javax.enterprise.inject.spi.Extension;

import javax.enterprise.inject.Alternative;

...


class ServiceAlternativeExtension implements Extension {


   <T extends Service> void processAnnotatedType(@Observes ProcessAnnotatedType<T> event) {

      event.configureAnnotatedType().add(Alternative.Literal.INSTANCE);

   }

}
The AnnotatedType is not the only thing that can be configured/wrapped by an
extension.
Configuring an AnnotatedType is a low-level approach to overriding CDI
metadata by adding, removing or replacing annotations. Since version
1.1, CDI provides a higher-level facility for overriding attributes of
beans discovered by the CDI container.
public interface BeanAttributes<T> {


   public Set<Type> getTypes();


   public Set<Annotation> getQualifiers();


   public Class<? extends Annotation> getScope();


   public String getName();


   public Set<Class<? extends Annotation>> getStereotypes();


   public boolean isAlternative();


}
The BeanAttributes interface exposes attributes of a bean. The
container fires a ProcessBeanAttributes event for each enabled bean,
interceptor and decorator before this object is registered. Similarly to
the ProcessAnnotatedType, this event allows an extension to modify
attributes of a bean or to veto the bean entirely.
public interface ProcessBeanAttributes<T> {


    public Annotated getAnnotated();


    public BeanAttributes<T> getBeanAttributes();


    public BeanAttributesConfigurator<T> configureBeanAttributes();


    public void setBeanAttributes(BeanAttributes<T> beanAttributes);


    public void addDefinitionError(Throwable t);


    public void veto();


}
The BeanManager also provides two utility methods for creating the
BeanAttributes object from scratch:
public <T> BeanAttributes<T> createBeanAttributes(AnnotatedType<T> type);


public BeanAttributes<?> createBeanAttributes(AnnotatedMember<?> type);
The InjectionTarget interface exposes operations for producing and
disposing an instance of a component, injecting its dependencies and
invoking its lifecycle callbacks. A portable extension may wrap the
InjectionTarget for any Java EE component that supports injection,
allowing it to intercept any of these operations when they are invoked
by the container.
Here’s a CDI portable extension that reads values from properties files
and configures fields of Java EE components, including servlets, EJBs,
managed beans, interceptors and more. In this example, properties for a
class such as org.mydomain.blog.Blogger go in a resource named
org/mydomain/blog/Blogger.properties, and the name of a property must
match the name of the field to be configured. So Blogger.properties
could contain:
firstName=Gavin

lastName=King
The portable extension works by wrapping the containers
InjectionTarget and setting field values from the inject() method.
import javax.enterprise.event.Observes;

import javax.enterprise.inject.spi.Extension;

import javax.enterprise.inject.spi.InjectionPoint;


public class ConfigExtension implements Extension {


    <X> void processInjectionTarget(@Observes ProcessInjectionTarget<X> pit) {


          /* wrap this to intercept the component lifecycle */

         final InjectionTarget<X> it = pit.getInjectionTarget();


        final Map<Field, Object> configuredValues = new HashMap<Field, Object>();


        /* use this to read annotations of the class and its members */

        AnnotatedType<X> at = pit.getAnnotatedType();


        /* read the properties file */

        String propsFileName = at.getJavaClass().getSimpleName() + ".properties";

        InputStream stream = at.getJavaClass().getResourceAsStream(propsFileName);

        if (stream!=null) {


            try {

                Properties props = new Properties();

                props.load(stream);

                for (Map.Entry<Object, Object> property : props.entrySet()) {

                    String fieldName = property.getKey().toString();

                    Object value = property.getValue();

                    try {

                        Field field = at.getJavaClass().getDeclaredField(fieldName);

                        field.setAccessible(true);

                        if ( field.getType().isAssignableFrom( value.getClass() ) ) {

                            configuredValues.put(field, value);

                        }

                        else {

                            /* TODO: do type conversion automatically */

                            pit.addDefinitionError( new InjectionException(

                                   "field is not of type String: " + field ) );

                        }

                    }

                    catch (NoSuchFieldException nsfe) {

                        pit.addDefinitionError(nsfe);

                    }

                    finally {

                        stream.close();

                    }

                }

            }

            catch (IOException ioe) {

                pit.addDefinitionError(ioe);

            }

        }


        InjectionTarget<X> wrapped = new InjectionTarget<X>() {


            @Override

            public void inject(X instance, CreationalContext<X> ctx) {

                it.inject(instance, ctx);


                /* set the values onto the new instance of the component */

                for (Map.Entry<Field, Object> configuredValue: configuredValues.entrySet()) {

                    try {

                        configuredValue.getKey().set(instance, configuredValue.getValue());

                    }

                    catch (Exception e) {

                        throw new InjectionException(e);

                    }

                }

            }


            @Override

            public void postConstruct(X instance) {

                it.postConstruct(instance);

            }


            @Override

            public void preDestroy(X instance) {

                it.dispose(instance);

            }


            @Override

            public void dispose(X instance) {

                it.dispose(instance);

            }


            @Override

            public Set<InjectionPoint> getInjectionPoints() {

                return it.getInjectionPoints();

            }


            @Override

            public X produce(CreationalContext<X> ctx) {

                return it.produce(ctx);

            }


        };


        pit.setInjectionTarget(wrapped);


    }


}
CDI provides a way to override the metadata of an InjectionPoint. This
works similarly to how metadata of a bean may be overridden using
BeanAttributes.
For every injection point of each component supporting injection Weld
fires an event of type
javax.enterprise.inject.spi.ProcessInjectionPoint
public interface ProcessInjectionPoint<T, X> {

    public InjectionPoint getInjectionPoint();

    public InjectionPointConfigurator configureInjectionPoint();

    public void setInjectionPoint(InjectionPoint injectionPoint);

    public void addDefinitionError(Throwable t);

}
An extension may either completely override the injection point metadata
or alter it by wrapping the InjectionPoint object obtained from
ProcessInjectionPoint.getInjectionPoint()
There’s a lot more to the portable extension SPI than what we’ve discussed here. Check out the CDI spec or Javadoc for more information. For now, we’ll just mention one more extension point.
An event of type javax.enterprise.inject.spi.AfterTypeDiscovery is
fired when the container has fully completed the type discovery process
and before it begins the bean discovery process.
public interface AfterTypeDiscovery {

    public List<Class<?>> getAlternatives();

    public List<Class<?>> getInterceptors();

    public List<Class<?>> getDecorators();

    public void addAnnotatedType(AnnotatedType<?> type, String id);

}
This event exposes a list of enabled alternatives, interceptors and decorators. Extensions may manipulate these collections directly to add, remove or change the order of the enabled records.
In addition, an AnnotatedType can be added to the types which will be
scanned during bean discovery, with an identifier, which allows multiple
annotated types, based on the same underlying type, to be defined.
The Context and AlterableContext interface support addition of new
scopes to CDI, or extension of the built-in scopes to new environments.
public interface Context {

   public Class<? extends Annotation> getScope();

   public <T> T get(Contextual<T> contextual, CreationalContext<T> creationalContext);

   public <T> T get(Contextual<T> contextual);

   boolean isActive();

}
For example, we might implement Context to add a business process
scope to CDI, or to add support for the conversation scope to an
application that uses Wicket.
import javax.enterprise.context.spi.Context;


public interface AlterableContext extends Context {

    public void destroy(Contextual<?> contextual);

}
AlterableContext was introduced in CDI 1.1. The destroy method
allows an application to remove instances of contextual objects from a
context.
For more information on implementing a custom context see this blog post or the Command context example.
A lot of additional information on CDI can be found online. Regardless, the CDI specification remains the authority for information on CDI. The spec is less than 100 pages and is quite readable (don’t worry, it’s not like your Blu-ray player manual). Of course, it covers many details we’ve skipped over here. The spec is available on the at the JCP website (CDI 1.0) (CDI 1.1).
The CDI reference implementation, Weld, is being developed by the Weld team. The team and the CDI spec lead blog at in.relation.to. This guide was originally based on a series of blog entries published there while the specification was being developed. It’s probably the best source of information about the future of CDI and Weld.
We encourage you to follow the weld-dev mailing list and to get involved in development. If you are reading this guide, you likely have something to offer.
Weld is the reference implementation of CDI, and is used by WildFly, GlassFish and WebLogic to provide CDI services for Java Enterprise Edition (Java EE) applications. Weld also goes beyond the environments and APIs defined by the CDI specification by providing support for a number of other environments (such as a servlet container such as Tomcat, or Java SE).
You might also want to check out DeltaSpike project which provides portable extensions to CDI.
If you want to get started quickly using Weld (and, in turn, CDI) with WildFly, GlassFish or Tomcat and experiment with one of the examples, take a look at Chapter 6, Getting started with Weld. Otherwise read on for a exhaustive discussion of using Weld in all the environments and application servers it supports and the Weld extensions.
Table of Contents
- 18. Application servers and environments supported by Weld
- 19. Configuration
- 19.1. Weld configuration
- 19.1.1. Relaxed construction
- 19.1.2. Concurrent deployment configuration
- 19.1.3. Thread pool configuration
- 19.1.4. Non-portable mode during application initialization
- 19.1.5. Proxying classes with final methods
- 19.1.6. Bounding the cache size for resolved injection points
- 19.1.7. Debugging generated bytecode
- 19.1.8. Injectable reference lookup optimization
- 19.1.9. Bean identifier index optimization
- 19.1.10. Rolling upgrades ID delimiter
- 19.1.11. Development Mode
- 19.1.12. Conversation timeout and Conversation concurrent access timeout
- 19.1.13. Veto types without bean defining annotation
- 19.1.14. Memory consumption optimization - removing unused beans
- 19.2. Defining external configuration
- 19.3. Excluding classes from scanning and deployment
- 19.4. Mapping CDI contexts to HTTP requests
- 20. Logging
- 21. WeldManager interface
- 22. Development Mode
- 23. Context Management
- A. Integrating Weld into other environments
- A.1. The Weld SPI
- A.1.1. Deployment structure
- A.1.2. EJB descriptors
- A.1.3. EE resource injection and resolution services
- A.1.4. EJB services
- A.1.5. JPA services
- A.1.6. Transaction Services
- A.1.7. Resource Services
- A.1.8. Web Service Injection Services
- A.1.9. Injection Services
- A.1.10. Security Services
- A.1.11. Initialization and shutdown
- A.1.12. Resource loading
- A.1.13. ClassFileServices
- A.1.14. Registering services
- A.2. The contract with the container
- A.2.1. Classloader isolation
- A.2.2. Servlet
- A.2.3. CDI Conversation Filter
- A.2.4. JSF
- A.2.5. JSP
- A.2.6. Session Bean Interceptor
- A.2.7. The weld-core.jar
- A.2.8. Binding the manager in JNDI
- A.2.9. CDIProvider
- A.2.10. Performing CDI injection on Java EE component classes
- A.2.11. Around-construct interception
- A.2.12. Probe Development Tool (Optional)
- A.2.13. Optimized cleanup after bootstrap
- A.3. Migration notes
WildFly comes with pre-configured Weld. There is no configuration needed to use Weld (or CDI for that matter). You may still want to fine-tune Weld with additional configuration settings.
Weld is also built into GlassFish from V3 onwards. Since GlassFish is the Java EE reference implementation, it supports all features of CDI. What better way for GlassFish to support these features than to use Weld, the CDI reference implementation? Just package up your CDI application and deploy.
While CDI does not require support for servlet environments, Weld can be used in a servlet container, such as Tomcat or Jetty.
Note
There is a major limitation to using a servlet container; Weld doesn’t
support deploying session beans, injection using @EJB
or @PersistenceContext, or using transactional events in servlet
containers. For enterprise features such as these, you should really be
looking at a Java EE application server.
Weld can be used as a library in an web application that is deployed to
a Servlet container. You should add the weld-servlet-core as a dependency
to your project:
<dependency>

    <groupId>org.jboss.weld.servlet</groupId>

    <artifactId>weld-servlet-core</artifactId>

    <version>3.1.0.Final</version>

</dependency>
All the necessary dependencies (CDI API, Weld core) will be fetched transitively.
Alternatively, there is a shaded version with all the dependencies in a single jar file which is available as:
<dependency>

    <groupId>org.jboss.weld.servlet</groupId>

    <artifactId>weld-servlet-shaded</artifactId>

    <version>3.1.0.Final</version>

</dependency>
In general, weld-servlet uses ServletContainerInitializer mechanism to hook into the life cycle of Servlet 3.x compatible containers.
In special cases when your Servlet container does not support ServletContainerInitializer
or you need more control over the ordering of listeners (e.g. move Weld’s listener)
to the beginning of the list so that CDI context are active during invocation of other listeners)
you can register Weld’s listener manually in the WEB-INF/web.xml file of the application:
<listener>

   <listener-class>org.jboss.weld.environment.servlet.Listener</listener-class>

</listener>
Note
There is quite a special use-case where one more special component must
be involved. If you want the session context to be active during
HttpSessionListener.sessionDestroyed() invocation when the session
times out or when all the sessions are destroyed because the deployment
is being removed then org.jboss.weld.module.web.servlet.WeldTerminalListener must
be specified as the last one in your web.xml. This listener activates
the session context before other listeners are invoked (note that the
listeners are notified in reverse order when a session is being
destroyed).
When working with multiple deployments in servlet environment, Weld Servlet
allows to define context identifier per application deployed. Each different
context identifier will create a new Weld container instance. If not specified,
Weld falls back to the default value - STATIC_INSTANCE. While using custom
identifiers is neither required nor commonly used, it certainly has some use-cases.
For instance managing several deployments with Arquillian Tomcat container.
Setting the identifier is as simple as adding one context parameter into web.xml:
<context-param>

   <param-name>WELD_CONTEXT_ID_KEY</param-name>

   <param-value>customValue</param-value>

</context-param>
Tomcat 9, which implements Servlet 4.0 specification, is supported.
Binding BeanManager to JNDI does not work out of the box.
Tomcat has a read-only JNDI, so Weld can’t automatically bind the
BeanManager extension SPI. To bind the BeanManager into JNDI, you should
populate META-INF/context.xml in the web root with the following
contents:
<Context>

   <Resource name="BeanManager"

      auth="Container"

      type="javax.enterprise.inject.spi.BeanManager"

      factory="org.jboss.weld.resources.ManagerObjectFactory"/>

</Context>
and make it available to your deployment by adding this to the bottom
of web.xml:
<resource-env-ref>

   <resource-env-ref-name>BeanManager</resource-env-ref-name>

   <resource-env-ref-type>

      javax.enterprise.inject.spi.BeanManager

   </resource-env-ref-type>

</resource-env-ref>
Tomcat only allows you to bind entries to java:comp/env, so the
BeanManager will be available at java:comp/env/BeanManager
With embedded Tomcat it is necessary to register Weld’s listener programmatically:
public class Main {


    public static void main(String[] args) throws ServletException, LifecycleException {

        Tomcat tomcat = new Tomcat();

        Context ctx = tomcat.addContext("/", new File("src/main/resources").getAbsolutePath());


        Tomcat.addServlet(ctx, "hello", HelloWorldServlet.class.getName());

        ctx.addServletMapping("/*", "hello");


        // ctx.addApplicationListener(Listener.class.getName());


        tomcat.start();

        tomcat.getServer().await();

    }


    public static class HelloWorldServlet extends HttpServlet {


        @Inject

        private BeanManager manager;


        @Override

        protected void doGet(HttpServletRequest req, HttpServletResponse resp) throws ServletException, IOException {

            resp.setContentType("text/plain");

            resp.getWriter().append("Hello from " + manager);

        }

    }

}
| Weld’s |
Jetty 9.4.14 and newer are supported. Context activation/deactivation and dependency injection into Servlets and Filters works out of the box. Injection into Servlet listeners works on Jetty 9.1.1 and newer.
No further configuration is needed when starting Jetty as an embedded webapp server from within another Java program. However, if you’re using a Jetty standalone instance one more configuration step is required.
The reason is that since Jetty 8 some internal classes are not visible from the web application.
See also Setting Server Classes.
Therefore, we have to tell Jetty not to hide the system classes which Weld integration code is using.
We can use the jetty-web.xml descriptor (see also Jetty XML Reference):
<?xml version="1.0" encoding="UTF-8"?>

<!DOCTYPE Configure PUBLIC "-//Jetty//Configure//EN" "http://www.eclipse.org/jetty/configure.dtd">

<Configure class="org.eclipse.jetty.webapp.WebAppContext">

   <Call name="prependServerClass">

      <Arg>-org.eclipse.jetty.util.Decorator</Arg>

   </Call>

   <Call name="prependServerClass">

      <Arg>-org.eclipse.jetty.util.DecoratedObjectFactory</Arg>

   </Call>

   <Call name="prependServerClass">

      <Arg>-org.eclipse.jetty.server.handler.ContextHandler.</Arg>

   </Call>

   <Call name="prependServerClass">

      <Arg>-org.eclipse.jetty.server.handler.ContextHandler</Arg>

   </Call>

   <Call name="prependServerClass">

      <Arg>-org.eclipse.jetty.servlet.ServletContextHandler</Arg>

   </Call>

</Configure>
Tip
Jetty distributions (from version 9.2.4) contain a dedicated CDI/Weld module which allows to deploy a CDI application without bundling the Weld Servlet integration code.
To bind the BeanManager into JNDI, you should either populate
WEB-INF/jetty-env.xml with the following contents:
<!DOCTYPE Configure PUBLIC "-//Mort Bay Consulting//DTD Configure//EN"

   "http://www.eclipse.org/jetty/configure.dtd">


<Configure id="webAppCtx" class="org.eclipse.jetty.webapp.WebAppContext">

    <New id="BeanManager" class="org.eclipse.jetty.plus.jndi.Resource">

        <Arg> <Ref id="webAppCtx"/> </Arg>

        <Arg>BeanManager</Arg>

        <Arg>

            <New class="javax.naming.Reference">

                <Arg>javax.enterprise.inject.spi.BeanManager</Arg>

                <Arg>org.jboss.weld.resources.ManagerObjectFactory</Arg>

                <Arg/>

            </New>

        </Arg>

    </New>

</Configure>
Or you can configure a special Servlet listener to bind the BeanManager automatically:
<listener>
<listener-class>org.jboss.weld.environment.servlet.BeanManagerResourceBindingListener</listener-class>
</listener>
Just like in Tomcat, you need to make the BeanManager available to your
deployment by adding this to the bottom of web.xml:
<resource-env-ref>
<resource-env-ref-name>BeanManager</resource-env-ref-name>
<resource-env-ref-type>
javax.enterprise.inject.spi.BeanManager
</resource-env-ref-type>
</resource-env-ref>
Jetty only allows you to bind entries to java:comp/env, so the
BeanManager will be available at java:comp/env/BeanManager.
When starting embedded Jetty programmatically from the main method it is necessary to register Weld’s listener:
public class Main {
public static void main(String[] args) throws Exception {
Server jetty = new Server(8080);
WebAppContext context = new WebAppContext();
context.setContextPath("/");
context.setResourceBase("src/main/resources");
jetty.setHandler(context);
context.addServlet(HelloWorldServlet.class, "/*");
context.addEventListener(new Listener());
jetty.start();
jetty.join();
}
public static class HelloWorldServlet extends HttpServlet {
@Inject BeanManager manager;
protected void doGet(HttpServletRequest req, HttpServletResponse resp) throws ServletException, IOException {
resp.setContentType("text/plain");
resp.getWriter().append("Hello from " + manager);
}
}
}
| Weld’s |
Weld supports context activation/deactivation and dependency injection into Servlets when running on Undertow. Injection into Filters and Servlet listeners is not currently supported. Weld’s listener needs to be registered programmatically:
public class Main {
public static void main(String[] args) throws ServletException {
DeploymentInfo servletBuilder = Servlets.deployment()
.setClassLoader(Main.class.getClassLoader())
.setResourceManager(new ClassPathResourceManager(Main.class.getClassLoader()))
.setContextPath("/")
.setDeploymentName("test.war")
.addServlet(Servlets.servlet("hello", HelloWorldServlet.class).addMapping("/*"))
.addListener(Servlets.listener(Listener.class));
DeploymentManager manager = Servlets.defaultContainer().addDeployment(servletBuilder);
manager.deploy();
HttpHandler servletHandler = manager.start();
PathHandler path = Handlers.path(Handlers.redirect("/")).addPrefixPath("/", servletHandler);
Undertow server = Undertow.builder().addHttpListener(8080, "localhost").setHandler(path).build();
server.start();
}
public static class HelloWorldServlet extends HttpServlet {
@Inject BeanManager manager;
protected void doGet(HttpServletRequest req, HttpServletResponse resp) throws ServletException, IOException {
resp.setContentType("text/plain");
resp.getWriter().append("Hello from " + manager);
}
}
}
| Weld’s |
WildFly Web is a lightweight Servlet container that uses Undertow. Weld supports context activation/deactivation and dependency injection into Servlets. Injection into Filters and Servlet listeners is not currently supported. Weld integration is started automatically when weld-servlet is part of your application.
By default, bean archive isolation is enabled. It means that alternatives, interceptors and decorators can be selected/enabled for a bean archive by using a beans.xml descriptor.
This behaviour can be changed by setting the servlet initialization parameter org.jboss.weld.environment.servlet.archive.isolation to false.
In this case, Weld will use a "flat" deployment structure - all bean classes share the same bean archive and all beans.xml descriptors are automatically merged into one. Thus alternatives, interceptors and decorators selected/enabled for a bean archive will be enabled for the whole application.
Note
Bean archive isolation is supported (and enabled by default) from version 2.2.5.Final. Previous versions only operated with the "flat" deployment structure.
CDI 1.1 introduced the bean discovery mode of annotated used for implicit bean archives (see also Section 15.6, “Packaging and deployment”).
This mode may bring additional overhead during container bootstrap. Therefore, Weld Servlet supports the use of Jandex bytecode scanning library to speed up the scanning process. Simply put the jandex.jar on the classpath.
If Jandex is not found on the classpath Weld will use the Java Reflection as a fallback.
In general, an implicit bean archive does not have to contain a beans.xml descriptor. However, such a bean archive is not supported by Weld Servlet, i.e. it’s excluded from discovery.
Note
The bean discovery mode of annotated is supported from version 2.2.5.Final. Previous versions processed implicit bean archives in the same way as explicit bean archives.
Weld servlet container integration is delivered as a single artifact, so that it’s possible to include this artifact in a war and deploy the application to any of the suported servlet containers.
This approach has advantages but also drawbacks.
One of them is the fact that Weld attempts to detect the servlet container automatically.
While this works most of the time, there are few rare cases, when it might be necessary to specify the container manually by setting the servlet initialization parameter org.jboss.weld.environment.container.class to:
org.jboss.weld.environment.tomcat.TomcatContainerorg.jboss.weld.environment.jetty.JettyContainerorg.jboss.weld.environment.undertow.UndertowContainer- or any custom
org.jboss.weld.environment.Containerimplementation
In addition to improved integration of the Enterprise Java stack, the "Contexts and Dependency Injection for the Java EE platform" specification also defines a state of the art typesafe, stateful dependency injection framework, which can prove useful in a wide range of application types. To help developers take advantage of this, Weld provides a simple means for being executed in the Java Standard Edition (SE) environment independently of any Java EE APIs.
When executing in the SE environment the following features of Weld are available:
- Managed beans with
@PostConstructand@PreDestroylifecycle callbacks - Dependency injection with qualifiers and alternatives
@Application,@Dependentand@Singletonscopes- Interceptors and decorators
- Stereotypes
- Events
- Portable extension support
EJB beans are not supported.
Weld provides an extension which will boot a CDI bean manager in Java SE, automatically registering all simple beans found on the classpath. The command line parameters can be injected using either of the following:
@Inject @Parameters List<String> params;
@Inject @Parameters String[] paramsArray;
The second form is useful for compatibility with existing classes.
Note
The command line parameters do not become available for injection until
the ContainerInitialized event is fired. If you need access to the
parameters during initialization you can do so via the
public static String[] getParameters() method in StartMain.
Here’s an example of a simple CDI SE application:
import javax.inject.Singleton;
@Singleton
public class HelloWorld
{
public void printHello(@Observes ContainerInitialized event, @Parameters List<String> parameters) {
System.out.println("Hello " + parameters.get(0));
}
}
Note
Weld automatically registers shutdown hook during initialization in order to properly terminate all running containers should the VM be terminated or program exited.
Even though it’s possible to change this behavior (either by setting a system property org.jboss.weld.se.shutdownHook to false or through the Weld.property() method) and register an alternative hook and implement the logic, it is not recommended.
The behavior across OS platforms may differ and specifically on Windows it proves to be problematic.
CDI SE applications can be bootstrapped in the following ways.
Thanks to the power of CDI’s typesafe event model, application
developers need not write any bootstrapping code. The Weld SE module
comes with a built-in main method which will bootstrap CDI for you and
then fire a ContainerInitialized event. The entry point for your
application code would therefore be a simple bean which observes the
ContainerInitialized event, as in the previous example.
In this case your application can be started by calling the provided main method like so:
java org.jboss.weld.environment.se.StartMain <args>
For added flexibility, CDI SE also comes with a bootstrap API which can
be called from within your application in order to initialize CDI and
obtain references to your application’s beans and events. The API
consists of two classes: Weld and WeldContainer.
/** A builder used to bootsrap a Weld SE container. */
public class Weld extends SeContainerInitializer implements ContainerInstanceFactory
{
/** Boots Weld and creates and returns a WeldContainer instance, through which
* beans and events can be accesed. */
public WeldContainer initialize() {...}
/** Convenience method for shutting down all the containers initialized by a specific builder instance. */
public void shutdown() {...}
}
/** Represents a Weld SE container. */
public class WeldContainer extends AbstractCDI<Object> implements AutoCloseable, ContainerInstance, SeContainer
{
/** Provides access to all events within the application. */
public Event<Object> event() {...}
/** Provides direct access to the BeanManager. */
public BeanManager getBeanManager() {...}
/** Returns the identifier of the container */
String getId() {...}
/** Shuts down the container. */
public void shutdown() {...}
/** Returns the running container with the specified identifier or null if no such container exists */
public static WeldContainer instance(String id) {...}
}
Here’s an example application main method which uses this API to
bootsrap a Wedl SE container and call a business method of a bean MyApplicationBean.
import org.jboss.weld.environment.se.Weld;
public static void main(String[] args) {
Weld weld = new Weld();
WeldContainer container = weld.initialize();
container.select(MyApplicationBean.class).get().callBusinessMethod();
container.shutdown();
}
Alternatively the application could be started by firing a custom event
which would then be observed by another simple bean. The following
example fires MyEvent on startup.
org.jboss.weld.environment.se.Weld;
public static void main(String[] args) {
Weld weld = new Weld();
WeldContainer container = weld.initialize();
container.event().select(MyEvent.class).fire( new MyEvent() );
// When all observer methods are notified the container shuts down
container.shutdown();
}
Because WeldContainer implements AutoCloseable, it can be used within a
try-with-resources block. Should the execution get out of the code block,
the Weld instance is shut down and all managed instances
are safely destroyed. Here is an example using the above code but
leaving out the shutdown() method:
org.jboss.weld.environment.se.Weld;
public static void main(String[] args) {
Weld weld = new Weld();
try (WeldContainer container = weld.initialize()) {
container.select(MyApplicationBean.class).get().callBusinessMethod();
}
}
In case of more complex scenarios, it might be handy to gain higher level of control over the bootstraping process. Using the builder, it is possible to disable automatic scanning and to explicitly select classes/packages which will be managed by Weld. Interceptors, decorators and extensions can be defined in the very same manner. Last but not least, builder can be used to set Weld-specific configuration. Following example demonstrates these features:
Weld weld = new Weld()
.disableDiscovery()
.packages(Main.class, Utils.class)
.interceptors(TransactionalInterceptor.class)
.property("org.jboss.weld.construction.relaxed", true);
try (WeldContainer container = weld.initialize()) {
MyBean bean = container.select(MyBean.class).get();
System.out.println(bean.computeResult());
}
Furthermore, it is also possible to create several independent Weld instances. Code snippet below shows how to achieve that:
Weld weld = new Weld()
.disableDiscovery();
weld.containerId("one").beanClasses(MyBean.class).initialize();
weld.containerId("two").beanClasses(OtherBean.class).initialize();
MyBean bean = WeldContainer.instance("one").select(MyBean.class).get();
System.out.println(bean.computeResult());
// Shutdown the first container
WeldContainer.instance("one").shutdown();
// Shutdown all the containers initialized by the builder instance
weld.shutdown();
Weld introduces an @ActivateRequestContext interceptor binding which enables you to explicitly activate the request context and use @RequestScoped beans in Java SE.
The following example shows how to achieve that:
public class Foo {
@Inject
MyRequestScopedBean bean;
@ActivateRequestContext
public void executeInRequestContext() {
bean.ping()
}
}
In contrast to Java EE applications, Java SE applications place no
restrictions on developers regarding the creation and usage of threads.
Therefore Weld SE provides a custom scope annotation, @ThreadScoped,
and corresponding context implementation which can be used to bind bean
instances to the current thread. It is intended to be used in scenarios
where you might otherwise use ThreadLocal, and does in fact use
ThreadLocal under the hood.
To use the @ThreadScoped annotation you need to enable the
RunnableDecorator which listens for all executions of
Runnable.run() and decorates them by setting up the thread context
beforehand, bound to the current thread, and destroying the context
afterwards.
<beans>
<decorators>
<class>org.jboss.weld.environment.se.threading.RunnableDecorator</class>
</decorator>
</beans>
Another option how to use thread context is to enable it at class or method
level by @ActivateThreadScope interceptor binding and related ActivateThreadScopeInterceptor.
public class Foo {
@Inject
MyThreadScopedBean bean;
@ActivateThreadScope
public void executeInThreadContext() {
bean.ping()
}
}
Note
It is not necessary to use @ThreadScoped in all multithreaded
applications. The thread context is not intended as a replacement for
defining your own application-specific contexts. It is generally only
useful in situations where you would otherwise have used ThreadLocal
directly, which are typically rare.
Weld SE comes packaged as a shaded jar which includes the CDI API,
Weld Core and all dependent classes bundled into a single jar. Therefore
the only Weld jar you need on the classpath, in addition to your
application’s classes and dependent jars, is the Weld SE jar. If you are
working with a pure Java SE application you launch using java, this
may be simpler for you.
If you prefer to work with individual dependencies, then you can use the
weld-se-core jar which just contains the Weld SE classes. Of course in
this mode you will need to assemble the classpath yourself.
If you work with a dependency management solution such as Maven you can declare a dependency such as:
<dependency>
<groupId>org.jboss.weld.se</groupId>
<artifactId>weld-se-shaded</artifactId>
</dependency>
By default, bean archive isolation is enabled. It means that alternatives, interceptors and decorators can be selected/enabled for a bean archive by using a beans.xml descriptor.
This behaviour can be changed by setting a system property org.jboss.weld.se.archive.isolation to false or through the Weld.property() method.
In this case, Weld will use a "flat" deployment structure - all bean classes share the same bean archive and all beans.xml descriptors are automatically merged into one. Thus alternatives, interceptors and decorators selected/enabled for a bean archive will be enabled for the whole application.
Note
Bean archive isolation is supported (and enabled by default) from version 2.2.0.Final. Previous versions only operated with the "flat" deployment structure.
Tip
All Weld SE specific configuration properties could be also set through CDI 2.0 API, i.e. using SeContainerInitializer.addProperty() and SeContainerInitializer.setProperties() methods.
CDI 1.1 introduced the bean discovery mode of annotated used for implicit bean archives (see also Section 15.6, “Packaging and deployment”). This mode may bring additional overhead during container bootstrap.
Therefore, Weld Servlet supports the use of Jandex bytecode scanning library to speed up the scanning process. Simply put the jandex.jar on the classpath.
If Jandex is not found on the classpath Weld will use the Java Reflection as a fallback.
By default, an implicit bean archive that does not contain a beans.xml descriptor is excluded from discovery.
However, it is possible to instruct Weld to scan all class path entries and discover such archive.
You can do so by setting Weld system property org.jboss.weld.se.scan.classpath.entries or CDI 2.0 system property javax.enterprise.inject.scan.implicit to true.
Another approach is to use Weld.property() and SeContainerInitializer.addProperty() methods.
Note
The bean discovery mode of annotated is supported from version 2.2.0.Final. Previous versions processed implicit bean archives in the same way as explicit bean archives.
If you are running with discovery mode annotated, then only classes with bean defining annotations will be picked up as beans.
The set of these annotations is given by CDI but Weld SE allows you to expand it via Weld.addBeanDefiningAnnotations(Class<? extends Annotation>... annotations).
Any annotation added this way will be considered a bean defining annotation when performing discovery.
Just note that added annotations are ignored if you are also using <trim/> option or Weld configuration key org.jboss.weld.bootstrap.vetoTypesWithoutBeanDefiningAnnotation.
Sometimes it could be convenient to start Servlet container programmatically.
In this case a cooperation with Weld SE might come handy.
This cooperation is based on passing Weld, WeldContainer or BeanManager instance to ServletContextHandler (in case of Jetty).
You can either set a context attribute or use org.jboss.weld.environment.servlet.Listener.
Check following examples.
Adding WeldContainer instance as a context attribute:
try (WeldContainer weld = new Weld().disableDiscovery().beanClasses(Cat.class).initialize()) {
ServletContextHandler context = new ServletContextHandler(ServletContextHandler.SESSIONS);
context.addEventListener(new Listener());
context.setAttribute(Listener.CONTAINER_ATTRIBUTE_NAME, weld);
Server server = new Server(8080);
context.setContextPath("/");
server.setHandler(context);
context.addServlet(TestServlet.class, "/test");
server.start();
}
Adding BeanManager instance as a context attribute:
Weld weld = new Weld();
WeldContainer container = weld.initialize();
Server server = new Server(8080);
context.setContextPath("/");
server.setHandler(context);
context.addServlet(TestServlet.class, "/test");
context.setAttribute(WeldServletLifecycle.BEAN_MANAGER_ATTRIBUTE_NAME, container.getBeanManager());
server.start();
Adding Weld instance as event listener with usage of org.jboss.weld.environment.servlet.Listener:
Weld builder = new Weld().disableDiscovery().beanClasses(Cat.class);
ServletContextHandler context = new ServletContextHandler(ServletContextHandler.SESSIONS);
context.addEventListener(Listener.using(builder));
Server server = new Server(8080);
context.setContextPath("/");
server.setHandler(context);
context.addServlet(TestServlet.class, "/test");
server.start();
Weld supports OSGi environment through Pax CDI. For more information on using Weld in OSGi environment check Pax CDI documentation. If you wish to see some examples, there is plenty of them in Pax CDI repository.
- 19.1. Weld configuration
- 19.1.1. Relaxed construction
- 19.1.2. Concurrent deployment configuration
- 19.1.3. Thread pool configuration
- 19.1.4. Non-portable mode during application initialization
- 19.1.5. Proxying classes with final methods
- 19.1.6. Bounding the cache size for resolved injection points
- 19.1.7. Debugging generated bytecode
- 19.1.8. Injectable reference lookup optimization
- 19.1.9. Bean identifier index optimization
- 19.1.10. Rolling upgrades ID delimiter
- 19.1.11. Development Mode
- 19.1.12. Conversation timeout and Conversation concurrent access timeout
- 19.1.13. Veto types without bean defining annotation
- 19.1.14. Memory consumption optimization - removing unused beans
- 19.2. Defining external configuration
- 19.3. Excluding classes from scanning and deployment
- 19.4. Mapping CDI contexts to HTTP requests
Weld can be configured per application through the set of properties. All the supported configuration properties are described in the following subsections.
Each configuration property can be specified (by priority in descending order):
- In a properties file named
weld.properties - As a system property
- By a bootstrap configuration provided by an integrator
If a configuration key is set in multiple sources (e.g. as a system property and in a properties file), the value from the source with higher priority is taken, other values are ignored. Unsupported configuration keys are ignored. If an invalid configuration property value is set, the container automatically detects the problem and treats it as a deployment problem.
CDI requires that beans that are normal-scoped, intercepted or decorated always define a no-argument constructor.
This requirement applies even if the bean already defines an @Inject annotated constructor with parameters.
This is purely a technical requirement implied by how Java allocates class instances.
Weld is however able to operate fine even if this requirement is not met. Weld uses special non-portable JVM APIs that allow it to allocate proxy instances without calling proxy’s constructor. This mode is not enabled by default. It can be enabled using the following configuration option:
Table 19.1. Supported configuration properties
| Configuration key | Default value | Description |
|---|---|---|
| false (true in weld-se) | If set to |
Note that relaxed construction is enabled by default in Weld SE.
By default Weld supports concurrent loading and deploying of beans. However, in certain deployment scenarios the default setup may not be appropriate.
Table 19.2. Supported configuration properties
| Configuration key | Default value | Description |
|---|---|---|
| true | If set to false, |
|
| Weld is capable of resolving observer methods for container lifecycle events in advance while bean deployer threads are blocked waiting for I/O operations (such as classloading). This process is called preloading and leads to better CPU utilization and faster application startup time. This configuration option specifies the number of threads used for preloading. If set to 0, preloading is disabled. |
Note
The bootstrap configuration may be altered using the deprecated org.jboss.weld.bootstrap.properties file located on the classpath (e.g. WEB-INF/classes/org.jboss.weld.bootstrap.properties in a web archive). The keys are concurrentDeployment and preloaderThreadPoolSize.
For certain types of tasks Weld uses its own thread pool. The thread
pool is represented by the ExecutorServices service.
First of all, let’s see what types of thread pools are available:
| Thread pool type | Description |
|---|---|
| Uses a fixed number of threads. The number of threads remains the same throughout the application. |
| Uses a fixed number of threads. A thread will be stopped after a configured period of inactivity. |
| A single-threaded thread pool |
| No executor is used by Weld |
| The default ForkJoinPool.commonPool() is used by Weld. See link for more details |
Now let’s see how to configure Weld to use a particular thread pool type:
Important
An integrator may choose to use custom implementation of org.jboss.weld.manager.api.ExecutorServices. If that’s the case, all configuration described in this section
might be ignored. An example of such integrator is WildFly.
Table 19.3. Supported configuration properties
| Configuration key | Default value | Description |
|---|---|---|
|
| The type of the thread pool. Possible values
are: |
|
| The
number of threads to be used for bean loading and deployment. Only used by |
| 60 seconds | Passed to the constructor of the
ThreadPoolExecutor class, maximum time that excess idle threads will
wait for new tasks before terminating. Only used by |
| false | If set to true, debug timing information is printed to the standard output. |
Note
It’s possible to alter the thread pool configuration using the deprecated org.jboss.weld.executor.properties file located on the classpath. The keys are threadPoolType, threadPoolSize, threadPoolKeepAliveTime and threadPoolDebug.
By default the application initialization is performed in the portable
mode which denotes specification-compliant behaviour. However it’s also
possible to enable the non-portable mode, in which some definition
errors and deployment problems do not cause application initialization
to abort. Currently the non-portable mode allows extension developers to
call all the BeanManager's methods before the
AfterDeploymentValidation event is fired.
Table 19.4. Supported configuration properties
| Configuration key | Default value | Description |
|---|---|---|
| false | If set to |
Note
The main purpose of the non-portable mode is to support some legacy extensions. It’s highly recommended to use the portable mode whenever possible - non-portable mode may lead to unexpected behaviour during initialization process.
Weld offers a non-standard way to create proxies for non-private, non-static final methods. When using this option, such final method will be ignored during proxy generation and the Java type will be proxied (as opposed to classical behavior when there would be an exception thrown). Since the method was ignored during proxy creation, it should never be invoked.
In order to make this work, use the below shown configuration key and pass it a regular expression. When Weld finds an unproxyable type which matches this pattern, the final methods will be ignored and the type will be proxied.
Table 19.5. Supported configuration properties
| Configuration key | Default value | Description |
|---|---|---|
| If defined, matching classes will be proxied and final methods ignored. |
Weld caches already resolved injection points in order to resolve them faster in the future. A separate type-safe resolver exists for beans, decorators, disposers, interceptors and observers. Each of them stores resolved injection points in its cache, which maximum size is bounded by a default value (common to all of them).
Table 19.6. Supported configuration properties
| Configuration key | Default value | Description |
|---|---|---|
| 65536 | The upper bound of the cache. |
For debugging purposes, it’s possible to dump the generated bytecode of client proxies and enhanced subclasses to the filesystem.
Table 19.7. Supported configuration properties
| Configuration key | Default value | Description |
|---|---|---|
| The file path where the files should be stored. |
For certain combinations of scopes, the container is permitted to optimize an injectable reference lookup. Enabling this feature brings some performance boost but causes javax.enterprise.context.spi.AlterableContext.destroy() not to work properly for @ApplicationScoped and @RequestScoped beans. Therefore, the optimization is disabled by default.
Table 19.8. Supported configuration properties
| Configuration key | Default value | Description |
|---|---|---|
| false | If set to |
This optimization is used to reduce the HTTP session replication overhead. However, the inconsistency detection mechanism may cause problems in some development environments. It’s recommended to disable this optimization during the development phase.
Table 19.9. Supported configuration properties
| Configuration key | Default value | Description |
|---|---|---|
| true (false in weld-servlet) | If set to |
Note
This optimization is disabled by default in Servlet containers.
Note
This configuration property should only be used if experiencing problems with rolling upgrades.
The delimiter is used to abbreviate a bean archive identifier (which is usually derived from the archive name) before used as a part of an identifier of an internal component (such as bean).
The abbreviation proceeds as follows:
- Try to find the first occurrence of the specified delimiter
- If not found, the identifier is not abbreviated
- If found, try to extract the archive suffix (
.war,.ear, etc.) and the final value consists of the part before the delimiter and the archive suffix (if extracted)
Note that the delimiter is used for all bean archives forming the application.
An example: Given an application with two versions going by the names test__1-1.war and test__1-2.war.
Weld normally cannot support replication of @SessionScoped beans between these two deployments.
Using this configuration option with delimiter "__" will allow Weld to see both applications simply as test.war, hence allowing for session replication.
Table 19.10. Supported configuration properties
| Configuration key | Default value | Description |
|---|---|---|
| The delimiter used during ID generation. |
Warning
Bean archive identifiers are provided by integrators. Therefore, the abbreviation algorithm may not always function properly.
Some features of the development mode may have negative impact on the performance and/or functionality of the application. The following configuration properties allow to tune or disable these features, e.g. to specify the set of components which will be monitored.
Table 19.11. Supported configuration properties
| Configuration key | Tool | Default value | Description |
|---|---|---|---|
| '' | A regular expression. If a non-empty string and the base type for an AnnotatedType or a declaring type for an AnnotatedMember matches this pattern the type is excluded from monitoring. | |
| true | If set to | |
| '' | A regular expression. If a non-empty string and the runtime class of the event object matches this pattern the event is excluded from monitoring. | |
| false | If set to | |
| true | If set to | |
| false | If set to | |
| '' | If a non-empty string the Probe data will be automatically exported after deployment validation. The value represents the path of the directory where to export the data file. |
Tip
To disable the monitoring entirely set org.jboss.weld.probe.invocationMonitor.excludeType and org.jboss.weld.probe.eventMonitor.excludeType properties to .*.
Weld provides configuration properties to override values for default conversation timeout and default conversation concurrent access timeout which represents the maximum time to wait on the conversation concurrent lock.
Table 19.12. Supported configuration properties
| Configuration key | Default value (ms) | Description |
|---|---|---|
| 600000 | Conversation timeout represent the maximum time during which is the conversation active. |
| 1000 | Conversation concurrent access timeout represent the maximum time to wait on the conversation concurrent lock. |
Sometimes it might be useful to process all types during bootstrap, i.e. fire/observe ProcessAnnotatedType event for each Java class discovered, but veto types which are not annotated with a bean defining annotation.
The main reason is that not all classes that meet all of the necessary conditions are intended to become beans.
And so vetoing such types helps to conserve memory used by the container.
Note that if you use bean-discovey-mode=annotated (implicit bean archive) then no ProcessAnnotatedType will be fired for any such type because it’s not discovered at all.
And there might be portable extensions which use ProcessAnnotatedType to extract some important information from classes which are not beans.
Therefore, Weld allows to use bean-discovey-mode=all (explicit bean archive) and veto types without a bean defining annotation whose AnnotatedType#getJavaClass().getName() matches a regular expression.
In other words, a type is vetoed if its name matches a regular expression and at the same time is not annotated with a bean defining annotation.
The functionality is implemented as a built-in portable extension processing all types from all bean archives.
Table 19.13. Supported configuration properties
| Configuration key | Default value | Description |
|---|---|---|
| A regular expression. If a non-empty string, then all annotated types whose |
CDI applications consist of user-defined beans implementing the business logic, but also beans coming from libraries (e.g. DeltaSpike) and integrations (e.g. various Java EE technologies - JSF, Bean Validation, Batch). Most applications actually use only a small part of the beans provided by libraries and integrations. Still, Weld has to retain the metadata for all the beans in memory which can be considerably vast footprint, depending on the application. If Section A.2.13, “Optimized cleanup after bootstrap” is allowed, Weld can remove unused beans after bootstrap.
An unused bean:
- is not excluded by the configuration properties described below,
- is not a built-in bean, session bean, extension, interceptor or decorator,
- does not have a name
- does not declare an observer
- is not eligible for injection to any injection point,
- does not declare a producer which is eligible for injection to any injection point,
- is not eligible for injection into any
Instance<X>injection point.
Tip
If you run Section 22.2.1, “Probe” and list all the beans in your application, you will almost certainly notice some of them coming from 3rd party libraries which you never use (marked with a trash icon). Those are candidates for unused beans as you can be sure you are not using them.
Note
As usual, there is a trade-off between memory consumption and bootstrap time. The results may vary depending on the application, but you should always expect (most probably negligible) increase of the bootstrap time.
The following properties can be used to restrict the set of beans Weld is going to remove, e.g. to eliminate the false positives.
Table 19.14. Supported configuration properties
| Configuration key | Default value | Description |
|---|---|---|
|
| A regular expression. A bean whose |
|
| A regular expression. A bean is not removed if the corresponding |
Weld allows integrators to provide an external configuration - a class which implements org.jboss.weld.configuration.spi.ExternalConfiguration interface.
This interface has getConfigurationProperties method which returns a Map with provided configuration and also inherits a cleanup method because it extends org.jboss.weld.bootstrap.api.Service.
Below is a short example of ExternalConfiguration implementation:
public class MyExternalConfiguration implements ExternalConfiguration {
@Override
public void cleanup() {
// cleanup code
}
@Override
public Map<String, Object> getConfigurationProperties() {
Map<String, Object> properties = new HashMap<String, Object>();
properties.put(ConfigurationKey.CONCURRENT_DEPLOYMENT.get(), false);
properties.put(ConfigurationKey.PRELOADER_THREAD_POOL_SIZE.get(), 200);
properties.put(ConfigurationKey.PROXY_DUMP.get(), "/home/weld");
return properties;
}
}
Bear in mind that because ExternalConfiguration extends a Service it is required that any custom external configuration implementation is explicitly registered. See Section A.1, “The Weld SPI” for more information.
Last but not least external configuration is considered a source with the lowest priority which means that the properties specified there can be overriden by other sources such as system properties. For information on supported configuration keys, see Section 19.1, “Weld configuration”. Also note that entries with unsupported properties will be ignored while invalid property values will lead to deployment problem.
CDI 1.1 allows you to exclude classes in your archive from being scanned, having container lifecycle events fired, and being deployed as beans. See also 12.4.2 Exclude filters.
Note
Weld still supports the original non-portable way of excluding classes
from discovery. The formal specification can be found in the xsd,
located at http://jboss.org/schema/weld/beans_1_1.xsd. Unlike Weld, the
CDI specification does not support regular expression patterns and !
character to invert the activation condition.
All the configuration is done in the beans.xml file. For more
information see Section 15.6, “Packaging and deployment”.
<?xml version="1.0" encoding="UTF-8"?>
<beans xmlns="http://xmlns.jcp.org/xml/ns/javaee">
<scan>
<!-- Don't deploy the classes for the swing app! -->
<exclude name="com.acme.swing.**" />
<!-- Don't include GWT support if GWT is not installed -->
<exclude name="com.acme.gwt.**">
<if-class-not-available name="com.google.GWT"/>
</exclude>
<!--
Exclude types from com.acme.verbose package if the system property verbosity is set to low
i.e.
java ... -Dverbosity=low
-->
<exclude name="com.acme.verbose.*">
<if-system-property name="verbosity" value="low"/>
</exclude>
<!--
Don't include JSF support if Wicket classes are present, and the viewlayer system
property is set
-->
<exclude name="com.acme.jsf.**">
<if-class-available name="org.apache.wicket.Wicket"/>
<if-system-property name="viewlayer"/>
</exclude>
</scan>
</beans>
In this example we show the most common use cases for exercising fine
control over which classes Weld scans. The first filter excludes all
types whose package name starts with com.acme.swing, and in most cases
this will be sufficient for your needs.
However, sometimes it’s useful to be able to activate the filter
depending on the environment used. In this case, Weld allows you to
activate (or deactivate) a filter based on either system properties or
whether a class is available. The second filter shows the use case of
disabling scanning of certain classes depending on the capabilities of
the environment you deploy to - in this case we are excluding GWT
support (all types whose package name starts with com.acme.gwt) if GWT
is not installed.
Note
If you specify just a system property name, Weld will activate the filter if that system property has been set (with any value). If you also specify the system property value, then Weld will only activate the filter if the system property’s value matches exactly.
The third filter shows how to exclude all types from a specific package
(note the name attribute has suffix ".*").
The fourth filter shows more a advanced configurations, where we use multiple activation conditions to decide whether to activate the filter.
You can combine as many activation conditions as you like (all must be true for the filter to be activated). If you want to a filter that is active if any of the activation conditions are true, then you need multiple identical filters, each with different activation conditions.
By default, CDI contexts are activated at the beginning of an HTTP request processing and deactivated once the processing finishes. This may represent an unnecessary overhead in certain situations, for example static resource serving.
Weld allows CDI context support to be mapped to a certain subset of requests only. A regular expression may be used for filtering HTTP requests that should have CDI contexts active during their processing.
<web-app version="3.1" xmlns="http://xmlns.jcp.org/xml/ns/javaee/"
xmlns:xsi="http://www.w3.org/2001/XMLSchema-instance"
xsi:schemaLocation="http://xmlns.jcp.org/xml/ns/javaee http://xmlns.jcp.org/xml/ns/javaee/web-app_3_1.xsd">
<context-param>
<param-name>org.jboss.weld.context.mapping</param-name>
<param-value>.*\.html</param-value>
</context-param>
</web-app>
Weld is using JBoss Logging, an abstraction layer which provides support for the internationalization and localization of log messages and exception messages. However, JBoss Logging itself does not write any log messages. Instead, it only constructs a log message and delegates to one of the supported logging frameworks.
The supported "back-end" frameworks include:
- jboss-logmanager
- Log4j
- SLF4J
- JDK logging
A system property org.jboss.logging.provider may be used to specify the logging framework directly. Supported values are jboss, jdk, log4j and slf4j. If this system property is not set, JBoss Logging will attempt to find the logging frameworks from the above-mentioned list on the classpath - the first one found is taken.
If using Weld with a Java EE container (e.g. WildFly) the logging configuration is under the direction of the container. You should follow the container-specific guides to change the configuration (e.g. WildFly Admin Guide - Logging Configuration).
Unlike the case of Java EE containers a web application deployed to a servlet container usually bundles a logging framework and possibly some configuration file. In this case, the configuration is in hands of the application developer (provided the bundled framework is supported by JBoss Logging).
If no logging framework is bundled follow the container-specific guides to change the configuration (e.g. Logging in Tomcat).
This is very similar to servlet containers except the class loading is usually even less complicated.
Tip
If you just want to see the debug log messages as quickly as possible in Weld SE try this:
- add org.slf4j:slf4j-simple on the classpath and remove other SLF4J bindings,
- set the "back-end" framework to
slf4j, and change the level for
org.jboss.weld, e.g.:mvn clean test -Dtest=MyWeldSETest -Dorg.jboss.logging.provider=slf4j -Dorg.slf4j.simpleLogger.log.org.jboss.weld=debug
WeldManager is an enhanced version of BeanManager which contains several additional methods.
While some of them are designed to be used by integrators such as WildFly, others can be handy for users writing their CDI applications.
Beginning with 3.1.0.Final, there is a built-in bean provided so that you can easily obtain it via @Inject WeldManager.
Here is a list of methods that this interface offers on top of what you can find in BeanManager:
public interface WeldManager extends BeanManager {
<T> InjectionTarget<T> createInjectionTarget(EjbDescriptor<T> descriptor);
<T> Bean<T> getBean(EjbDescriptor<T> descriptor);
<T> EjbDescriptor<T> getEjbDescriptor(String ejbName);
ServiceRegistry getServices();
<X> InjectionTarget<X> fireProcessInjectionTarget(AnnotatedType<X> type);
<X> InjectionTarget<X> fireProcessInjectionTarget(AnnotatedType<X> annotatedType, InjectionTarget<X> injectionTarget);
String getId();
Instance<Object> instance();
<T> WeldInjectionTargetFactory<T> getInjectionTargetFactory(AnnotatedType<T> type);
<T> WeldCreationalContext<T> createCreationalContext(Contextual<T> contextual);
Bean<?> getPassivationCapableBean(BeanIdentifier identifier);
<T> WeldInjectionTargetBuilder<T> createInjectionTargetBuilder(AnnotatedType<T> type);
WeldManager unwrap();
<T> AnnotatedType<T> createAnnotatedType(Class<T> type, String id);
<T> void disposeAnnotatedType(Class<T> type, String id);
boolean isContextActive(Class<? extends Annotation> scopeType);
Collection<Class<? extends Annotation>> getScopes();
Collection<Context> getActiveContexts();
Collection<WeldAlterableContext> getActiveWeldAlterableContexts();
}
Please refer to the JavaDoc in the API to see what each method does.
Weld comes with a special mode for application development. When enabled, certain built-in tools which facilitate the development of CDI applications, are available.
Note
The development mode should not be used in production as it may have negative impact on the performance of the application. Make sure to disable the development mode before deploying to production.
Warning
Not all environments and containers may support the development mode and all tools. Check the tools details and the container documentation.
For a web application, set the Servlet initialization parameter org.jboss.weld.development to true:
<web-app version="3.1" xmlns="http://xmlns.jcp.org/xml/ns/javaee/"
xmlns:xsi="http://www.w3.org/2001/XMLSchema-instance"
xsi:schemaLocation="http://xmlns.jcp.org/xml/ns/javaee http://xmlns.jcp.org/xml/ns/javaee/web-app_3_1.xsd">
<context-param>
<param-name>org.jboss.weld.development</param-name>
<param-value>true</param-value>
</context-param>
</web-app>
Note
An integrator is allowed to specify an alternative way of enabling the development mode. See for example WildFly Documentation.
For a Java SE application, set the system property org.jboss.weld.development to true:
java -cp myCoolApp.jar -Dorg.jboss.weld.development=true com.foo.MyMain
or use the Weld.enableDevMode() method:
org.jboss.weld.environment.se.Weld;
public static void main(String[] args) {
try (WeldContainer container = new Weld().enableDevMode().initialize()) {
...
}
}
You should see the following log message during initialization of your application:
===================================== Weld Development Mode: ENABLED ------------------------------------ Disable this mode in production - it may have negative impact on performance and/or represent a potential security risk =====================================
This tool allows you to inspect the application CDI components at runtime.
There is a default UI - HTML client (single-page application), which is only available in web applications.
Just point your browser to protocol://host:port/webappContextPath/weld-probe, e.g. http://localhost:8080/weld-numberguess/weld-probe.
However, it’s also posible to obtain the JSON data through the REST API, eventually (if JMX support is enabled) through the MXBean of name org.jboss.weld.probe:type=JsonData,context=ID where ID should be replaced with an idenfitier of an application.
Right now, Probe integration is provided for WildFly, Tomcat and Jetty (Weld Servlet), and Weld SE.
Tip
There are some configuration properties which allow to tune or disable Probe features, e.g. to restrict the set of components which will be monitored. See also Section 19.1.11, “Development Mode”.
If a deployment validation fails and the development mode is enabled a simple HTML report is generated.
The report contains a lot of useful information such as Weld version, list of enabled beans, list of bean archives, Weld configuration, etc.
By default, the report is generated to the user’s current working directory, ie. user.dir.
However, it is also possible to specify a path to the target directory using the org.jboss.weld.probe.exportDataAfterDeployment configuration property - see also Section 19.1.11, “Development Mode”.
You should see a similar log message which contains the path to the report file:
===================================== Weld - Deployment Validation: FAILED ------------------------------------ HTML report generated to: file:///path/to/report/weld-validation-report.html =====================================
Tip
We encourage you to always attach this report when asking a question on the mailing list or any other communication channel.
Weld allows you to easily manage the built in contexts by injecting them and calling lifecycle methods. Weld defines two types of context, managed and unmanaged. Managed contexts can be activated (allowing bean instances to be retrieved from the context), invalidated (scheduling bean instances for destruction) and deactivated (stopping bean instances from being retrieved, and if the context has been invalidated, causing the bean instances to be destroyed). Unmanaged contexts are always active; some may offer the ability to destroy instances.
Managed contexts can either be bound or unbound. An unbound context is scoped to the thread in which it is activated (instances placed in the context in one thread are not visible in other threads), and is destroyed upon invalidation and deactivation. Bound contexts are attached to some external data store (such as the HTTP Session or a manually propagated map) by associating the data store with the context before calling activate, and dissociating the data store after calling activate.
Tip
Weld automatically controls context lifecycle in many scenarios such as HTTP requests, EJB remote invocations, and MDB invocations. Many of the extensions for CDI offer context lifecycle for other environments, it’s worth checking to see if there is a suitable extension before deciding to manage the context yourself.
Weld provides a number of built in contexts, which are shown in Table 23.1, “Available Contexts in Weld”.
Table 23.1. Available Contexts in Weld
| Scope | Qualifiers | Context | Notes |
|---|---|---|---|
|
|
| The dependent context is unbound and unmanaged |
|
|
| An unbound request context, useful for testing |
|
|
| A request context bound to a manually propagated map, useful for testing or non-Servlet environments |
|
|
| A request context bound to a Servlet request, used for any Servlet based request context |
|
|
| A request context bound to a an interceptor’s invocation context, used for EJB invocations outside of Servlet requests |
|
|
| A conversation context bound to two manually propagated maps (one which represents the request and one which represents the session), useful for testing or non-Servlet environments |
|
|
| A conversation context bound to a Servlet request, used for any Servlet based conversation context |
|
|
| A session context bound to a manually propagated map, useful for testing or non-Servlet environments |
|
|
| A session context bound to a Servlet request, used for any Servlet based session context |
|
|
| An application context backed by an application scoped singleton, it is unmanaged and unbound but does offer an option to destroy all entries |
|
|
| A singleton context backed by an application scoped singleton, it is unmanaged and unbound but does offer an option to destroy all entries |
Unmanaged contexts offer little of interest in a discussion about managing context lifecycles, so from here on in we will concentrate on the managed contexts (unmanaged contexts of course play a vital role in the functioning of your application and Weld!). As you can see from the table above, the managed contexts offer a number of different implementations for the same scope; in general, each flavor of context for a scope has the same API. We’ll walk through a number of common lifecycle management scenarios below; armed with this knowledge, and the Javadoc, you should be able to work with any of the context implementations Weld offers.
We’ll start simple with the BoundRequestContext, which you might use
to provide the request scope outside of a Servlet request or EJB
Invocation.
/* Inject the BoundRequestContext. */
/* Alternatively, you could look this up from the BeanManager */
@Inject BoundRequestContext requestContext;
...
/* Start the request, providing a data store which will last the lifetime of the request */
public void startRequest(Map<String, Object> requestDataStore) {
// Associate the store with the context and activate the context
requestContext.associate(requestDataStore);
requestContext.activate();
}
/* End the request, providing the same data store as was used to start the request */
public void endRequest(Map<String, Object> requestDataStore) {
try {
/* Invalidate the request (all bean instances will be scheduled for destruction) */
requestContext.invalidate();
/* Deactivate the request, causing all bean instances to be destroyed (as the context is invalid) */
requestContext.deactivate();
} finally {
/* Ensure that whatever happens we dissociate to prevent any memory leaks */
requestContext.dissociate(requestDataStore);
}
}
The bound session context works in much the same way, excepting that invalidating and deactivating the session context causes the any conversations in the session to be destroyed as well. The HTTP session context and HTTP request context also work similarly, and might be of use if you find yourself creating threads from an HTTP request). The HTTP session context additionally offers a method which can immediately destroy the context.
Note
Weld’s session contexts are "lazy" and don’t require a session to actually exist until a bean instance must be written.
The conversation context offers a few more options, which we will walk through here.
@Inject BoundConversationContext conversationContext;
...
/* Start a transient conversation */
/* Provide a data store which will last the lifetime of the request */
/* and one that will last the lifetime of the session */
public void startTransientConversation(Map<String, Object> requestDataStore,
Map<String, Object> sessionDataStore) {
resumeOrStartConversation(requestDataStore, sessionDataStore, null);
}
/* Start a transient conversation (if cid is null) or resume a non-transient */
/* conversation. Provide a data store which will last the lifetime of the request */
/* and one that will last the lifetime of the session */
public void resumeOrStartConversation(Map<String, Object> requestDataStore,
Map<String, Object> sessionDataStore,
String cid) {
/* Associate the stores with the context and activate the context */
* BoundRequest just wraps the two datastores */
conversationContext.associate(new MutableBoundRequest(requestDataStore, sessionDataStore));
// Pass the cid in
conversationContext.activate(cid);
}
/* End the conversations, providing the same data store as was used to start */
/* the request. Any transient conversations will be destroyed, any newly-promoted */
/* conversations will be placed into the session */
public void endOrPassivateConversation(Map<String, Object> requestDataStore,
Map<String, Object> sessionDataStore) {
try {
/* Invalidate the conversation (all transient conversations will be scheduled for destruction) */
conversationContext.invalidate();
/* Deactivate the conversation, causing all transient conversations to be destroyed */
conversationContext.deactivate();
} finally {
/* Ensure that whatever happens we dissociate to prevent memory leaks*/
conversationContext.dissociate(new MutableBoundRequest(requestDataStore, sessionDataStore));
}
}
The conversation context also offers a number of properties which
control the behavior of conversation expiration (after this period of
inactivity the conversation will be ended and destroyed by the
container), and the duration of lock timeouts (the conversation context
ensures that a single thread is accessing any bean instances by locking
access, if a lock can’t be obtained after a certain time Weld will error
rather than continue to wait for the lock). Additionally, you can alter
the name of the parameter used to transfer the conversation id (by
default, cid).
Weld also introduces the notion of a ManagedConversation, which
extends the Conversation interface with the ability to lock, unlock
and touch (update the last used timestamp) a conversation. Finally, all
non-transient conversations in a session can be obtained from the
conversation context, as can the current conversation.
Note
Weld’s conversations are not assigned ids until they become non-transient.
By context propagation we understand a scenario in which you want to capture a collection of contextual instances bound to certain context in one thread and provide them as context state in another thread. Starting with Weld 3.1.0.Final, this kind of context propagation is possible.
Note
Context propagation comes with some additional requirements on user code and may not work for every scenario!
First of all, what contexts are affected and how:
Application context
- Works out of the box, no propagation needed
Singleton context
- Works out of the box, no propagation needed
Dependent context
- By nature of this context, this cannot be propagated
Request, session, conversation contexts
- These can be manually propagated if desired
In order to achieve context propagation you generally need the following steps:
- Obtain collection of contextual instances from current thread
- In another thread, obtain a reference to given context and activate it
- Feed this newly activated context the instances you previously obtained
- Perform your tasks
- Clean up the context by deactivating it
There are several new things in Weld API allowing for this.
Firstly, all contexts supporting propagation now implement org.jboss.weld.context.WeldAlterableContext, an interface extending javax.enterprise.context.spi.AlterableContext.
Methods on WeldAlterableContext allow to capture current context state, returning a collection of all contextual instances, as well as clear and set the context state by feeding it a collection of contextual instances.
public interface WeldAlterableContext extends AlterableContext {
default <T> Collection<ContextualInstance<T>> getAllContextualInstances();
default <T> void clearAndSet(Collection<ContextualInstance<T>> setOfInstances);
}
In order to get hold of these contexts, the best approach is to use WeldManager, an injectable bean providing some capabilities on top of what BeanManager has.
Following WeldManager methods are useful for context propagation:
public interface WeldManager extends BeanManager {
// excerpt of interface methods is shortened here
boolean isContextActive(Class<? extends Annotation> scopeType);
Collection<Class<? extends Annotation>> getScopes();
default Collection<Context> getActiveContexts() {
return getScopes().stream()
.filter(this::isContextActive)
.map(this::getContext)
.collect(Collectors.toSet());
}
default Collection<WeldAlterableContext> getActiveWeldAlterableContexts() {
return getScopes().stream()
.filter(this::isContextActive)
.map(this::getContext)
.filter(t -> t instanceof WeldAlterableContext)
.map(t -> (WeldAlterableContext) t)
.collect(Collectors.toSet());
}
}
There is a concise example in a form of a test in our code showing how to propagate all built-in contexts. This doc only contains an excerpt from it, you can look here to get the full picture.
Following code shows a service that provides an extra thread onto which you offload a Callable<T> that uses beans from currently active context.
The service activates contexts, propagates state from original thread, executes task and cleans up.
Bound versions of Weld context implementations are used as on this new thread there is no actual HTTP request or session existing.
public class ContextPropagationService {
private static final ExecutorService executor = Executors.newFixedThreadPool(1);
public static <T> Future<T> propagateContextsAndSubmitTask(Callable<T> task) {
// gather all the contexts we want to propagate and the instances in them
Map<Class<? extends Annotation>, Collection<ContextualInstance<Object>>> scopeToContextualInstances = new HashMap<>();
WeldManager get = CDI.current().select(WeldManager.class).get();
for (WeldAlterableContext context : CDI.current().select(WeldManager.class).get().getActiveWeldAlterableContexts()) {
scopeToContextualInstances.put(context.getScope(), context.getAllContextualInstances());
}
// We create a task wrapper which will make sure we have contexts propagated
Callable<T> wrappedTask = new Callable<T>() {
@Override
public T call() throws Exception {
// Get WeldManager,get instances of @Bound contexts for request, session and conversation scopes
WeldManager weldManager = CDI.current().select(WeldManager.class).get();
BoundRequestContext requestContext = weldManager.instance().select(BoundRequestContext.class, BoundLiteral.INSTANCE).get();
BoundSessionContext sessionContext = weldManager.instance().select(BoundSessionContext.class, BoundLiteral.INSTANCE).get();
BoundConversationContext conversationContext = weldManager.instance().select(BoundConversationContext.class, BoundLiteral.INSTANCE).get();
// We will be using bound contexts, prepare backing structures for contexts
Map<String, Object> sessionMap = new HashMap<>();
Map<String, Object> requestMap = new HashMap<>();
BoundRequest boundRequest = new MutableBoundRequest(requestMap, sessionMap);
// activate contexts
requestContext.associate(requestMap);
requestContext.activate();
sessionContext.associate(sessionMap);
sessionContext.activate();
conversationContext.associate(boundRequest);
conversationContext.activate();
// propagate all contexts that have some bean in them
if (scopeToContextualInstances.get(requestContext.getScope()) != null) {
requestContext.clearAndSet(scopeToContextualInstances.get(requestContext.getScope()));
}
if (scopeToContextualInstances.get(sessionContext.getScope()) != null) {
sessionContext.clearAndSet(scopeToContextualInstances.get(sessionContext.getScope()));
}
if (scopeToContextualInstances.get(conversationContext.getScope()) != null) {
conversationContext.clearAndSet(scopeToContextualInstances.get(conversationContext.getScope()));
}
// now execute the actual original task
T result = task.call();
// cleanup, context deactivation, do not trigger @PreDestroy/@Disposes
requestContext.deactivate();
conversationContext.deactivate();
sessionContext.deactivate();
// all done, return
return result;
}
};
return executor.submit(wrappedTask);
}
}
There are several things that can possibly go wrong when propagating contexts. User code needs to be aware that propagation can happen and prepare their beans accordingly. For instance request scoped beans could now theoretically be accessed concurrently which wasn’t the case before.
@PreDestroy and @Disposes on your beans could cause inconsistent state based on how you perform the propagation.
Since the same bean is now used in several threads, all of them can, in invalidating and deactivating contexts, trigger these methods but the bean will still exist in yet another thread.
The example given above avoids calling context.invalidate() and only performs context.deactivate() - this avoids invoking @PreDestroy/@Disposes methods but could possibly lead to never invoking them if no thread does it.
Note that this problem only concerns request, session and conversation beans where you manually need to activate/deactivate contexts.
Application/singleton scoped bean would still work and their cleanup callbacks will only be invoked once during container shutdown.
There is currently no way to propagate any other contexts than those mentioned here.
Custom scopes as well as scopes from other EE specifications have no support for this feature.
The reason is that while technically any context implementing WeldAlterableContext can be used to obtain/set collection of contextual instances, there is no way of knowing how to activate custom contexts in different threads.
Last but not least, context propagator needs to be aware of context implementations existing in Weld, see Table 23.1, “Available Contexts in Weld”.
However, in a new thread some extra knowledge is required to activate the contexts.
Bound versions (backed by a provided storage; a map in our case) were used, and those need to have a storage associated before activating them, hence the code such as requestContext.associate(requestMap).
There is no need to use bound version though; propagators are free to choose from other context implementations.
If you want to use Weld in another environment, you will need to provide certain information to Weld via the integration SPI. In this Appendix we will briefly discuss the steps needed.
If you are upgrading existing Weld integration to work with Weld 3, see Section A.3.6, “Migration from Weld 2.4 to 3.0”.
Note
If you just want to use managed beans, and not take advantage of enterprise services (EE resource injection, CDI injection into EE component classes, transactional events, support for CDI services in EJBs) and non-flat deployments, then the generic servlet support provided by the "Weld: Servlets" extension will be sufficient, and will work in any container supporting the Servlet API.
All SPIs and APIs described have extensive JavaDoc, which spell out the detailed contract between the container and Weld.
The Weld SPI is located in the weld-spi module, and packaged as
weld-spi.jar. Some SPIs are optional, and should only be implemented
if you need to override the default behavior; others are required.
All interfaces in the SPI support the decorator pattern and provide a
Forwarding class located in the helpers sub package. Additional,
commonly used, utility classes, and standard implementations are also
located in the helpers sub package.
Weld supports multiple environments. An environment is defined by an
implementation of the Environment interface. A number of standard
environments are built in, and described by the Environments
enumeration. Different environments require different services to be
present. For example a Servlet container doesn’t require transaction,
EJB or JPA services.
Weld uses services to communicate with its environment. A service is a
java class that implements the org.jboss.weld.bootstrap.api.Service
interface and is explicitly registered. A service may be BDA-specific or
may be shared across the entire application.
public interface Service {
public void cleanup();
}
Certain services are only used at bootstrap and need to be cleaned up
afterwards in order not to consume memory. A service that implements the
specialized org.jboss.weld.bootstrap.api.BootstrapService interface
receives a cleanupAfterBoot() method invocation once Weld
initialization is finished but before the deployment is put into
service.
public interface BootstrapService extends Service {
void cleanupAfterBoot();
}
Weld uses a generic-typed service registry to allow services to be
registered. All services implement the Service interface. The service
registry allows services to be added and retrieved.
An application is often comprised of a number of modules. For example, a
Java EE deployment may contain a number of EJB modules (containing
business logic) and war modules (containing the user interface). A
container may enforce certain accessibility rules which limit the
visibility of classes between modules. CDI allows these same rules to
apply to bean and observer method resolution. As the accessibility rules
vary between containers, Weld requires the container to describe the
deployment structure, via the Deployment SPI.
The CDI specification discusses Bean Archives (BAs)—archives which are marked as containing beans which should be deployed to the CDI container, and made available for injection and resolution. Weld reuses this description and uses Bean Deployment Archives (BDA) in its deployment structure SPI.
Each deployment exposes the containing BDAs that form a graph. A node in the graph represents a BDA. Directed edges between nodes designate visibility. Visibility is not transitive (i.e. a bean from BDA A can only see beans in BDAs with which A is directly connected by a properly oriented edge).
To describe the deployment structure to Weld, the container should
provide an implementation of Deployment.
Deployment.getBeanDeploymentArchives() allows Weld to discover the
modules which make up the application. The CDI specification also allows
beans to be specified programmatically as part of the bean deployment.
These beans may, or may not, be in an existing BDA. For this reason,
Weld will call Deployment.loadBeanDeploymentArchive(Class clazz) for
each programmatically described bean.
As programmatically described beans may result in additional BDAs being
added to the graph, Weld will discover the BDA structure every time an
unknown BDA is returned by Deployment.loadBeanDeploymentArchive.
Note
In a strict container, each BDA might have to explicitly specify which
other BDAs it can access. However many containers will allow an easy
mechanism to make BDAs bi-directionally accessible (such as a library
directory). In this case, it is allowable (and reasonable) to describe
all such archives as a single, virtual BeanDeploymentArchive.
A container, might, for example, use a flat accessibility structure for
the application. In this case, a single BeanDeploymentArchive would be
attached to the Deployment.
BeanDeploymentArchive provides three methods which allow it’s contents
to be discovered by Weld—BeanDeploymentArchive.getBeanClasses() must
return all the classes in the BDA, BeanDeploymentArchive.getBeansXml()
must return a data structure representing the beans.xml deployment
descriptor for the archive, and BeanDeploymentArchive.getEjbs() must
provide an EJB descriptor for every EJB in the BDA, or an empty list if
it is not an EJB archive.
To aid container integrator, Weld provides a built-in beans.xml
parser. To parse a beans.xml into the data-structure required by
BeanDeploymentArchive, the container should call
Bootstrap.parse(URL). Weld can also parse multiple beans.xml files,
merging them to become a single data-structure. This can be achieved by
calling Bootstrap.parse(Iterable<URL>).
When multiple beans.xml files are merged, Weld keeps duplicate enabled
entries (interceptors, decorators or alternatives). This may cause
validation problems when multiple physical archives which define an
overlapping enabled entries are merged. A version of the
Bootstrap.parse() method that provides control over whether duplicate
enabled entries are remove or not is provided:
Bootstrap.parse(Iterable<URL> urls, boolean removeDuplicates).
BDA X may also reference another BDA Y whose beans can be resolved by, and injected into, any bean in BDA X. These are the accessible BDAs, and every BDA that is directly accessible by BDA X should be returned. A BDA will also have BDAs which are accessible transitively, and the transitive closure of the sub-graph of BDA X describes all the beans resolvable by BDA X.
Note
In practice, you can regard the deployment structure represented by
Deployment, and the virtual BDA graph as a mirror of the classloader
structure for a deployment. If a class can from BDA X can be loaded by
another in BDA Y, it is accessible, and therefore BDA Y’s accessible
BDAs should include BDA X.
To specify the directly accessible BDAs, the container should provide an
implementation of BeanDeploymentArchive.getBeanDeploymentArchives().
Note
Weld allows the container to describe a circular graph, and will convert a graph to a tree as part of the deployment process.
Certain services are provided for the whole deployment, whilst some are
provided per-BDA. BDA services are provided using
BeanDeploymentArchive.getServices() and only apply to the BDA on which
they are provided.
The contract for Deployment requires the container to specify the
portable extensions (see chapter Packaging and deployment of the CDI specification) which
should be loaded by the application. To aid the container integrator,
Weld provides the method Bootstrap.loadExtensions(ClassLoader) which
will load the extensions for the specified classloader.
In Java EE environment, description of each Java EE module that contains bean archives deployment should be provided. This applies to:
- web modules (wars)
- EJB modules
- connector modules (rar)
- application client modules
- enterprise archive libraries (ear/lib)
For each such module the integrator should create an instance of the EEModuleDescriptor
which describes the module. EEModuleDescriptorImpl is provided for convenience.
An EEModuleDescriptor instance that represents a given module should be registered
as a per bean archive service in each BeanDeploymentArchive that belongs to the given
module. This applies both to physical bean archives deployed within the given module
and also to logical bean archives that belong to the module. Bean archives that are not
part of a Java EE module (e.g. built-in server libraries) are not required to have a
EEModuleDescriptor service registered.
Weld delegates EJB 3 bean discovery to the container so that it doesn’t duplicate the work done by the EJB container, and respects any vendor-extensions to the EJB definition.
The EjbDescriptor should return the relevant metadata as defined in
the EJB specification. Each business interface of a session bean should
be described using a BusinessInterfaceDescriptor.
By default, Weld uses the EJB component class when creating new EJB instances.
This may not always be desired especially if the EJB container uses subclassing
internally. In such scenario, the EJB container requires that the subclass
it generated is used for creating instances instead of the component class.
An integrator can communicate such layout to Weld by additionally implementing the optional
SubclassedComponentDescriptor interface in the EjbDescriptor implementation.
The return value of the
SubclassedComponentDescriptor.getComponentSubclass()
method determines which class will be used by Weld when creating new EJB instances.
All the EE resource services are per-BDA services, and may be provided using one of two methods. Which method to use is at the discretion of the integrator.
The integrator may choose to provide all EE resource injection services
themselves, using another library or framework. In this case the
integrator should use the EE environment, and implement the Section A.1.9, “Injection Services” SPI.
Alternatively, the integrator may choose to use CDI to provide EE
resource injection. In this case, the EE_INJECT environment should be
used, and the integrator should implement the Section A.1.4, “EJB services”, Section A.1.7, “Resource Services”
and Section A.1.5, “JPA services”.
Important
CDI only provides annotation-based EE resource injection; if you wish to
provide deployment descriptor (e.g. ejb-jar.xml) injection, you must
use Section A.1.9, “Injection Services”.
If the container performs EE resource injection, the injected resources must be serializable. If EE resource injection is provided by Weld, the resolved resource must be serializable.
Tip
If you use a non-EE environment then you may implement any of the EE service SPIs, and Weld will provide the associated functionality. There is no need to implement those services you don’t need!
Weld registers resource injection points with EjbInjectionServices,
JpaInjectionServices, ResourceInjectionServices and
JaxwsInjectionServices implementations upfront (at bootstrap). This
allows validation of resource injection points to be performed at boot
time rather than runtime. For each resource injection point Weld obtains
a ResourceReferenceFactory which it then uses at runtime for creating
resource references.
public interface ResourceReferenceFactory<T> {
ResourceReference<T> createResource();
}
A ResourceReference provides access to the resource reference to be
injected. Furthermore, ResourceReference allows resource to be release
once the bean that received resource injection is destroyed.
public interface ResourceReference<T> {
T getInstance();
void release();
}
EJB services are split between two interfaces which are both per-BDA.
EjbServices is used to resolve local EJBs used to back session beans,
and must always be provided in an EE environment.
EjbServices.resolveEjb(EjbDescriptor ejbDescriptor) returns a
wrapper—SessionObjectReference—around the EJB reference. This wrapper
allows Weld to request a reference that implements the given business
interface, and, in the case of SFSBs, both request the removal of the
EJB from the container and query whether the EJB has been previously
removed.
EjbInjectionServices.registerEjbInjectionPoint(InjectionPoint injectionPoint)
registers an @EJB injection point (on a managed bean) and returns a
ResourceReferenceFactory as explained above. This service is not
required if the implementation of Section A.1.9, “Injection Services” takes care of @EJB injection.
Note
EJBInjectionServices.resolveEjb(InjectionPoint ij), which allows
@EJB injection point to be resolved without prior registration was
deprecated in Weld 2 and should no longer be used. An injection point
should be registered properly using
EjbInjectionServices.registerEjbInjectionPoint(InjectionPoint injectionPoint)
instead.
Just as EJB resolution is delegated to the container, resolution of
@PersistenceContext for injection into managed beans (with the
InjectionPoint provided), is delegated to the container.
To allow JPA integration, the org.jboss.weld.injection.spi.JpaInjectionServices interface
should be implemented. This service is not required if the implementation of
Section A.1.9, “Injection Services” takes care of @PersistenceContext injection.
Note
The following methods were deprecated in Weld 2:
*
JpaInjectionServices.resolvePersistenceContext(InjectionPoint injectionPoint)
*
JpaInjectionServices.resolvePersistenceUnit(InjectionPoint injectionPoint)
An injection point should instead be registered properly using the following methods:
*
JpaInjectionServices.registerPersistenceContextInjectionPoint(InjectionPoint injectionPoint)
*
JpaInjectionServices.registerPersistenceUnitInjectionPoint(InjectionPoint injectionPoint)
Weld delegates JTA activities to the container. The SPI provides a
couple hooks to easily achieve this with the TransactionServices
interface.
Any javax.transaction.Synchronization implementation may be passed to
the registerSynchronization() method and the SPI implementation should
immediately register the synchronization with the JTA transaction
manager used for the EJBs.
To make it easier to determine whether or not a transaction is currently
active for the requesting thread, the isTransactionActive() method can
be used. The SPI implementation should query the same JTA transaction
manager used for the EJBs.
The resolution of @Resource (for injection into managed beans) is
delegated to the container. You must provide an implementation of
ResourceInjectionServices which provides these operations. This
service is not required if the implementation of Section A.1.9, “Injection Services” takes care of
@Resource injection.
Note
The following methods were deprecated in Weld 2:
*
ResourceInjectionServices.resolveResource(InjectionPoint injectionPoint)
*
ResourceInjectionServices.resolveResource(String jndiName, String mappedName)
An injection point should instead be registered properly using the following methods:
*
ResourceInjectionServices.registerResourceInjectionPoint(InjectionPoint injectionPoint)
*
ResourceInjectionServices.registerResourceInjectionPoint(String jndiName, String mappedName)
The resolution of @WebServiceRef (for injection into managed beans) is
delegated to the container. An integrator must provide an implementation
of JaxwsInjectionServices. This service is not required if the
implementation of Section A.1.9, “Injection Services” takes care of @WebServiceRef injection.
An integrator may wish to use InjectionServices to provide additional
field or method injection over-and-above that provided by Weld. An
integration into a Java EE environment may use InjectionServices to
provide EE resource injection for managed beans.
InjectionServices provides a very simple contract, the
InjectionServices.aroundInject(InjectionContext ic); interceptor will
be called for every instance that CDI injects, whether it is a
contextual instance, or a non-contextual instance injected by
InjectionTarget.inject().
The InjectionContext can be used to discover additional information
about the injection being performed, including the target being
injected. ic.proceed() should be called to perform CDI-style
injection, and call initializer methods.
For each
- @Resource injection point
- @PersistenceContext injection point
- @PersistenceUnit injection point
- @EJB injection point
- @WebServiceRef injection point
Weld calls the InjectionServices.registerInjectionTarget() method.
That allows the integrator to validate resource injection points before
the application is deployed.
In order to obtain the Principal representing the current caller
identity, the container should provide an implementation of
SecurityServices.
The org.jboss.weld.bootstrap.api.Bootstrap interface defines the
initialization for Weld, bean deployment and bean validation. To boot
Weld, you must create an instance of
org.jboss.weld.bootstrap.WeldBootstrap which implements
org.jboss.weld.bootstrap.api.CDI11Bootstrap which extends the above mentioned
Bootstrap. Then you need to tell it about the services in use, and finally request the
container start.
public interface Bootstrap {
public Bootstrap startContainer(Environment environment, Deployment deployment);
public Bootstrap startInitialization();
public Bootstrap deployBeans();
public Bootstrap validateBeans();
public Bootstrap endInitialization();
public void shutdown();
public WeldManager getManager(BeanDeploymentArchive beanDeploymentArchive);
public BeansXml parse(URL url);
public BeansXml parse(Iterable<URL> urls);
public BeansXml parse(Iterable<URL> urls, boolean removeDuplicates);
public Iterable<Metadata<Extension>> loadExtensions(ClassLoader classLoader);
}
The bootstrap is split into phases, container initialization, bean deployment, bean validation and shutdown. Initialization will create a manager, and add the built-in contexts, and examine the deployment structure. Bean deployment will deploy any beans (defined using annotations, programmatically, or built in). Bean validation will validate all beans.
To initialize the container, you call Bootstrap.startInitialization().
Before calling startInitialization(), you must register any services
required by the environment. You can do this by calling, for example,
bootstrap.getManager().getServices().add(JpaServices.class, new
MyJpaServices()).
Having called startInitialization(), the org.jboss.weld.manager.api.WeldManager
for each BDA can be obtained by calling Bootstrap.getManager(BeanDeploymentArchive bda).
To deploy the discovered beans, call Bootstrap.deployBeans().
To validate the deployed beans, call Bootstrap.validateBeans().
To place the container into a state where it can service requests, call
Bootstrap.endInitialization()
Note
Integrators can set org.jboss.weld.bootstrap.allowOptimizedCleanup configuration property using Section 19.2, “Defining external configuration” to allow to perform efficient cleanup and further optimizations after bootstrap. In this case, Bootstrap.endInitialization() must be called after all EE components which support injection are installed (that means all relevant ProcessInjectionTarget events were already fired).
To shutdown the container you call Bootstrap.shutdown(). This allows
the container to perform any cleanup operations needed.
Weld needs to load classes and resources from the classpath at various
times. By default, they are loaded from the Thread Context ClassLoader
if available, if not the same classloader that was used to load Weld,
however this may not be correct for some environments. If this is case,
you can implement org.jboss.weld.resources.spi.ResourceLoader.
import org.jboss.weld.bootstrap.api.Service;
public interface ResourceLoader extends Service {
public Class<?> classForName(String name);
public URL getResource(String name);
public Collection<URL> getResources(String name);
}
Integrators with bytecode-scanning capabilities may implement an
optional ClassFileServices service.
Bytecode-scanning is used by some application servers to speed up
deployment. Compared to loading a class using ClassLoader,
bytecode-scanning allows to obtain only a subset of the Java class file
metadata (e.g. annotations, class hierarchy, etc.) which is usually
loaded much faster. This allows the container to scan all classes
initially by a bytecode scanner and then use this limited information to
decide which classes need to be fully loaded using ClassLoader.
Jandex is an example of a
bytecode-scanning utility.
ClassFileServices may be used by an integrator to provide container’s
bytecode-scanning capabilities to Weld. If present, Weld will try to use
the service to avoid loading of classes that do not need to be loaded.
These are classes that:
- are not CDI managed beans and
- are not assignable to any ProcessAnnotatedType observer
This usually yields improved bootstrap performance especially in large deployments with a lot of classes in explicit bean archives.
public interface ClassFileServices extends BootstrapService {
ClassFileInfo getClassFileInfo(String className);
}
public interface ClassFileInfo {
String getClassName();
String getSuperclassName();
boolean isAnnotationDeclared(Class<? extends Annotation> annotationType);
boolean containsAnnotation(Class<? extends Annotation> annotationType);
int getModifiers();
boolean hasCdiConstructor();
boolean isAssignableFrom(Class<?> javaClass);
boolean isAssignableTo(Class<?> javaClass);
boolean isVetoed();
boolean isTopLevelClass();
NestingType getNestingType();
See the JavaDoc for more details.
The standard way for an integrator to provide Service implementations is via
the deployment structure. Alternatively, services may be registered
using the ServiceLoader
mechanism. This is useful e.g. for a library running
in weld-servlet environment. Such library may provide TransactionServices implementation
which would not otherwise be provided by weld-servlet.
A service implementation should be listed in a file named META-INF/services/org.jboss.weld.bootstrap.api.Service
A service implementation can override another service implementation. The priority of a service
implementation is determined from the javax.annotation.Priority annotation. Service implementations with
higher priority have precedence. A service implementation that does not define priority explicitly
is given implicit priority of 4500.
There are a number of requirements that Weld places on the container for correct functioning that fall outside implementation of APIs.
If you are integrating Weld into an environment that supports deployment of multiple applications, you must enable, automatically, or through user configuration, classloader isolation for each CDI application.
If you are integrating Weld into a Servlet environment you must register
org.jboss.weld.servlet.WeldInitialListener and
org.jboss.weld.servlet.WeldTerminalListener as Servlet listeners,
either automatically, or through user configuration, for each CDI
application which uses Servlet.
You must ensure that WeldInitialListener is called before any other
application-defined listener is called and that WeldTerminalListener
is called only after all application-defined listeners have been called.
You must ensure that WeldInitialListener.contextInitialized() is called after
beans are deployed is complete (Bootstrap.deployBeans() has been
called).
A CDI implementation is required to provide a Servlet filter named “CDI Conversation Filter”. The filter may be mapped by an application in the web descriptor. That allows application to place another filter around the CDI filter for dealing with exceptions.
Weld provides this filter with a fully qualified class name of`org.jboss.weld.servlet.ConversationFilter`.
If the application contains a filter mapping for a filter named “CDI
Conversation Filter”, the integrator is required to register
org.jboss.weld.servlet.ConversationFilter as a filter with “CDI
Conversation Filter” as its filter name. If no such mapping exists in
the application, the integrator is not required to register the filter.
In that case, WeldInitialListener will take care of conversation context
activation/deactivation at the beginning of HTTP request processing.
If you are integrating Weld into a JSF environment you must register
org.jboss.weld.el.WeldELContextListener as an EL Context listener.
If you are integrating Weld into a JSF environment you must register
org.jboss.weld.jsf.ConversationAwareViewHandler as a delegating view
handler.
If you are integrating Weld into a JSF environment you must obtain the
bean manager for the module and then call
BeanManager.wrapExpressionFactory(), passing
Application.getExpressionFactory() as the argument. The wrapped
expression factory must be used in all EL expression evaluations
performed by JSF in this web application.
If you are integrating Weld into a JSF environment you must obtain the
bean manager for the module and then call BeanManager.getELResolver(),
The returned EL resolver should be registered with JSF for this web
application.
Tip
There are a number of ways you can obtain the bean manager for the
module. You could call Bootstrap.getManager(), passing in the BDA for
this module. Alternatively, you could use the injection into Java EE
component classes, or look up the bean manager in JNDI.
If you are integrating Weld into a JSF environment you must register
org.jboss.weld.servlet.ConversationPropagationFilter as a Servlet
listener, either automatically, or through user configuration, for each
CDI application which uses JSF. This filter can be registered for all
Servlet deployment safely.
Note
Weld 3 only supports JSF 2.2 and above.
Note
org.jboss.weld.servlet.ConversationPropagationFilter was deprecated
and should no longer be used.
If you are integrating Weld into a JSP environment you must register
org.jboss.weld.el.WeldELContextListener as an EL Context listener.
If you are integrating Weld into a JSP environment you must obtain the
bean manager for the module and then call
BeanManager.wrapExpressionFactory(), passing
Application.getExpressionFactory() as the argument. The wrapped
expression factory must be used in all EL expression evaluations
performed by JSP.
If you are integrating Weld into a JSP environment you must obtain the
bean manager for the module and then call BeanManager.getELResolver(),
The returned EL resolver should be registered with JSP for this web
application.
Tip
There are a number of ways you can obtain the bean manager for the
module. You could call Bootstrap.getManager(), passing in the BDA for
this module. Alternatively, you could use the injection into Java EE
component classes, or look up the bean manager in JNDI.
org.jboss.weld.ejb.SessionBeanInterceptor takes care of activating the
request scope around EJB method invocations in a non-servlet
environment, such as message-driven bean invocation, @Asynchronous
invocation or @Timeout. If you are integrating Weld into an EJB
environment you must register the aroundInvoke method of
SessionBeanInterceptor as a EJB around-invoke interceptor for all EJBs
in the application, either automatically, or through user configuration,
for each CDI application which uses enterprise beans.
If you are running in a EJB 3.2 environment, you should register this as an around-timeout interceptor as well.
In addition, since CDI 1.1 the aroundInvoke method of
SessionBeanInterceptor should be invoked around @PostConstruct
callbacks of EJBs.
Important
You must register the SessionBeanInterceptor as the outer most
interceptor in the stack for all EJBs.
Weld can reside on an isolated classloader, or on a shared classloader.
If you choose to use an isolated classloader, the default
SingletonProvider, IsolatedStaticSingletonProvider, can be used. If
you choose to use a shared classloader, then you will need to choose
another strategy.
You can provide your own implementation of Singleton and
SingletonProvider and register it for use using
SingletonProvider.initialize(SingletonProvider provider).
Weld also provides an implementation of Thread Context Classloader per
application strategy, via the TCCLSingletonProvider.
You should bind the bean manager for the bean deployment archive into
JNDI at java:comp/BeanManager. The type should be
javax.enterprise.inject.spi.BeanManager. To obtain the correct bean
manager for the bean deployment archive, you may call
bootstrap.getBeanManager(beanDeploymentArchive)
CDI 1.1 provides a simplified approach to accessing the BeanManager /
CDI container from components that do not support injection. This is
done by the CDI class API. The integrating part can either use
org.jboss.weld.AbstractCDI or org.jboss.weld.SimpleCDI provided by
Weld core and register it using
javax.enterprise.inject.spi.CDIProvider file that is visible to the
CDI API classes or use the CDI.setCDIProvider(CDIProvider provider)
method method early in the deployment.
Alternatively, an integrating part may provide a specialized implementation such as the one provided by WildFly integration.
The CDI specification requires the container to provide injection into
non-contextual resources for all Java EE component classes. Weld
delegates this responsibility to the container. This can be achieved
using the CDI defined InjectionTarget SPI. Furthermore, you must
perform this operation on the correct bean manager for the bean
deployment archive containing the EE component class.
The CDI specification also requires that a ProcessInjectionTarget
event is fired for every Java EE component class. Furthermore, if an
observer calls ProcessInjectionTarget.setInjectionTarget() the
container must use the specified injection target to perform
injection.
To help the integrator, Weld provides
WeldManager.fireProcessInjectionTarget() which returns the
InjectionTarget to use.
// Fire ProcessInjectionTarget, returning the InjectionTarget
// to use
AnnotatedType<?> at = weldBeanManager.createAnnotatedType(clazz);
InjectionTarget it = weldBeanManager.fireProcessInjectionTarget(at);
// Per instance required, create the creational context
CreationalContext<?> cc = beanManager.createCreationalContext(null);
// Produce the instance, performing any constructor injection required
Object instance = it.produce();
// Perform injection and call initializers
it.inject(instance, cc);
// Call the post-construct callback
it.postConstruct(instance);
// Call the pre-destroy callback
it.preDestroy(instance);
// Clean up the instance
it.dispose(instance);
cc.release();
The container may intersperse other operations between these calls. Further, the integrator may choose to implement any of these calls in another manner, assuming the contract is fulfilled.
When performing injections on EJBs you must use the Weld-defined SPI,
WeldManager. Furthermore, you must perform this operation on the
correct bean manager for the bean deployment archive containing the EJB.
// Obtain the EjbDescriptor for the EJB
// You may choose to use this utility method to get the descriptor
EjbDescriptor<T> ejbDescriptor = beanManager.<T>getEjbDescriptor(ejbName);
// Get the Bean object
Bean<T> bean = beanManager.getBean(ejbDescriptor);
// Create AnnotatedType from the implementation class of the EJB descriptor
AnnotatedType<T> at = beanManager.createAnnotatedType(descriptorImplClazz);
// Create the injection target
InjectionTarget<T> it = beanManager.createInjectionTarget(ejbDescriptor);
// Fire ProcessInjectionTarget event and store new IT as it can be modified by extensions
it = beanManager.fireProcessInjectionTarget(at, it);
// Per instance required, create the creational context
WeldCreationalContext<T> cc = beanManager.createCreationalContext(bean);
// register an AroundConstructCallback if needed
cc.setConstructorInterceptionSuppressed(true);
cc.registerAroundConstructCallback(new AroundConstructCallback<T>() {
public T aroundConstruct(ConstructionHandle<T> handle, AnnotatedConstructor<T> constructor, Object[] parameters,
Map<String, Object> data) throws Exception {
// TODO: invoke @AroundConstruct interceptors
return handle.proceed(parameters, data);
}
});
// Produce the instance, performing any constructor injection required
T instance = it.produce(cc);
// Perform injection and call initializers
it.inject(instance, cc);
// You may choose to have CDI call the post construct and pre destroy
// lifecycle callbacks
// Call the post-construct callback
it.postConstruct(instance);
// Call the pre-destroy callback
it.preDestroy(instance);
// Clean up the instance
it.dispose(instance);
cc.release();
Weld implements support for constructor call interception and invokes interceptors that are
associated with the particular component either using an interceptor binding
or the @Interceptors annotation.
This can be suppressed by calling WeldCreationalContext.setConstructorInterceptionSuppressed(true)
In addition, an integrator may register a callback in which it performs additional operations around the constructor call. This way an integrator may for example implement support for additional interceptors (e.g. those bound using the deployment descriptor).
See AroundConstructCallback and WeldCreationalContext.registerAroundConstructCallback() for more details.
Optionally, an integrator may register the following Probe Development Tool components in order to enable its functionality. Note that these components should only be registered if the development mode is enabled - see also Section 22.1, “How to enable the development mode”.
Table A.1. Probe components
| Class | Type | Description |
|---|---|---|
| Servlet filter | An integrator is required to register this filter for every web application which should be a subject of inspection. The filter should only be mapped to a single URL pattern of value |
| CDI extension | An integrator is required to register this extension for every application which should be a subject of inspection. |
Note
Probe classes reside in a separate module with the following coordinates: org.jboss.weld.probe:weld-probe-core. This module is a dependency of a Weld Servlet integration module and it’s also a part of the weld-servlet-shaded artifact and Weld OSGi bundle.
Note
Probe REST API is implemented using a servlet filter. However, not all servlet containers trigger filters when recieving a request to a path which is not mapped to any servlet (although most of them define a "default" servlet for each application). In this case, an integrator should register a "dummy" servlet (its methods will never be invoked) mapped to the URL pattern /weld-probe/*.
Weld can perfom additional cleanup operations after bootstrap, in order to conserve resources. See for example Section 19.1.14, “Memory consumption optimization - removing unused beans”. However, this feature is disabled by default. An integrator may enable this feature provided the following requirements are met:
org.jboss.weld.bootstrap.api.Bootstrap#endInitialization()must be called after all EE components which support injection are installed (that means all relevantProcessInjectionTargetevents were already fired)
Table A.2. Supported configuration properties
| Configuration key | Default value | Description |
|---|---|---|
|
| If set to |
Note
This property can only be set by integrators through Section 19.2, “Defining external configuration”.
This part of the appendix documents the changes in Weld across major and minor releases that an integrator should be aware of. These changes mostly touch changes in the SPI or in the container contract.
All the changes are documented in this external migration document.
Weld no longer uses slf4j for logging. Instead,
jboss-logging
is now used as a logging facade.
A new service named HttpContextActivationFilter was added to the Weld SPI. This optional service allows an integrator to decide if CDI contexts should be activated or not for a given HTTP request. By default, CDI contexts are always active but this hook allows an integrator to eliminate the overhead of CDI context activation for certain types of requests where CDI is known not to be needed (e.g. request for a static resource).
Note that when the service is provided, user configuration is overriden.
The BootstrapConfiguration service now allows the non-portable mode to be enabled by the integrator.
Since Weld 2.1 the
Singleton
SPI requires the singleton to be identified by a String context id.
This allows multiple Weld containers to run at the same time in
environments where the TCCL cannot be used to distinguish the containers
(e.g. OSGi environment).
The integrator should:
- implement the new methods
- use WeldBootstrap.startContainer(String contextId, Environment environment, Deployment deployment) to start Weld
- eliminate all Container.instance() calls and replace them with Container.instance(String contextId)
The Weld-OSGi bundle does no include Weld’s runtime dependencies anymore. Therefore, it is possible to deploy the following artifacts in order to satisfy Weld’s dependencies:
| group id | artifact id | version |
|---|---|---|
org.jboss.logging | jboss-logging | 3.1.3.GA |
javax.enterprise | cdi-api | 1.1-20130918 |
javax.annotation | javax.annotation-api | 1.2 |
javax.interceptor | javax.interceptor-api | 1.2 |
org.apache.geronimo.specs | geronimo-el_2.2_spec | 1.0.3 |
- The definition of a bean defining annotation was altered in CDI 1.2. See the specification for more information.
- A new
WeldInjectionTargetBuilder
SPI was added. The SPI allows an integrator to obtain a customized
InjectionTargetimplementation using the builder pattern. - The AnnotationDiscovery service was deprecated in favor of ClassFileServices.
- CDIBootstrap.startContainer() method, which allows a container identifier to be passed as a parameter, was added.
- The contract of the SessionObjectReference.getBusinessObject() method was altered. Weld may now call this method passing in a remote view of a session bean.
- The CDI provider implementation was reimplemented and is no longer compatible with the previous version.
- The
jboss-classfilewriterdependency, which is used by Weld for runtime bytecode generation, is no longer bundled within the Weld OSGi bundle. Instead, this dependency needs to be deployed separately to the OSGi container.
| group id | artifact id | version |
|---|---|---|
org.jboss.classfilewriter | jboss-classfilewriter | 1.1.2.Final |
EEModuleDescriptorwhich describes Java EE modules has been introduced and is now required as part of deployment structure metadata. See Section A.1.1.1, “EE Modules” for details.- Java 6 support was dropped. Java 7 or newer is now required for both compile time and runtime.
- An observer for
@Initialized(ConversationScoped.class)or@Destroyed(ConversationScoped.class)event no longer forces eager conversation context initialization. See also Section 5.3.5, “Lazy and eager conversation context initialization”. ScheduledExecutorServiceFactoryis deprecated and no default implementation is provided by default. This service has not been used by Weld internals at least since version 1.1.0.Final.
- Weld does not depend on
com.google.guava:guavaanymore. The dependency is also not bundled with shaded artifacts for Weld SE and Weld Servlet. - A wildcard type is not considered an unresolvable type variable - this reflects the output of a clarification issue CDI-494.
- Deprecated
org.jboss.weld.resources.SingleThreadScheduledExecutorServiceFactorywas removed. Weld SE:
org.jboss.weld.environment.se.contexts.activators.ActivateRequestScopewas moved to the Weld API. From now on, the FQCN of the interceptor binding is:org.jboss.weld.context.activator.ActivateRequestScope.- Deprecated
org.jboss.weld.environment.se.beans.InstanceManagerwas removed. - Deprecated
org.jboss.weld.environment.se.ShutdownManagerwas removed. - Deprecated
org.jboss.weld.environment.se.contexts.interceptors.ActivateThreadScopewas removed.
Weld 3.0 implements CDI 2.0 so this is a huge update which contains bunch of new features. However, this document only covers part which might prove problematic while moving existing application from Weld 2.4 to Weld 3.0. For more information on the CDI 2.0 itself, please consult the specification.
Weld 2.4 created shaded JARs for SE and Servlet with following artifact IDs: weld-se, weld-servlet.
In Weld 3.0 a -shaded affix was added to the name of these artifacts to make it clear what they contain.
E.g. new artifact IDs of these JARs are weld-se-shaded and weld-servlet-shaded respectively.
Weld 3.0 was fine-grained and several optional modules were separated from the core. Namely, Weld now has Web, JTA, JSF and EJB modules.
The coordinates for these artifacts are as follows:
- WEB -
org.jboss.weld.module:weld-web - JTA -
org.jboss.weld.module:weld-jta - JSF -
org.jboss.weld.module:weld-jsf - EJB -
org.jboss.weld.module:weld-ejb
Each module represents the logic behind Weld integration with the given technology.
Based on the decision taken in CDI-627, the behaviour of vetoed alternatives had changed slightly.
beans.xml validation is now less strict and you can have a vetoed alternative while still having it enabled via beans.xml.
This behaviour is the same as it was in CDI 1.0.
While BeanManager#fireEvent still works, users are encouraged to use newly added BeanManager#getEvent method instead.
This method returns an instance of Event<Object> built-in bean which can then have the types and qualifiers further specified via select method.
It also allows to fire both kinds of events; synchronous and asynchronous.
See the example below:
@Inject
BeanManager bm;
public void fireMyEvent() {
bm.getEvent().select(Any.Literal.INSTANCE).fire(new Payload());
bm.getEvent().select(PaymentCheck.class, Default.Literal.INSTANCE)
.fireAsync(new Payload());
}
For historical reasons, Weld 2.4 core is released in two versions which are identical in their contents.
Those are org.jboss.weld:weld-core and org.jboss.weld:weld-core-impl.
Starting with Weld 3.0, only org.jboss.weld:weld-core-impl artifact will be released.
The SPI changes are mainly important for integrators, such as WildFly. Here is a list of changes based on what SPI class/method they affect:
org.jboss.weld.bootstrap.spi.BeanDeploymentArchive- Two new methods -
getKnownClasses()andgetLoadedBeanClasses(); both of them have default implementations getLoadedBeanClasses()- Integrators might want to override this method if they want to make use of preloaded classes during bootstrap
getKnownClasses()- For explicit bean archive, the result of this method should be equal to that of
getBeanClasses() - For implicit bean archive, it should also return types which have neither bean defining annotations nor session bean definitions
- For explicit bean archive, the result of this method should be equal to that of
- Two new methods -
org.jboss.weld.bootstrap.spi.BeansXml- One new method -
isTrimmed() - If an explicit bean archive contains the
<trim/>element in itsbeans.xmlfile, types that don’t have either a bean defining annotation or any scope annotation, are removed from the set of discovered types. - If an integrator provides custom implementation of
BeansXmlinterface, this method will need to be implemented as well
- One new method -
org.jboss.weld.security.spi.SecurityServices- One new method -
getSecurityContext() - Returns current security context, which can then be propagated to different threads
- This method has a default implementation which returns a no-op
SecurityContextimplementation
- One new method -
org.jboss.weld.security.spi.SecurityContext- Newly added interface which Weld uses to associate and dissociate security context with given thread
- The main use case for this are asynchronous event observers which are executed in separate threads, yet need to have identical context
- There are three methods in this interface -
associate(),dissociate()andclose()
org.jboss.weld.manager.api.ExecutorServices- One new method -
getTimerExecutor() - Returns an instance of
ScheduledExecutorService - This executor is only required for the timeout feature of asynchronous events
- This method has a default implementation returning ‘null’
- One new method -
org.jboss.weld.manager.api.WeldManagerFollowing methods were removed from the SPI:
WeldManager.createActivityWeldManager.getCurrentWeldManager.setCurrentsetCurrent