Adding a new Page
Adding a new Page using Page Creation Wizard
A page creation wizard is available to administrators in order to create and publish portal pages quickly and easily.
-
**
Mouse over Site Editor then select Add New Page.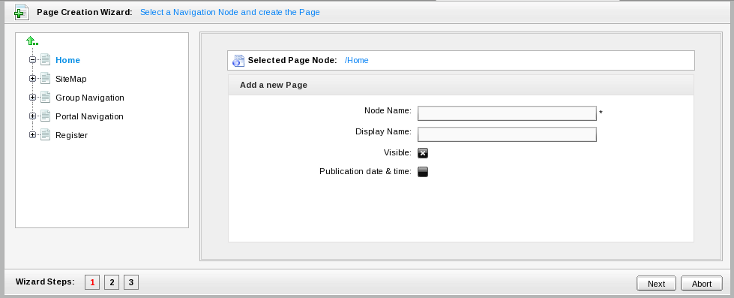
-
**
The wizard window is divided into two sections: the left pane contains the existing page/node hierarchy and the right pane displays the Page Editor. -
**
In the left pane, you can navigate up and down the node/page structure: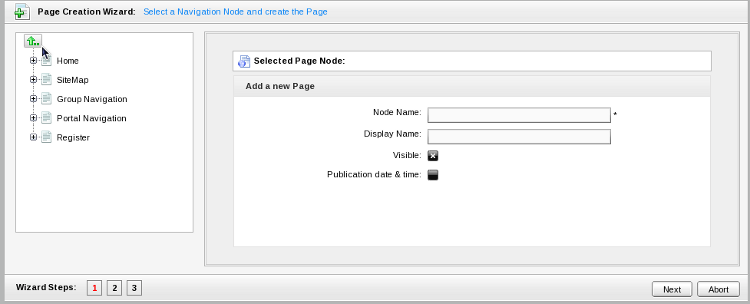
-
**
In the right pane are the required paramters for a new page:
-
Current Selected Page Node
The path of the selected node to add a new sub page
-
Node Name
The node name of the added page. It is required field. This field must start with a character and must have a length between 3 and 30 characters.
-
Display Name
The display name of the node which contains the added page and must have a length between 3 and 30 characters.
-
Visible
This checkbox toggles the global visibility of this page.
If checked the page or the page node appears on on the navigation bar, the page navigation and the site map. If "visible" is checked the visibility depends on the "publication date & time" attribute.
If unchecked, the page is not shown in the site map or navigation bar.Non-visible Pages and SecurityThe Visible checkbox should not be used as a security measure, as non-visible pages will still be accessible using a direct URL, such as http://localhost:8080/portal/private/classic/pagename.
-
Publication date &time
This option allows publishing the page for a period of time. If this option is checked the visibility of the page depends on the publication period start and end date.
-
Start Publication Date
The start date and time to publish the page
-
End Publication Date
The end date and time to publish the page.
Setting Time and DateYou can set date and time by clicking the Start Publication Date field and End Publication Date field and select a date in the calendar pop up
-
**
Click Next or number '2' of the wizard steps to go to step 2.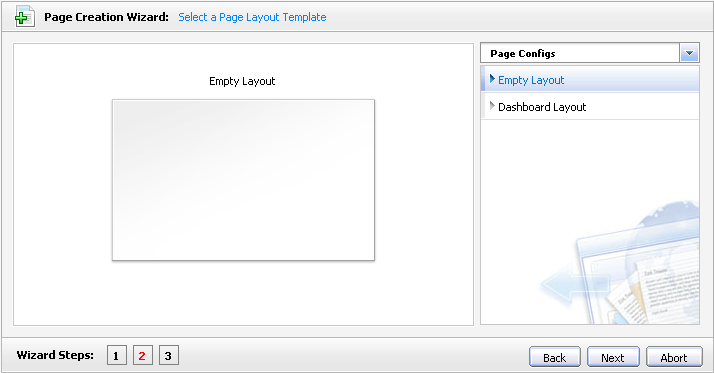
-
**
Select Empty Layout or click the icon to see more templates to select. -
**
Click the Next button or number '3' of the wizard step to go to step 3. You can drag portlets from the popup panel into the main pane to create the content of this page.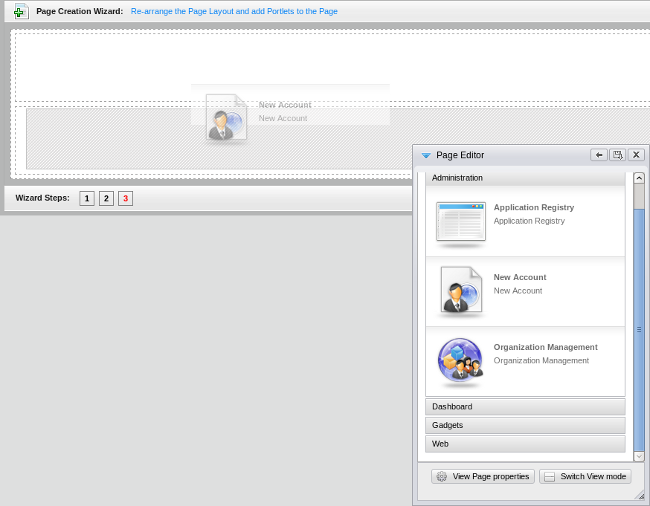
-
Applications
Allows listing all existing portlets
-
Containers
Allows listing all existing containers
-
Switch View mode
Allows viewing a page in preview mode
-
**
Click the Show Container icon if you want to see the existing containers and re-select the layout of the page. You can click on the Switch icon to view the content of this page. -
**
Click Save to accept creating a new page, Back button to return the previous step or Abort button to quit without creating a new page.
Adding a new Page using Page Management
-
**
Mouse over Group in the Toolbar, highlight Administration then select Page Management.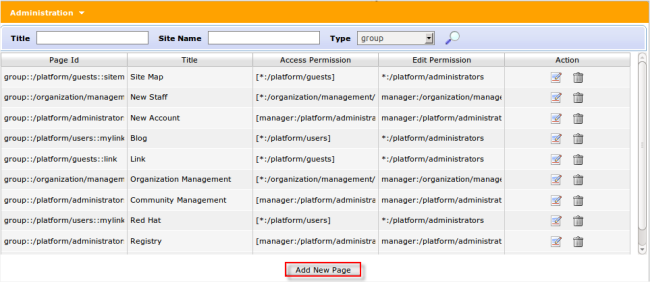
-
**
Click on Add New Page. -
**
-
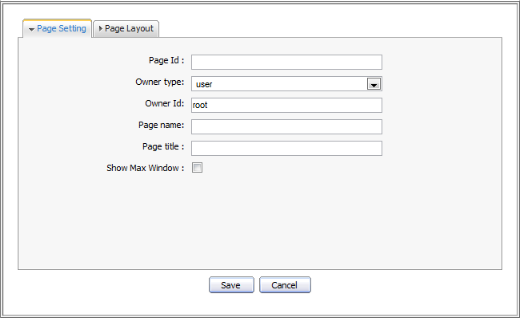
Page Id
A string that identifies the page. It is automatically generated when you finish creating the page.
-
Owner type
If the page Owner type is portal the page is created for a portal. Therefore only users who have edit permissions on the portal level can create this page type.
The name of the current portal is automatically selected for Owner id ensuring the edit permissions are assigned to users who can edit the current portal.
If the page Owner type is group the page is created for a group. Therefore only users who have manager permissions for that group can create this page type.
-
Owner Id
The name of the page owner. When the owner type is set to group, a list of groups will allow you to select one user as the 'owner'.
-
Page Name
The name of the page. This is a required field and must be unique. Only alphabetical, numerical and underscore characters are allowed to be used for this field and the name must be at least 3 and no more than 30 characters in length.
-
Page title
The title of the the page. This is an optional field. If you choose to add a title to the page it must be at least 3 and no more than 30 characters in length.
-
Show Max Window
The option allows users to choose whether the page is shown at maximum size or not.
-
**
Enter values for fields in the Permission Setting tab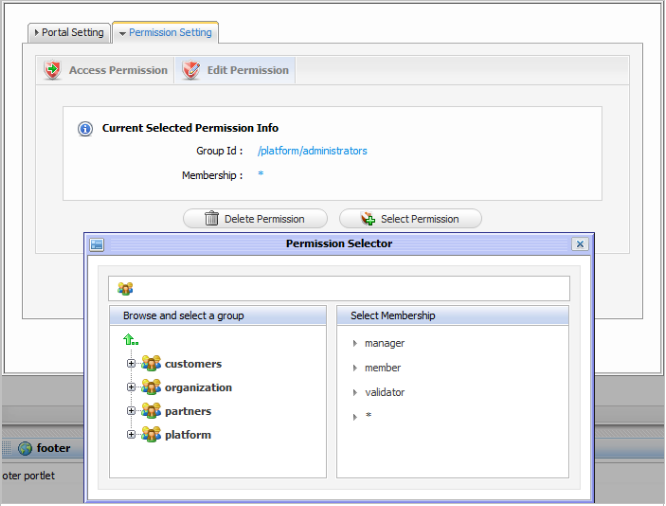
-
Access Permission
The content of this tab is identical to the Owner type field in the Page Setting tab. Therefore, all users having access rights for the type selected in the Owner type field will appear in this tab. But users can also change the value of this tab.
Check the check box if you want to share access with everyone or click the Add Permission button to assign permission on group level, then select a group and membership or click the trash can icon to remove a group from the list.
-
Edit Permission
The content of this tab depends on the value of the Owner type field in the Page Setting tab.
If the Owner type is "group", edit permission is assigned to users who are "manager" of the group that is selected in Owner id. You can only change this value when editing the page.
-
**
Click Save.
Edit a Page
-
**
Mouse over Group in the Toolbar. Highlight Administration and then click on Page Management. -
**
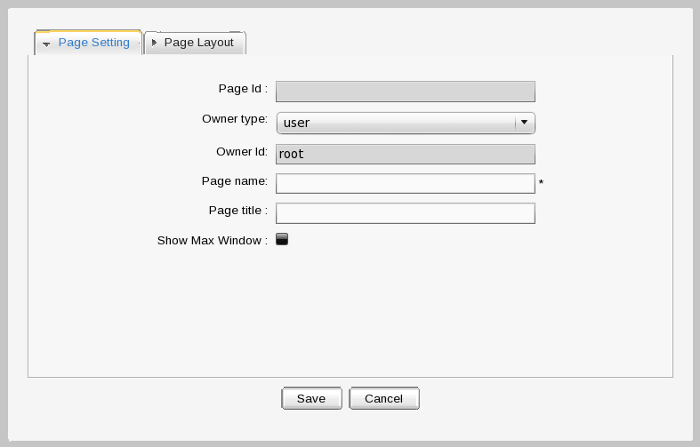
Click the edit icon on the row of page you want to edit in the existing page list.
Click the edit icon to show a form to edit page properties. -
**
The properties presented in the Page Properties window are the same as those outlined in sect-User_Guide-Manage_Pages-Add_a_new_Page_in_the_Page_List.
-
Permission Setting
This form is supported for pages with group or portal ownership types. Because a user page is private, no user, other than the creator, can access or edit it.
Permission on each page is set in two levels: Access right and Edit right. -
Access right
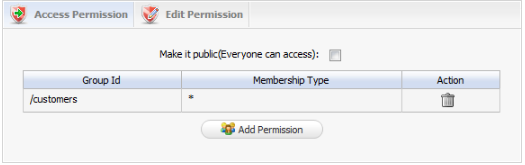
The page Access right can be set to specific user groups or set to everyone (this includes unregistered users).
Current access permissions on page are listed and you can remove permissions (by clicking the delete icon) or add further permission (by click the Add Permission button).
Populating the Make it public check box will allow all users (registered or unregistered) to access the page. -
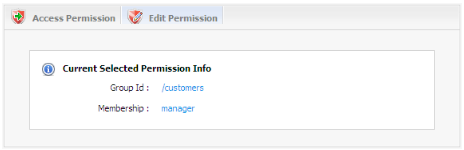
Edit right
The Edit right allows users to change information on a page. Edit right only is set for a group of users.
Edit right can be set for one specific membership type within a particular group (* allows every membership type in a group). If you want to re-assign this right to another group, click Select Permission to choose another one.
-
**
-
Editing page container layout
Click the Show Container icon to show current container layout of selected page on your right and all the container layouts list on the left pane.
If you want to change the current layout, select a layout type from the list on the left pane, then drag the template you want into the right pane. The new container will be displayed on the right pane.
You can change the position of the current container by dragging it to another place on the right pane or remove it completely by clicking the delete icon in the right corner.
-
**
-
Editing page portlet layout
Click the Show Portlet icon to show current portlet layout of page.
If you want to change the current layout, select a layout type from the list on the left pane, then drag it into the right pane. The new portlet will be added and displayed in the right pane. You can change the position of the current portlet by dragging it to the place you want on the right pane, or remove it completely by clicking the delete icon.
View a Page
View any page in the existing pages list by clicking on the View icon corresponding to the page you want to view.
Delete a Page
-
**
Go to Group in the Toolbar. Highlight Administration and then click on Page Management. You will be presented with a list of all existing pages. -
**
Click the trash can icon in the row of the page you want to delete. It will display the confirmation message.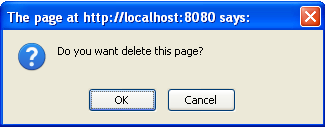
-
**
Click the OK button to complete the deletion or Cancel button to quit without deleting the page.
Drag and Drop the Page Body
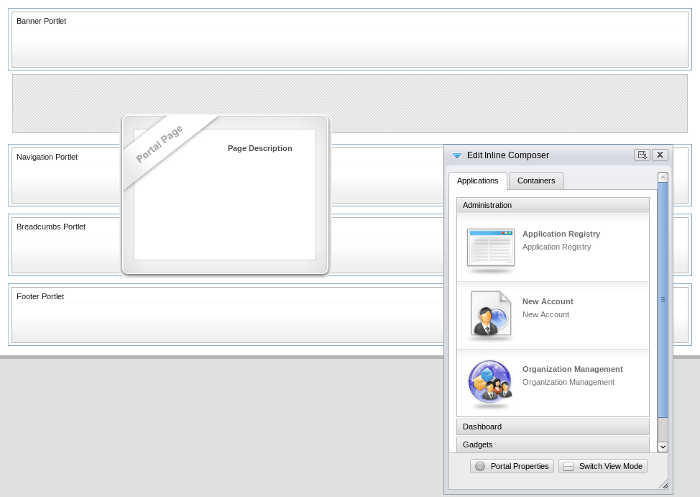
To assist administrators to modify or personalize their portal GateIn 3.2 allows you to easily drag and drop page content within the page.
-
**
Go to Site Editor in the toolbar and click on Edit Layout It will display :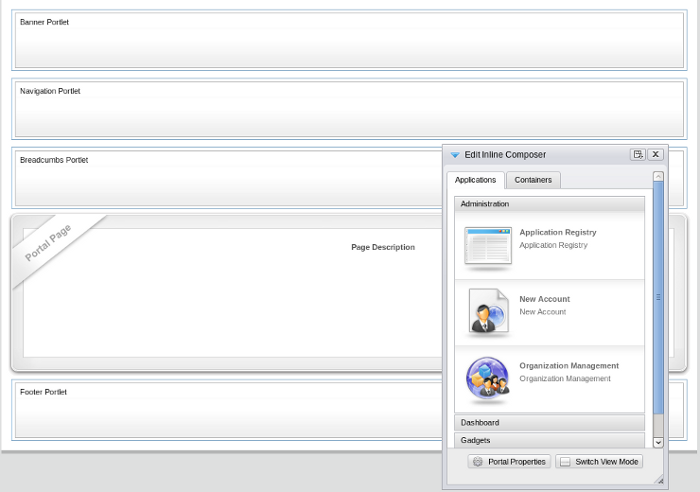
-
**
Click on the Portal Page, drag and drop within the portal page.