Several tools are offered to assist Administrators manage users, groups and memberships easily and effectively.
Manage users
Mouse over Group on the Toolbar. Highlight Organization and select Users and Groups Management
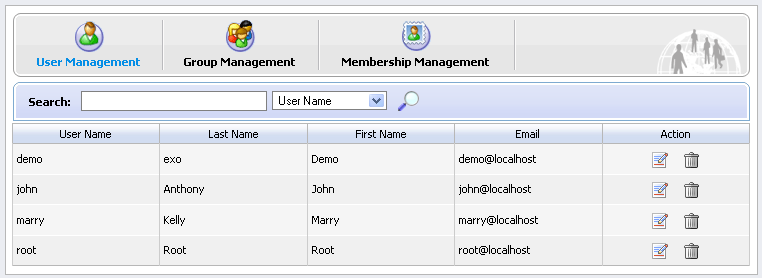
Administrators can see all existing registered users and search, edit or even delete them. Each user's groups and memberships (roles) in these groups are also available. You can not add users to a group but you can remove them from the group.
Add a user
To add a new user to the portal user lists follow these steps:
-
**
Mouse-over Group in the Toolbar. -
**
Highlight Organization and then click on New Staff.
The New Staff window will open: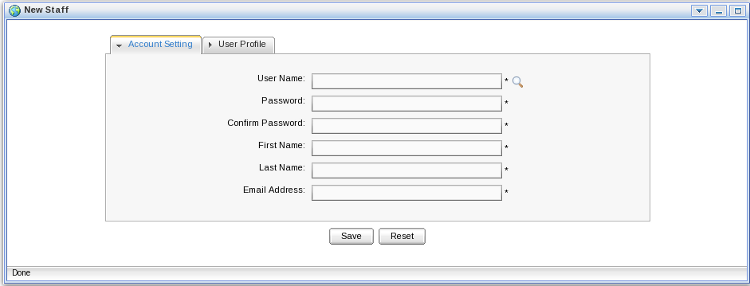
This window has two tabs; Account Settings and User Profile.
-
**
To create a new user all of the fields in the Account Settings tab must be completed.
Further information about the user (such as nickname and birthday) can be added in the User Profile tab. This information is not required for the creation of the account. -
**
Click either Save or Reset to create or discard the new account.
Search for users
The Administrator can search for specific users by username, first name, last name or email address.
-
**
Select the information type (name, email, etc) to search against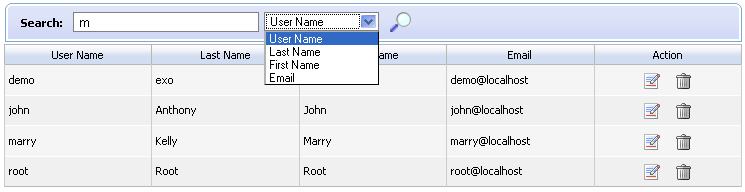
-
**
Type in a partial/full string which identifies the user record being searched. Note that wild cards are not supported at this release. -
**
Click the magnifying glass icon to begin the search.
Edit a user
-
**
Locate the user you wish to edit. -
**
Click the edit icon (next to the trash icon).
-
**
Select the Account Info tab to edit the main user information set including first name, last name or email address.
-
User Name
The User Name field cannot be changed. Other fields First Name , Last Name , Email Address can be changed.
-
Change Password
The Change Password option allows an administrator to set a new password for a user. When the Change Password option is unchecked, New Password and Confirm Password are hidden. Passwords must contain at least 6 characters and can contain letters, numbers and punctuation marks.
-
**
Select the User Profile tab to edit additional information about the user's profile such as the birthdate or the job title as well as some home and business metadata. You may also switch the default display language for that user. -
**
Select the User Membership tab to see a user's group membership information.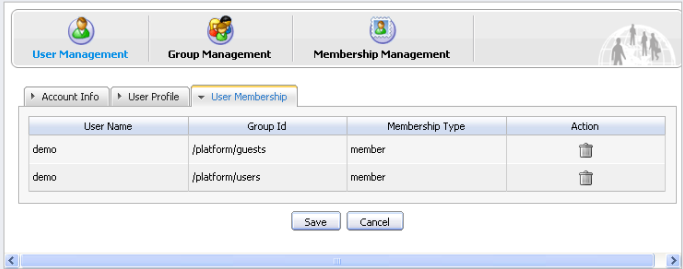
-
User Membership
The User Membership tab displays which group(s) the selected user belongs to. In the above figure, the user "demo" is a member of two groups: "guests" and "users". The parent group of both is "platform".
To remove the user from a group, click the trash can icon.
-
**
Click the Save.
Delete a user
-
**
Locate the user you wish to delete
Click the trash icon in the Action column -
**
Click OK to confirm.
Manage groups
Mouse over Group on the Toolbar. Highlight Organization and select Users and Groups Management
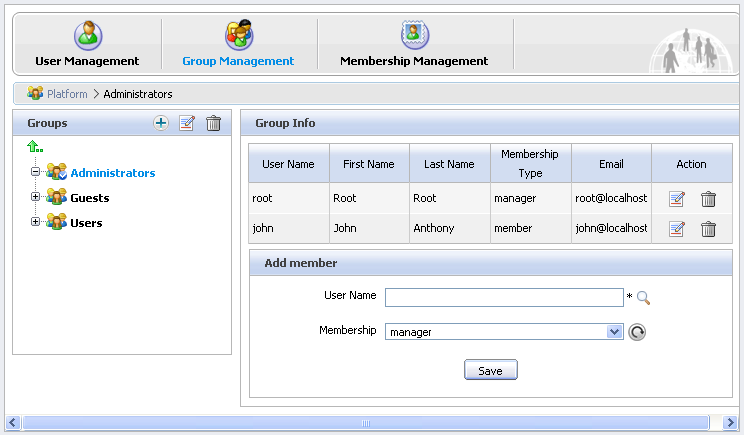
Select the tab Group Management
By default, all existing groups will be displayed on the left pane. This tab is used to add new, edit or delete a group. The right pane shows information about the selected group including information about the members in the specific group along with a small form to add a new user to a group.
Add a New Group
-
**
First choose where in the existing group structure you want the new group to be created. You may navigate up the tree by clicking on the green vertical little arrow at the top of the tree. The current path is displayed in the path bar.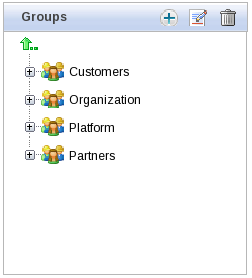
-
**
Click Add New Group.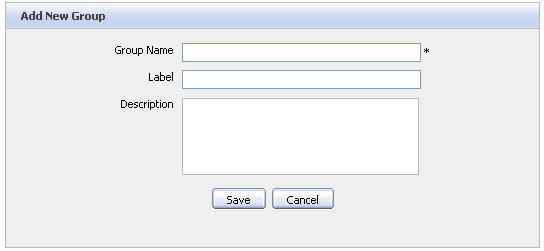
-
Group Name
The name of the new group. This field is required and any length from 3 to 30 characters is allowed. Once saved this name cannot be edited.
-
Label
The display name of the group. Any length from 3 to 30 characters is allowed.
-
Description
A description of the group. Any length from 3 to 30 characters is allowed.
-
**
Fill in the required fields. Only letters, numbers and underscore characters are allowed for the Group Name field. The name must be unique within the portal. -
**
Click Save
Edit a group
-
**
Find the group in the existing tree and click on the label -
**
Click the edit icon to display the Edit Current Group window. -
**
Make the desired changes in the appropriate fields. You can not change the Group Name, however you may change to the Label field. You are also able to edit the Description field. -
**
Click Save
Add a new user to a group
-
**
Find the group in the existing tree and click on its label. Existing group memberships are listed on the left hand side along with the Add Member window.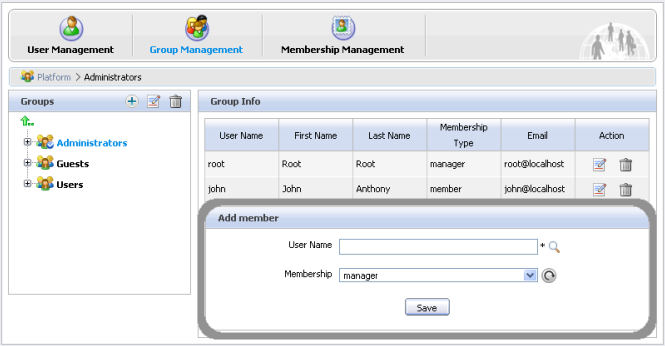
-
**
Click on the magnify glass to open up the User selector.
Refer to sect-User_Guide-User_Management-Search_a_user for instructions on how to locate a user.
Check the box next to the user name then click Add -
**
Select the membership appropriate for this user. If the desired membership does not appear you may try to click on the refresh icon to get the latest list. -
**
Click Save
Edit the user membership in a group
-
**
Click the edit icon in the Action column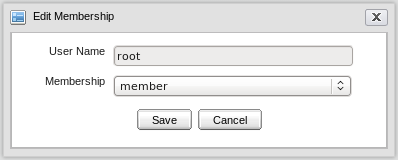
-
**
Select another membership. -
**
Click Save.
Delete a group
-
**
Find the group in the tree -
**
Click the trash icon.
-
**
Click OK.
Manage memberships
The role of a user in a specific group is managed using memberships.
By default three membership types are available: Manager, Member and Validator. By definition, Manager has got the highest rights in a group.
Mouse over Group on the Toolbar. Highlight Organization and select Users and Groups Management. Select the Membership Management tab.
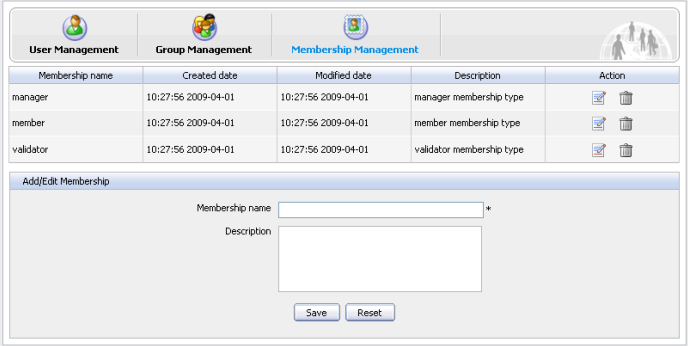
Add a new membership type
-
**
In the Add/Edit Membership form, enter the values for the membership name field (required) and the description field (optional). Only letters, digits, dots, dashes and underscores are allowed for the membership name. -
**
Click the Save
Edit a membership type
-
**
Click the edit icon in the Action column. -
**
Make the desired changes to the description. -
**
Click Save
Delete a membership type
-
**
Click the trash icon in the Action column. -
**
Click OK