This section assumes you have already successfully installed and started an RHQ Server, RHQ Storage Node and at least one RHQ Agent.
Login
Using one of the supported RHQ Browsers open http://localhost:7080 (assuming your browser is running on the RHQ Server host and is using the default port. Otherwise, substitute the alternate host and port).
The default username/password is rhqadmin/rhqadmin. Once you login, you can change the default password of this user.
Auto-Discovery and Import
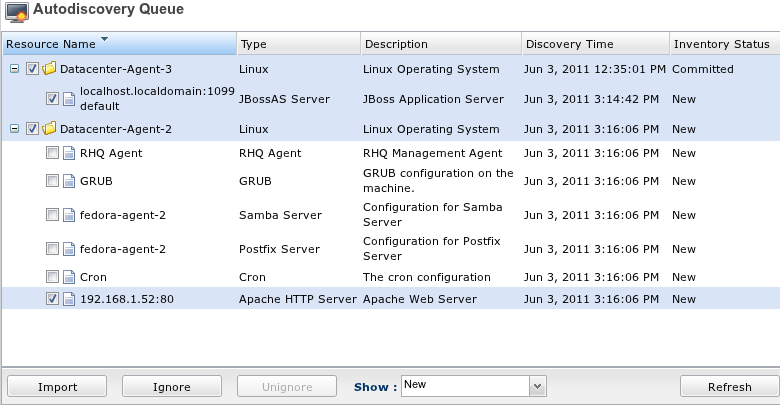
Once the RHQ Agent has been started it will run discovery scans for resources on its local machine and reports them back to the RHQ Server. Before those auto-discovered resources can be managed by RHQ, an administrator must approve of those resources to be imported into inventory. Importing is done through the or on the Auto-Discovery Queue page:
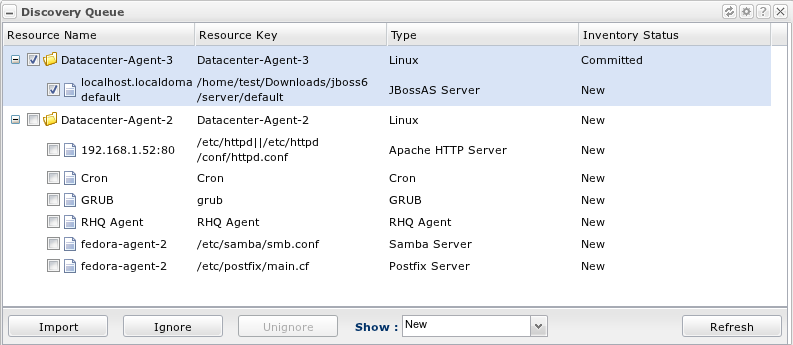
If desired, users can also configure a GUI Dashboard to include the Auto-Discovery portlet:
You simply select the newly discovered platform and its first level child servers and click the Import button. You can also ignore resources so they are never imported.
Once the platform has been imported, the RHQ Agent will run a more detailed discovery scan. This discovery will check for child servers and services of the imported resources.
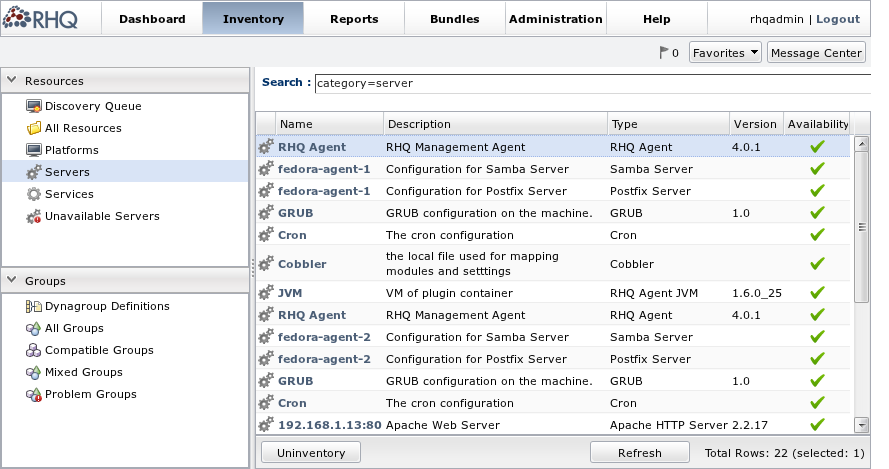
The RHQ Server GUI will be able to display a summary of the entire RHQ Server inventory, including all resources that were just committed:
The RHQ Agent will continue to report back to the RHQ Server with data about the resources in inventory. This includes their availability and metric data. At this point, the installation and initial setup are complete. You may begin to explore the RHQ Server user interface.
RHQ Agents are used to manage RHQ Storage Nodes. Therefore every RHQ Storage Node installation will also include an RHQ Agent. Moreover, RHQ will automatically import RHQ Storage Node resources, and, as necessary, their parent platforms. So, users will have some imported inventory prior to manual (or scripted) imports.