> cd switchyard-installer-2.1
> ant
Buildfile: /tmp/switchyard-installer-2.1/build.xml

get-jboss-path-question:
    [input] Enter the path to the root of your JBoss EAP installation:
/tmp/jboss-eap-6.4
Installing SwitchYard Runtime
Overview
The SwitchYard runtime can be installed into an existing EAP 6 installation using one of two methods:
-
Ant-based installer : supports interactive or parameterized installation of SwitchYard into EAP via an Ant script.
-
Distribution zip : an archive containing all SwitchYard modules, configuration, and quickstarts which is unzipped on top of an EAP installation.
The Ant-based installer is a bit more flexible in terms of options and also preserves existing EAP configuration. The distribution zip doesn't require Ant and allows for an easy unzip installation, but it does have the drawback of replacing the existing EAP configuration files (e.g.. standalone.xml). Whatever option you choose, you'll need to visit the SwitchYard Downloads page to get it.
Prerequisites
SwitchYard is low on prerequisites. The only things you need check are:
-
Java 8
-
Maven 3
-
EAP 6.4
If you plan to use the Ant-based installer, you'll need Ant as well.
based installer
Please make sure you are using ant version 1.9.x or newer.
Download the installer from the SwitchYard Downloads page and extract it to a location of your choice. Once extracted, you can simply run 'ant from within the installer directory to start the interactive installer:
Interactive mode can be disabled by passing the EAP_PATH property when executing Ant:
> ant -DEAP_PATH=/tmp/jboss-eap-6.4
Distribution Zip
Download the distribution zip from the SwitchYard Downloads page and unzip it inside of your EAP installation:
> cd /tmp/jboss-eap-6.1
> unzip switchyard-2.1.0.Final-EAP6.4.4.GA.zip
Depending on the zip utility in use, you may be prompted whether existing files should be replaced. Answer yes/all for all files being unzipped.
replace domain/configuration/domain.xml? [y]es, [n]o, [A]ll, [N]one, [r]ename: A
Installing Eclipse Tooling
Overview
The Eclipse-based tooling for SwitchYard is organized in the following feature groups:
-
SwitchYard Tools : core SwitchYard tooling support including the visual editor
-
SwitchYard BPEL Support : optional add-on to implement services using BPEL and integrates with the Eclipse BPEL editor
-
SwitchYard BPM Support : optional add-on to implement services using jBPM 6 and integrates with the Eclipse BPMN 2 modeler
The following sections cover how to install SwitchYard tooling into JBoss Developer Studio (JBDS) and Eclipse.
Please make sure to disable Honour all XML schema locations in preferences, XML→XML Files→Validation after installation. This will prevent erroneous XML validation errors from appearing on switchyard.xml files.
JBoss Developer Studio
SwitchYard tooling is compatible with JBoss Developer Studio 7. If you don't have JBDS installed already, download and install it from the JBDS site (https://devstudio.jboss.com/download/).
-
Download a release version of the offline update site ZIP (switchyard-site-assembly) from the SwitchYard Downloads page.
-
Open JBDS.
-
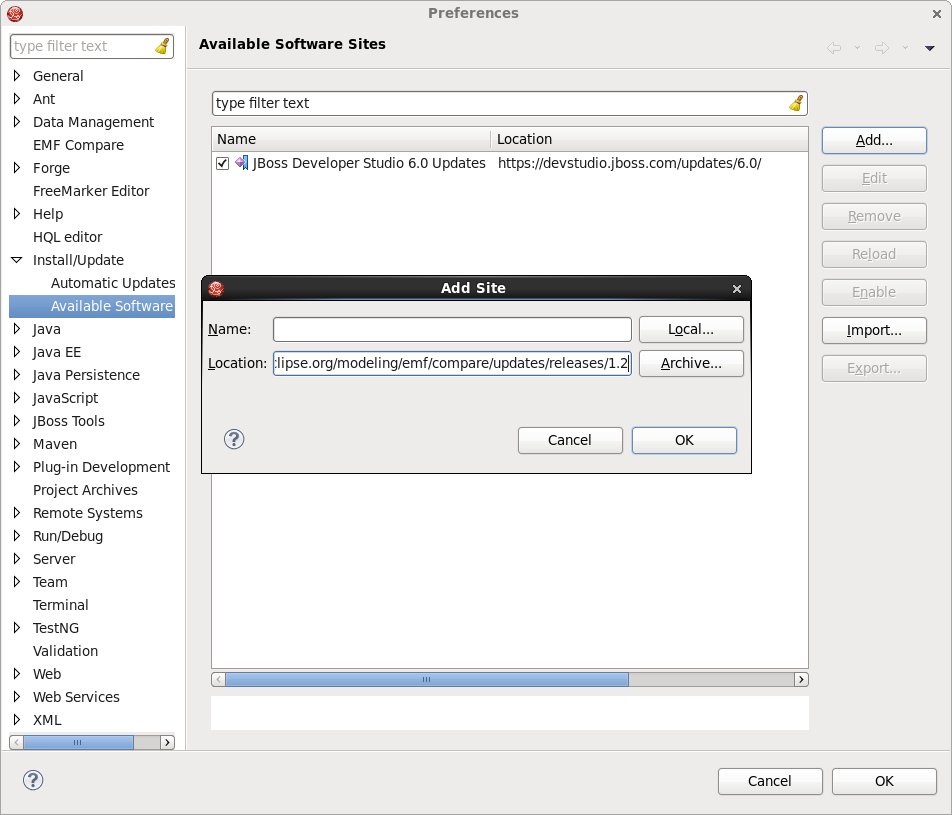
Select Window→Preferences from the main menu bar, go to Install/Update→Available Software Sites, and Add... the following sites:
http://download.jboss.org/jbosstools/updates/stable/kepler/integration-stack/aggregate/4.1.4.Final/
-
Select Help-->Install New Software... from the main menu bar.
-
Press the Add... button to add the SwitchYard tooling software site zip. Click the Archive... button and specify the location of the downloaded zip.
-
Once the software site has been configured, SwitchYard Tools should be displayed in the list of available software. Check the box, press Next and proceed through the rest of the wizard. (Refer to the Eclipse documentation for more information on software installation.)
Eclipse Kepler
In addition to JBDS, SwitchYard Tooling is also compatible with Eclipse JEE Kepler release. If you don't already have a Kepler JEE install, download and install from the Eclipse Download site.
-
Download a release version of the offline update site ZIP (switchyard-site-assembly) from the SwitchYard Downloads page.
-
Open Eclipse Kepler
-
Select Window→Preferences from the main menu bar, go to Install/Update→Available Software Sites, and Add... the following sites:
http://download.jboss.org/jbosstools/updates/stable/kepler/integration-stack/aggregate/4.1.4.Final/
-
Select Help-->Install New Software... from the main menu bar.
-
Press the Add... button to add the SwitchYard tooling software site zip. Click the Archive... button and specify the location of the downloaded zip.
-
Once the software site has been configured, SwitchYard Tools should be displayed in the list of available software. Check the box, press Next and proceed through the rest of the wizard. (Refer to the Eclipse documentation for more information on software installation.)
Installing Extras
BPEL Console
The BPEL console server and web application can be deployed from the SwitchYard installer using the install-bpel-console target:
ant install-bpel-console
The script will ask for the location of your EAP install where the console server and webapp will be deployed.
Forge Tooling
Forge is a rapid-application development tool focused on a shell-based interface with application developers. The SwitchYard project has a set of plugins for Forge which dramatically decrease the amount of time needed to create a new application. If you plan to develop SwitchYard applications, we highly recommend using the Forge or Eclipse tooling (or both!).
The first step is to install Forge itself, which is covered nicely in the Forge documentation. Please be sure to download Forge 1.3.2 Final, which can be found here. As part of installation, be sure to setup the $FORGE_HOME environment variable.
Once Forge is installed it's time to install the SwitchYard extensions to Forge. The easiest way to install them is to download the SwitchYard Installer and run:
ant install-forge
The installer will copy the necessary SwitchYard forge plugins directly into your ~/.forge directory.
For more details on using the Forge tooling for SwitchYard, please see the User Guide.