WILDFLY_HOME/bin/standalone.sh
Overview
In this document you will learn how to integrate security for Wildfly Administration Console with Keycloak using Elytron subsystem.
System Requirements
To follow the instructions in this document, make sure you have both Wildfly and Keycloak servers properly installed. You need the latest versions for both servers.
When running Wildfly, it must be using port 8080 (default port). The following command can be used to start the server:
For Keycloak, use the following command to start the server on port 8180:
KEYCLOAK_HOME/bin/standalone.sh \-Djboss.socket.binding.port-offset=100
Installing Keycloak Wildfly Elytron Adapters
Keycloak integration is only possible when using Keycloak Wildfly Elytron Adapter. This adapter is fully integrated with the new security infrastructure in Wildfly provided by Elytron and its subsystem.
Download the latest version of Wildfly Client Adapters and follow the instructions in this document to extract/install the adapters in your Wildfly installation. Make sure you run the following script when installing the adapter:
WILDFLY_HOME/bin/jboss-cli.sh --file=adapter-elytron-install-offline.cli
Creating a Keycloak Realm for Wildfly Management Services
We'll be protecting both administration console and HTTP management interface in Wildfly. For that, we need to create a Keycloak realm and two client applications, where these clients will be used to configure security for both administration console and HTTP management interface.
Start your Keycloak server using the following command:
KEYCLOAK_HOME/bin/standalone.sh -Djboss.socket.binding.port-offset=100
After running the command above you should be able to access Keycloak Administration Console at http://localhost:8180/auth and log in.
If you are running the server for the first name, you will be prompted to create an initial admin user to get started. Once you provide the username and password for the admin user you'll be redirected to Keycloak Administration Console login page.
Create a realm with a name wildfly-infra.
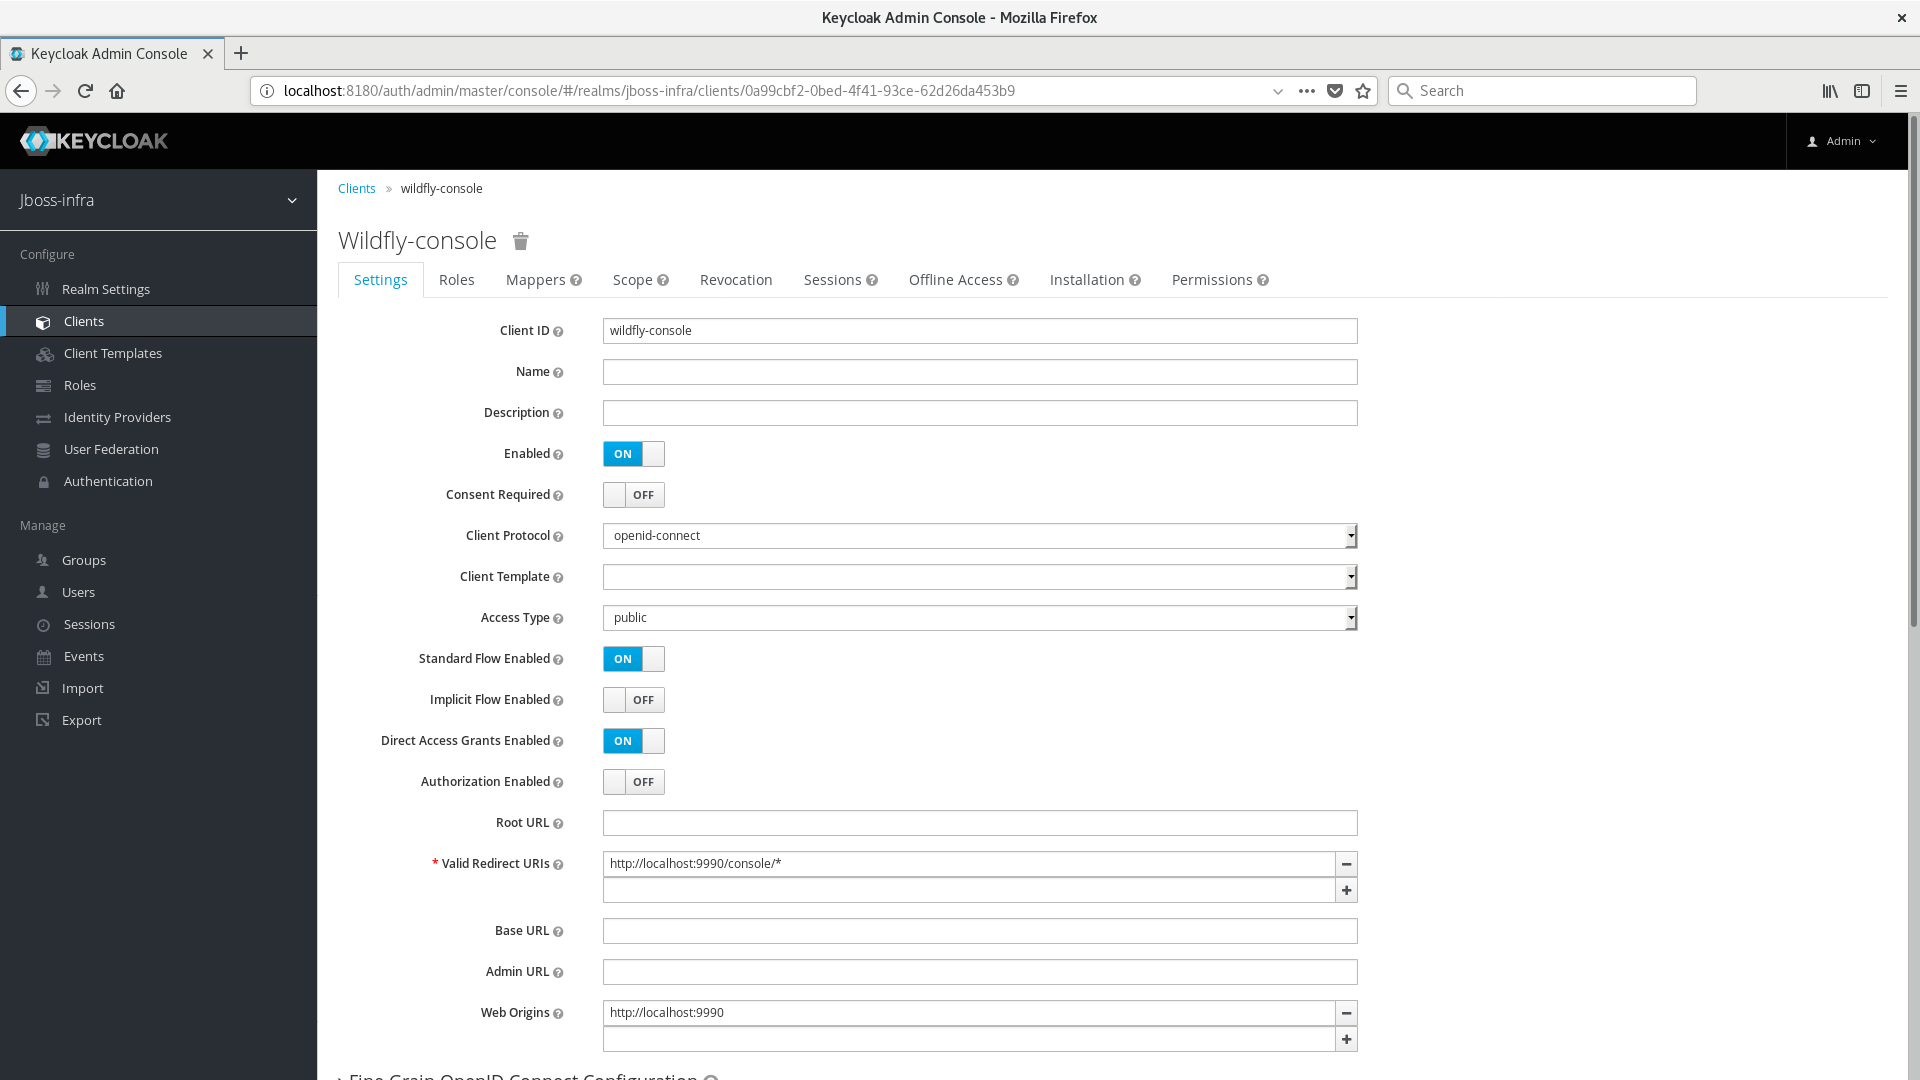
Create a client application with a name wildfly-console and configure it as follows:
-
Select public in the Access Type field
-
Add a new Valid Redirect URI with a value http://localhost:9990/console/*
-
Add a new Web Origins with a value http://localhost:9990
Save changes for client wildfly-console and make sure it is properly updated. The client should have a configuration similar to following:
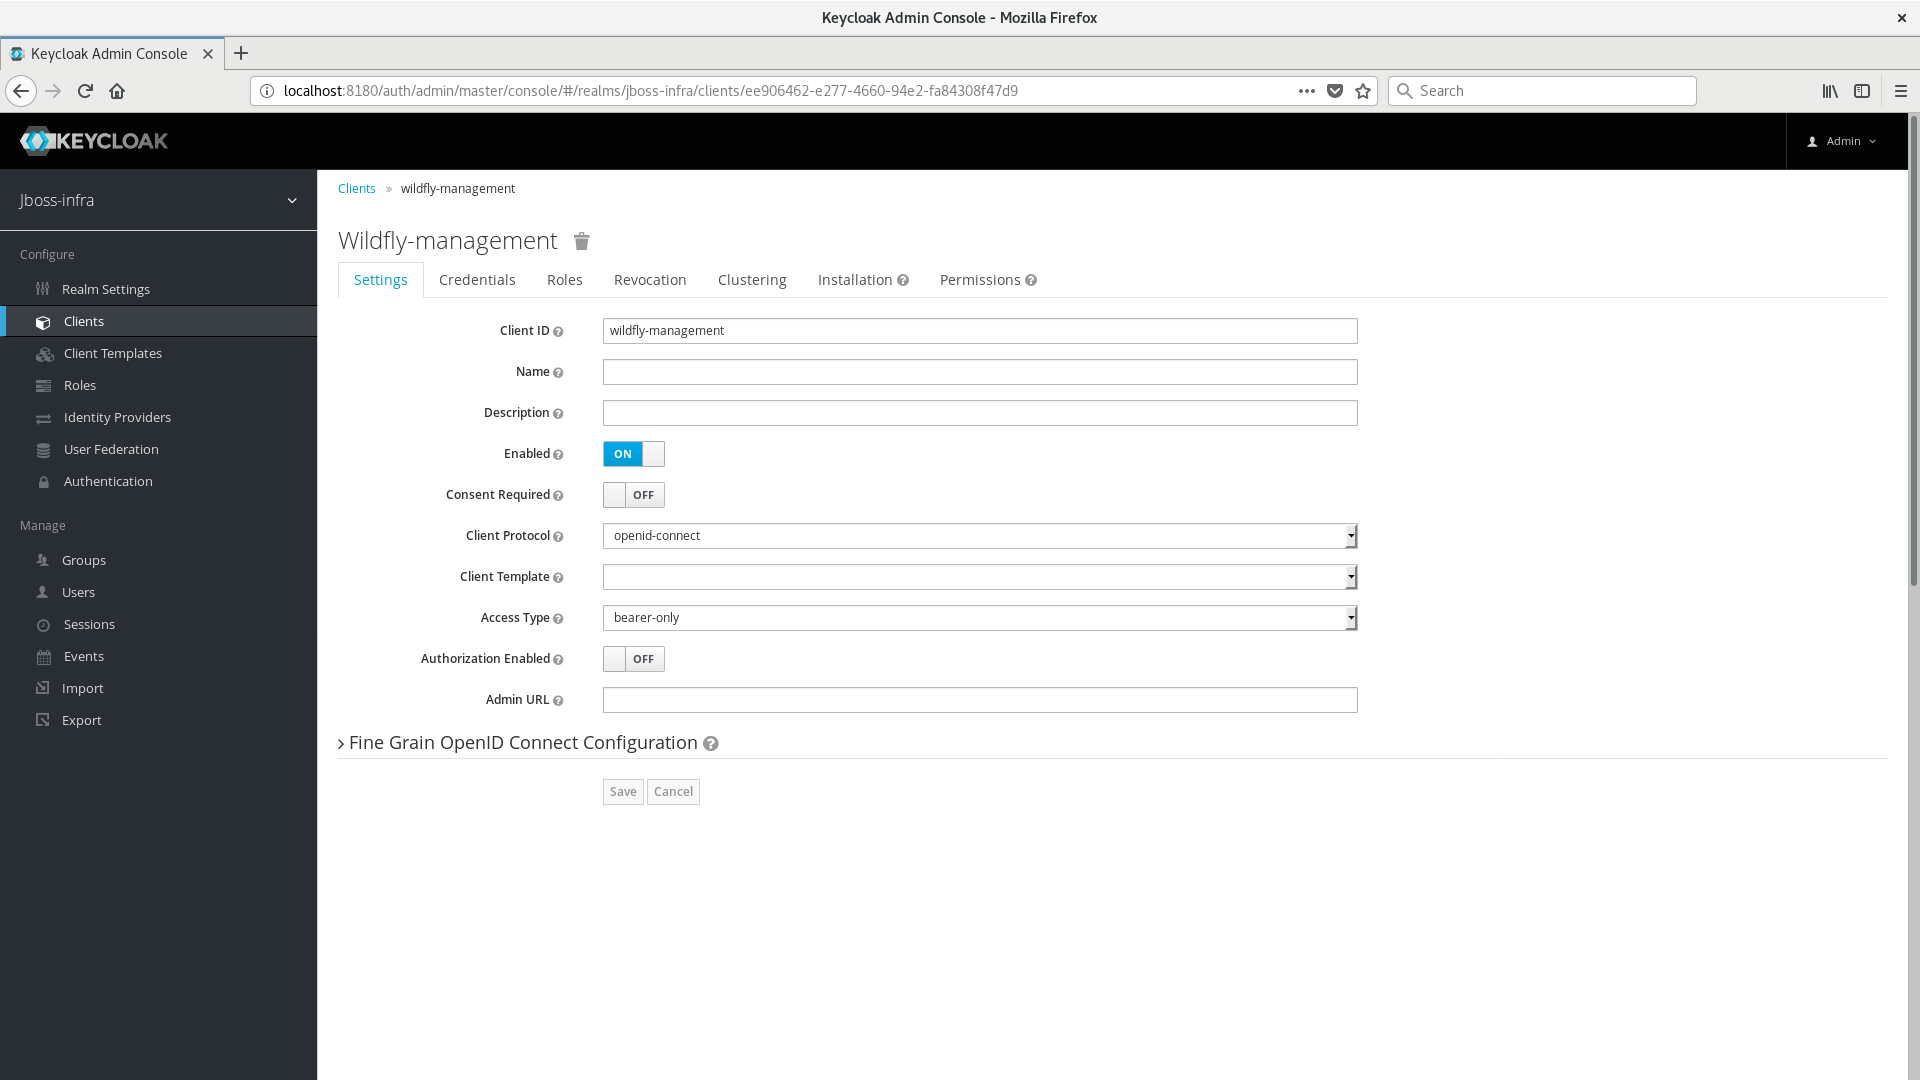
Create another client application with a name wildfly-management and configure it as follows:
-
Select bearer-only in the Access Type field
Save changes for client wildfly-management and make sure it is properly updated. The client should have a configuration similar to following:
For last, we need to create an user to wildfly-infra realm and also a role to grant to this user access to the Wildfly Administration Console.
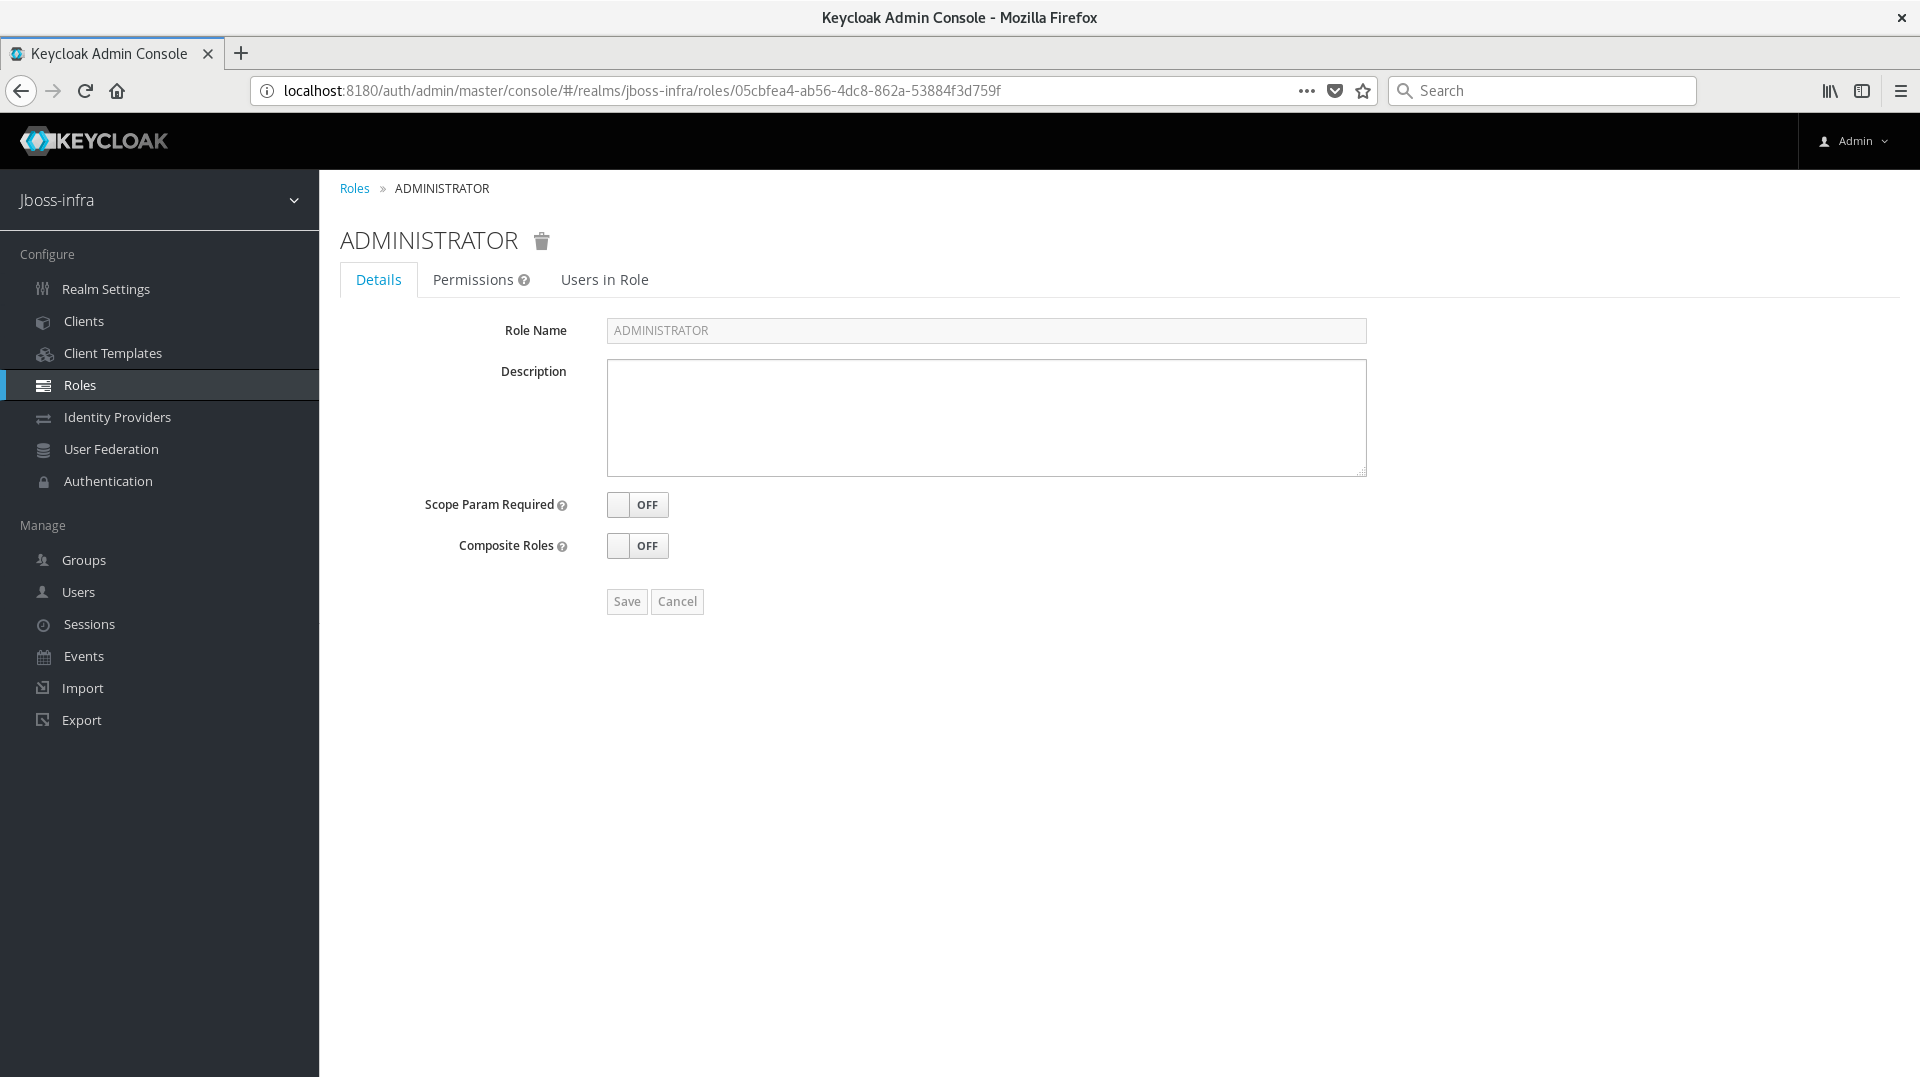
Create a Realm Role with a name ADMINISTRATOR. It is important to keep the name in uppercase.
For example purposes, we are only using the ADMINISTRATOR role to grant users access to the administration console. However, Wildfly also supports other roles with different access scopes. For more details, please take a look at https://docs.jboss.org/author/display/WFLY/RBAC.
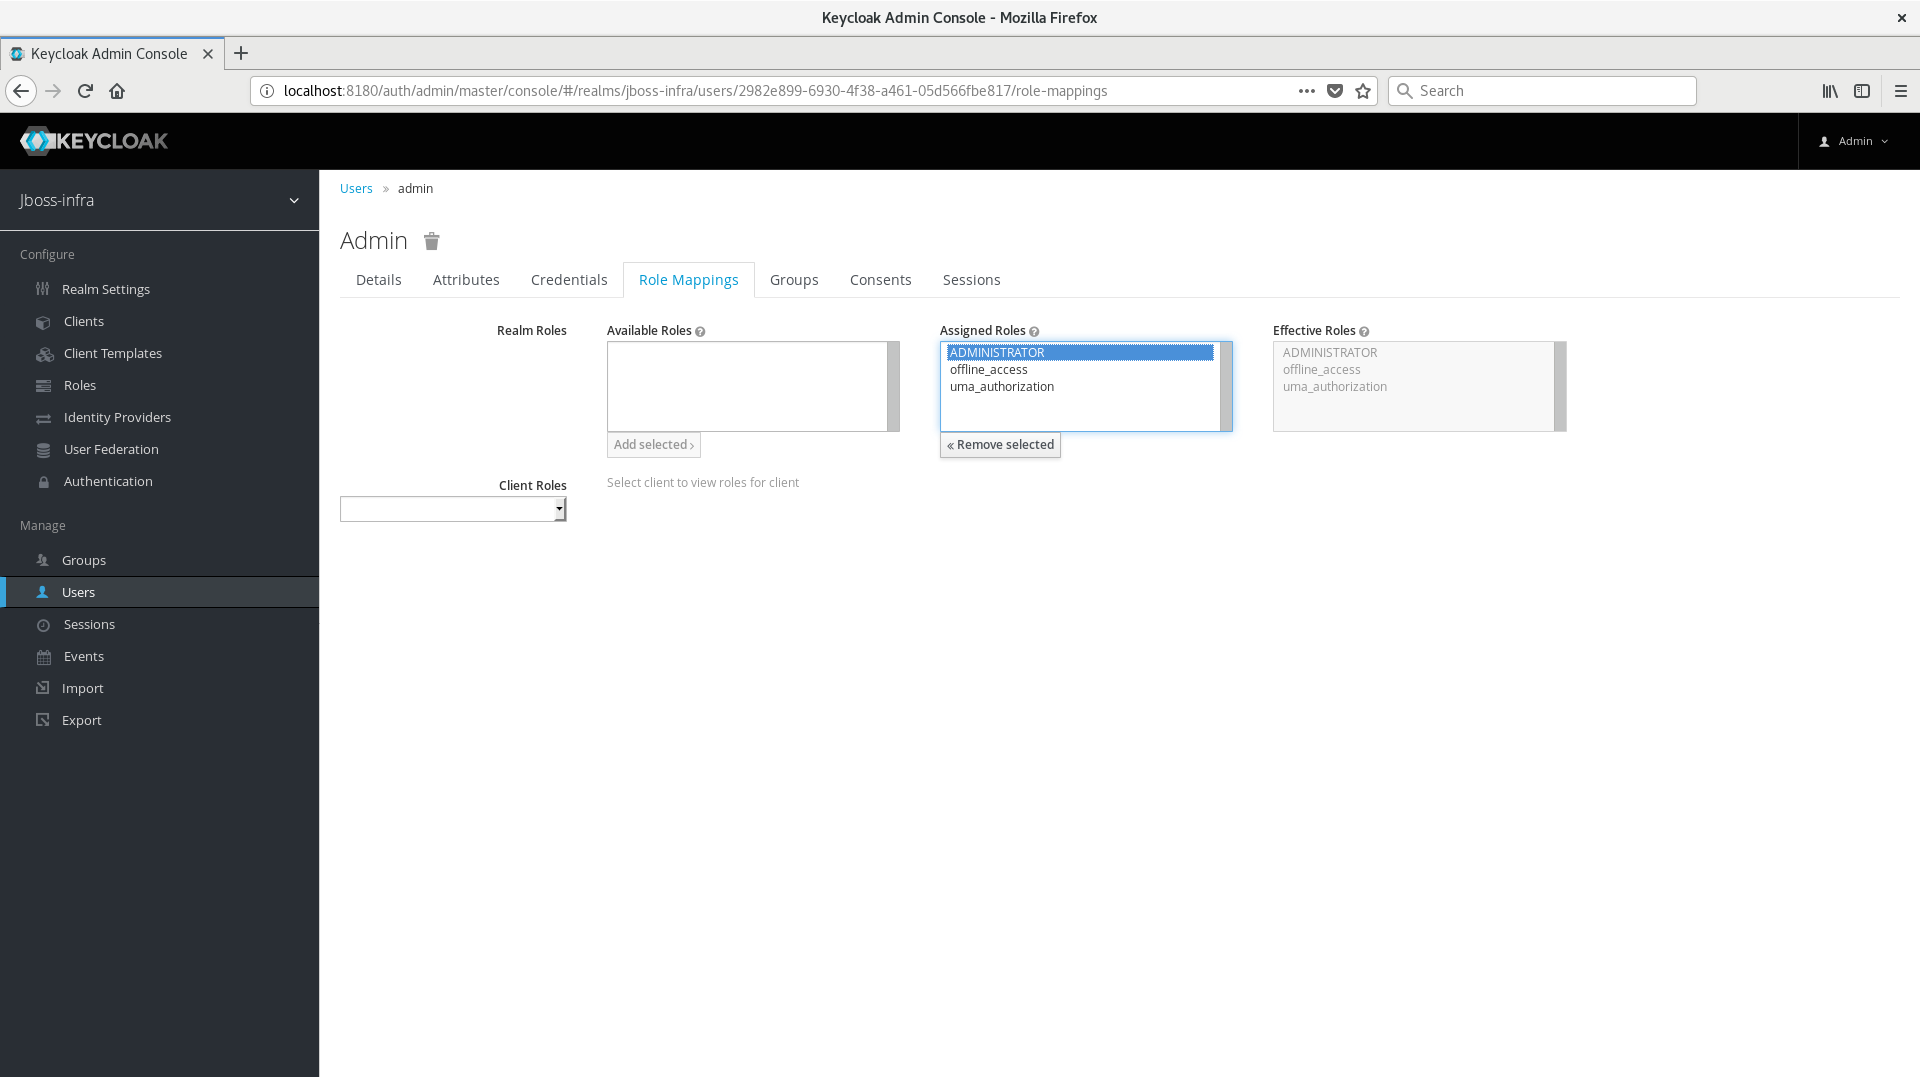
Create a new user with a name admin. You can choose whatever password you like, just make sure you set one. After creating the user, map the ADMINISTRATOR role to the admin user.
Protecting Wildfly Console and Management API
As a last configuration step, you need to configure Keycloak, Elytron and core subsystems to protect both management services.
Copy and paste the following commands to a new file with a name protect-wildfly-mgmt-services.cli:
# Create a realm for both wildfly console and mgmt interface
/subsystem=keycloak/realm=wildfly-infra:add(auth-server-url=http://localhost:8180/auth,realm-public-key=[REALM_PUBLIC_KEY])

# Create a secure-deployment in order to protect mgmt interface
/subsystem=keycloak/secure-deployment=wildfly-management:add(realm=wildfly-infra,resource=wildfly-management,principal-attribute=preferred_username,bearer-only=true,ssl-required=EXTERNAL)

# Protect HTTP mgmt interface with Keycloak adapter
/core-service=management/management-interface=http-interface:undefine-attribute(name=security-realm)
/subsystem=elytron/http-authentication-factory=keycloak-mgmt-http-authentication:add(security-domain=KeycloakDomain,http-server-mechanism-factory=wildfly-management,mechanism-configurations=[{mechanism-name=KEYCLOAK,mechanism-realm-configurations=[{realm-name=KeycloakOIDCRealm,realm-mapper=keycloak-oidc-realm-mapper}]}])
/core-service=management/management-interface=http-interface:write-attribute(name=http-authentication-factory,value=keycloak-mgmt-http-authentication)
/core-service=management/management-interface=http-interface:write-attribute(name=http-upgrade, value={enabled=true, sasl-authentication-factory=management-sasl-authentication})

# Enable RBAC where roles are obtained from the identity
/core-service=management/access=authorization:write-attribute(name=provider,value=rbac)
/core-service=management/access=authorization:write-attribute(name=use-identity-roles,value=true)

# Create a secure-server in order to publish the wildfly console configuration via mgmt interface
/subsystem=keycloak/secure-server=wildfly-console:add(realm=wildfly-infra,resource=wildfly-console,public-client=true)

# reload
reload
For last, execute the protect-wildfly-mgmt-services.cli script using JBoss CLI. Make sure your Wildfly instance is running before running the script:
WILFLY_HOME/bin/jboss-cli.sh --connect --file=protect-wildfly-mgmt-services.cli
Accessing Wildfly Administration Console
If everything is correct you should be able to access the Wildfly Administration Console now after authenticating in Keycloak.
Try to access Wildfly Administration Console and you should be redirected to a login page in Keycloak. You should be able to log in as the admin user you created in the wildfly-infra realm.