To use WebDAV in eXo Platform, you first need to have the Internet or Intranet connected. Next, you can follow one of the two following ways:
You need to connect to the WebDAV server. For example, for Windows XP, do the following steps:
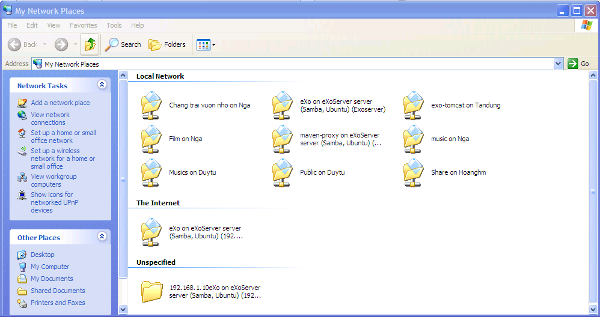
Navigate to the My Network Places on your local device. You will see all shared files and folders:
Click the Add a network place link on the left to open the Add Network Place Wizard.

Click Next to select a network location:

Select Choose another network location to create a shortcut.
Enter an address into the Internet or network address field.
For example, the address of the Acme demonstration site is
http://mycompany.com:8080/portal/rest/private/jcr/repository/collaboration/sites/content/live/acme.Click Next. After a few seconds, a folder named acme on localhost appears in the My Network Places directory.
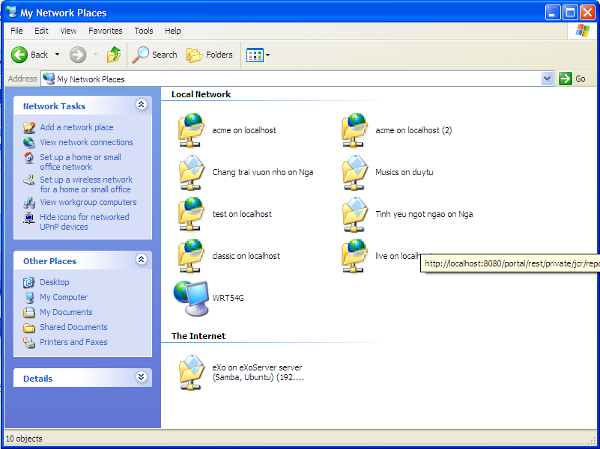
Each site managed by WebDAV appears as a folder in this location.
Take actions on the content in this folder to administrate the site content remotely.
This way can be done through Sites Management.
Hover your cursor over
 on the Administration bar, then select Content --> Sites Explorer from the drop-down menu.
Click the Drives button, then select Sites Management.

You will see all sites listed in the left sidebar.

Right-click your desired site to view with WebDAV, and select Download and Allow Edition from the menu.
The selected site will be shown in WebDAV.
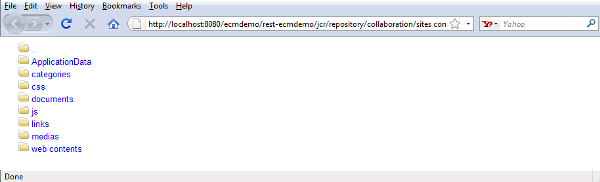
In this view, you can access documents in the directories that are linked to the web server.