Select Add New Node to create a node as a sub-node of the selected node.
If you want to create a new node at the root level of the portal, click
 , then right-click the empty space and select Add New Node;
Or, simply click the Add Node button.
The Add/Edit Page Node form appears.
Enter values in the Page Node Settings tab.
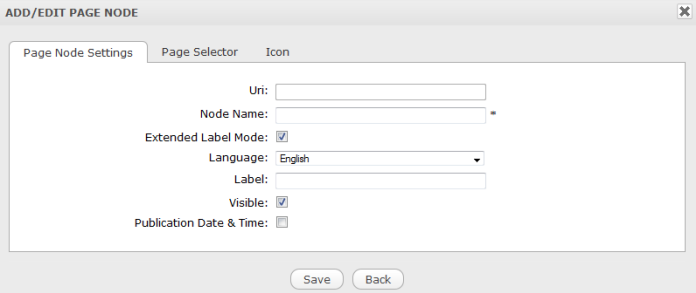
Details:
Field Description Asterisk (*) This mark next to each field means that it is required to enter values in the field. Uri An identification of the node that is auto-created after the new node has been created. Node Name The node name which must be unique. Only alphabetic, numeric and underscore characters are allowed with its length from 3 to 30 characters and without ANY SPACES. Extended Label Mode Tick this checkbox to activate the extended label mode for your page node's label. If this checkbox is deselected, the Language field will disappear. Language Select your desired language for the node label from the drop-down menu. Label The display name of the node on the screen in the selected language. This field is not required and may be changed. Its length must be between 3 and 120 characters, including SPACES. For example, if you want to create a French label for your node, first select the Extended Label Mode checkbox. Next, from the Language drop-down list, select your desired language and enter your French label into the Label field. Visible This checkbox enables the page and its node to be shown or hidden at the navigation bar and sitemap. Publication Date & Time This option enables this node to be published for a given period. Two fields, including Start Publication Date and End Publication Date only display when this option is checked. Start Publication Date The start date and time to publish the node. End Publication Date The end date and time to publish the node. Note
You can set date and time by clicking Start Publication Date and End Publication Date and selecting a date from the calendar pop-up.
Select a page for this node in the Page Selector tab if you want.
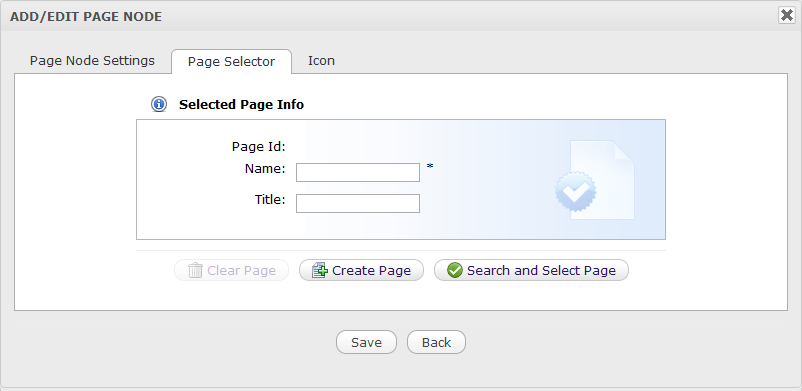
Details:
Field Description Page Id The identification string of the page which is created automatically. Name The selected page's name. Title The selected page's title. Clear Page Remove the inputted page information from fields. Create Page Create a new page with the inputted name and the title. Search and Select Page Search and select an existing page. If you select Create Page, input the name and title for the page.
If you select Search and Select Page, you do not need to enter values in these fields. They are automatically recorded after you have selected an existing page from the Select Page form .
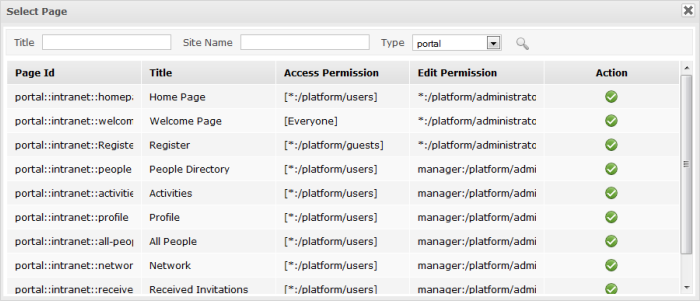
This window lists all existing pages of Portal or Group with basic information for each page.
You can select a page for creating a node by simply clicking
 , or search for a specific page as
follows:
, or search for a specific page as
follows:
i. Enter your page title into the Title field to search by title;
Or, enter the site name into the Site Name field to search by the page's site name;
Or, enter values into both fields to further limit your search results by both Title and Site Name.
ii. Select the area in which you want to search into the Type field.
iii. Click
 to perform your search. All pages matching your search criteria will be listed.
iv. Click
on the row of the page to select.
After selecting a page, you will see the page details in the Page Selector form.
Select one icon in the Icon tab if you want.
Click Save to accept the new node page, or X to close the form.
Note
To select a page, you must be a member in the Access Permission or Edit Permission list of the selected pages. When the page type is 'User', you cannot select a page of another users.
If you do not have the Access permission for any page in the list, please contact your administrator to get appropriate permissions.