All developers and process analysts who are beginning to use JBoss jBPM should read this Getting Started guide. It will give them a jumpstart showing how to create a process definition.
This document introduces the use of the JBoss jBPM Graphical Process Designer (GPD) to create workflow processes. It will help first time users with the following tasks :
Install the JBoss jBPM GPD Eclipse plugin available from the JBoss jBPM download area
Set up a Java project in Eclipse and prepare it to do test driven process development
Using the creation wizard to create an empty process definition
Use the designer palette to draw the first processdefinition
Show how the xml processdefinition can be inspected as an xml file
Set up a Java project in Eclipse and prepare it to do test driven process development
Write an example process test case
If you have questions, please feel free to contact Koen Aers or Tom Baeyens for more information.
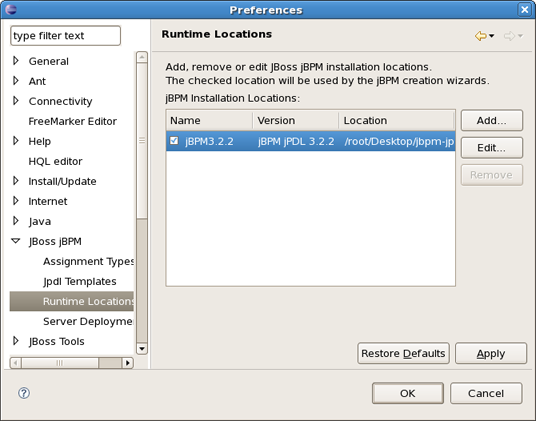
The jBPM plugin (jBPM Designer) is already included in JBDS. To make it work, you should only download the jBPM runtime (jbpm-jpdl-3.2.2 currently) from here and specify the directory where you extracted the runtime either when you create a jBPM project or by using the jBPM preference pages.
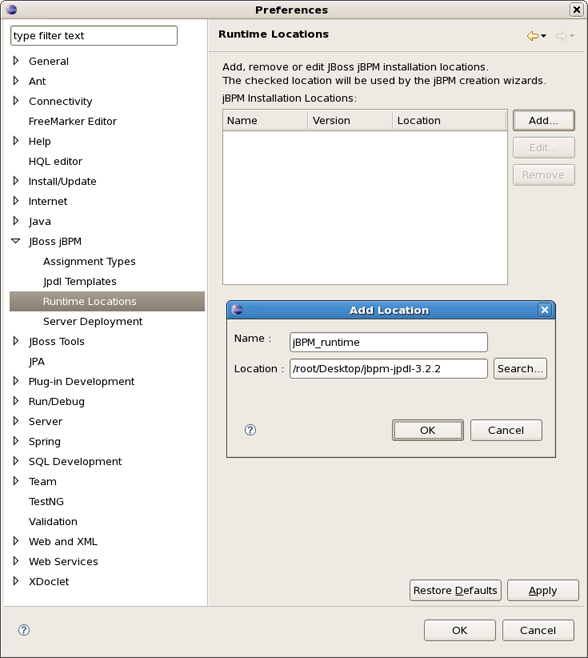
Navigate to Window > Preferences > JBoss jBPM > Runtime Locations. Here you can add, edit and remove JBoss jBPM installation locations.
Click Add button. In the diallog that appeared enter a name for a newly added jBPM runtime and point to the correct location of this package on your harddrive. Click OK then click OK again.
We have included a wizard in the GPD plugin to create a jBPM project. We have opted to create a project containing based on a template already containing a number of advanced artifacts that we will ignore for this section. In the future we will elaborate this wizard and offer the possibility to create an empty jBPM project as well as projects based on templates taken from the jBPM tutorial.
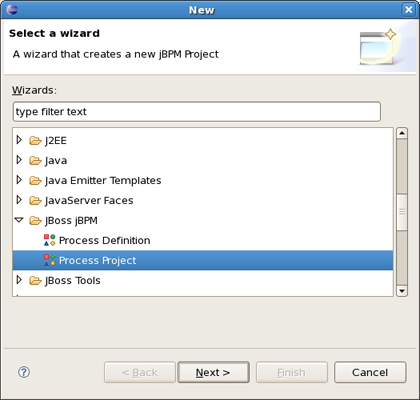
To create a new jBPM project using the project creation wizard, we select File >New Project... and in the New Project dialog, we select JBoss jBPM > Process Project :
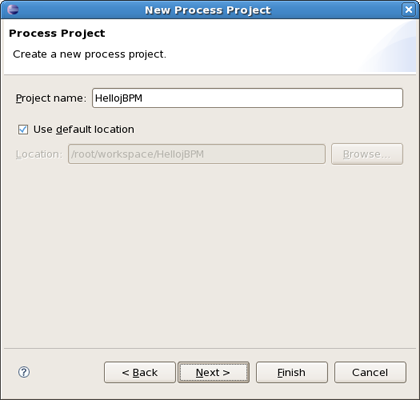
Clicking Next brings us to the wizard page where we have to specify the name and location for the project. We choose for example Hello jBPM as the name and accept the default location.
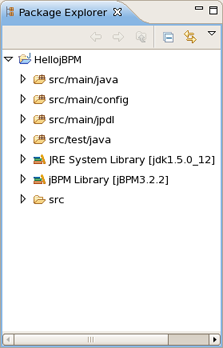
Clicking on Finish results in the project being created. The wizard creates four source folders: one for the processes ( src/main/jpdl ), one for the java sources ( src/main/java ), one for the unit tests ( src/test/java ) and one for the resources such as the jbpm.properties and the hibernate.properties files ( src/main/config ). In addition a classpath container with all the core jBPM libraries is added to the project
Looking inside the different source folders will reveal a number of other artifacts that were generated, but we will leave these untouched for the moment. Instead, we will look at another wizard that enables us to create an empty process definition.
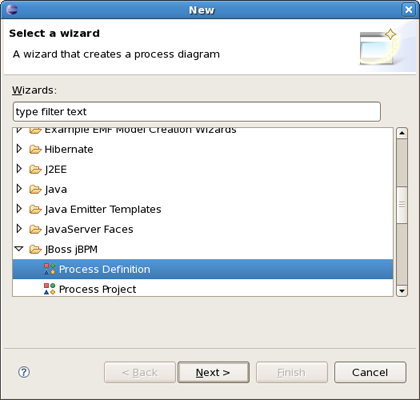
When the project is set up, we can use a creation wizard to create an empty process definition. Bring up the New wizard by clicking the File > New > Other... menu item. The wizard opens on the Select Wizard page.
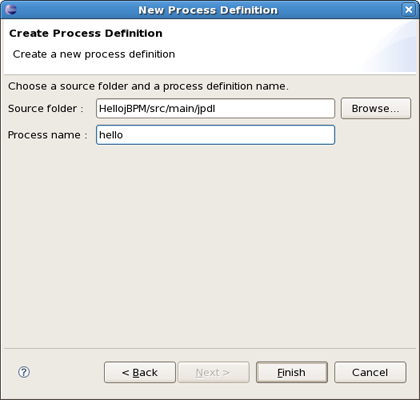
Selecting the JBoss jBPM category, then the Process Definition item and clicking on the Next button brings us to the Create Process Definition page.
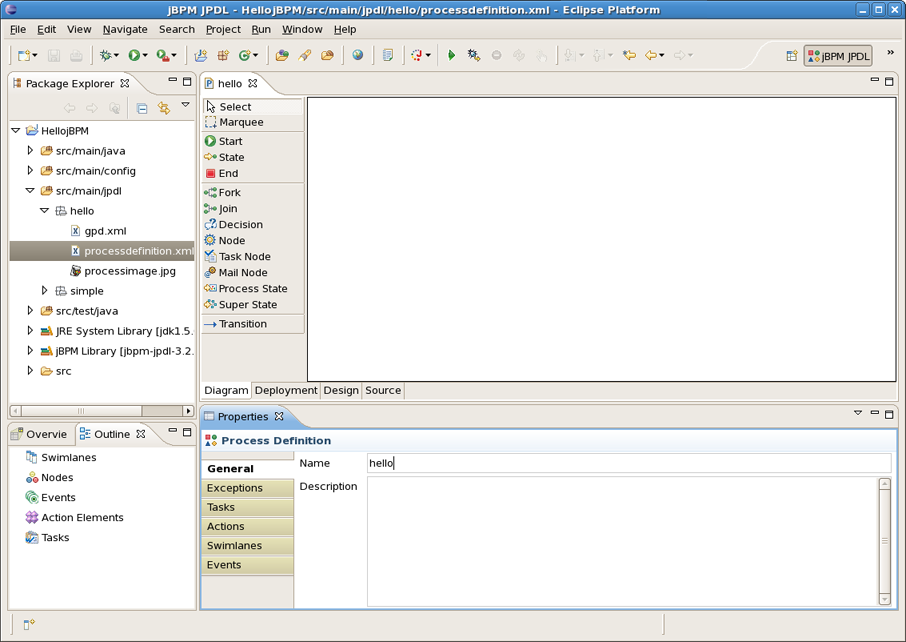
We choose hello as the name of the process archive file. Click on the Finish button to end the wizard and open the process definition editor.
You can see in the Package Explorer that creating a process definition involves creating a folder with the name of the process definition and populating this folder with two .xml files : gpd.xml and processdefinition.xml .
The first of these two contains the graphical information used by the process definition editor. The processdefinition.xml file contains the actual process definition info without the graphical rendering info. At present, the GPD assumes that these two files are siblings. More sophisticated configuration will be supported later.
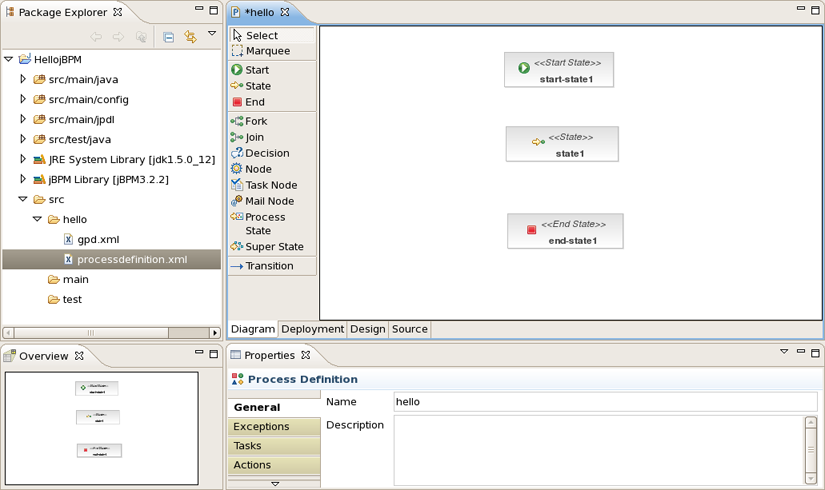
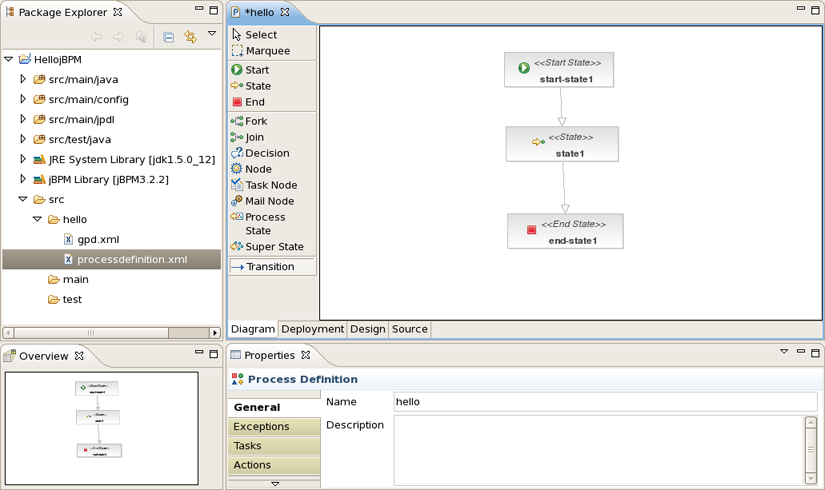
We will create a very simple process definition, consisting of a begin state, an intermediate state and an end state.
To make the configuration of actions much easier it's better to use the jPDL perspective. It provides the tabbed Properties Editor which allows to configure all the relevant properties of the current selected item.
Select respectively Start , State and End on the tools palette and click on the canvas to add these nodes to the process definition. The result should look similar to this:
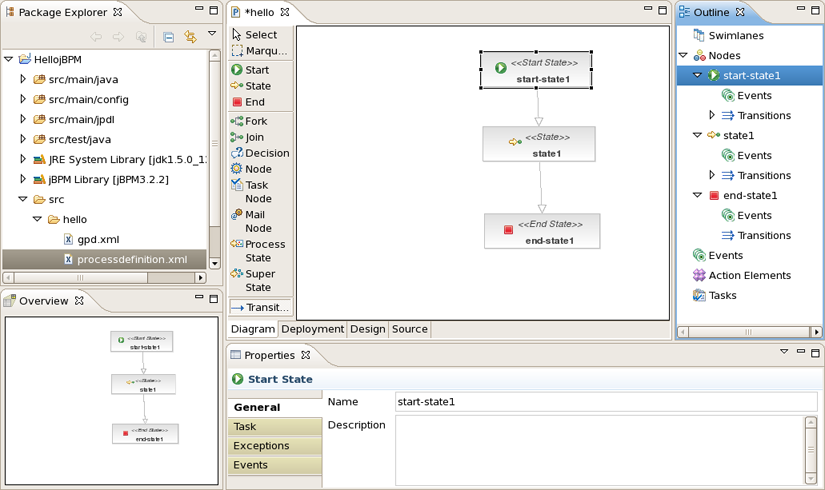
We will connect the nodes with transitions. Select the Transition tool in the tools palette and click on the Start node, then move to the State node and click again to see the transition being drawn. Perform the same steps to create a transition from the State node to the End node. The result will look like:
You can see an outline of the process being drawn in the JBDS outline view if it is visible (if not select Window > Show view > Outline ). It is presented as the classical tree view. Also you can use Overview that comes as a scrollable thumbnail.
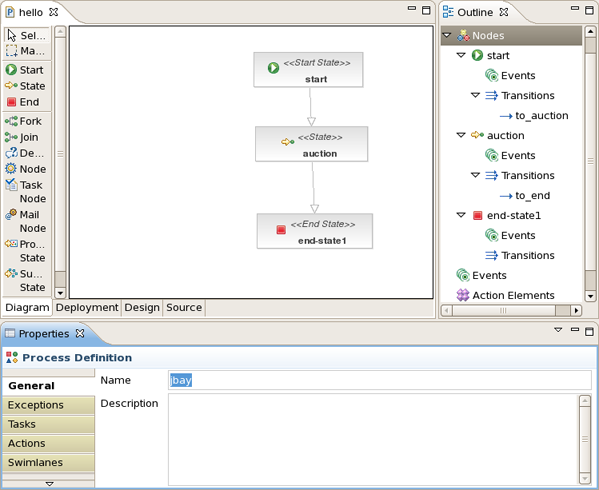
If the JBDS Properties view is visible (if not select Window > Show view > Properties ), the relevant properties of the selected item are shown. Some of these properties may be directly editable in the properties view. An example of a directly editable property is the name property of the process definition. As you can see in the next figure, the name property of the process definition can be changed to jbay . You can also write a description for this property.
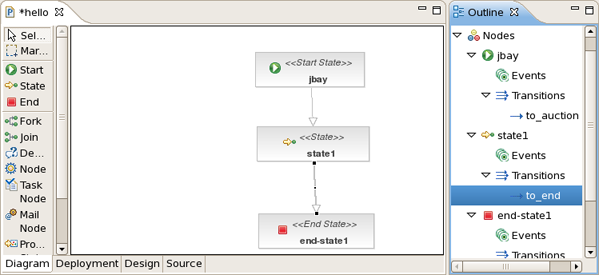
Let's change the name of the first transition to to_auction . We repeat this name change for the second transition and name it to_end .
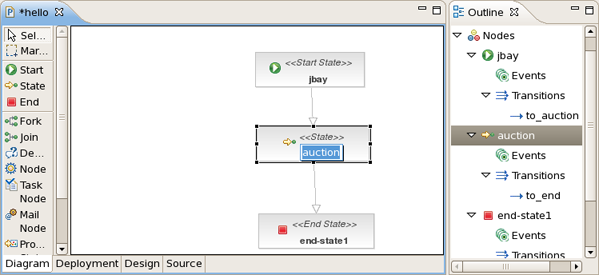
Some properties can be directly edited in the graphical editor. One example of this is the Name property of nodes. You can edit this directly by selecting the node of which you want to change the name and then click once inside this node. This enables an editor in the node. We change the name of the node to auction .
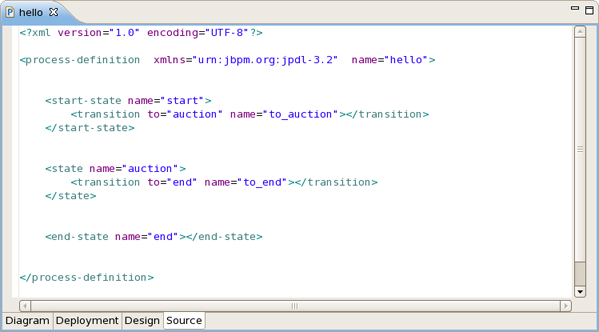
Now that we have defined a simple process definition, we can have a look at the xml that is being generated under the covers. To see this xml, click on the source tab of the process definition editor.
This source tab is editable, so if you know your way around in jpdl, you can create or tweak your process definitions directly in the xml source.
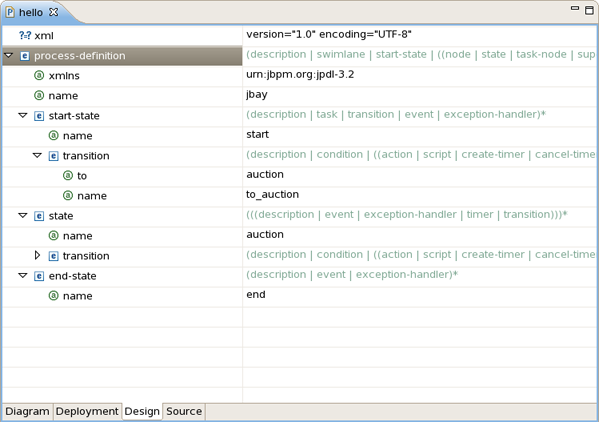
The file is also editable in Design view as you can see in the next picture:
One of the most important advantages of JBoss jBPM's lightweight approach to BPM and workflow management is that developers can easily leverage their usual programming skills and techniques. One of these well-known techniques is unit testing and test driven development. In this chapter we will show how developers, making use of the JBoss jBPM GPD can use a technique we have baptized Test Driven Process Development to create process definitions and test their correctness.
When creating the HellojBPM project the create process project wizard has already put in place all the library requirements we need to start writing jBPM unit tests. These are contained in the jBPM Library container and the most important of it is the .jar file containing the core jBPM classes. It must be noted that it is possible to change the location of the core jBPM installation by changing the preference settings. More on this later in the book.
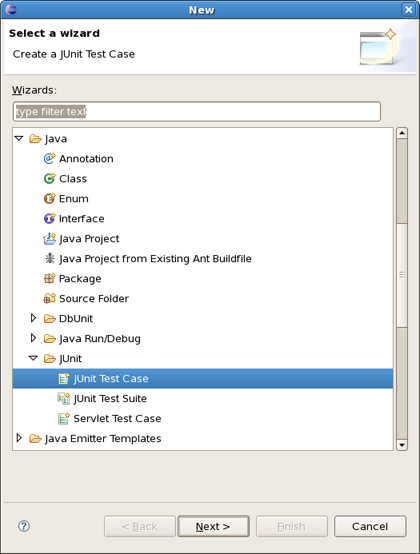
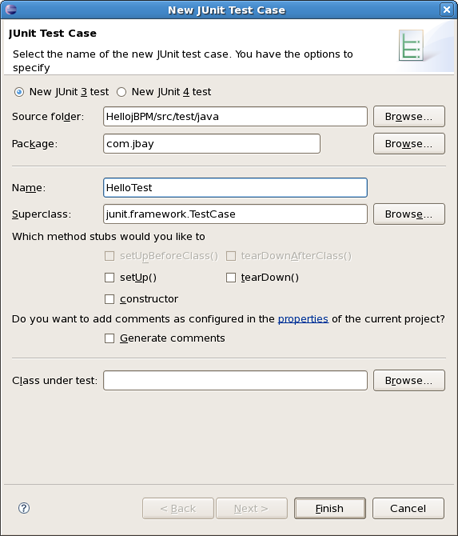
With that extra knowledge on the project settings, you can create your first test. To do this, we create the com.jbay package in the test/java source folder. Then we bring up the context menu on this package and select New > Other... and then Java > JUnite > JUnite Test Case.
We call the test class HelloTest .
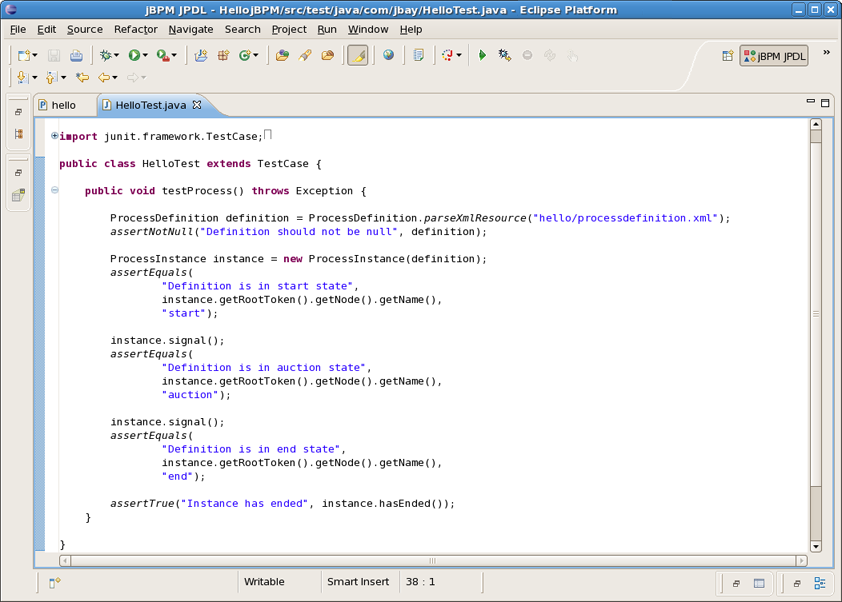
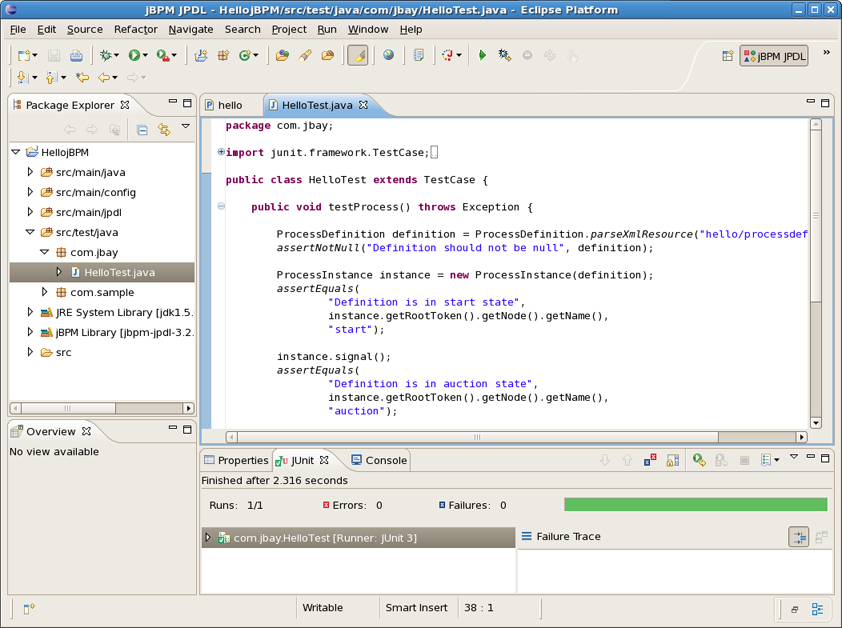
We write a simple test scenario as shown on the next figure. Let's study the code of this testcase.
In the first line of the method, a jBPM process archive object is created. We use a constructor accepting the filename of the archive. In our case it is the hello file we created earlier and which lives in the src/main/jpdl folder of our project. After asserting that this object is really created, we extract a process definition object from it. This object is fed to the constructor of a process instance object. We have a process instance object, but this process is not yet started, so we can safely assert that its root token still resides in the start node. After signalling the token will move to the next state and the process will be in the auction state. Finally another signal will end the process.
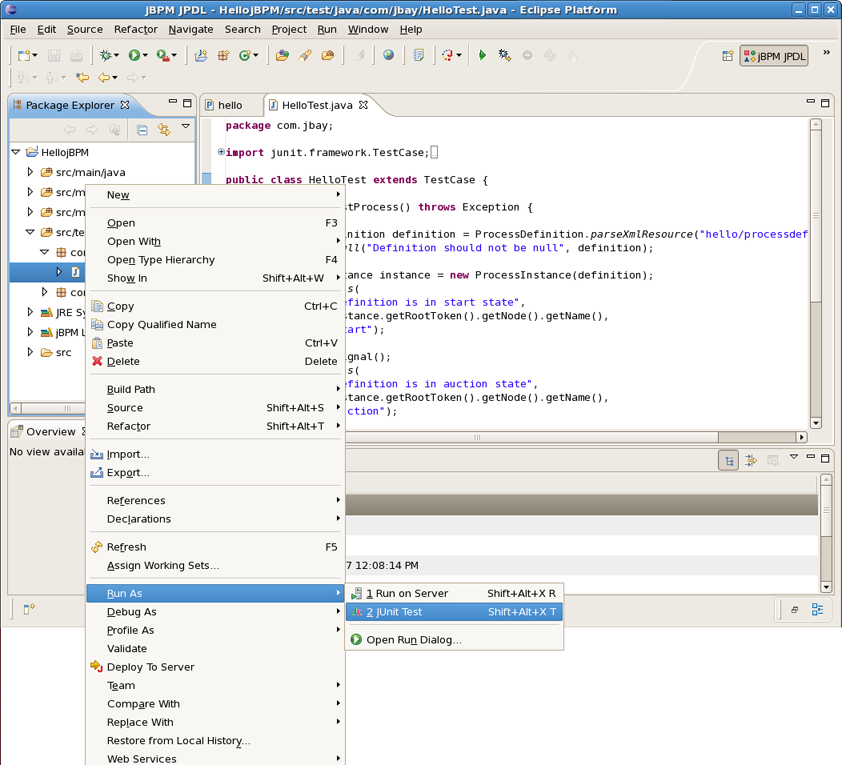
After writing this test we can check whether it works as expected by running it .
All went well as we have a green light:
Of course, this simple scenario was not very interesting, but the purpose of it was to show how you can reuse your development skills in a very straightforward way when doing process development. To see how more interesting processes and process test scenario's can be developed, we suggest you to read the JBoss jBPM User Guide and to study the API reference. Moreover some more examples will be given later in this book.
In this chapter we will show how to do software integration with JBoss jBPM. The standard mechanism to realize this is to wrap the functionality you want to integrate in a class that implements the ActionHandler interface.
Each hello process should integrate one or more hello actions, so this is what we will be doing. We can integrate custom code at different points in the process definition. To do this we have to specify an action handler, represented by an implementation of the ActionHandler interface, and attach this piece of code to a particular event. These events are amongst others, going over a transition, leaving or entering nodes, after and before signalling.
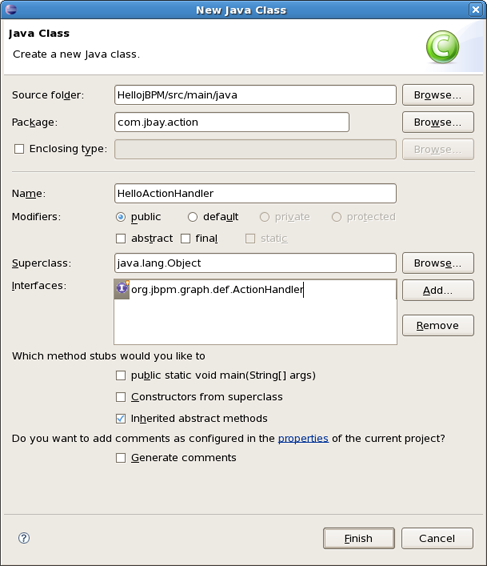
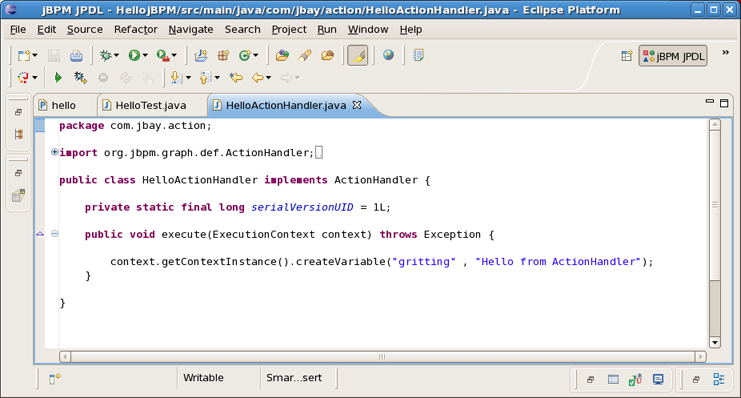
To make things a little bit more concrete, we will implement an ActionHandler . To do this, create a new class called HelloActionHandler , which implements the ActionHandler interface and implement the execute method as shown in the next figure. This test will add a variable named greeting to the collection of process variables and puts a message in it : "Hello from ActionHandler".
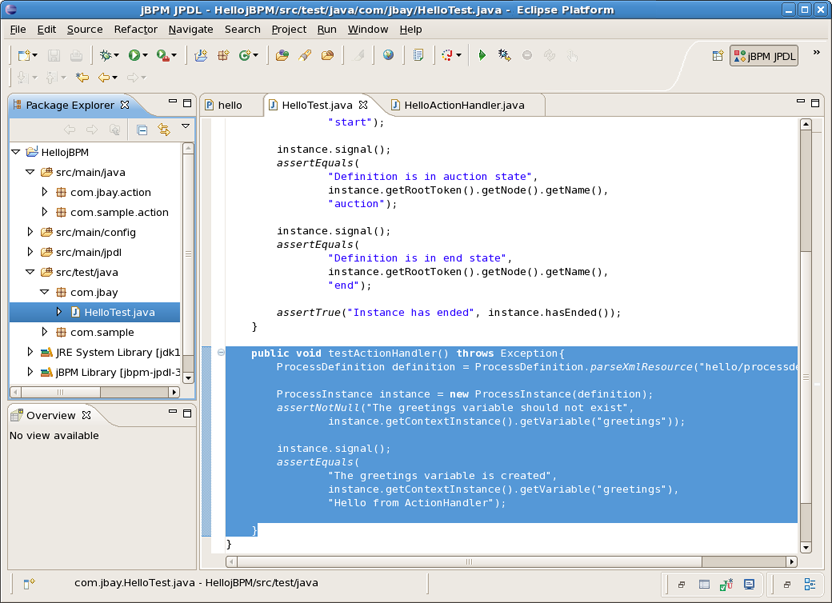
As good Testcity citizens we will first create a unit test that proves the behaviour we want to achieve by adding the ActionHandler to the process. So we implement another test. Creating the process instance is code we already saw in the previous chapter. We assert that no variable called greeting exist. Then we give the process a signal to move it to the first state. We want to associate the execution of the action with the event of going over the transition from the start state to the first state. So after the signal, the process should be in the first state as in the previous scenario. But moreover, the greeting variable should exist and contain the string "Hello from ActionHandler". That's what we assert in the last lines of the test method.
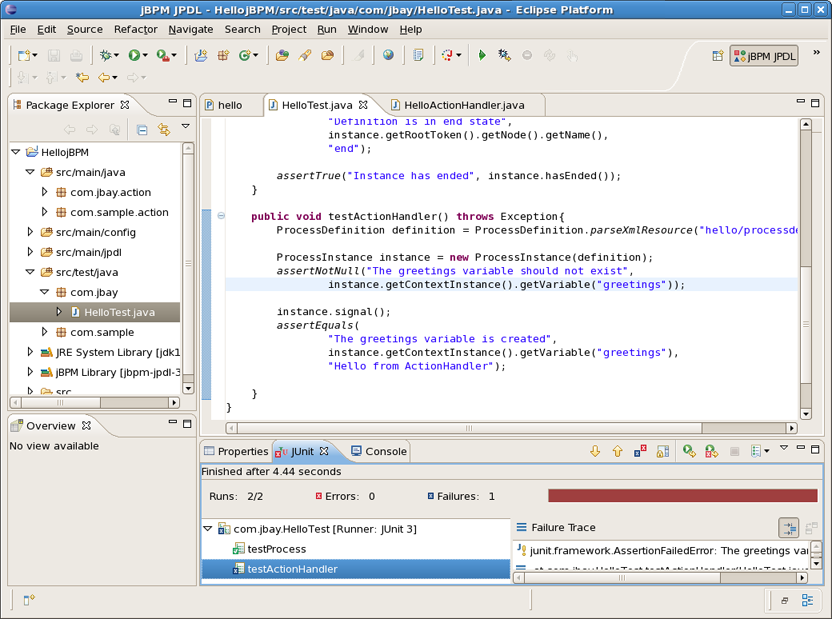
Running the tests now results in a failure. As a matter of fact, we did not associate the action with any particular event in the process definition, so the process variable did not get set.
Let's do something about it and add an action to the first transition of our sample process. To do this you can use the Actions tab in the Properties Editor that is under the graphical canvas. Bring up the popup menu of the action element container and chose New Action as it’s shown on the screenshot below. The other way to add an action to the transition is simply to use the dropdown menu that is available under the action icon in the right upper corner of the Properties View.
After adding the action a tabbed view with three pages will appear.
The first of these three pages allows you to give the Action a name. The last page contains some advanced attributes such as whether the Action is asynchronous. The Details page is the most important. It allows to choose and configure the actual action handler implementation.
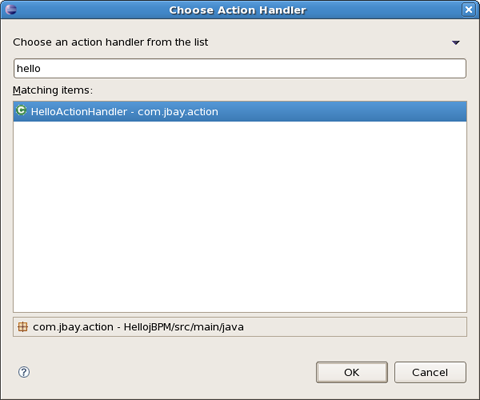
Clicking on the Search... button brings us to a Choose Class dialog.
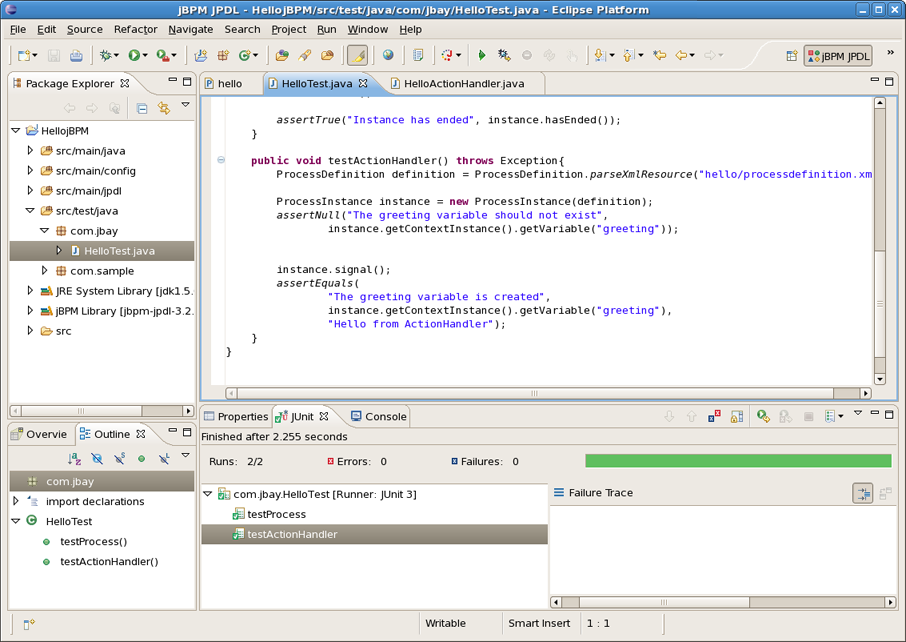
We choose our previously created 'HelloActionHandler' class and push the OK button. After the selection of the action handler for the action, we can run the test and observe it gives us a green light.
The different integration points in a process definition are thoroughly documented in the JBoss jBPM User Guide. Instance nodes can contain many action elements. Each of these will appear in the Action element list of the Actions tab. But each Action also has a properties view of itself. You can navigate to this view by selecting the added Action in the outline view.
You can change the default jBPM installation by means of the Eclipse preference mechanism. Open the Preferences dialog by selecting Window > Preferences and select the JBoss jBPM > Runtime Location category. Using this page you can add multiple jBPM installation locations and change the default one. The default installation is used for the classpath settings when creating a new Process Project. Changing the preferences has no influence on already created projects. Getting rid of a jBPM installation that's being referenced by a project however will cause the classpath to contain errors.
