JBDS is supplied with a huge range of various editors for different file types.
JBoss Developer Studio has powerful editor features that help you easily navigate within your application and make use of content and code assist no matter what project file (jsp, xhtml, xml, css, etc.) you are working on.
OpenOn let's you easily navigate through your project without using the Package Explorer view (project tree). With OpenOn, you can simply click on a reference to another file and that file will be opened.
OpenOn is available for the following files:
XML files
JSP/XHTML Pages
Java files
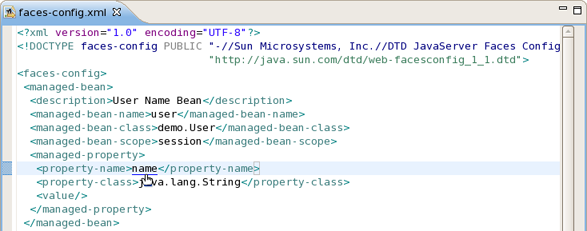
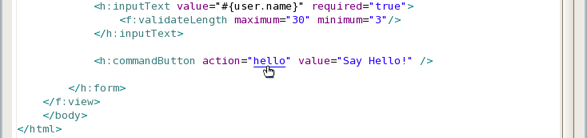
Press and hold down the Ctrl key. As you move the mouse cursor over different file references in the file, they display an underline. When you have the mouse cursor over the name of the file you want to open, click and the file will open in its own editor. In this example the managed bean NameBean will open.
This is the result of using OpenOn
You can also try OpenOn with defined attributes.
You can also open any JSP pages.
OpenOn is also very useful in JSP pages. It will allow you to quickly jump to the reference instead of having to hunt around in the project structure.
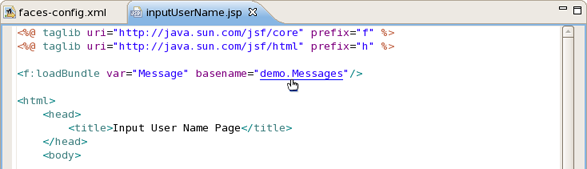
You can easily open the imported property files.
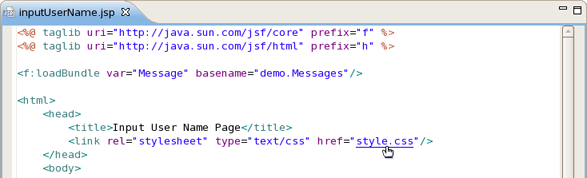
Use OpenOn to open a CSS file used with a JSP page:
Open managed beans:

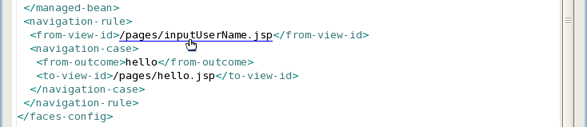
For JSP files in a JSF project, you can also easily open the navigation rules by applying OpenOn to the JSF tag for the navigation outcome:
Content assist is available when working with
Seam project files
JSF project files
Struts project files
JSP files
When working with JSF project in JBoss Developer Studio, you can use various Content Assist features while developing:
Content Assist for XML, JSP and JSF configuration files
Content Assist based on project data
Content Assist with graphical JSF editor
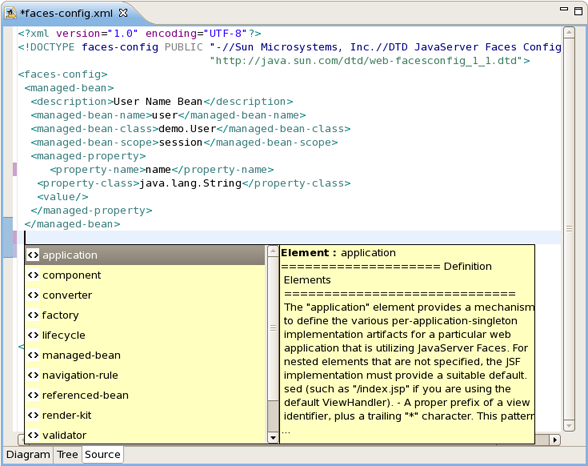
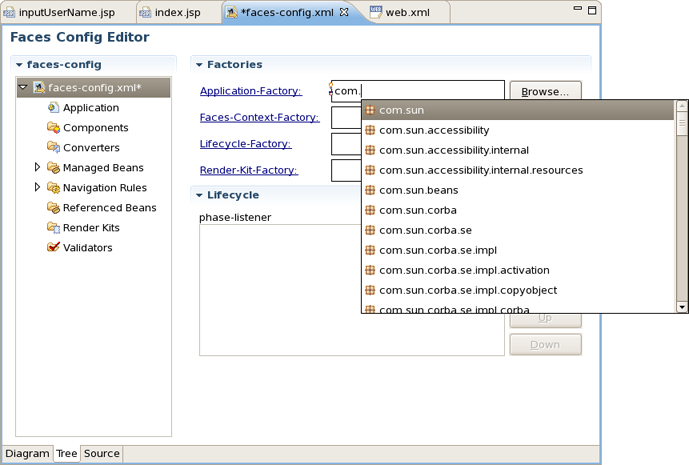
At any point when working with any XML, JSP and JSF configuration files Content Assist is available to help you. Simply type Ctrl-Space to see what is available.
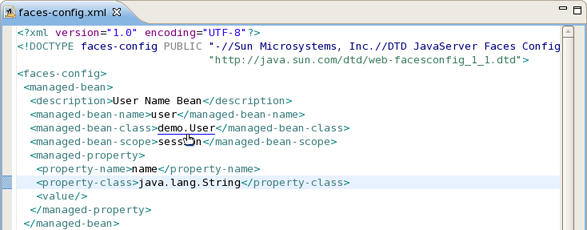
Content Assist for JSF configuration file:
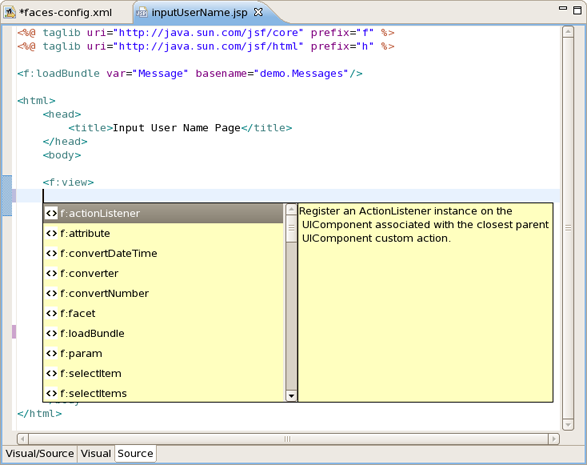
Content Assist for JSF JSP file:
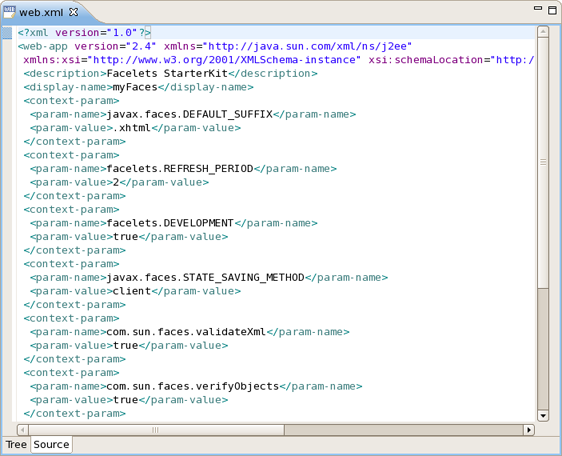
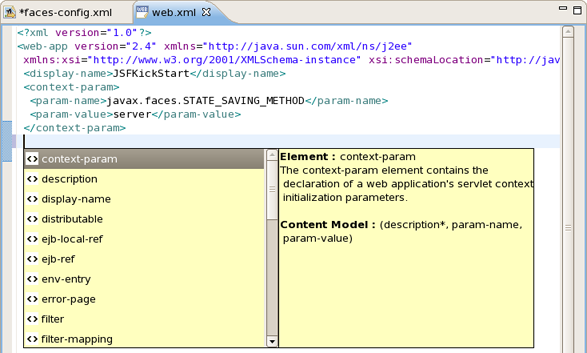
Content Assist for other JSF XML project files (web.xml shown):
JBoss Developer Studio takes Content Assist to the next level. Studio will constantly scan your project and you will be able to insert code into the JSP page from your project that includes:
Values from Property files
"Managed beans" attributes and methods
Navigation Rule Outcomes
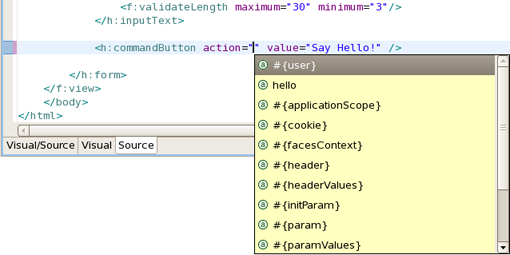
JSF variables (context, request etc...)
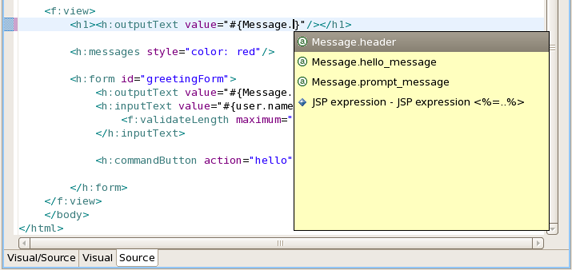
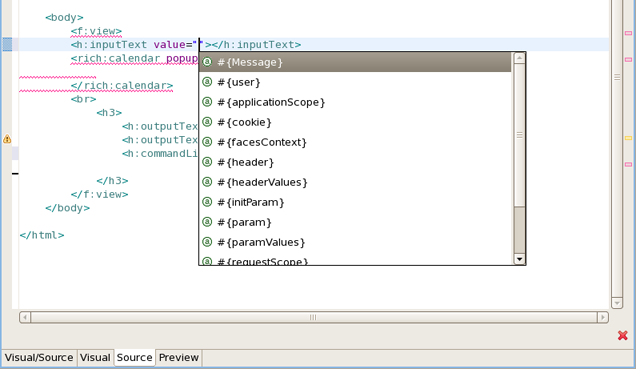
The first screenshot shows how to insert message from a Properties files. You simply put the cursor inside the "value" attribute and press Ctrl-Space . JBoss Developer Studio will scan your project and show a list of possible values to insert.
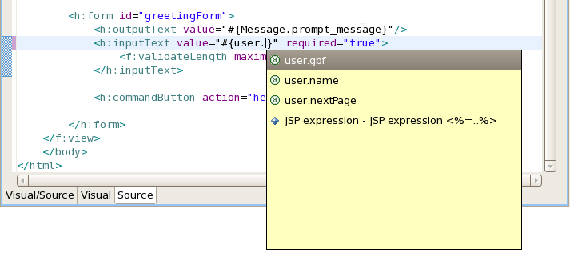
In the following screen shot we are inserting a "Managed bean" attribute value. Again, by simply clicking Ctrl-Space , JBoss Developer Studio will show a list of all possible values that you can insert:
Once you select a Managed bean, it will show you a list of all available attributes for the selected Managed bean (userBean).
Code Assist based on project data will also prompt you for navigation rules that exist in your JSF configuration file.
JBoss Developer Studio also provides Content Assist when working within the Tree JSF configuration editor. Just click Ctrl-Space .

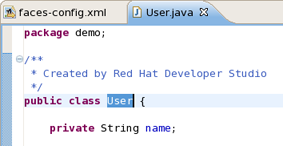
If a field contains right class name and you click a link near the field you will come to the file with this class otherwise a new Java Class dialog will be shown:

If you entered an incorrect name in the field error markers will be shown for field labels and tree items:

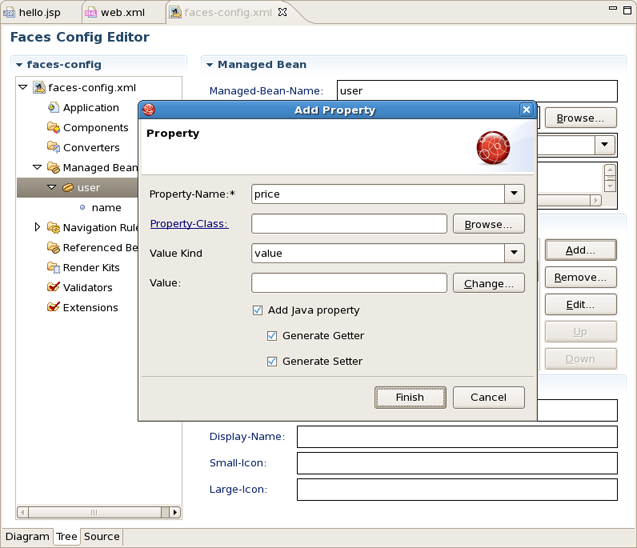
To add a new property to a managed bean expand Managed Beans and select <name_of_bean>
Click Add button in the Properties panel
In the dialog Add Property define a new property. From here also you can generate setters and getters methods:
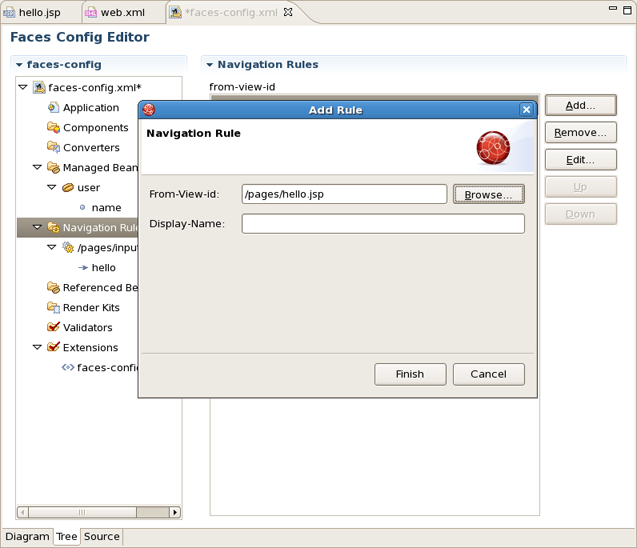
Here you can also add an additional navigation rule to the faces-config.xml file.
Select Navigation Rules
Click Add button
In the dialog Add Rule define a view and give a name to the rule. Click Finish:
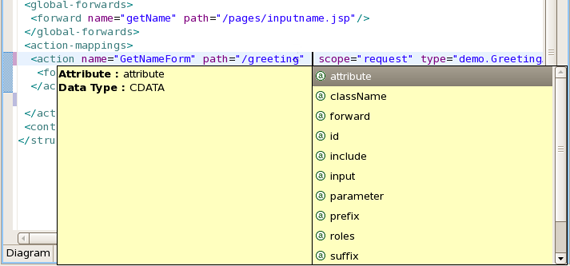
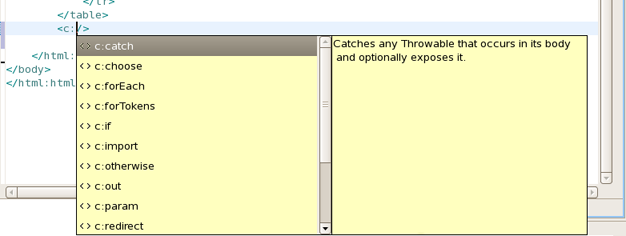
JBDS provides full code completion for JSF tags:

When the tag is selected the required attributes, if there any, are already inserted and the cursor is located to the first attribute. As this point you can ask for attribute proposals.
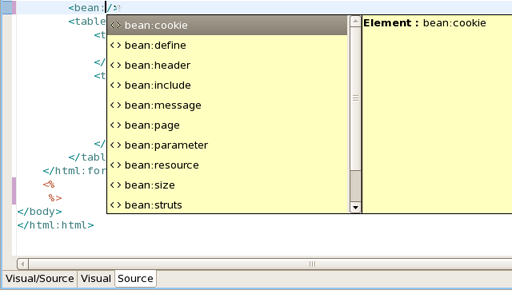
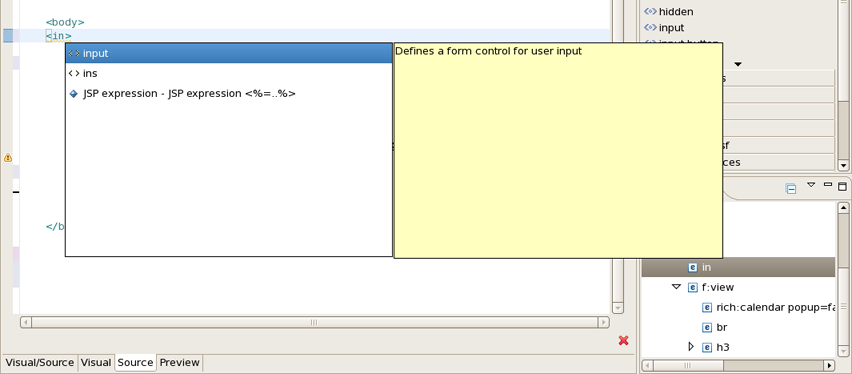
Content assist for HTML tags has the same mechanism as for JSF tags:
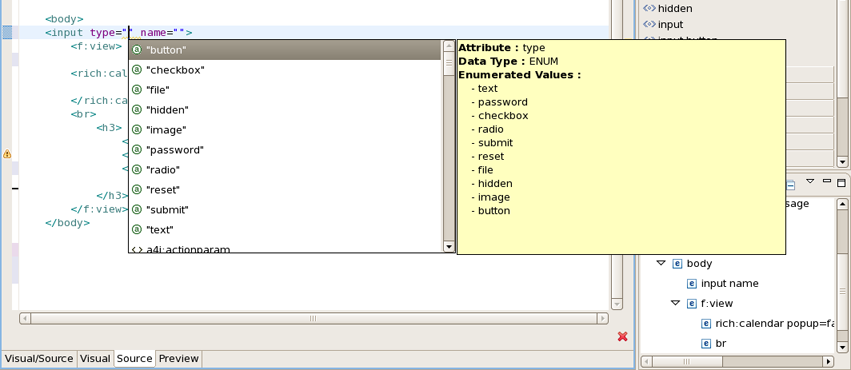
You can use as well attributes proposals for HTML tags:
JBDS indeed provides code completion for Rich Faces framework components. All you have to do is to install Rich Faces libraries into your project. See here how to install.
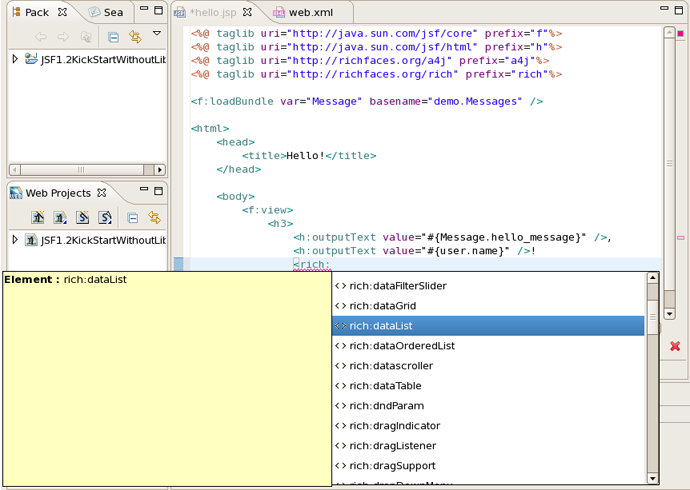
To insert a Rich Faces component on a page expand JBoss Rich Faces group on the palette
Click on some component
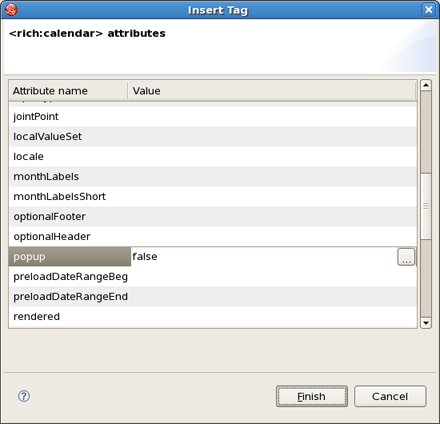
Put the needed attributes in the Insert Tag dialog and click Finish button
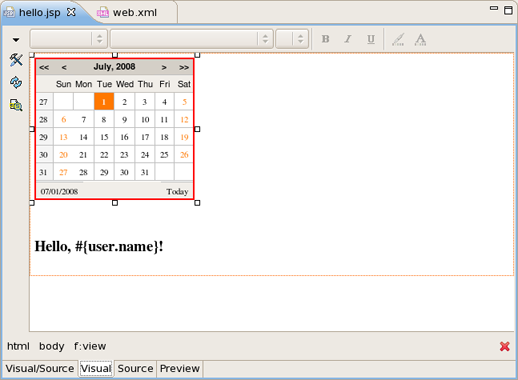
The Rich Faces tag will be inserted on your page displayed in source and visual modes:
Here is what you need to do to add project based code assist to a custom component added in JBoss Developer Studio:
Create a new xml file in <JBDS_home>studio/eclipse/plugins/org.jboss.tools.common.kb_***/schemas/tld/ . For example call it JeniaFaces.xml. The file should be written according to <JBDS_home>/studio/eclipse/plugins/org.jboss.tools.common.kb/kb.jar/org/jboss/tools/common/kb/kb-schema_1.0.dtd
Here is how you set what is available for code assist:
Adds code assist for JSF pre-defined objects, such as value= "#{param}" :
<AttributeType ...>

       <proposal type="jsfVariables"/>

</AttributeType>
Adds bundle resource (property file) code assist:
<AttributeType ...>

       <proposal type="bundleProperty"/>

</AttributeType>
Adds managed bean property code assist:
<AttributeType ...>

       <proposal type="beanProperty"/>

</AttributeType>
Adds managed bean property but with a specified type:
<AttributeType ...>

       <proposal type="beanProperty">

          <param name="type" value="java.lang.Boolean"/>

       </proposal>

</AttributeType>
Adds managed bean method with a signature:
<AttributeType ...>

       <proposal type="beanMethodBySignature">

          <param name="paramType" value="javax.faces.context.FacesContext"/>

          <param name="paramType" value="javax.faces.component.UIComponent"/>

          <param name="paramType" value="java.lang.Object"/>

          <param name="returnType" value="void"/>

       </proposal>

</AttributeType>
Add information on your xml file in <JBDS_home>/studio/eclipse/plugins/org.jboss.common.kb_***/plugin.xml
         <tld

            jsf="true"

            name="Jenia Faces"

            schema-location="schemas/tld/myJSF.xml"

            uri="http://www.jenia.org/jsf/dataTools"/>
Restart Eclipse. You should now have code assist for the component.
JBoss Developer Studio offers the flexibility to edit any files in either source or extra visual modes at the same time.
The project is yours and so is the source. JBoss Developer Studio provides you many different graphical editors to speed your application development. At the same time, you always have full control over all project source files. Any changes you make in the source view, will immediately appear in the graphical view.
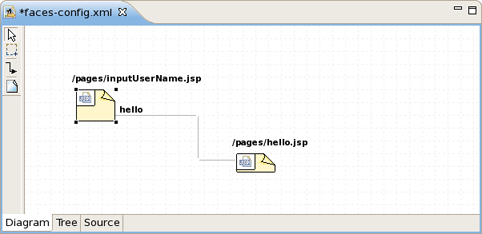
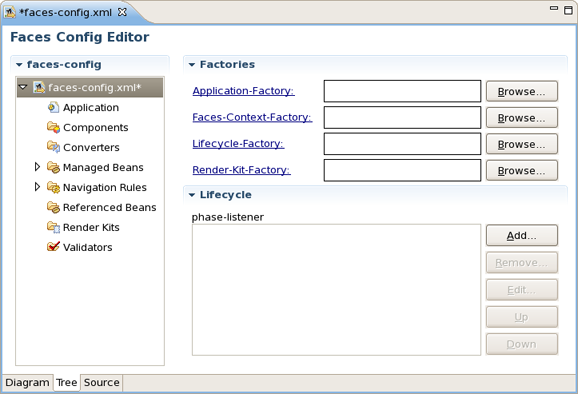
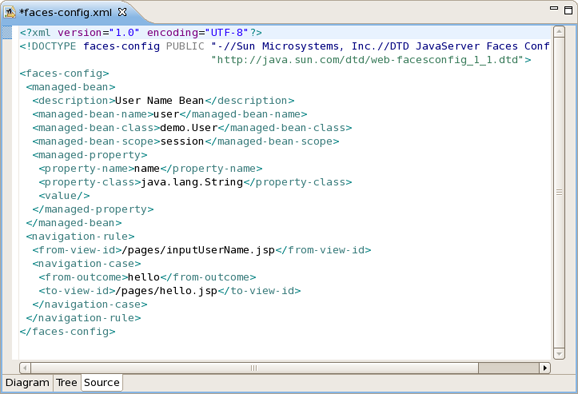
The JSF configuration file editor has three views: Diagram, Tree and Source. All views are synchronized, you can edit the file in any view.
The same applies to all other JBoss Developer Studio editors.
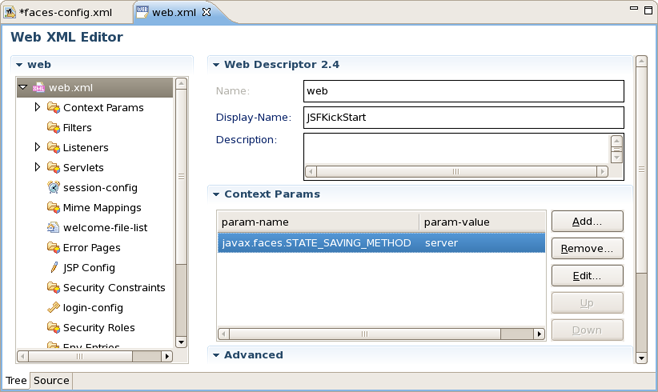
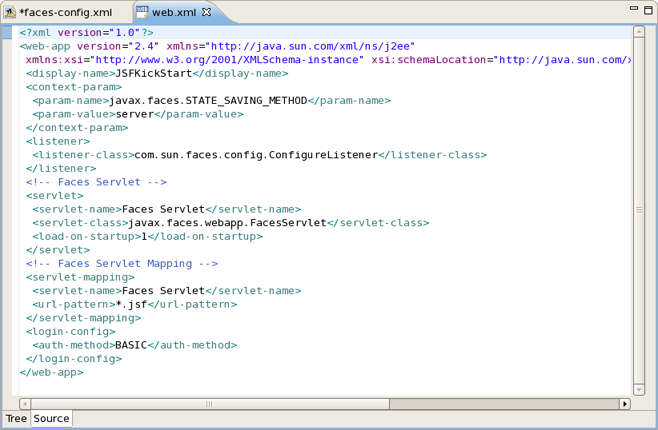
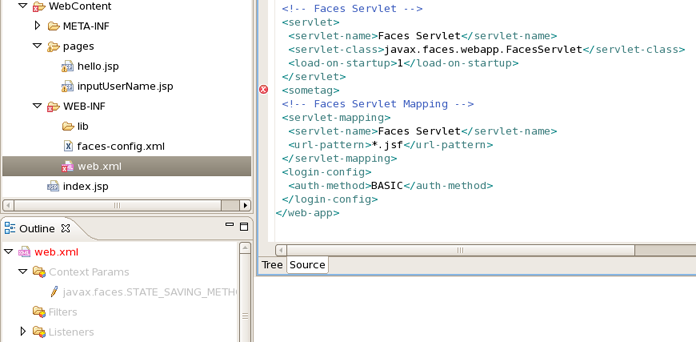
Web XML editor is shown. Web XML editor has a graphical view (Tree) and source (Source).
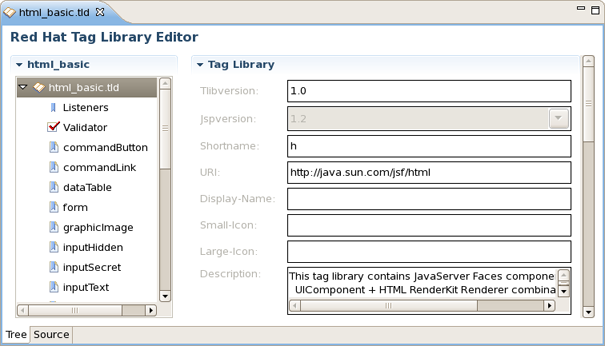
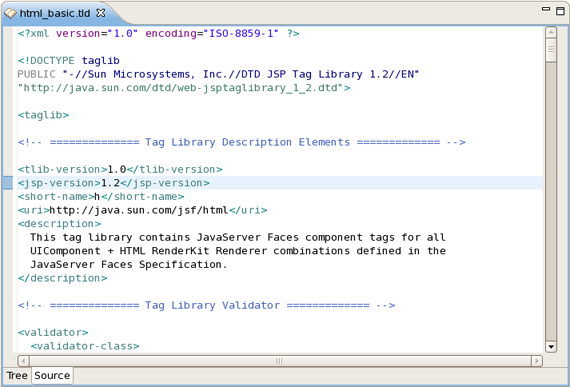
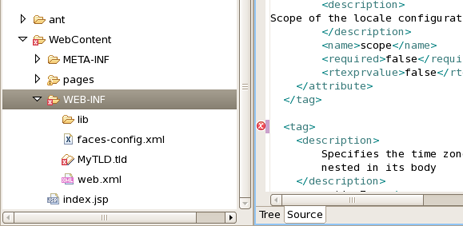
JBoss Developer Studio TLD file editor shown in Tree view. At any point you can edit the source by going switching to Source view.
The Struts configuration file editor has three views: Diagram, Tree and Source. All views are synchronized, you can edit the file in any view.

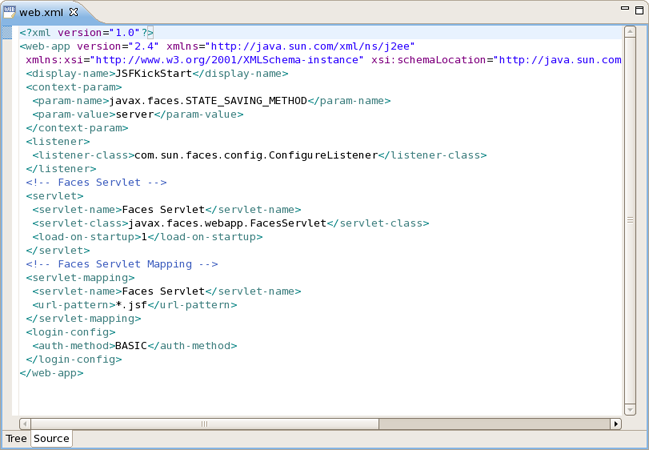
Source view. Any changes here will immediately appear in all other views.

JBoss Developer Studio comes with a powerful and customizable Visual Page Editor (VPE). You can use the Visual Page Editor to develop an application using any technology: JSF, Struts, JSP, HTML and others.
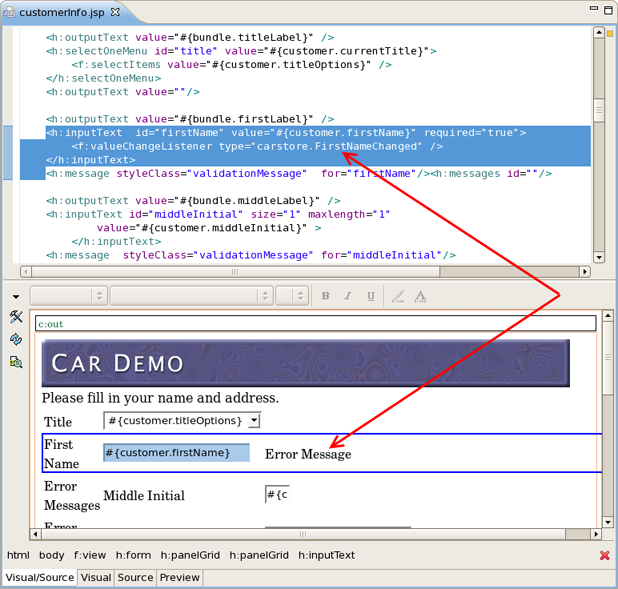
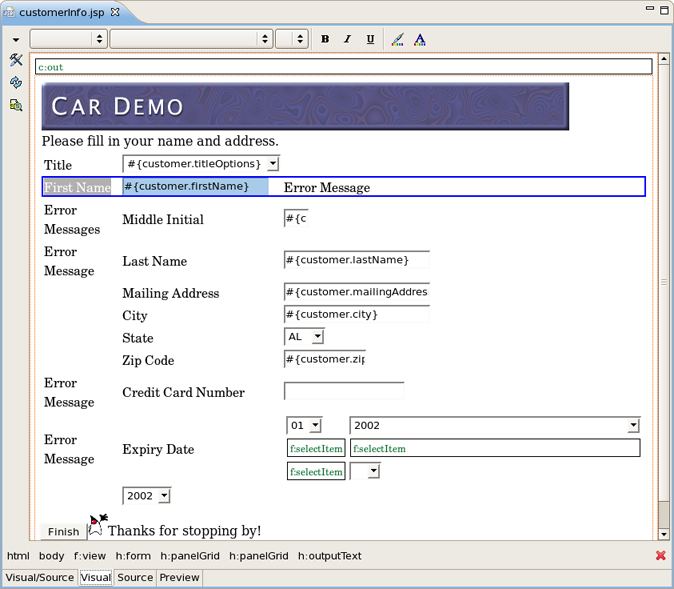
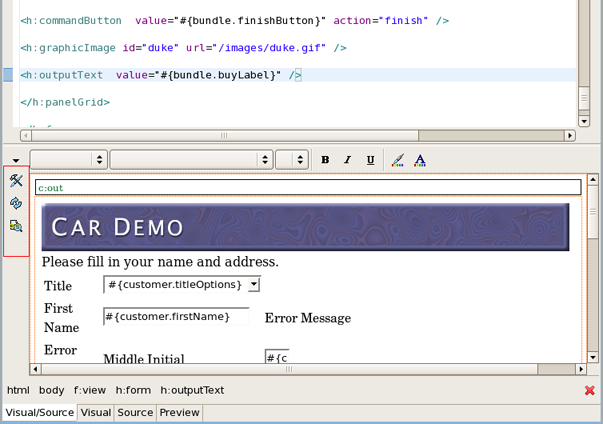
Current VPE version has four tabs: Visual/Source, Visual, Source and Preview.
Split screen design with instant synchronization between source and visual views:
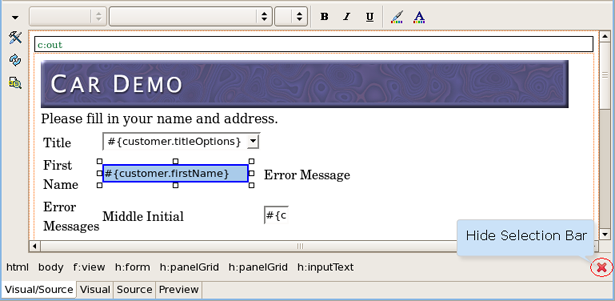
You can also switch to pure Visual design:
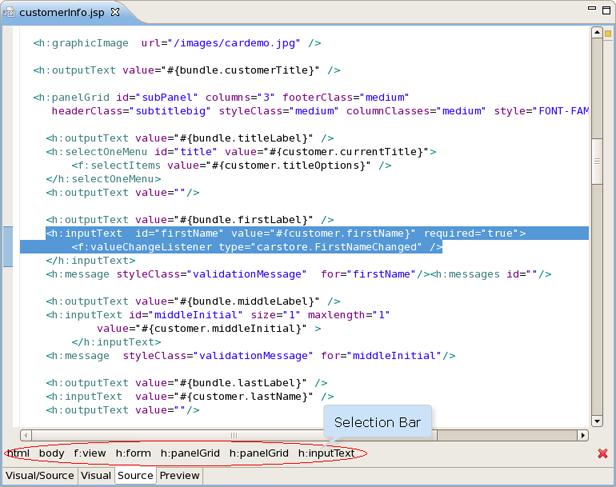
Or work just in Source view. Note that selection bar is now available not only in Visual mode but also in Source one:
No matter what view you select, you get full integration with Properties and Outline views:

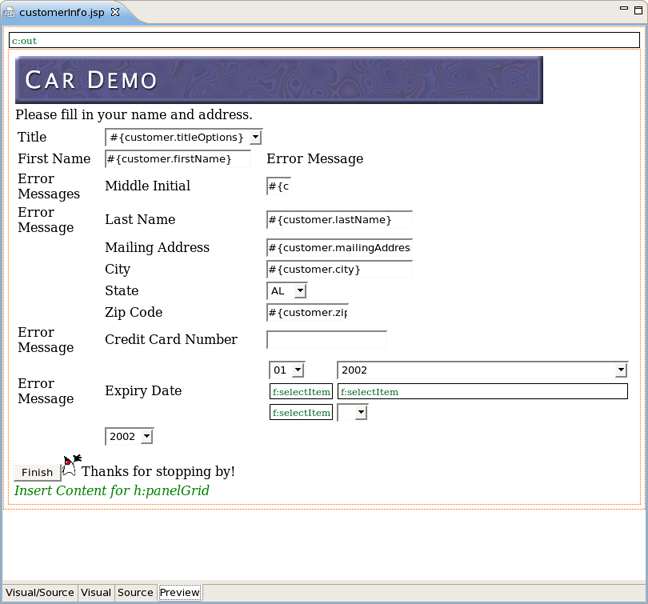
Preview mode is read-only, it only shows how the page will look like in a browser.
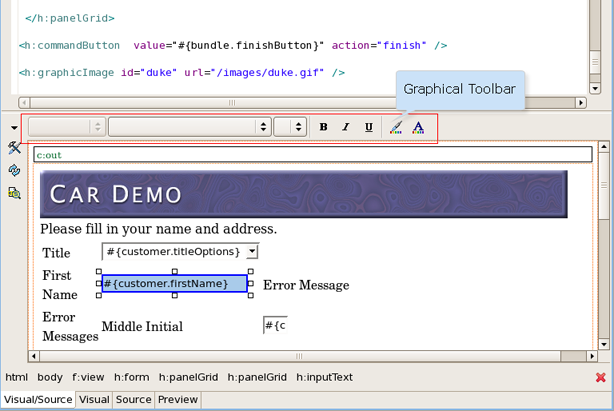
Use the graphical toolbar to add inline styling to any tag.
With just a click or drag-and-drop insert any tags from the palette on to the page you are editing.

There are three buttons on the Visual Page Editor left side:
Preferences
Provides quick access to Visual Page Editor preferences.
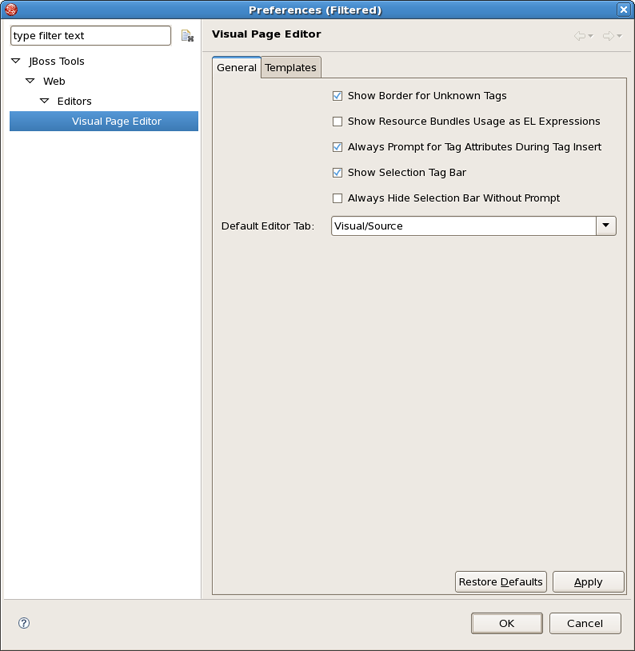
Refresh
Refresh displaying information with this button.
Page Design Options
This button leads to page design options.
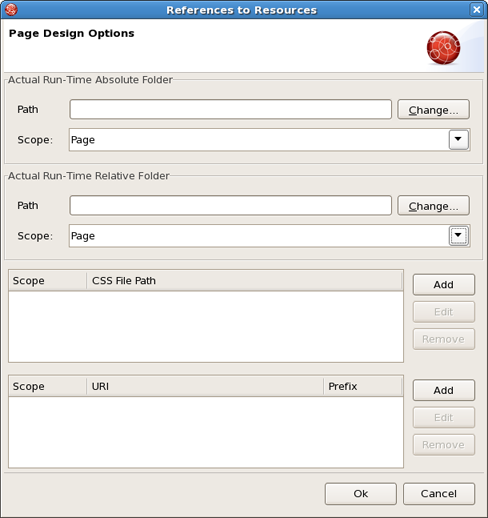
This dialog let's you set resources which are usually only resolved in runtime. To set a stylesheet, click Add (for CSS File Path section) and add your stylesheet. It works when CSS is defined on your page in the following way:
Code:
<link rel="stylesheet" type="text/css" href="#{facesContext.externalContext.requestContextPath}/style.css"/>
This will work fine in runtime, but the Visual Page Editor doesn't know what requestContextPath in design time is.
The next section (URI), let's you add URI taglibs if you are using includes so that the editor knows where to find the tag libraries.
The first two sections let you define actual runtime folders. Here is an example.
Let's say you have the following project structure:
WebContent/

  pages/

    img/

       a.gif

    header.jsp

  main.jsp
header.jsp content:
My Header

<img src="img/a.gif"/>
main.jsp:
<jsp:include page="pages/header.jsp" />
When you open main.jsp in Visual Page Editor, it will not be able to resolve the image from the header, however, it will work fine in runtime. To fix this in design time, click the Page Design Options button and set Actual Run-Time Relative Folder to <project>WebContent > pages and you will see the image appear.
Hide Selection bar
By clicking on the component in Visual view or selecting a code snippet in Source mode you can see the tags tree. If you want to hide the selection bar, use the "Hide Selection Bar" button on the lower right side.
Linux users may need to do the following to get the Visual Editor to work correctly on their machines.
The Visual Page Editor requires the library libstdc++.so.5. This library is contained in the compat-libstdc++-33.i386 package.
To install this package on Fedora Core or Red Hat Enterprise Linux run the following command:
yum install compat-libstdc++-33.i386
On any other rpm based distributions download libstdc++.so.5 and run the following command:
rpm -Uvh compat-libstdc++-33.i386
On Debian based distributives run the following command:
apt-get install compat-libstdc++-33.i386
In case you have the library installed and you still have issue with starting the visual page editor then close all browser views/editors and leave one visual page editor open and restart eclipse. This should force a load of the right XULRunner viewer.
When working in JBoss Tools JSP editor you are constantly provided with feedback and contextual error checking as you type.
JBoss Developer Studio comes with JSP design-time preview features. When designing JSP pages you can easily preview how they will look during runtime. You can even attach your stylesheet to the preview.
JSP preview is available for:
Struts Pages
JSF Pages
The preview features are available with Visual Page Editor.
Besides Visual Page Editor JBDS provides editors for editing project files of any types: properties, TLD, web.xml, tiles, and so on.
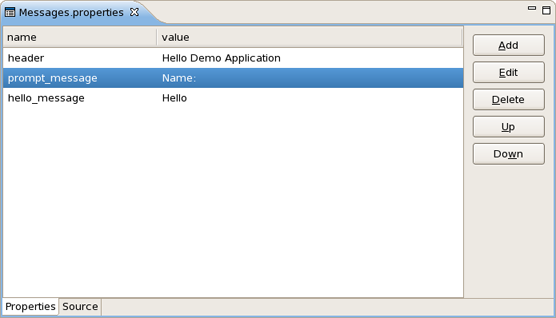
The Properties editor allows you to work in two different modes and also supports unicode characters.
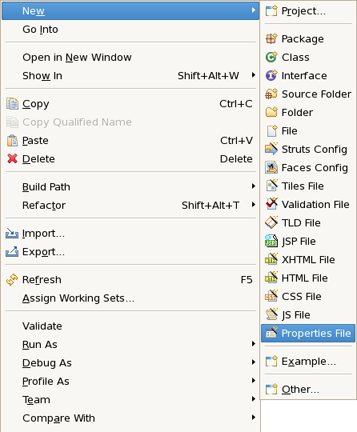
To create a new properties file, in the Package Explorer view, select New > Properties File from the right-click context menu on the folder where you want to create the file.
You can edit the file using a table-oriented "Properties" viewer:
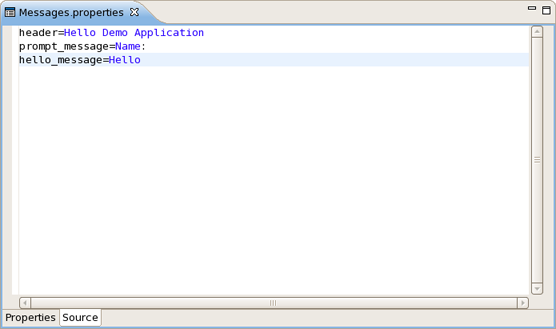
You can also use a Source viewer for editing the file:
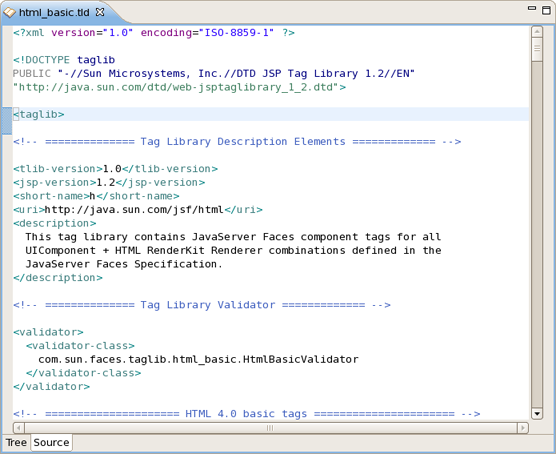
The TLD editor comes with same features you will find in all other JBoss Developer Studio editors:
Graphical and source edit modes
Validation and error checking
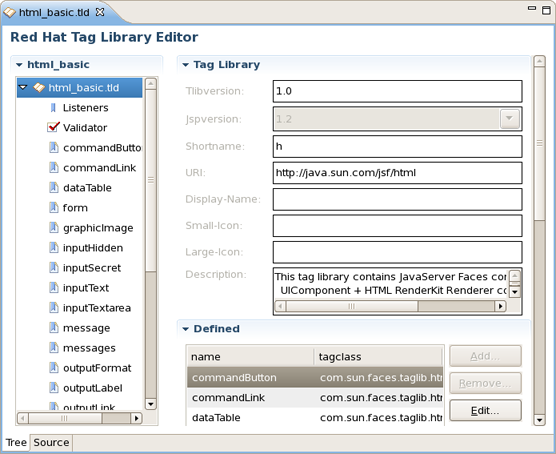
You can easily switch from Tree to Source by selecting the Source tab at the bottom of the editor.
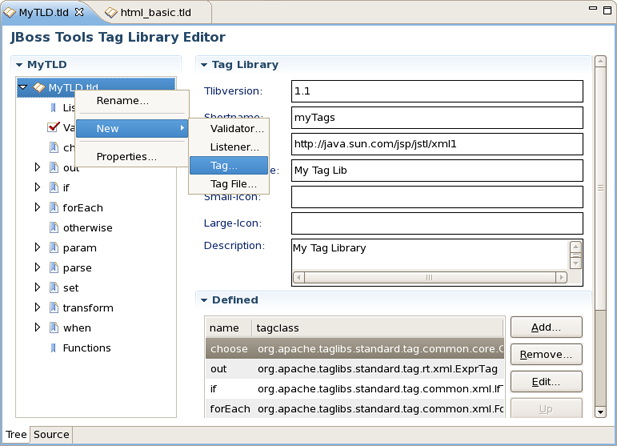
You can easily add a new tag:
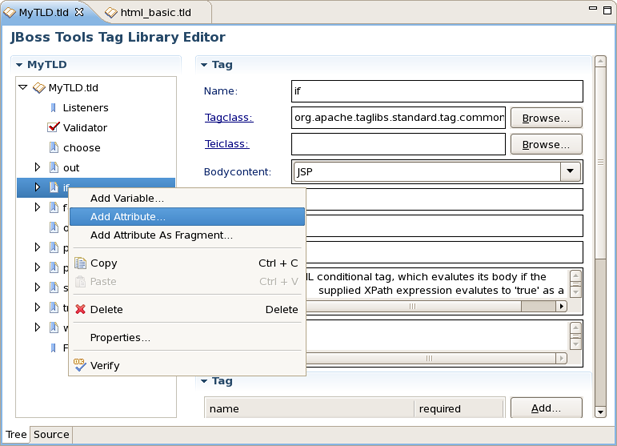
You can also easily add a new attribute to an existing tag:
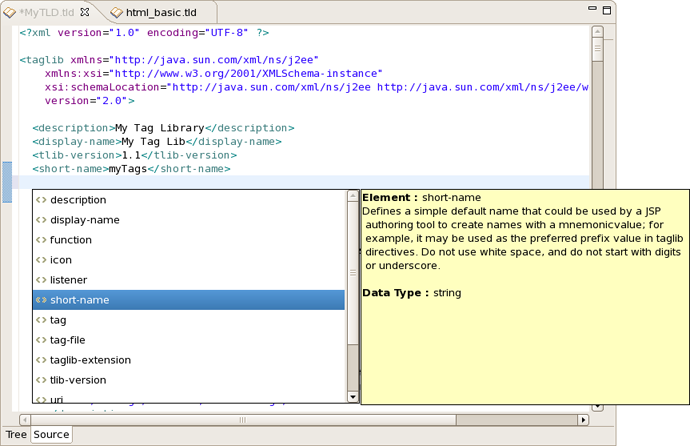
Content assist is available when editing the file using the Source viewer:
In the Source viewer, if at any point a tag is incorrect or incomplete, an error will be indicated next to the line and also in the Problems view below.
The Web Application File editor comes with the same features you will find in all other JBoss Developer Studio editors:
Graphical and source edit modes
Validation and error checking
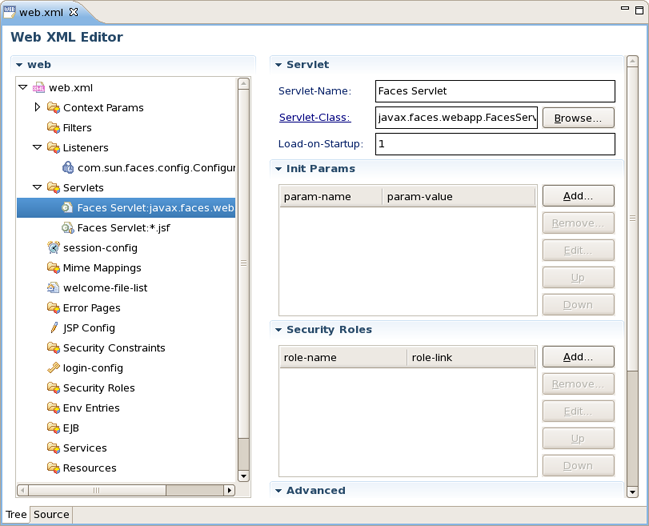
You can add any new elements right in the Tree viewer:

Switch to the Source viewer to edit the web.xml file by hand at any time:
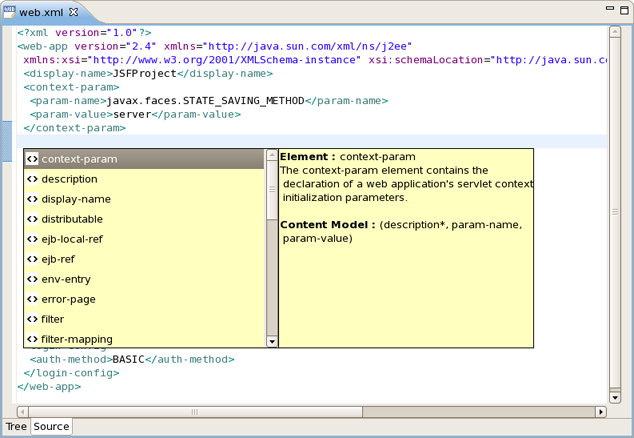
Content assist is available in the Source viewer. Simply click CTRL-Space anywhere in the file.
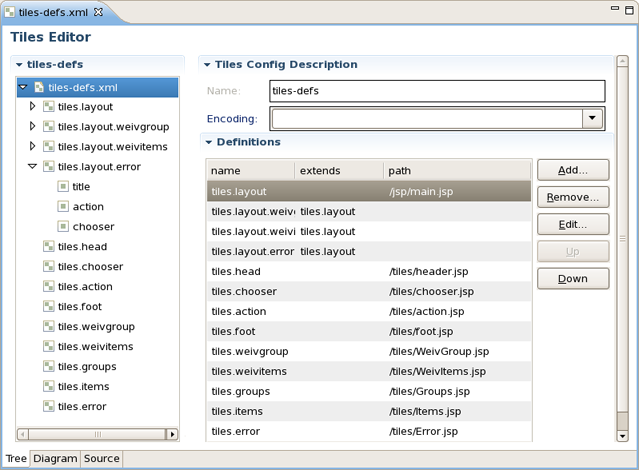
The Tiles configuration file editor has three main viewers (modes): Tree (shown), Diagram and Source. The modes can be selected via the tabs at the bottom of the editor. Any changes made in one mode are immediately visible when you switch to any other mode.
When working in Source view, you always have all following features available:
Content Assist
Open On Selection
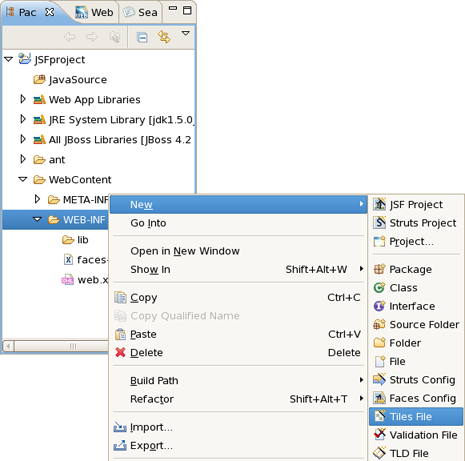
To create a new Tiles files, right click any folder and select New > Tiles Files :
In the Tree mode, the different elements of the Tiles file are organized into functional categories on the left-hand side and a form for editing the properties of currently selected items on the right-hand side.
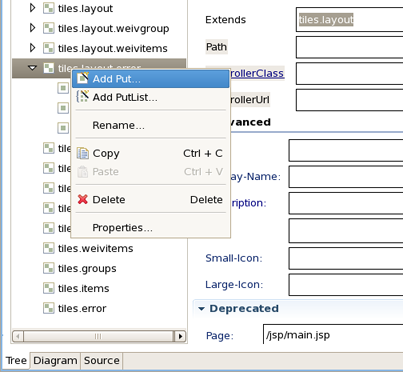
To edit the file, simply right click any node and select among the available actions:
The Diagram mode is shown below:
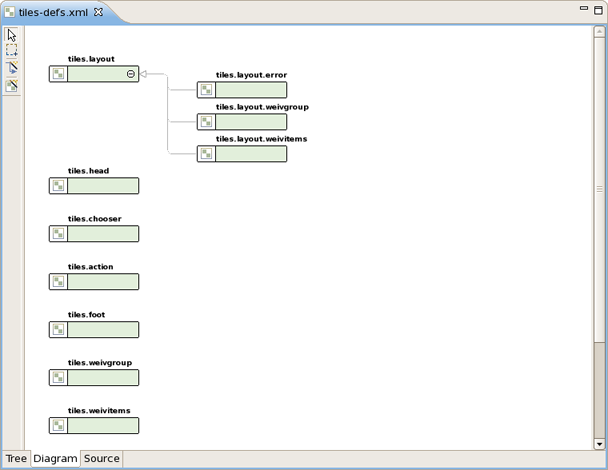
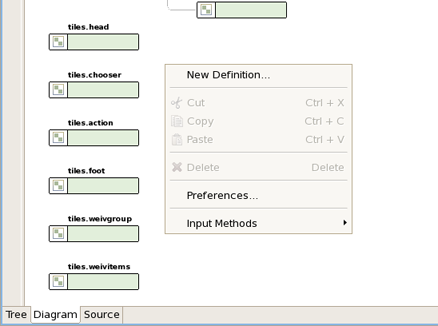
To create new definition, simply right click anywhere in the diagram:
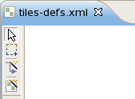
You can also use the Diagram toolbar to make editing easier:
The Tiles editor also comes with a Source view that gives you full control over the source. Any changes here will immediately appear in when you switch to any of the other viewers.
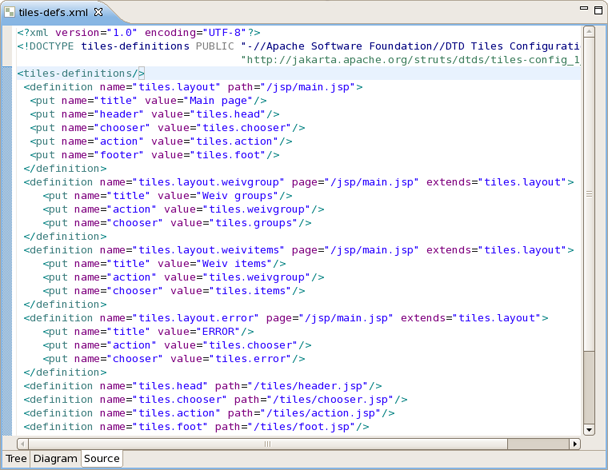
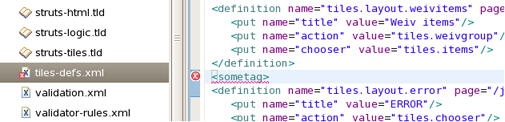
Content assist is available in the Source mode.

Any errors are immediately reported as shown below:
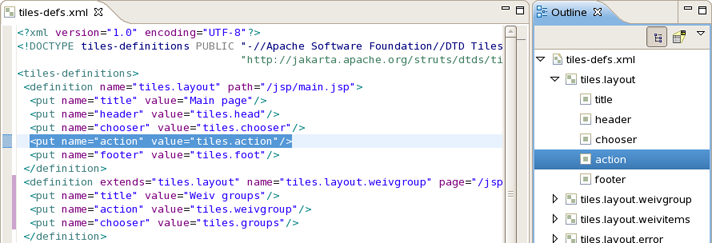
You can also use the Outline view together with the editor's Source mode. Selecting any node in the Outline view will jump to that place in the source:
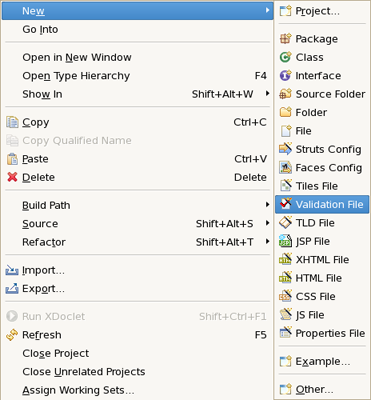
JBoss Developer Studio comes with a visual validation editor. To create a new validation file, right click any folder and select File > Validation File from the context menu.
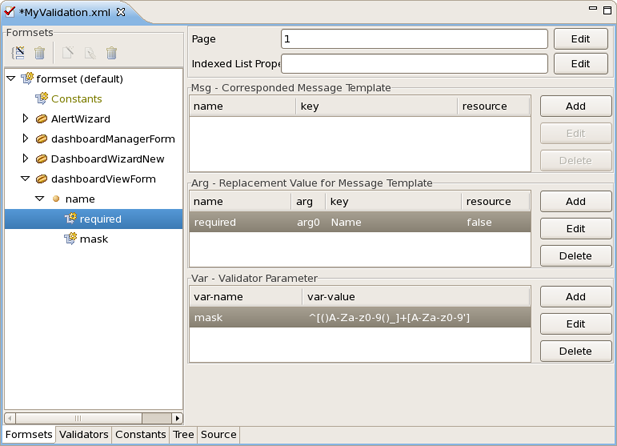
The validation editor works through a number of viewers.
The Formsets viewer shows forms and their elements for which to define validation rules:
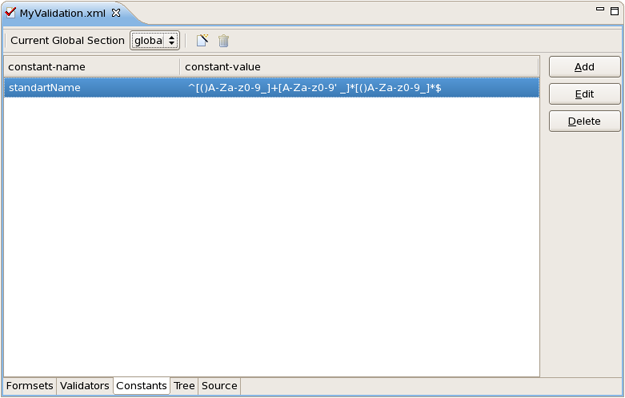
The Constants viewer lets you set constant values for your validation rules:
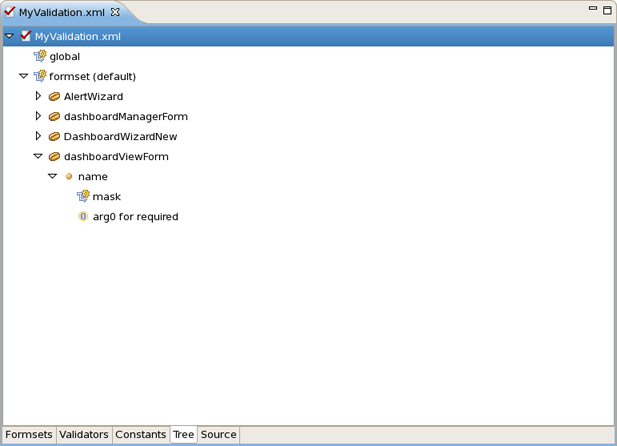
The validation file also can be viewed in a Tree viewer:
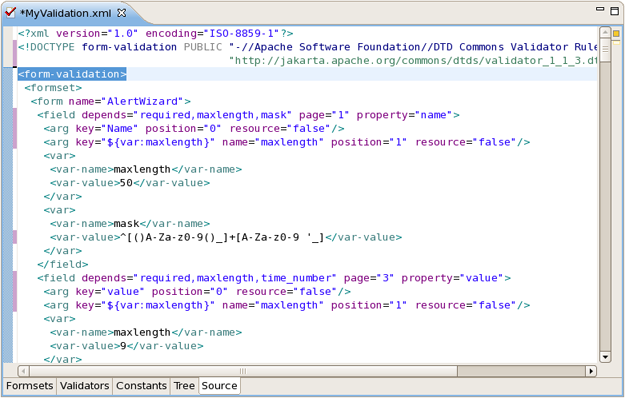
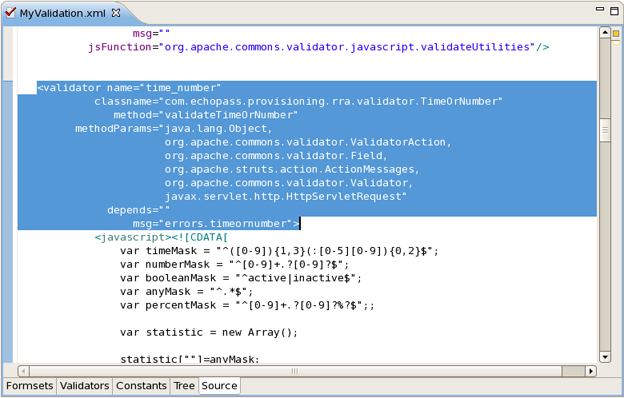
At any point you have full control over the source by switching to the Source viewer. Any editing in this viewer will immediately be available in the other viewers of this editor.
You can also open your own custom or Struts-standard validation-rules.xml file.
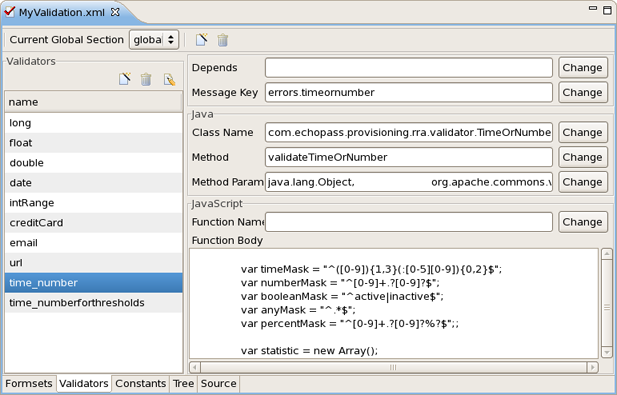
The Validators viewer shows the validation rules for a selected validator. You can of course add your own rules.
Here are the validation rules shown in the Source viewer.
JBoss Developer Studio bundles a Spring Framework editor from Spring IDE for Eclipse. Visit this site for the latest versions and documentation.
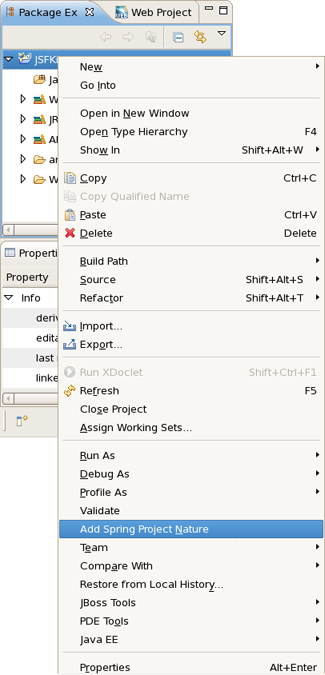
You can add a Spring Project Nature to an existing project by right-clicking on the project and selecting Adding Spring Project Nature from the context menu:
If you need to remove it you should select Remove Spring Project Nature from the context menu of your project.
Once the Nature is added, a Spring project will be decorated with a small "S" in the Package Explorer view.

To add a Spring Configuration File with bean definitions open Properties dialog from the context menu of your project. Then select Spring > Beans Support on the left side.
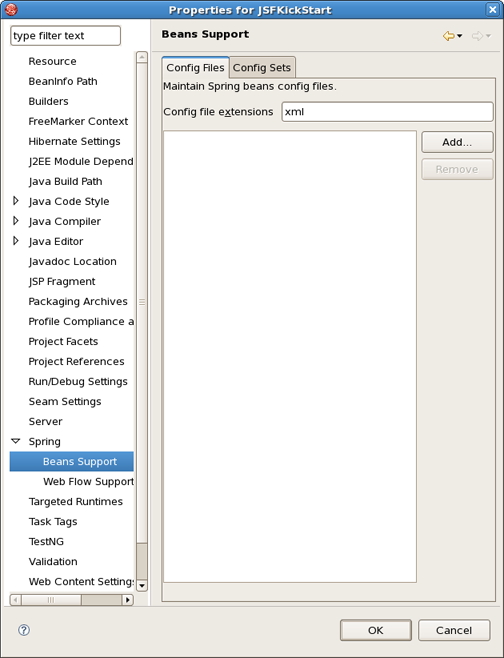
Click on Add button to choose the corresponding Spring Configuration File.
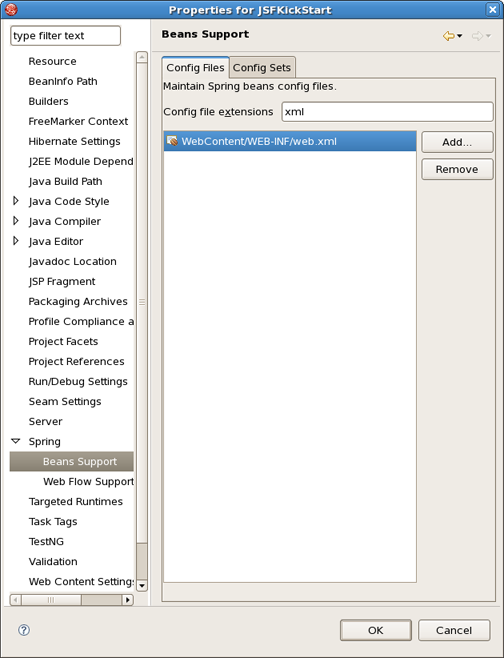
The added file will also be marked by an "S" in the Package Explorer view.
To activate the Spring Explorer view, select Window > Show View... > Other and then Spring > Spring Explorer .

This view shows a read-only outline view of the Spring Bean Configuration File.
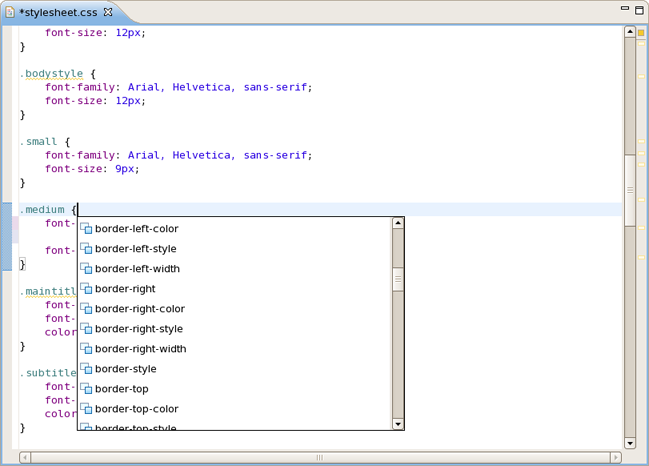
The CSS editor comes with the same features you will find in all other JBoss Developer Studio editors.
Content assist
Validation and error checking
With the CSS (Cascading Style Sheet) editor, you can take advantage of code prompting:
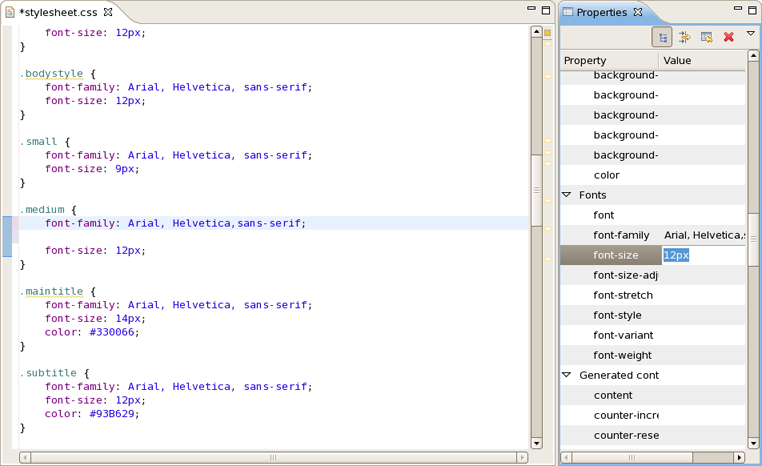
And you can also use the Properties view next to the editor to edit existing stylesheet declaration properties:
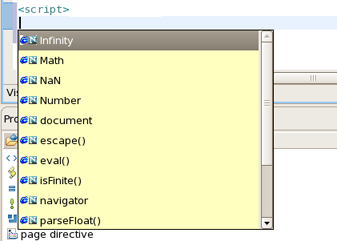
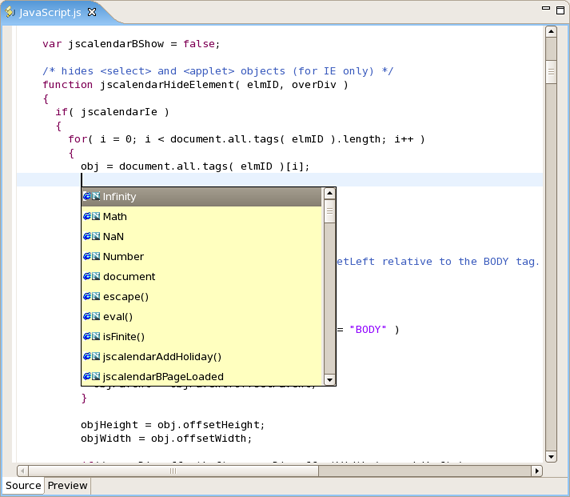
The JavaScript editor includes a Preview viewer and a Source viewer. In the Source viewer, you can use code assist:
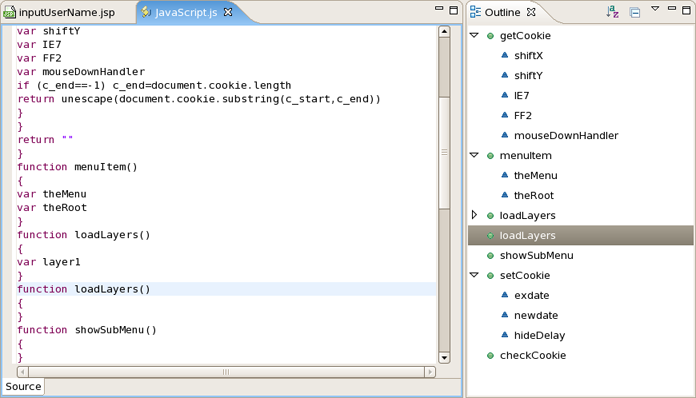
You can also use the Source viewer with the Outline view to navigate around the file:
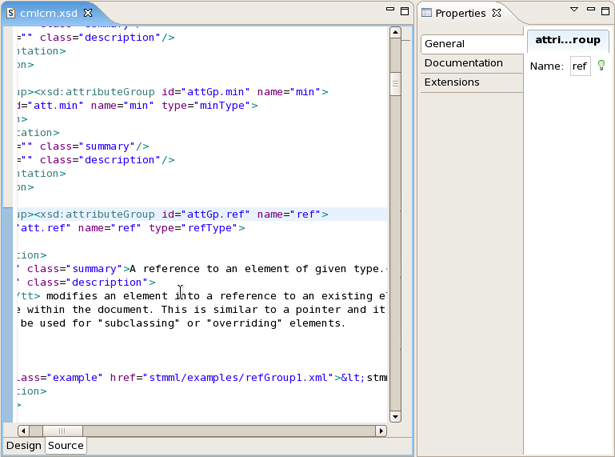
JBoss Developer Studio comes with an XSD Editor for XML Schema files. This editor comes from the Web Tools Project (WTP) (see WTP Getting Started).
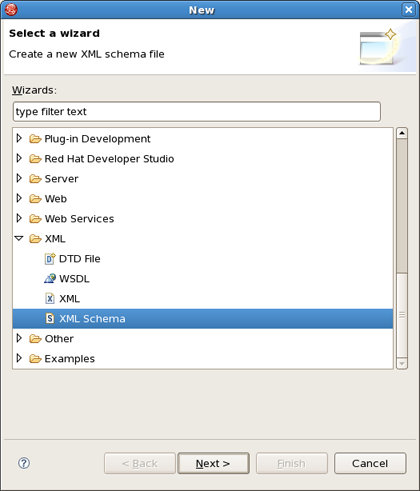
To create a new XSD file, right-click a folder in the Package Explorer view, select New > Other... from the context menu and then select XML > XML Schema in the dialog box.
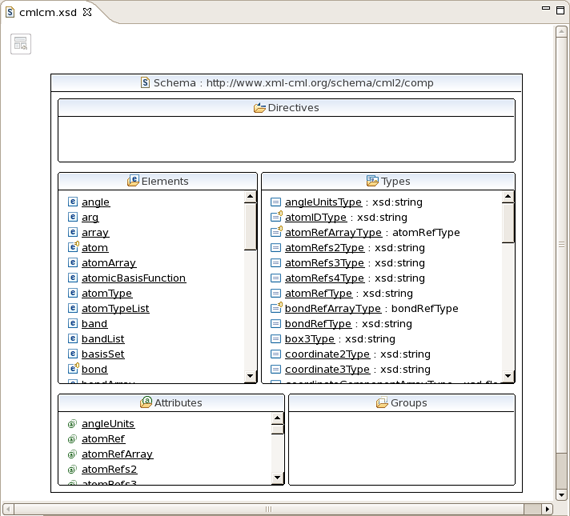
The XSD Editor includes two viewers for working on the file, a Design viewer and a Source viewer:
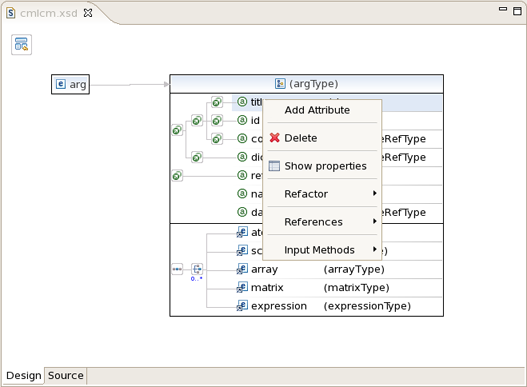
In the Design viewer, you can drill down on an element by double-clicking on it:

Various edit options are available when you right-click an element in the diagram:
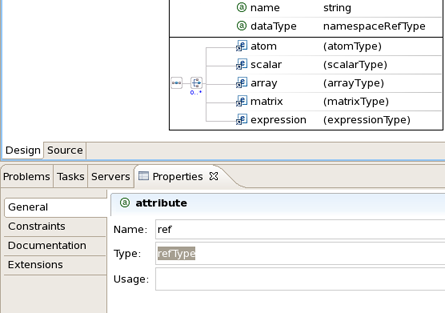
You can also use the Properties view to edit a selected element:
You can also use a Source viewer for the file. In this viewer, along with direct editing of the source code, you can also edit the file by using the Properties view on the right: