JBoss.comEnterprise Documentation
Version: 2.0.0.CR1
Copyright © 2007, 2008 JBoss, a division of Red Hat Inc.
April 2008
This document is intended to help you to migrate an existing Exadel JSF or Struts projects into JBoss Developer Studio. Preferences can be exported from Eclipse 3.2.0 (3.2.1 or 3.2.2) and imported in Eclipse 3.3 by the standard Eclipse means.
You will not be able to run projects in JBoss Developer Studio using Exadel Studio workspace. In this case, project capabilities and settings specified in Exadel Studio will be lost. The simplest way to avoid this, is to copy your projects in JBoss Developer Studio workspace and make an import as it is described in the following chapters.
In this chapter you can find concise description of migration of JSF and Struts Projects.
JBoss Developer Studio includes an Import JSF Project Wizard that radically simplifies the process of bringing your existing JSF applications into your JBoss Developer Studio workspace as JSF projects. You just need to follow these four steps:
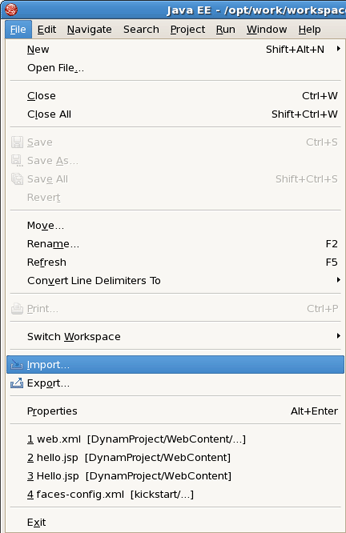
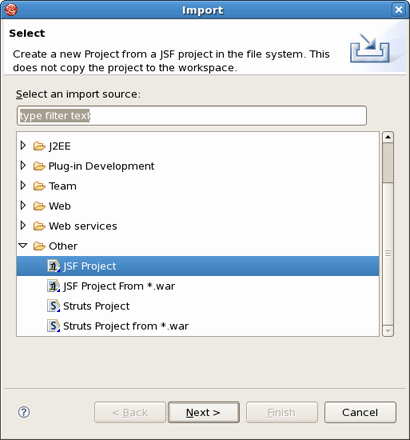
Select File > Import... from the menu bar, and then select Other > JSF Project from the Import dialog box that appears.
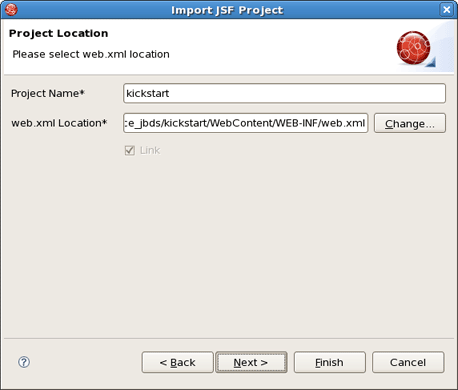
In the first screen of the wizard, select the Change... button next to the web.xml Location field. Browse to the location of the web.xml file for the application you want to import as a JSF project. Once you select it, you'll be returned to the dialog box to see a project name derived from the web.xml file you selected. You can edit this project name, if you wish.
In the Project Folders screen, you can configure the rest of your project. Afterwards click on the Finish button.
On this step JBoss Developer Studio will try to determine your project structure and set the values for: Web Root, Source Folder, Classes Folder, Lib Folder. If your project has a custom structure, some values might not be set. If this is the case, you can manually set those values by clicking the Change... button.
After dealing with these settings, you have to work through a few more configuration settings. These settings deal primarily with how the project will be deployed within JBoss Developer Studio.
First, if the project you are importing is not already a JSF project, select the Add Libraries check box to add all the JSF-related libraries to your project.
Then, you may select the JavaServer Faces implementation (Environment) and Servlet Version.
The Context Path is the name under which the application will be deployed.
The Runtime value tells Eclipse where to find Web libraries in order to build the project. It is not possible to finish the importing of a project without selecting a Runtime. If you don't have any choices displayed for this, select New... to add a new Runtime.
Finally, Target Server sets the server to deploy the application under. The Target Server corresponds to the Runtime value selected above. If you don't want to deploy the application, uncheck this value.

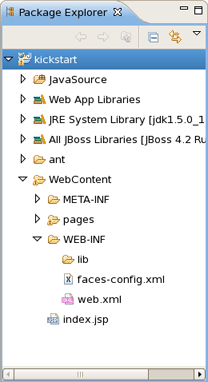
Once the project is imported, it will appear in the Package Explorer view.
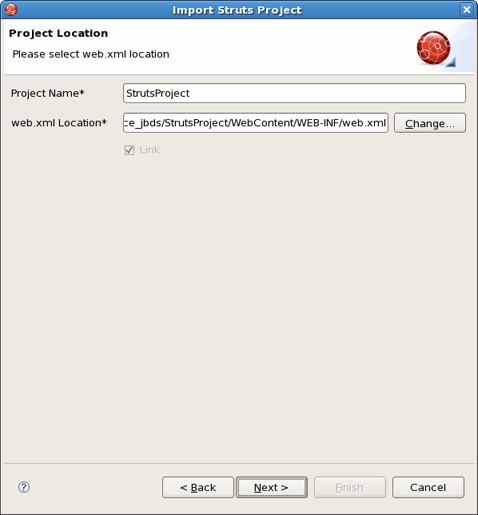
Select File > Import... from the menu bar, and then select Other > Struts Project from the Import dialog box that appears.

In the Project Location screen of the wizard, select the Change... button next to the web.xml Location field. Browse the location of the web.xml file for the application you want to import as a Struts project. Once you select it, you'll be returned to the dialog box to see a project name derived from the web.xml file you selected. You can edit this project name, if you wish.
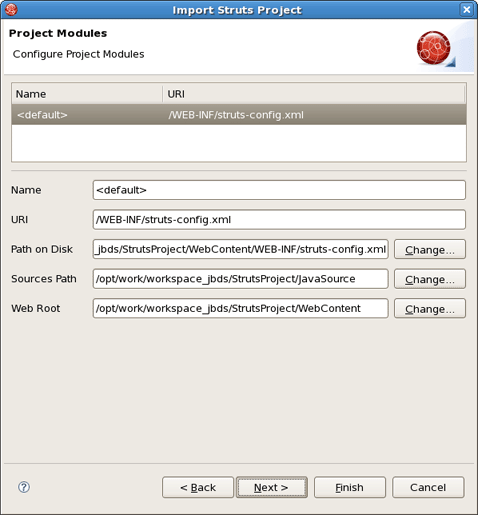
In the next screen, JBoss Developer Studio will try to determine your project structure. The upper pane shows the modules in this project. The lower pane allows you to edit the details of the select module. If the project structure is non-standard, some values might be left blank. You can edit any values by hand or by using the Change... button.
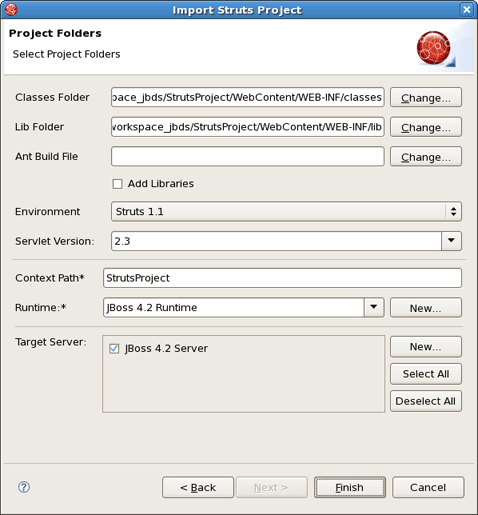
In the Project Folders screen, you can configure the rest of your project. Afterwards click on the Finish button.
On this step JBoss Developer Studio will try to determine your project structure and set the values for: Classes Folder, Lib Folder, and Ant Build File. If your project has a custom structure, some values might not be set. If this is the case, you can manually set those values by clicking Change.
After dealing with these settings, you have to work through a few more configuration settings. These settings deal primarily with how the project will be deployed within JBoss Developer Studio.
First, if the project you are importing is not already a Struts project, select the Add Libraries check box to add all the Struts-related libraries to your project.
Then, you may select the Struts Environment and Servlet Version.
The Context Path is the name under which the application will be deployed.
The Runtime value tells Eclipse where to find Web libraries in order to build the project. It is not possible to finish the importing of a project without selecting a Runtime. If you don't have any choices displayed for this, select New... to add a new Runtime.
Finally, Target Server sets the server to deploy the application under. The Target Server corresponds to the Runtime value selected above. If you don't want to deploy the application, uncheck this value.
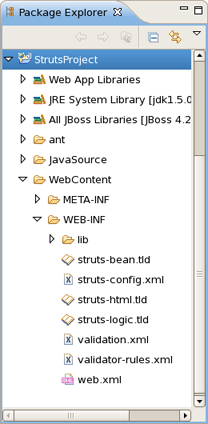
Once the project is imported, it will appear in the Package Explorer view.
After you familiarized oneself with last chapter you can read this chapter. It looks as if you read in last chapter.
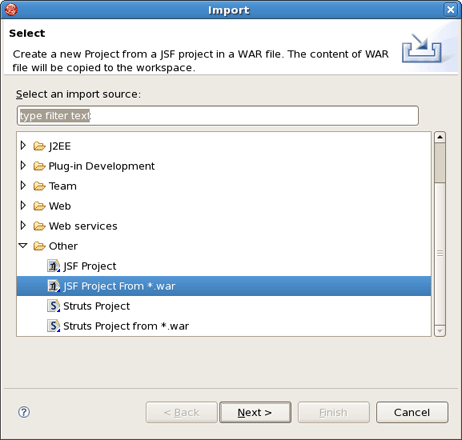
Select File > Import... from the menu bar, and then select Other > JSF Project From *.war from the Import dialog box that appears.

In the wizard screen, select the Change... button next to the *.war Location field. Browse to the location of the *.war file for the application you want to import as a JSF project. Once you select it, you'll be returned to the dialog box to see a project name derived from the *.war file you selected. You can edit this name, if you wish.
Uncheck the Use Default Path check box if you want to import your project outside of the Eclipse workspace. In this case, you would use Change... button next to the Location field to choose a location.
Context Path is the name under which the application will be deployed.
The Runtime value tells Eclipse where to find Web libraries in order to build the project. It is not possible to finish project import without selecting Runtime. If you don't have any options here, select New... to add a new Runtime.
Finally, Target Server sets the server to deploy the application under. The Target Server corresponds to the Runtime value selected above. If you don't want to deploy the application, uncheck this value.
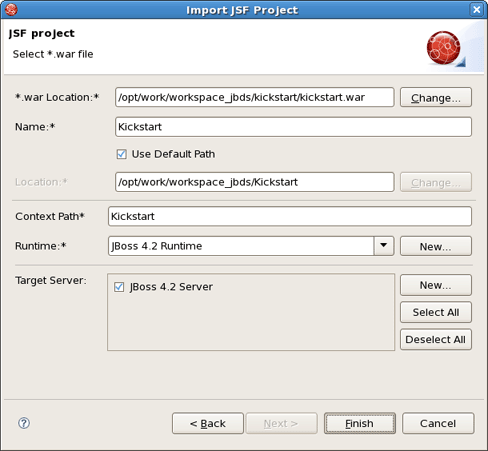
Click on the Finish button.
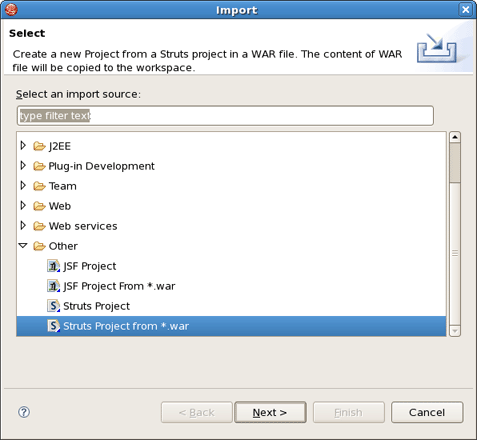
Select File > Import... from the menu bar, and then select Other > Struts Project From *.war from the Import dialog box that appears.
Follow the same steps as with the JSF Project From *.war import wizard.
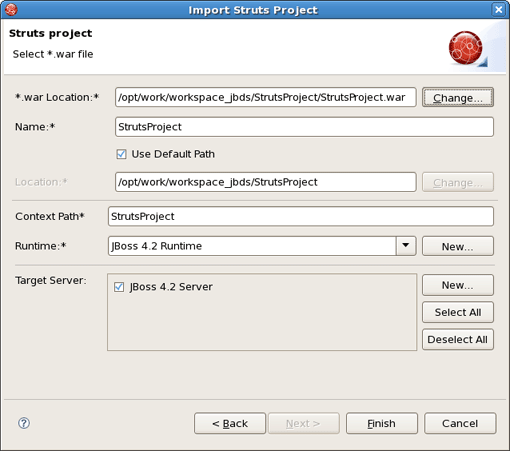
Click on the Finish button.
The migration process is completed