There are a few ways you can configure HTTP over SSL for the embedded Tomcat servlet container depending on whether or not you use the JBoss specific connector socket factory, which allows you to obtain the JSSE server certificate information from a JBossSX SecurityDomain. This requires establishing a SecurityDomain using the org.jboss.security.plugins.JaasSecurityDomain MBean. A server.xml configuration file that illustrates the setup of only an SSL connector via this approach is given below.
<Server>
    <Service name="jboss.web" className="org.jboss.web.tomcat.tc5.StandardService">

        <Connector port="8080" address="${jboss.bind.address}" maxThreads="150"
            minSpareThreads="25" maxSpareThreads="75" enableLookups="false"
            redirectPort="443" acceptCount="100" connectionTimeout="20000"
            disableUploadTimeout="true"/>

        <Connector port="443" address="${jboss.bind.address}" maxThreads="100"
            minSpareThreads="5" maxSpareThreads="15" scheme="https"
            secure="true" clientAuth="false"
            keystoreFile="${jboss.server.home.dir}/conf/chap8.keystore"
            keystorePass="rmi+ssl" sslProtocol="TLS"/>

        <Engine name="jboss.web" defaultHost="localhost">
            <Realm
                className="org.jboss.web.tomcat.security.JBossSecurityMgrRealm"
                certificatePrincipal="org.jboss.securia.Log4jLogger"
                verbosityLevel="WARNING" category="org.jboss.web.localhost.Engine"/>
            <Host name="localhost" autoDeploy="false" deployOnStartup="false"
                  deployXML="false">
                <DefaultContext cookies="true" crossContext="true" override="true"/>
            </Host>
        </Engine>
    </Service>
            </Server>
This configuration includes a JaasSecurityDomain, but since the descriptor is not being deployed as part of a SAR that includes the chap8.keystore, you need to copy the chap8.keystore to the server/default/conf directory. You can test this configuration by accessing the JMX console web application over HTTPS using this URL: https://localhost/jmx-console.
Note: if you are running on a system that requires special permissions to open ports below 1024, it might be easier need to change the port number to one above 1024. Port 8443 is commonly used because of this.
The configurable attributes are as follows:
algorithm: This is the certificate encoding algorithm to be used. If not specified, the default value is SunX509.
className: This is the fully qualified class name of the SSL server socket factory implementation class. You must specify org.apache.coyote.tomcat4.CoyoteServerSocketFactory here. Using any other socket factory will not cause an error, but the server socket will not be using SSL.
clientAuth: This attribute should be set to true if you want the SSL stack to require a valid certificate chain from the client before accepting a connection. A false value, which is the default, will not require a certificate chain unless the client requests a resource protected by a security constraint that uses CLIENT-CERT authentication.
keystoreFile: This is the pathname of the keystore file where you have stored the server certificate to be loaded. By default, the pathname is the file .keystore in the operating system home directory of the user that is running Tomcat.
keystorePass: This is the password used to access the server certificate from the specified keystore file. The default value is changeit.
keystoreType: The type of keystore file to be used for the server certificate. If not specified, the default value is JKS.
protocol: The version of the SSL protocol to use. If not specified, the default is TLS.
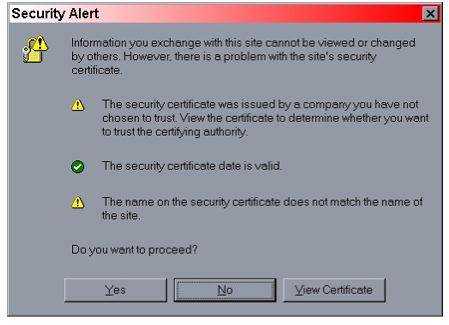
Note that if you try to test this configuration using the self-signed certificate and attempt to access content over an HTTPS connection, your browser should display a warning dialog indicating that it does not trust the certificate authority that signed the certificate of the server you are connecting to. For example, when we tested the first configuration example, IE 5.5 showed the initial security alert dialog listed in Figure 4.1, “The Internet Explorer 5.5 security alert dialog.”. Figure 4.2, “The Internet Explorer 5.5 SSL certificate details dialog.” shows the server certificate details. This warning is important because anyone can generate a self-signed certificate with any information desired. Your only way to verify that the system on the other side really represents the party it claim to is by verifying that it is signed by a trusted third party.