Note
"The primary goal of BPMN is to provide a notation that is readily understandable by all business users, from the business analysts that create the initial drafts of the processes, to the technical developers responsible for implementing the technology that will perform those processes, and finally, to the business people who will manage and monitor those processes."
The Business Process Model and Notation (BPMN) 2.0 specification is an OMG specification that not only defines a standard on how to graphically represent a business process (like BPMN 1.x), but now also includes execution semantics for the elements defined, and an XML format on how to store (and share) process definitions.
jBPM6 allows you to execute processes defined using the BPMN 2.0 XML format. That means that you can use all the different jBPM6 tooling to model, execute, manage and monitor your business processes using the BPMN 2.0 format for specifying your executable business processes. Actually, the full BPMN 2.0 specification also includes details on how to represent things like choreographies and collaboration. The jBPM project however focuses on that part of the specification that can be used to specify executable processes.
Executable processes in BPMN consist of a different types of nodes being connected to each other using sequence flows. The BPMN 2.0 specification defines three main types of nodes:
- Events: They are used to model the occurrence of a particular event. This could be a start event (that is used to indicate the start of the process), end events (that define the end of the process, or of that subflow) and intermediate events (that indicate events that might occur during the execution of the process).
- Activities: These define the different actions that need to be performed during the execution of the process. Different types of tasks exist, depending on the type of activity you are trying to model (e.g. human task, service task, etc.) and activities could also be nested (using different types of sub-processes).
- Gateways: Can be used to define multiple paths in the process. Depending on the type of gateway, these might indicate parallel execution, choice, etc.
jBPM6 does not implement all elements and attributes as defined in the BPMN 2.0 specification. We do however support a significant subset, including the most common node types that can be used inside executable processes. This includes (almost) all elements and attributes as defined in the "Common Executable" subclass of the BPMN 2.0 specification, extended with some additional elements and attributes we believe are valuable in that context as well. The full set of elements and attributes that are supported can be found below, but it includes elements like:
- Flow objects
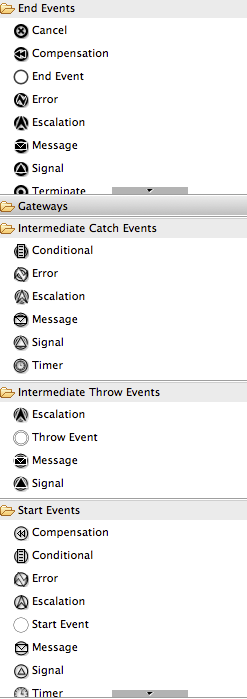
- Events
- Start Event (None, Conditional, Signal, Message, Timer)
- End Event (None, Terminate, Error, Escalation, Signal, Message, Compensation)
- Intermediate Catch Event (Signal, Timer, Conditional, Message)
- Intermediate Throw Event (None, Signal, Escalation, Message, Compensation)
- Non-interrupting Boundary Event (Escalation, Signal, Timer, Conditional, Message)
- Interrupting Boundary Event (Escalation, Error, Signal, Timer, Conditional, Message, Compensation)
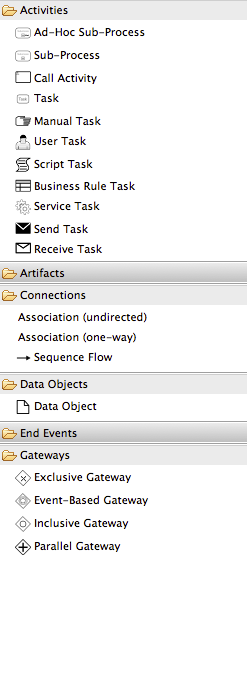
- Activities
- Script Task
- Task
- Service Task
- User Task
- Business Rule Task
- Manual Task
- Send Task
- Receive Task
- Reusable Sub-Process (Call Activity)
- Embedded Sub-Process
- Event Sub-Process
- Ad-Hoc Sub-Process
- Data-Object
- Gateways
- Diverging
- Exclusive
- Inclusive
- Parallel
- Event-Based
- Converging
- Exclusive
- Inclusive
- Parallel
- Diverging
- Lanes
- Events
- Data
- Java type language
- Process properties
- Embedded Sub-Process properties
- Activity properties
- Connecting objects
- Sequence flow
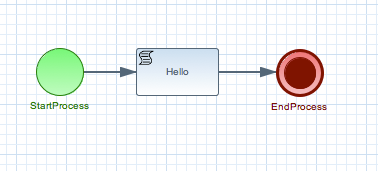
For example, consider the following "Hello World" BPMN 2.0 process, which does nothing more that writing out a "Hello World" statement when the process is started.

An executable version of this process expressed using BPMN 2.0 XML would look something like this:
<?xml version="1.0" encoding="UTF-8"?>

<definitions id="Definition"

             targetNamespace="http://www.example.org/MinimalExample"

             typeLanguage="http://www.java.com/javaTypes"

             expressionLanguage="http://www.mvel.org/2.0"

             xmlns="http://www.omg.org/spec/BPMN/20100524/MODEL"

             xmlns:xs="http://www.w3.org/2001/XMLSchema-instance"

             xs:schemaLocation="http://www.omg.org/spec/BPMN/20100524/MODEL BPMN20.xsd"

             xmlns:bpmndi="http://www.omg.org/spec/BPMN/20100524/DI"

             xmlns:dc="http://www.omg.org/spec/DD/20100524/DC"

             xmlns:di="http://www.omg.org/spec/DD/20100524/DI"

             xmlns:tns="http://www.jboss.org/drools">


  <process processType="Private" isExecutable="true" id="com.sample.HelloWorld" name="Hello World" >


    <!-- nodes -->

    <startEvent id="_1" name="StartProcess" />

    <scriptTask id="_2" name="Hello" >

      <script>System.out.println("Hello World");</script>

    </scriptTask>

    <endEvent id="_3" name="EndProcess" >

        <terminateEventDefinition/>

    </endEvent>


    <!-- connections -->

    <sequenceFlow id="_1-_2" sourceRef="_1" targetRef="_2" />

    <sequenceFlow id="_2-_3" sourceRef="_2" targetRef="_3" />


  </process>


  <bpmndi:BPMNDiagram>

    <bpmndi:BPMNPlane bpmnElement="Minimal" >

      <bpmndi:BPMNShape bpmnElement="_1" >

        <dc:Bounds x="15" y="91" width="48" height="48" />

      </bpmndi:BPMNShape>

      <bpmndi:BPMNShape bpmnElement="_2" >

        <dc:Bounds x="95" y="88" width="83" height="48" />

      </bpmndi:BPMNShape>

      <bpmndi:BPMNShape bpmnElement="_3" >

        <dc:Bounds x="258" y="86" width="48" height="48" />

      </bpmndi:BPMNShape>

      <bpmndi:BPMNEdge bpmnElement="_1-_2" >

        <di:waypoint x="39" y="115" />

        <di:waypoint x="75" y="46" />

        <di:waypoint x="136" y="112" />

      </bpmndi:BPMNEdge>

      <bpmndi:BPMNEdge bpmnElement="_2-_3" >

        <di:waypoint x="136" y="112" />

        <di:waypoint x="240" y="240" />

        <di:waypoint x="282" y="110" />

      </bpmndi:BPMNEdge>

    </bpmndi:BPMNPlane>

  </bpmndi:BPMNDiagram>


</definitions>
To create your own process using BPMN 2.0 format, you can
The jBPM Designer is an open-source web-based editor that supports the BPMN 2.0 format. We have embedded it into jbpm console for BPMN 2.0 process visualization and editing. You could use the Designer (either standalone or integrated) to create / edit BPMN 2.0 processes and then export them to BPMN 2.0 format or save them into repository and import them so they can be executed.
A new BPMN2 Eclipse plugin is being created to support the full BPMN2 specification.
You can always manually create your BPMN 2.0 process files by writing the XML directly. You can validate the syntax of your processes against the BPMN 2.0 XSD, or use the validator in the Eclipse plugin to check both syntax and completeness of your model.
Note
Drools Eclipse Process editor has been deprecated in favor of BPMN2 Modeler for process modeling. It can still be used for limited number of supported elements but should be faced out as it is not being developed any more.
Create a new Process file using the Drools Eclipse plugin wizard and in the last page of the wizard, make sure you select Drools 5.1 code compatibility. This will create a new process using the BPMN 2.0 XML format. Note however that this is not exactly a BPMN 2.0 editor, as it still uses different attributes names etc. It does however save the process using valid BPMN 2.0 syntax. Also note that the editor does not support all node types and attributes that are already supported in the execution engine.
The following code fragment shows you how to load a BPMN2 process into your knowledge base ...
private static KnowledgeBase createKnowledgeBase() throws Exception {

    KieHelper kieHelper = new KieHelper();

    KieBase kieBase = kieHelper

    .addResource(ResourceFactory.newClassPathResource("sample.bpmn2"))

    .build();


    return kieBase;

}
... and how to execute this process ...
KieBase kbase = createKnowledgeBase();

KieSession ksession = kbase.newKieSession();

ksession.startProcess("com.sample.HelloWorld");
For more detail, check out the chapter on the API and the basics.

A business process is a graph that describes the order in which a series of steps need to be executed, using a flow chart. A process consists of a collection of nodes that are linked to each other using connections. Each of the nodes represents one step in the overall process while the connections specify how to transition from one node to the other. A large selection of predefined node types have been defined. This chapter describes how to define such processes and use them in your application.
Processes can be created by using one of the following three methods:
- Using the graphical process editor such as jBPM web designer or Eclipse BPMN2 modeler
- As an XML file, according to the XML process format as defined in the XML Schema Definition in the BPMN 2.0 specification.
- By directly creating a process using the Process API.
The graphical BPMN2 editor is an editor that allows you to create a process by dragging and dropping different nodes on a canvas and editing the properties of these nodes. The graphical BPMN2 modeler is an Eclipse plugin hosted on eclipse.org that provides number of contributors where one of them is jBPM project. Once you have set up a jBPM project (see the installer for creating a working Eclipse environment where you can start), you can start adding processes. When in a project, launch the "New" wizard (use Ctrl+N) or right-click the directory you would like to put your process in and select "New", then "File". Give the file a name and the extension bpmn (e.g. MyProcess.bpmn). This will open up the process editor (you can safely ignore the warning that the file could not be read, this is just because the file is still empty).
First, ensure that you can see the Properties View down the bottom of the Eclipse window, as it will be necessary to fill in the different properties of the elements in your process. If you cannot see the properties view, open it using the menu "Window", then "Show View" and "Other...", and under the "General" folder select the Properties View.
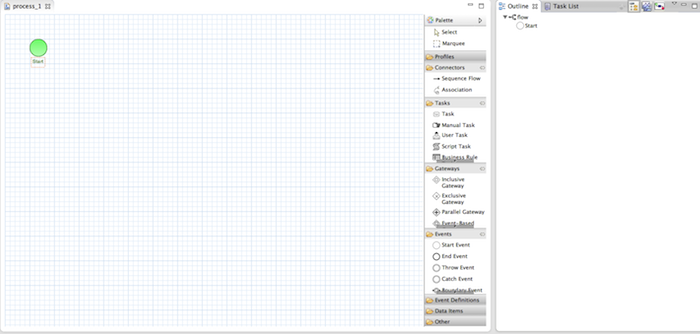
The process editor consists of a palette, a canvas and an outline view. To add new elements to the canvas, select the element you would like to create in the palette and then add them to the canvas by clicking on the preferred location. For example, click on the "End Event" icon in the palette of the GUI. Clicking on an element in your process allows you to set the properties of that element. You can connect the nodes (as long as it is permitted by the different types of nodes) by using "Sequence Flow" from the palette.
You can keep adding nodes and connections to your process until it represents the business logic that you want to specify.
It is also possible to specify processes using the underlying BPMN 2.0 XML directly. The syntax of these XML processes is defined using the BPMN 2.0 XML Schema Definition. For example, the following XML fragment shows a simple process that contains a sequence of a Start Event, a Script Task that prints "Hello World" to the console, and an End Event.
<?xml version="1.0" encoding="UTF-8"?>

<definitions id="Definition"

             targetNamespace="http://www.jboss.org/drools"

             typeLanguage="http://www.java.com/javaTypes"

             expressionLanguage="http://www.mvel.org/2.0"

             xmlns="http://www.omg.org/spec/BPMN/20100524/MODEL"Rule Task

             xmlns:xsi="http://www.w3.org/2001/XMLSchema-instance"

             xsi:schemaLocation="http://www.omg.org/spec/BPMN/20100524/MODEL BPMN20.xsd"

             xmlns:g="http://www.jboss.org/drools/flow/gpd"

             xmlns:bpmndi="http://www.omg.org/spec/BPMN/20100524/DI"

             xmlns:dc="http://www.omg.org/spec/DD/20100524/DC"

             xmlns:di="http://www.omg.org/spec/DD/20100524/DI"

             xmlns:tns="http://www.jboss.org/drools">


  <process processType="Private" isExecutable="true" id="com.sample.hello" name="Hello Process" >


    <!-- nodes -->

    <startEvent id="_1" name="Start" />

    <scriptTask id="_2" name="Hello" >

      <script>System.out.println("Hello World");</script>

    </scriptTask>

    <endEvent id="_3" name="End" >

        <terminateEventDefinition/>

    </endEvent>


    <!-- connections -->

    <sequenceFlow id="_1-_2" sourceRef="_1" targetRef="_2" />

    <sequenceFlow id="_2-_3" sourceRef="_2" targetRef="_3" />


  </process>


  <bpmndi:BPMNDiagram>

    <bpmndi:BPMNPlane bpmnElement="com.sample.hello" >

      <bpmndi:BPMNShape bpmnElement="_1" >

        <dc:Bounds x="16" y="16" width="48" height="48" />

      </bpmndi:BPMNShape>

      <bpmndi:BPMNShape bpmnElement="_2" >

        <dc:Bounds x="96" y="16" width="80" height="48" />

      </bpmndi:BPMNShape>

      <bpmndi:BPMNShape bpmnElement="_3" >

        <dc:Bounds x="208" y="16" width="48" height="48" />

      </bpmndi:BPMNShape>

      <bpmndi:BPMNEdge bpmnElement="_1-_2" >

        <di:waypoint x="40" y="40" />

        <di:waypoint x="136" y="40" />

      </bpmndi:BPMNEdge>

      <bpmndi:BPMNEdge bpmnElement="_2-_3" >

        <di:waypoint x="136" y="40" />

        <di:waypoint x="232" y="40" />

      </bpmndi:BPMNEdge>

    </bpmndi:BPMNPlane>

  </bpmndi:BPMNDiagram>


</definitions>
The process XML file consists of two parts, the top part (the "process" element) contains the definition of the different nodes and their properties, the lower part (the "BPMNDiagram" element) contains all graphical information, like the location of the nodes. The process XML consist of exactly one <process> element. This element contains parameters related to the process (its type, name, id and package name), and consists of three subsections: a header section (where process-level information like variables, globals, imports and lanes can be defined), a nodes section that defines each of the nodes in the process, and a connections section that contains the connections between all the nodes in the process. In the nodes section, there is a specific element for each node, defining the various parameters and, possibly, sub-elements for that node type.
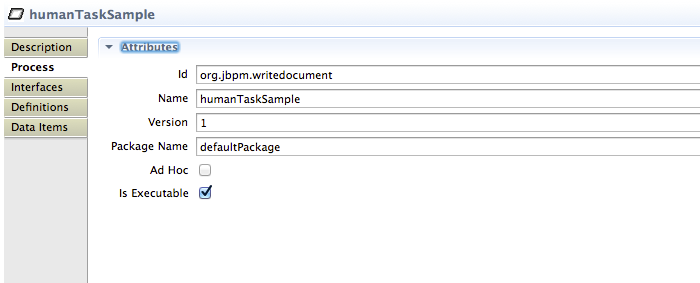
A BPMN2 process is a flow chart where different types of nodes are linked using connections. The process itself exposes the following properties:
Id: The unique id of the process.
Name: The display name of the process.
Version: The version number of the process.
Package: The package (namespace) the process is defined in.
In addition to that following can be defined as well:
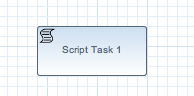
Represents a script that
should be executed in this process. A Script Task should have one incoming
connection and one outgoing connection. The associated action specifies what
should be executed, the dialect used for coding the action (i.e., Java or MVEL),
and the actual action code. This code can access any variables and globals.
There is also a predefined variable kcontext that references the
ProcessContext object (which can,
for example, be used to access the current ProcessInstance or
NodeInstance, and to get and set variables, or get access to the
ksession using kcontext.getKnowledgeRuntime()). When a Script Task
is reached in the process, it will execute the action and then continue with the
next node. It contains the following properties:
Id: The id of the node (which is unique within one node container).
Name: The display name of the node.
Action: The action script associated with this action node.
Note that you can write any valid Java code inside a script node. This basically allows you to do anything inside such a script node. There are some caveats however:
- When trying to create a higher-level business process, that should also be understood by business users, it is probably wise to avoid low-level implementation details inside the process, including inside these script tasks. A Script Task could still be used to quickly manipulate variables etc. but other concepts like a Service Task could be used to model more complex behaviour in a higher-level manner.
- Scripts should be immediate. They are using the engine thread to execute the script. Scripts that could take some time to execute should probably be modeled as an asynchronous Service Task.
- You should try to avoid contacting external services through a script node. Not only does this usually violate the first two caveats, it is also interacting with external services without the knowledge of the engine, which can be problematic, especially when using persistence and transactions. In general, it is probably wiser to model communication with an external service using a service task.
- Scripts should not throw exceptions. Runtime exceptions should be caught and for example managed inside the script or transformed into signals or errors that can then be handled inside the process.
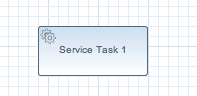
Represents an (abstract) unit of work that should be executed in this process. All work that is executed outside the process engine should be represented (in a declarative way) using a Service Task. Different types of services are predefined, e.g., sending an email, logging a message, etc. Users can define domain-specific services or work items, using a unique name and by defining the parameters (input) and results (output) that are associated with this type of work. Check the chapter on domain-specific processes for a detailed explanation and illustrative examples of how to define and use work items in your processes. When a Service Task is reached in the process, the associated work is executed. A Service Task should have one incoming connection and one outgoing connection.
Id: The id of the node (which is unique within one node container).
Name: The display name of the node.
Parameter mapping: Allows copying the value of process variables to parameters of the work item. Upon creation of the work item, the values will be copied.
Result mapping: Allows copying the value of result parameters of the work item to a process variable. Each type of work can define result parameters that will (potentially) be returned after the work item has been completed. A result mapping can be used to copy the value of the given result parameter to the given variable in this process. For example, the "FileFinder" work item returns a list of files that match the given search criteria within the result parameter
Files. This list of files can then be bound to a process variable for use within the process. Upon completion of the work item, the values will be copied.On-entry and on-exit actions: Actions that are executed upon entry or exit of this node, respectively.
Additional parameters: Each type of work item can define additional parameters that are relevant for that type of work. For example, the "Email" work item defines additional parameters such as
From,To,SubjectandBody. The user can either provide values for these parameters directly, or define a parameter mapping that will copy the value of the given variable in this process to the given parameter; if both are specified, the mapping will have precedence. Parameters of typeStringcan use#{expression}to embed a value in the string. The value will be retrieved when creating the work item, and the substitution expression will be replaced by the result of callingtoString()on the variable. The expression could simply be the name of a variable (in which case it resolves to the value of the variable), but more advanced MVEL expressions are possible as well, e.g.,#{person.name.firstname}.
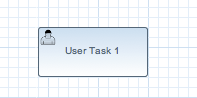
Processes can also involve tasks that need to be executed by human actors. A User Task represents an atomic task to be executed by a human actor. It should have one incoming connection and one outgoing connection. User Tasks can be used in combination with Swimlanes to assign multiple human tasks to similar actors. Refer to the chapter on human tasks for more details. A User Task is actually nothing more than a specific type of service node (of type "Human Task"). A User Task contains the following properties:
Id: The id of the node (which is unique within one node container).
Name: The display name of the node.
TaskName: The name of the human task.
Priority: An integer indicating the priority of the human task.
Comment: A comment associated with the human task.
ActorId: The actor id that is responsible for executing the human task. A list of actor id's can be specified using a comma (',') as separator.
GroupId: The group id that is responsible for executing the human task. A list of group id's can be specified using a comma (',') as separator.
Skippable: Specifies whether the human task can be skipped, i.e., whether the actor may decide not to execute the task.
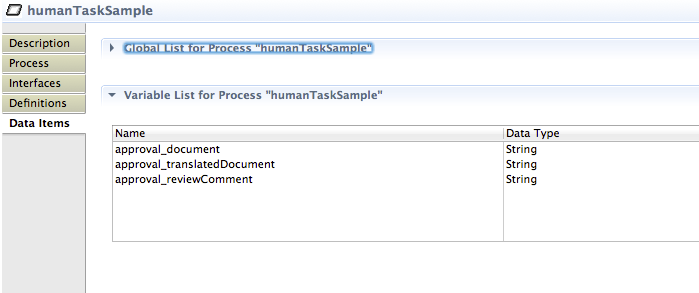
Content: The data associated with this task.
Swimlane: The swimlane this human task node is part of. Swimlanes make it easy to assign multiple human tasks to the same actor. See the human tasks chapter for more detail on how to use swimlanes.
On entry and on exit actions: Action scripts that are executed upon entry and exit of this node, respectively.
Parameter mapping: Allows copying the value of process variables to parameters of the human task. Upon creation of the human tasks, the values will be copied.
Result mapping: Allows copying the value of result parameters of the human task to a process variable. Upon completion of the human task, the values will be copied. A human task has a result variable "Result" that contains the data returned by the human actor. The variable "ActorId" contains the id of the actor that actually executed the task.
A user task should define the type of task that needs to be executed (using properties like TaskName, Comment, etc.) and who needs to perform it (using either actorId or groupId). Note that if there is data related to this specific process instance that the end user needs when performing the task, this data should be passed as the content of the task. The task for example does not have access to process variables. Check out the chapter on human tasks to get more detail on how to pass data between human tasks and the process instance.
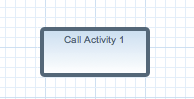
Represents the invocation of another process from within this process. A sub-process node should have one incoming connection and one outgoing connection. When a Reusable Sub-Process node is reached in the process, the engine will start the process with the given id. It contains the following properties:
Id: The id of the node (which is unique within one node container).
Name: The display name of the node.
ProcessId: The id of the process that should be executed.
Wait for completion (by default true): If this property is true, this sub-process node will only continue if the child process that was started has terminated its execution (completed or aborted); otherwise it will continue immediately after starting the subprocess (so it will not wait for its completion).
Independent (by default true): If this property is true, the child process is started as an independent process, which means that the child process will not be terminated if this parent process is completed (or this sub-process node is canceled for some other reason); otherwise the active sub-process will be canceled on termination of the parent process (or cancellation of the sub-process node). Note that you can only set independent to "false" only when "Wait for completion" is set to true.
On-entry and on-exit actions: Actions that are executed upon entry or exit of this node, respectively.
Parameter in/out mapping: A sub-process node can also define in- and out-mappings for variables. The variables given in the "in" mapping will be used as parameters (with the associated parameter name) when starting the process. The variables of the child process that are defined for the "out" mappings will be copied to the variables of this process when the child process has been completed. Note that you can use "out" mappings only when "Wait for completion" is set to true.
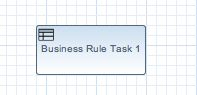
A Business Rule Task Represents a set of rules that need to be
evaluated. The rules are evaluated when the node is reached. A Rule
Task should have one incoming connection and one outgoing connection.
Rules are defined in separate files using the Drools rule format. Rules
can become part of a specific ruleflow group using the ruleflow-group
attribute in the header of the rule.
When a Rule Task is reached in the process, the engine will start executing rules that are part of the corresponding ruleflow-group (if any). Execution will automatically continue to the next node if there are no more active rules in this ruleflow group. As a result, during the execution of a ruleflow group, new activations belonging to the currently active ruleflow group can be added to the Agenda due to changes made to the facts by the other rules. Note that the process will immediately continue with the next node if it encounters a ruleflow group where there are no active rules at that time.
If the ruleflow group was already active, the ruleflow group will remain active and execution will only continue if all active rules of the ruleflow group has been completed. It contains the following properties:
Id: The id of the node (which is unique within one node container).
Name: The display name of the node.
RuleFlowGroup: The name of the ruleflow group that represents the set of rules of this RuleFlowGroup node.
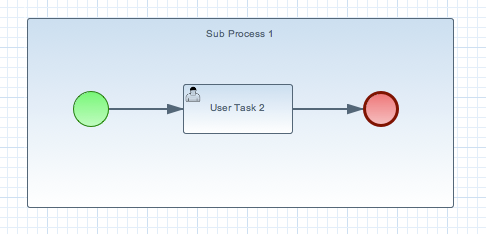
A Sub-Process is a node that can contain other nodes so that it acts as a node container. This allows not only the embedding of a part of the process within such a sub-process node, but also the definition of additional variables that are accessible for all nodes inside this container. A sub-process should have one incoming connection and one outgoing connection. It should also contain one start node that defines where to start (inside the Sub-Process) when you reach the sub-process. It should also contain one or more end events. Note that, if you use a terminating event node inside a sub-process, you are terminating just that sub-process. A sub-process ends when there are no more active nodes inside the sub-process. It contains the following properties:
Id: The id of the node (which is unique within one node container).
Name: The display name of the node.
Variables: Additional variables can be defined to store data during the execution of this node. See section “???” for details.
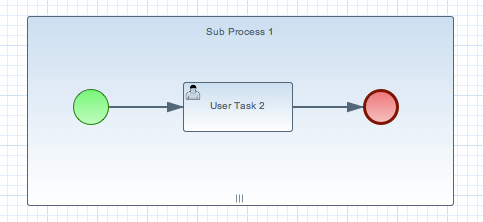
A Multiple Instance sub-process is a special kind of sub-process that allows you to execute the contained process segment multiple times, once for each element in a collection. A multiple instance sub-process should have one incoming connection and one outgoing connection. It waits until the embedded process fragment is completed for each of the elements in the given collection before continuing. It contains the following properties:
Id: The id of the node (which is unique within one node container).
Name: The display name of the node.
CollectionExpression: The name of a variable that represents the collection of elements that should be iterated over. The collection variable should be an array or of type
java.util.Collection. If the collection expression evaluates to null or an empty collection, the multiple instances sub-process will be completed immediately and follow its outgoing connection.VariableName: The name of the variable to contain the current element from the collection. This gives nodes within the composite node access to the selected element.
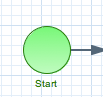
The start of the process. A process should have exactly one start node (none start node which does not have event definitions), which cannot have incoming connections and should have one outgoing connection. Whenever a process is started, execution will start at this node and automatically continue to the first node linked to this start event, and so on. It contains the following properties:
Id: The id of the node (which is unique within one node container).
Name: The display name of the node.
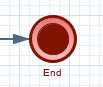
The end of the process. A process should have one or more end events. The End Event should have one incoming connection and cannot have any outgoing connections. It contains the following properties:
Id: The id of the node (which is unique within one node container).
Name: The display name of the node.
Terminate: An End Event can terminate the entire process or just the path. When a process instance is terminated, it means its state is set to completed and all other nodes that might still be active (on parallel paths) in this process instance are canceled. Non-terminating end events are simply end for this path (execution of this branch will end here), but other parallel paths can still continue. A process instance will automatically complete if there are no more active paths inside that process instance (for example, if a process instance reaches a non-terminating end node but there are no more active branches inside the process instance, the process instance will be completed anyway). Terminating end events are visualized using a full circle inside the event node, non-terminating event nodes are empty. Note that, if you use a terminating event node inside a sub-process, you are terminating just that sub-process and top level continues.

An Error Event can be used to signal an exceptional condition in the process. It should have one incoming connection and no outgoing connections. When an Error Event is reached in the process, it will throw an error with the given name. The process will search for an appropriate error handler that is capable of handling this kind of fault. If no error handler is found, the process instance will be aborted. An Error Event contains the following properties:
Id: The id of the node (which is unique within one node container).
Name: The display name of the node.
FaultName: The name of the fault. This name is used to search for appropriate exception handlers that are capable of handling this kind of fault.
FaultVariable: The name of the variable that contains the data associated with this fault. This data is also passed on to the exception handler (if one is found).
Error handlers can be specified using boundary events.

Represents a timer that can trigger one or multiple times after a given period of time. A Timer Event should have one incoming connection and one outgoing connection. The timer delay specifies how long the timer should wait before triggering the first time. When a Timer Event is reached in the process, it will start the associated timer. The timer is canceled if the timer node is canceled (e.g., by completing or aborting the enclosing process instance). Consult the section “???” for more information. The Timer Event contains the following properties:
Id: The id of the node (which is unique within one node container).
Name: The display name of the node.
Timer delay: The delay that the node should wait before triggering the first time. The expression should be of the form
[#d][#h][#m][#s][#[ms]]. This allows you to specify the number of days, hours, minutes, seconds and milliseconds (which is the default if you don't specify anything). For example, the expression "1h" will wait one hour before triggering the timer. The expression could also use #{expr} to dynamically derive the delay based on some process variable. Expr in this case could be a process variable, or a more complex expression based on a process variable (e.g. myVariable.getValue()).Timer period: The period between two subsequent triggers. If the period is 0, the timer should only be triggered once. The expression should be of the form
[#d][#h][#m][#s][#[ms]]. You can specify the number of days, hours, minutes, seconds and milliseconds (which is the default if you don't specify anything). For example, the expression "1h" will wait one hour before triggering the timer again. The expression could also use #{expr} to dynamically derive the period based on some process variable. Expr in this case could be a process variable, or a more complex expression based on a process variable (e.g. myVariable.getValue()).
Timer events could also be specified as boundary events on sub-processes and tasks that are not automatic tasks like script task that have no wait state as timer will not have a change to fire before task completion.

A Signal Event can be used to respond to internal or external events during the execution of the process. A Signal Event should have one incoming connections and one outgoing connection. It specifies the type of event that is expected. Whenever that type of event is detected, the node connected to this event node will be triggered. It contains the following properties:
Id: The id of the node (which is unique within one node container).
Name: The display name of the node.
EventType: The type of event that is expected.
VariableName: The name of the variable that will contain the data associated with this event (if any) when this event occurs.
A process instance can be signaled that a specific event occurred using
ksession.signalEvent(eventType, data, processInstanceId)
This will trigger all (active) signal event nodes in the given process instance that are waiting for that event type. Data related to the event can be passed using the data parameter. If the event node specifies a variable name, this data will be copied to that variable when the event occurs.
It is also possible to use event nodes inside sub-processes. These event nodes will however only be active when the sub-process is active.
You can also generate a signal from inside a process instance. A script (in a script task or using on entry or on exit actions) can use
kcontext.getKnowledgeRuntime().signalEvent(eventType, data, kcontext.getProcessInstance().getId());
A throwing signal event could also be used to model the signaling of an event.

Allows you to create branches in your process. A Diverging Gateway should have one incoming connection and two or more outgoing connections. There are three types of gateway nodes currently supported:
AND or parallel means that the control flow will continue in all outgoing connections simultaneously.
XOR or exclusive means that exactly one of the outgoing connections will be chosen. The decision is made by evaluating the constraints that are linked to each of the outgoing connections. The constraint with the lowest priority number that evaluates to true is selected. Constraints can be specified using different dialects. Note that you should always make sure that at least one of the outgoing connections will evaluate to true at runtime (the engine will throw an exception at runtime if it cannot find at least one outgoing connection).
OR or inclusive means that all outgoing connections whose condition evaluates to true are selected. Conditions are similar to the exclusive gateway, except that no priorities are taken into account. Note that you should make sure that at least one of the outgoing connections will evaluate to true at runtime because the engine will throw an exception at runtime if it cannot determine an outgoing connection.
It contains the following properties:
Id: The id of the node (which is unique within one node container).
Name: The display name of the node.
Type: The type of the split node, i.e., AND, XOR or OR (see above).
Constraints: The constraints linked to each of the outgoing connections (in case of an exclusive or inclusive gateway).
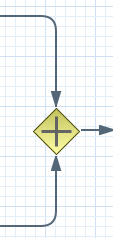
Allows you to synchronize multiple branches. A Converging Gateway should have two or more incoming connections and one outgoing connection. There are three types of splits currently supported:
AND or parallel means that is will wait until all incoming branches are completed before continuing.
XOR or exclusive means that it continues as soon as one of its incoming branches has been completed. If it is triggered from more than one incoming connection, it will trigger the next node for each of those triggers.
OR or inclusive means that it continues as soon as all direct active paths of its incoming branches has been completed. This is complex merge behaviour that is described in BPMN2 specification but in most cases it means that OR join will wait for all active flows that started in OR split. Some advanced cases (including other gateways in between or repeatable timers) will be causing different "direct active path" calculation.
It contains the following properties:
Id: The id of the node (which is unique within one node container).
Name: The display name of the node.
Type: The type of the Join node, i.e. AND, OR or XOR.
While the flow chart focuses on specifying the control flow of the process, it is usually also necessary to look at the process from a data perspective. Throughout the execution of a process, data can be retrieved, stored, passed on and used.
For storing runtime data, during the execution of the process, process variables can be used. A variable is defined by a name and a data type. This could be a basic data type, such as boolean, int, or String, or any kind of Object subclass (it must implement Serializable interface). Variables can be defined inside a variable scope. The top-level scope is the variable scope of the process itself. Subscopes can be defined using a Sub-Process. Variables that are defined in a subscope are only accessible for nodes within that scope.
Whenever a variable is accessed, the process will search for the appropriate variable scope that defines the variable. Nesting of variable scopes is allowed. A node will always search for a variable in its parent container. If the variable cannot be found, it will look in that one's parent container, and so on, until the process instance itself is reached. If the variable cannot be found, a read access yields null, and a write access produces an error message, with the process continuing its execution.
Variables can be used in various ways:
Process-level variables can be set when starting a process by providing a map of parameters to the invocation of the
startProcessmethod. These parameters will be set as variables on the process scope.Script actions can access variables directly, simply by using the name of the variable as a local parameter in their script. For example, if the process defines a variable of type "org.jbpm.Person" in the process, a script in the process could access this directly:
// call method on the process variable "person"

person.setAge(10);
Changing the value of a variable in a script can be done through the knowledge context:
kcontext.setVariable(variableName, value);
Service tasks (and reusable sub-processes) can pass the value of process variables to the outside world (or another process instance) by mapping the variable to an outgoing parameter. For example, the parameter mapping of a service task could define that the value of the process variable x should be mapped to a task parameter y right before the service is being invoked. You can also inject the value of process variable into a hard-coded parameter String using
#{expression}. For example, the description of a human task could be defined asYou need to contact person #{person.getName()}(where person is a process variable), which will replace this expression by the actual name of the person when the service needs to be invoked. Similarly results of a service (or reusable sub-process) can also be copied back to a variable using a result mapping.Various other nodes can also access data. Event nodes for example can store the data associated to the event in a variable, etc. Check the properties of the different node types for more information.
Process variables can be accessed also from the Java code of your application. It is done by casting of
ProcessInstancetoWorkflowProcessInstance. See the following example:
variable = ((WorkflowProcessInstance) processInstance).getVariable("variableName");
To list all the process variables see the following code snippet:
org.jbpm.process.instance.ProcessInstance processInstance = ...;

VariableScopeInstance variableScope = (VariableScopeInstance) processInstance.getContextInstance(VariableScope.VARIABLE_SCOPE);

Map<String, Object> variables = variableScope.getVariables();
Note that when you use persistence then you have to use a command based approach to get all process variables:
Map<String, Object> variables = ksession.execute(new GenericCommand<Map<String, Object>>() {

    public Map<String, Object> execute(Context context) {

        KieSession ksession = ((KnowledgeCommandContext) context).getStatefulKnowledgesession();

        org.jbpm.process.instance.ProcessInstance processInstance = (org.jbpm.process.instance.ProcessInstance) ksession.getProcessInstance(piId);

        VariableScopeInstance variableScope = (VariableScopeInstance) processInstance.getContextInstance(VariableScope.VARIABLE_SCOPE);

        Map<String, Object> variables = variableScope.getVariables();

        return variables;

    }

});
Finally, processes (and rules) all have access to globals, i.e.
globally defined variables and data in the Knowledge Session. Globals are directly
accessible in actions just like variables. Globals need to be defined as part of the
process before they can be used. You can for example define globals by clicking the
globals button when specifying an action script in the Eclipse action property
editor. You can also set the value of a global from the outside using
ksession.setGlobal(name, value) or from inside process scripts using
kcontext.getKnowledgeRuntime().setGlobal(name,value);.
Action scripts can be used in different ways:
- Within a Script Task,
- As entry or exit actions, with a number of nodes.
Actions have access to globals and the variables that are defined
for the process and the predefined variable kcontext. This
variable is of type
org.kie.api.runtime.process.ProcessContext and can be used for
several tasks:
Getting the current node instance (if applicable). The node instance could be queried for data, such as its name and type. You can also cancel the current node instance.
NodeInstance node = kcontext.getNodeInstance();

String name = node.getNodeName();
Getting the current process instance. A process instance can be queried for data (name, id, processId, etc.), aborted or signaled an internal event.
ProcessInstance proc = kcontext.getProcessInstance();

proc.signalEvent( type, eventObject );
Getting or setting the value of variables.
Accessing the Knowledge Runtime allows you do things like starting a process, signaling (external) events, inserting data, etc.
jBPM currently supports two dialects, Java and MVEL.
Java actions should be valid Java code. MVEL actions can use the business
scripting language MVEL to express the action. MVEL accepts any valid Java
code but additionally provides support for nested accesses of parameters
(e.g., person.name instead of person.getName()),
and many other scripting improvements. Thus, MVEL expressions are more
convenient for the business user. For example, an action that prints out
the name of the person in the "requester" variable of the process would
look like this:
// Java dialect
System.out.println( person.getName() );

//  MVEL dialect
System.out.println( person.name );
Constraints can be used in various locations in your processes, for example in a diverging gateway. jBPM supports two types of constraints:
Code constraints are boolean expressions, evaluated directly whenever they are reached. We currently support two dialects for expressing these code constraints: Java and MVEL. Both Java and MVEL code constraints have direct access to the globals and variables defined in the process. Here is an example of a valid Java code constraint,
personbeing a variable in the process:return person.getAge() > 20;
A similar example of a valid MVEL code constraint is:
return person.age > 20;
Rule constraints are equals to normal Drools rule conditions. They use the Drools Rule Language syntax to express possibly complex constraints. These rules can, like any other rule, refer to data in the Working Memory. They can also refer to globals directly. Here is an example of a valid rule constraint:
Person( age > 20 )
This tests for a person older than 20 being in the Working Memory.
Rule constraints do not have direct access to variables defined
inside the process. It is however possible to refer to the current process
instance inside a rule constraint, by adding the process instance to the
Working Memory and matching for the process instance in your rule
constraint. We have added special logic to make sure that a variable
processInstance of type WorkflowProcessInstance
will only match to the current process instance and not to other process
instances in the Working Memory. Note that you are however responsible
yourself to insert the process instance into the session and, possibly,
to update it, for example, using Java code or an on-entry or on-exit or
explicit action in your process. The following example of a rule
constraint will search for a person with the same name as the value
stored in the variable "name" of the process:
processInstance : WorkflowProcessInstance()
Person( name == ( processInstance.getVariable("name") ) )
# add more constraints here ...Timers wait for a predefined amount of time, before triggering, once or repeatedly. They can be used to trigger certain logic after a certain period, or to repeat some action at regular intervals.
A Timer node is set up with a delay and a period. The delay specifies the amount of time to wait after node activation before triggering the timer the first time. The period defines the time between subsequent trigger activations. A period of 0 results in a one-shot timer.
The (period and delay) expression should be of the form [#d][#h][#m][#s][#[ms]]. You can specify the amount of days, hours, minutes, seconds and milliseconds (which is the default if you don't specify anything). For example, the expression "1h" will wait one hour before triggering the timer (again).
since version 6 timers can be configured with valid ISO8601 date format that supports both one shot timers and repeatable timers. Timers can be defined as date and time representation, time duration or repeating intervals
- Date - 2013-12-24T20:00:00.000+02:00 - fires exactly at Christmas Eve at 8PM
- Duration - PT1S - fires once after 1 second
- Repeatable intervals - R/PT1S - fires every second, no limit, alternatively R5/PT1S will fire 5 times every second
The timer service is responsible for making sure that timers get triggered at the appropriate times. Timers can also be canceled, meaning that the timer will no longer be triggered.
Timers can be used in two ways inside a process:
A Timer Event may be added to the process flow. Its activation starts the timer, and when it triggers, once or repeatedly, it activates the Timer node's successor. Subsequently, the outgoing connection of a timer with a positive period is triggered multiple times. Canceling a Timer node also cancels the associated timer, after which no more triggers will occur.
Timers can be associated with a Sub-Process or tasks as a boundary event.
While it is recommended to define processes using the graphical editor or
the underlying XML (to shield yourself from internal APIs), it is also possible
to define a process using the Process API directly. The most important process
model elements are defined in the packages org.jbpm.workflow.core and
org.jbpm.workflow.core.node. A "fluent API" is provided that
allows you to easily construct processes in a readable manner using factories.
At the end, you can validate the process that you were constructing manually.
This is a simple example of a basic process with a script task only:
RuleFlowProcessFactory factory =

    RuleFlowProcessFactory.createProcess("org.jbpm.HelloWorld");

factory

    // Header

    .name("HelloWorldProcess")

    .version("1.0")

    .packageName("org.jbpm")

    // Nodes

    .startNode(1).name("Start").done()

    .actionNode(2).name("Action")

        .action("java", "System.out.println(\"Hello World\");").done()

    .endNode(3).name("End").done()

    // Connections

    .connection(1, 2)

    .connection(2, 3);

RuleFlowProcess process = factory.validate().getProcess();

KnowledgeBuilder kbuilder = KnowledgeBuilderFactory.newKnowledgeBuilder();

kbuilder.add(ResourceFactory.newByteArrayResource(

    XmlBPMNProcessDumper.INSTANCE.dump(process).getBytes()), ResourceType.BPMN2);

KnowledgeBase kbase = kbuilder.newKnowledgeBase();

StatefulKnowledgeSession ksession = kbase.newStatefulKnowledgeSession();

ksession.startProcess("org.jbpm.HelloWorld");
You can see that we start by calling the static createProcess()
method from the RuleFlowProcessFactory class. This method creates
a new process with the given id and returns the RuleFlowProcessFactory
that can be used to create the process. A typical process consists of three parts.
The header part comprises global elements like the name of the process, imports,
variables, etc. The nodes section contains all the different nodes that are part of the
process. The connections section finally links these nodes to each other
to create a flow chart.
In this example, the header contains the name and the version of the process and the package name. After that, you can start adding nodes to the current process. If you have auto-completion you can see that you have different methods to create each of the supported node types at your disposal.
When you start adding nodes to the process, in this example by calling
the startNode(), actionNode() and endNode()
methods, you can see that these methods return a specific NodeFactory,
that allows you to set the properties of that node. Once you have finished
configuring that specific node, the done() method returns you to the
current RuleFlowProcessFactory so you can add more nodes, if necessary.
When you are finished adding nodes, you must connect them by creating
connections between them. This can be done by calling the method
connection, which will link previously created nodes.
Finally, you can validate the generated process by calling the
validate() method and retrieve the created
RuleFlowProcess object.
Even though business processes aren't code (we even recommend you to make them as high-level as possible and to avoid adding implementation details), they also have a life cycle like other development artefacts. And since business processes can be updated dynamically, testing them (so that you don't break any use cases when doing a modification) is really important as well.
When unit testing your process, you test whether the process behaves as expected in specific use cases, for example test the output based on the existing input. To simplify unit testing, jBPM includes a helper class called JbpmJUnitBaseTestCase (in the jbpm-test module) that you can use to greatly simplify your JUnit testing, by offering:
helper methods to create a new RuntimeManager and RuntimeEngine for a given (set of) process(es)
you can select whether you want to use persistence or not
assert statements to check
the state of a process instance (active, completed, aborted)
which node instances are currently active
which nodes have been triggered (to check the path that has been followed)
get the value of variables
For example, consider the following "hello world" process containing a start event, a script task and an end event. The following JUnit test will create a new session, start the process and then verify whether the process instance completed successfully and whether these three nodes have been executed.
public class ProcessPersistenceTest extends JbpmJUnitBaseTestCase {


    public ProcessPersistenceTest() {

        // setup data source, enable persistence

        super(true, true);

    }


    @Test

    public void testProcess() {

        // create runtime manager with single process - hello.bpmn

        createRuntimeManager("hello.bpmn");


        // take RuntimeManager to work with process engine

        RuntimeEngine runtimeEngine = getRuntimeEngine();


        // get access to KieSession instance

        KieSession ksession = runtimeEngine.getKieSession();


        // start process

        ProcessInstance processInstance = ksession.startProcess("com.sample.bpmn.hello");


        // check whether the process instance has completed successfully

        assertProcessInstanceCompleted(processInstance.getId(), ksession);


        // check what nodes have been triggered

        assertNodeTriggered(processInstance.getId(), "StartProcess", "Hello", "EndProcess");

    }

}
JbpmJUnitBaseTestCase acts as base test case class that shall be used for jBPM related tests. It provides four usage areas:
JUnit life cycle methods
setUp: executed @Before and configures data source and EntityManagerFactory, cleans up Singleton's session id
tearDown: executed @After and clears out history, closes EntityManagerFactory and data source, disposes RuntimeEngines and RuntimeManager
Knowledge Base and KnowledgeSession management methods
createRuntimeManager creates RuntimeManager for given set of assets and selected strategy
disposeRuntimeManager disposes RuntimeManager currently active in the scope of test
getRuntimeEngine creates new RuntimeEngine for given context
Assertions
assertProcessInstanceCompleted
assertProcessInstanceAborted
assertProcessInstanceActive
assertNodeActive
assertNodeTriggered
assertProcessVarExists
assertNodeExists
assertVersionEquals
assertProcessNameEquals
Helper methods
getDs - returns currently configured data source
getEmf - returns currently configured EntityManagerFactory
getTestWorkItemHandler - returns test work item handler that might be registered in addition to what is registered by default
clearHistory - clears history log
setupPoolingDataSource - sets up data source
JbpmJUnitBaseTestCase supports all three predefined RuntimeManager strategies as part of the unit testing. It's enough to specify which strategy shall be used whenever creating runtime manager as part of single test:
public class ProcessHumanTaskTest extends JbpmJUnitBaseTestCase {


    private static final Logger logger = LoggerFactory.getLogger(ProcessHumanTaskTest.class);


    public ProcessHumanTaskTest() {

        super(true, false);

    }


    @Test

    public void testProcessProcessInstanceStrategy() {

        RuntimeManager manager = createRuntimeManager(Strategy.PROCESS_INSTANCE, "manager", "humantask.bpmn");

        RuntimeEngine runtimeEngine = getRuntimeEngine(ProcessInstanceIdContext.get());

        KieSession ksession = runtimeEngine.getKieSession();

        TaskService taskService = runtimeEngine.getTaskService();


        int ksessionID = ksession.getId();

        ProcessInstance processInstance = ksession.startProcess("com.sample.bpmn.hello");


        assertProcessInstanceActive(processInstance.getId(), ksession);

        assertNodeTriggered(processInstance.getId(), "Start", "Task 1");


        manager.disposeRuntimeEngine(runtimeEngine);

        runtimeEngine = getRuntimeEngine(ProcessInstanceIdContext.get(processInstance.getId()));


        ksession = runtimeEngine.getKieSession();

        taskService = runtimeEngine.getTaskService();


        assertEquals(ksessionID, ksession.getId());


        // let john execute Task 1

        List<TaskSummary> list = taskService.getTasksAssignedAsPotentialOwner("john", "en-UK");

        TaskSummary task = list.get(0);

        logger.info("John is executing task {}", task.getName());

        taskService.start(task.getId(), "john");

        taskService.complete(task.getId(), "john", null);


        assertNodeTriggered(processInstance.getId(), "Task 2");


        // let mary execute Task 2

        list = taskService.getTasksAssignedAsPotentialOwner("mary", "en-UK");

        task = list.get(0);

        logger.info("Mary is executing task {}", task.getName());

        taskService.start(task.getId(), "mary");

        taskService.complete(task.getId(), "mary", null);


        assertNodeTriggered(processInstance.getId(), "End");

        assertProcessInstanceCompleted(processInstance.getId(), ksession);

    }

}
Above is more complete example that uses PerProcessInstance runtime manager strategy and uses task service to deal with user tasks.
Real-life business processes typically include the invocation of external services (like for example a human task service, an email server or your own domain-specific services). One of the advantages of our domain-specific process approach is that you can specify yourself how to actually execute your own domain-specific nodes, by registering a handler. And this handler can be different depending on your context, allowing you to use testing handlers for unit testing your process. When you are unit testing your business process, you can register test handlers that then verify whether specific services are requested correctly, and provide test responses for those services. For example, imagine you have an email node or a human task as part of your process. When unit testing, you don't want to send out an actual email but rather test whether the email that is requested contains the correct information (for example the right to email, a personalized body, etc.).
A TestWorkItemHandler is provided by default that can be registered to collect all work items (a work item represents one unit of work, like for example sending one specific email or invoking one specific service and contains all the data related to that task) for a given type. This test handler can then be queried during unit testing to check whether specific work was actually requested during the execution of the process and that the data associated with the work was correct.
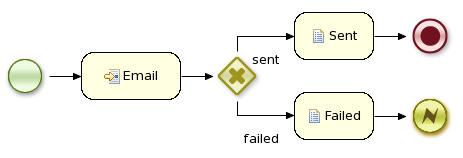
The following example describes how a process that sends out an email could be tested. This test case in particular will test whether an exception is raised when the email could not be sent (which is simulated by notifying the engine that the sending the email could not be completed). The test case uses a test handler that simply registers when an email was requested (and allows you to test the data related to the email like from, to, etc.). Once the engine has been notified the email could not be sent (using abortWorkItem(..)), the unit test verifies that the process handles this case successfully by logging this and generating an error, which aborts the process instance in this case.
public void testProcess2() {


    // create runtime manager with single process - hello.bpmn

    createRuntimeManager("sample-process.bpmn");

    // take RuntimeManager to work with process engine

    RuntimeEngine runtimeEngine = getRuntimeEngine();


    // get access to KieSession instance

    KieSession ksession = runtimeEngine.getKieSession();


    // register a test handler for "Email"

    TestWorkItemHandler testHandler = getTestWorkItemHandler();


    ksession.getWorkItemManager().registerWorkItemHandler("Email", testHandler);


    // start the process

    ProcessInstance processInstance = ksession.startProcess("com.sample.bpmn.hello2");


    assertProcessInstanceActive(processInstance.getId(), ksession);

    assertNodeTriggered(processInstance.getId(), "StartProcess", "Email");


    // check whether the email has been requested

    WorkItem workItem = testHandler.getWorkItem();

    assertNotNull(workItem);

    assertEquals("Email", workItem.getName());

    assertEquals("me@mail.com", workItem.getParameter("From"));

    assertEquals("you@mail.com", workItem.getParameter("To"));


    // notify the engine the email has been sent

    ksession.getWorkItemManager().abortWorkItem(workItem.getId());

    assertProcessInstanceAborted(processInstance.getId(), ksession);

    assertNodeTriggered(processInstance.getId(), "Gateway", "Failed", "Error");


}
You can configure whether you want to execute the JUnit tests using persistence or not. By default, the JUnit tests will use persistence, meaning that the state of all process instances will be stored in a (in-memory H2) database (which is started by the JUnit test during setup) and a history log will be used to check assertions related to execution history. When persistence is not used, process instances will only live in memory and an in-memory logger is used for history assertions.
Persistence (and setup of data source) is controlled by the super constructor and allows following
default, no arg constructor - the most simple test case configuration (does NOT initialize data source and does NOT configure session persistence) - this is usually used for in memory process management, without human task interaction
super(boolean, boolean) - allows to explicitly configure persistence and data source. This is the most common way of bootstrapping test cases for jBPM
super(true, false) - to execute with in memory process management with human tasks persistence
super(true, true) - to execute with persistent process management with human tasks persistence
super(boolean, boolean, string) - same as super(boolean, boolean) but allows to use another persistence unit name than default (org.jbpm.persistence.jpa)
public class ProcessHumanTaskTest extends JbpmJUnitBaseTestCase {


    private static final Logger logger = LoggerFactory.getLogger(ProcessHumanTaskTest.class);


    public ProcessHumanTaskTest() {

        // configure this tests to not use persistence for process engine but still use it for human tasks

        super(true, false);

    }

}