Every application, whether Plain Old Java, J2EE, or some other language altogether, needs to be packaged in some way. In Java-related projects, many people use ANT.
But JBoss Tools™ comes with our own Archives tool with simpler and less-verbose XML and a handy user interface. The Project Archives plugin consists primarily of the Project Archives view to set up each packaging configuration.
Let's look through all functionality that the Project Archives view provides.
The packaging configuration for each project is stored in the project's root folder in a file named .packages, which has a fairly simple XML structure. Modifying the file by hand is neither required nor recommended, as the UI is the only supported way to modify your packaging structure.
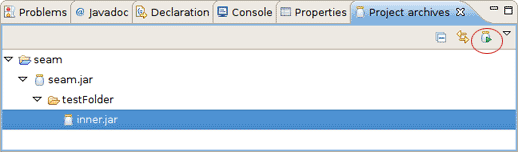
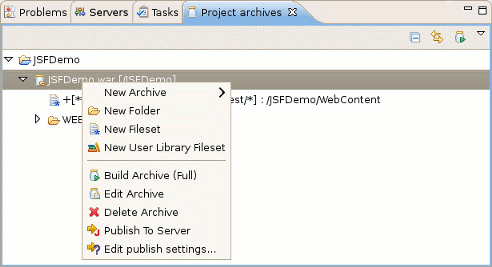
A project's configuration contains archives. As you can see on the image above a project can contain more than one archive. Internal archives and filesets can be directly inside of an archive, or in a sub-folder of that archive.
In the upper right corner of the view you can see an icon which, when clicked, will build the selected top-level archive. Additionally, you can select → when a project is selected in the Packages View to build all declared packages in that project's .packages file. This will execute a full build on all declared archives.
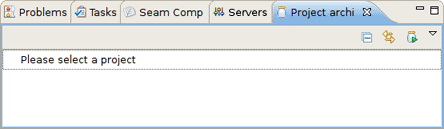
When you open the Project archives view for the first time, it asks you to select the project for which you want to create an archive.
To get started creating a jar, you need right-click inside the view and select . When creating your new JAR output, you can customize the name, add folders, filesets and inner JARs to it. Shown below is the first page of the New archive wizard.
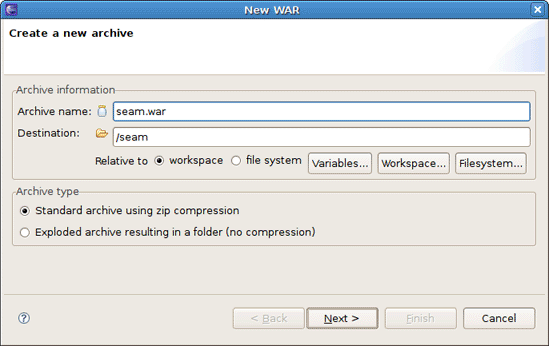
The page is pretty simple. First it prompts you to set the name of your new archive and a destination.
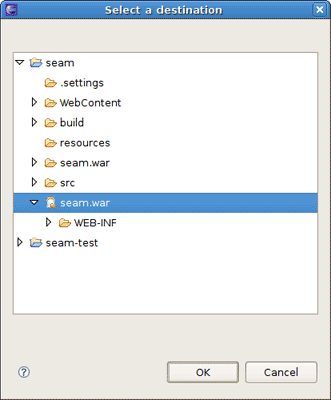
The destination of an archive can be anywhere on the file system, anywhere in the workspace, inside another archive, or inside a folder declared inside an archive. Select the appropriate checkbox (either workspace or file system) to specify that the destination is related to either the workspace or filesystem. You can browse to workspace or filesystem destinations by clicking on their respective buttons. To select a destination inside some other archive, you'll need to click the button.
Also in the wizard for creating a new archive you can choose whether an archive to be compressed or exploded into a folder (without compression). You need just select proper checkbox in the Archive type section.
If a build or incremental update fails Project Archives will show an error dialog:
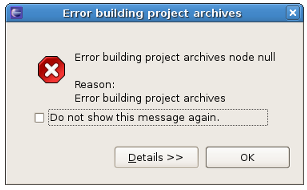
Click the button to view detailed information about the cause of the error.
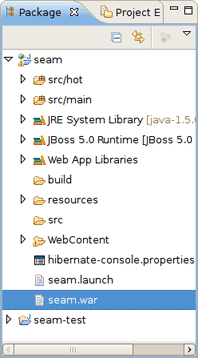
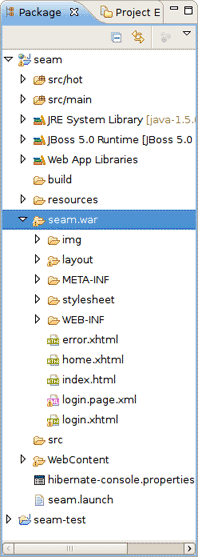
In the Package Explorer you can view the created archive.
If you use the exploded type of archiving, instead of a single file archive the result put into a folder is displayed in the Package Explorer.
To create a folder right-click on an archive or folder you want your new folder to be a child of. The only piece of required information the folder name.
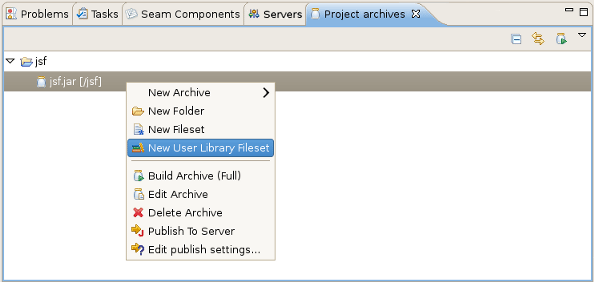
To create a new fileset, right click on an available target location such as an archive, a nested archive, or a folder within an archive and select the option.
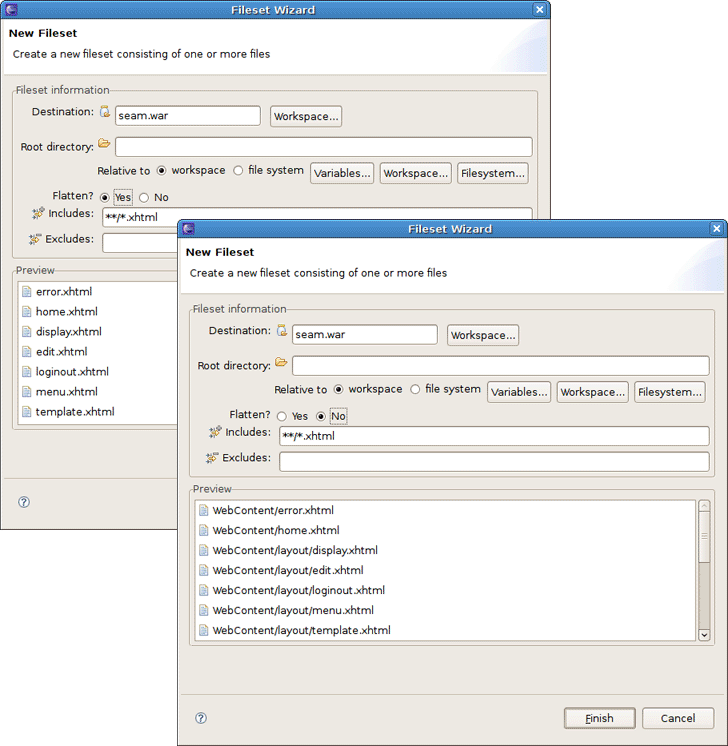
The New Fileset wizard requires a destination (where the files will be located) and a root directory (or where the files are coming from). The source can be anywhere in the workspace or from the filesystem at large.
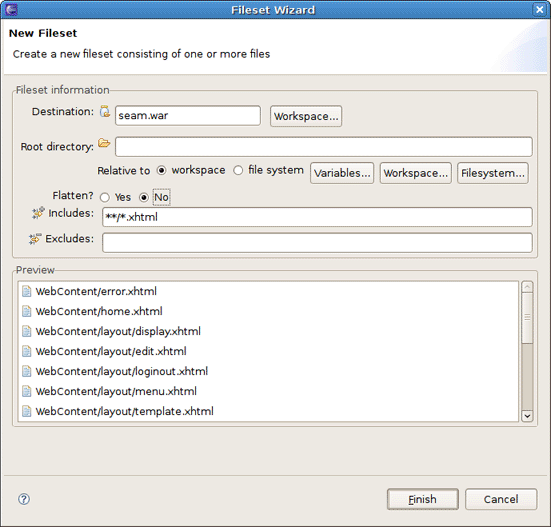
Below that, the fileset requires only an Includes and excludes pattern. As you type in either of these fields, the preview viewer will list those files that are matched.
You can create a Fileset with flattening or without it. Look at the difference on the figure below.
If you make use of user libraries in your projects you can also refer to these from project archives and have all the JAR and ZIP files they refer included into the archive.
To add a new user libraries file set, right-click on the necessary archive and select the option.
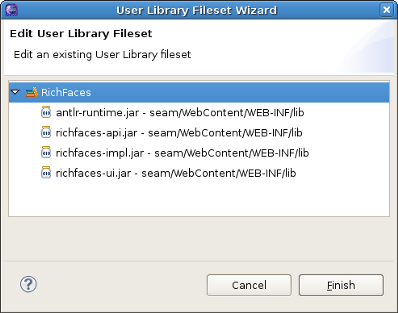
You can edit the existing user libraries as well using User Libraries Fileset Wizard. Right-click on the library fileset and select the option.
There are a number of variable options in the context menu, but there are also several that come standard.
Table 7.1. Context Menu on the Item
|
Name |
Description |
|---|---|
|
Build Archive (Full) |
This action is enabled only on top-level archives and initiates a full build on that archive |
|
Edit Archive |
Standard action that brings up the wizard associated with that particular node type and allows the details to be changed |
|
Delete Archive |
This option deletes the selected node |
|
Publish To Server |
This action will publish to a declared server |
|
Edit publish settings |
This option edits the archives publish settings |
Note:
When editing an archive, it is also updated in all folders and other archives where it is nested.
Finally, you will need to publish your application to a server. This section describes how to do it with the help of the Archives View.
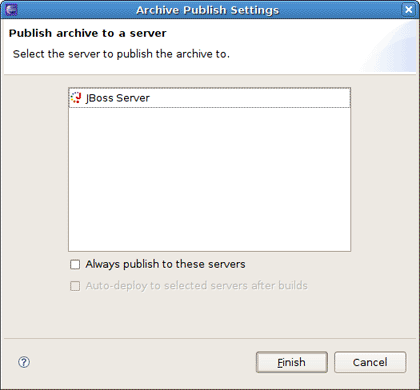
The dialog shown above appears after selecting the Publish To Server option. To publish once, select the server(s) that you want and click the button. If you want the Publish to Server action on that particular Archive to always publish to that set of servers, then check the appropriate checkbox. To enable automatic publishing upon build events, check the last checkbox.
The automatic publishing feature is nice if, for example, your package's destination (where it is built) is a temporary folder and you want the archive published to several servers. If you only need your archive published to one server, it might be easier to have the archive's destination folder be the deploy folder of the server.
Refer to the Ant manual to find more on how to build your applications using Ant.
We also recommend that you watch this movie which demonstrates the powerful archiving functionality in JBoss Tools™.