JBoss Tools includes many example projects which are available by selecting → . The following sections describe setting up the example RESTEasy project. This project serves as a good example for testing the numerous Web Service Test View functions.
Once the required plugins have been installed, the example project can be set up as described in JBoss Tools New Example Project
Procedure 3.1. JBoss Tools New Example Project
Access the New Example Project Dialog
Select →
Result:
The New Example Project dialog displays.
Define the Example Project Type
Click the RESTEasy Simple Example label by expanding the node.
Click the button to complete the project set up.
Result:
The simple project is configured and ready to build.
Project requirements
In the event that a message is displayed indicating some requirements could not be configured, click the button followed by the button to rectify the problem. The message will be displayed as a result of missing plugins or a requirement to select or configure a suitable runtime.
Build the project
Right click on the project name and select →
Result:
The
simple.warfile is written to the project's 'targetdirectory.Deploy the project
Copy the
simple.warfile to thedeploydirectory of the required server profile such as theallprofile.Result:
The
simple.warfile is written to thetargetdirectory.Determine the URL for the web service
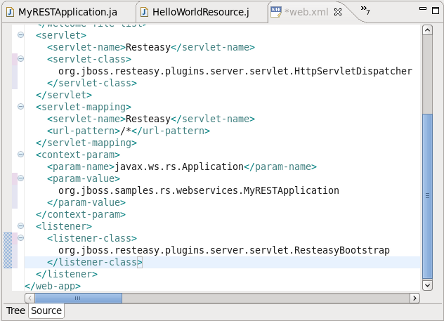
Double click the
web.xmlfile and note thejax.ws.rs.Applicationparameter mapped to the Application class. Note also that:the main servlet for the application is
org.jboss.resteasy.plugins.server.servlet.HttpServletDispatcherwhich is given the custom name Resteasy; andthe main servlet is mapped to the url
/rest-services/*[1].
The url for sending GET requests can be resolved as follows:
Identify the Application class as defined in the deployment descriptor.
Note the object type (
CustomerResource) instantiated in the Application class (ShoppingApplication) and added to the singleton set (singletons.add(new CustomerResource())).Note the JAX-RS annotated path declared in the corresponding
CustomerResourceclass:@Path("/customers")[2].
The url for sending GET requests can be formed from http://localhost:8080/ProjectName/[1]/[2] or, http://localhost:8080/simple/rest-services/customers..
Procedure 3.2. Export the project as a Web Archive (WAR)
Access the Export dialog
Right click on the project name in the Project Explorer view.
Select → .
Result:
The Export- WAR Export dialog displays with the selected web project highlighted.
Complete the export dialog
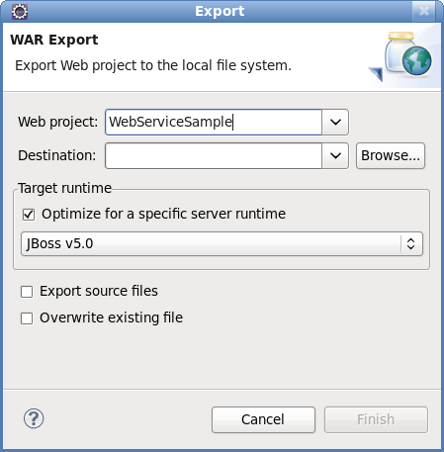
Define the WAR file attributes as described in Table 3.1, “Export - War Export”
Table 3.1. Export - War Export
Field Mandatory Instruction Description Web project yes Enter the web project name. The project name will default to the highlighted project in the Project Explorer. A different project can be selected from the list or entered directly in the editable drop-down list. Destination yes Enter or browse to the destination. Set the destination as the buildfolder to store the WAR file within the project. Alternatively, deploy the project directly to thedeploydirectory of the target server profile.Optimize for a specific server runtime no Select this box to optimize the WARfile for deployment to the targeted runtime.The list of available runtimes will be those configured during the project set-up or by selecting → → . Deploy the application
Copy the file to the
deploydirectory of the required target server profile, such as theallprofile. Note that the WAR file destination may have already been set as the deploy directory in Step 2.