This chapter will introduce you to the functionality provided by JBoss Tools Palette. The Palette allows you to quickly and easily create your JSP or JSF pages.
The JBoss Tools Palette allows you to:
Insert tags into a
JSPorJSFpage with one clickAdd custom and 3rd party tags
The JBoss Tools Palette contains a developer's project tag libraries and provides possibility to add any tag libraries to it. Also you can choose a necessary one from the list of already existing tag libraries:
HTML
JBoss
JSF
JSTL
MyFaces
Oracle ADF Faces
Struts
XHTML
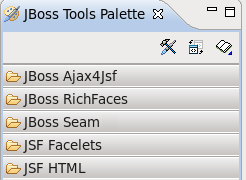
By default the JBoss Tools Palette is not displayed. If you want to use it select → → → from the menu bar.
The standard Eclipse Palette is displayed by default in both Web Development and Seam perspectives. Now the standard Eclipse Palette is featured with all JBoss Tools Palette options and capabilities.
To open the standard Eclipse Palette navigate to → → → → .
The differences between the two palettes are as follows:
The standard Eclipse Palette is blank by default. Content of the palette is available only if Visual Page Editor is open and active, while JBoss Tools Palette always contains a predefined set of components.
The Expanded/Collapsed state of components in the standard Eclipse Palette is not global as in JBoss Tools Palette. State is associated with an instance of Visual Page Editor. It means that the state can be different for various files and each new file opened in Visual Page Editor will have the default state of Palette with all components collapsed.
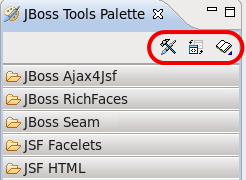
The Palette can be customized by using the following buttons on the Palette toolbar, which provide the following functionality:
editing the palette content by adding, removing or changing the palette elements
showing or hiding groups and subgroups
importing groups and subgroups
The JBoss Tools Palette contains existing libraries of tags, and the Palette editor provides a way to add a new library, or edit existing libraries.
To open the editor, click on the Palette Editor icon (
 ).
).
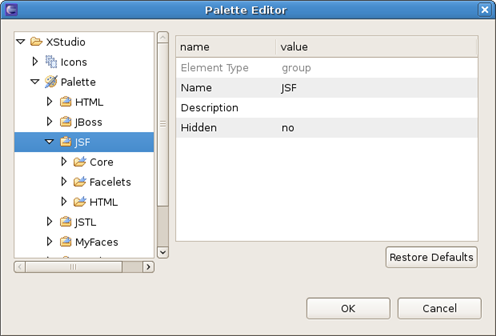
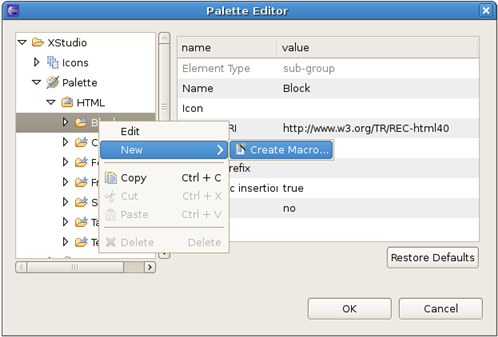
The window has two parts. There is a reflected grouped list of components on the left side of the palette editor. Each group is divided into multiple groups, each of which is a tag library. To the right side of the palette editor is an editing window where it is possible to change values of group or tag library attributes that you have chosen on the left part of the window.
It can also be done by right click and using option.
For example, JSF group consists of Core, Facelets, HTML tag libraries and the attributes as name, description and hidden which are available for editing:
The Palette Editor provides the following functionality when working with existing tags or icons:
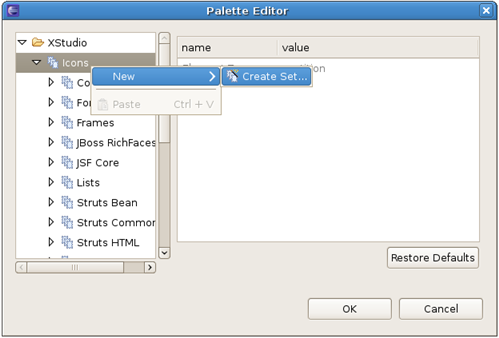
To work with a set of icons
Icons is the root folder for the icon sets. The first step is creating the icon set. Right click on the Icons folder and select → .
Set the value of the name in the Add Icons window and click the button. A new element will appear in the list.
Also you can delete the set. Right click on the set of icons that you wish to remove and select the option from the pop-up menu, or click the Delete keyboard button.
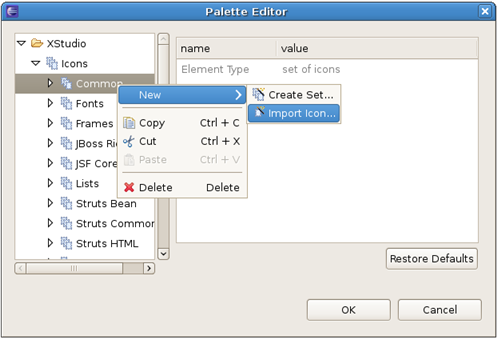
To edit icons in the chosen set
When the set of icons is created, new icons can be imported to it. Choose the required set and select the option → from the pop-up menu that appears after you right-click on a folder.
Set the name of the icon and the path and click the button.
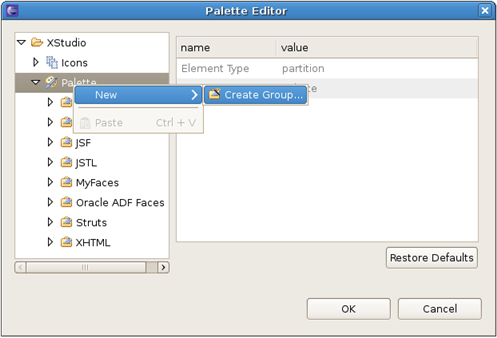
To work with a group of tag libraries
The first step in working with the editor is creating a group of libraries. It's very easy to do, right click on the Palette folder and select →
Set a name of a group in the Create Group window and click the button. A new element will appear at the end of the list.
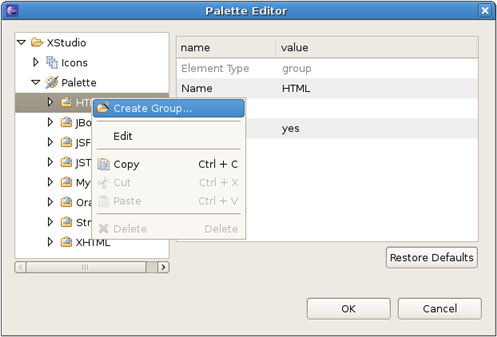
You are allowed to edit or delete a group as well. If you'd like to change attributes of a group, use the right editing window of the palette editor or the option, like it was mentioned before. In order to remove the group, right click on the group that you wish to remove and choose the option or click the Delete keyboard button.
Important:
The removal option is enabled only for custom folders.
To work with a tag library
The group maintains a list of tag libraries. If you would like to create your own library, right click on the group and select the option.
After setting the attribute name and the path of the icon, click the button.
Note:
If you do not choose an icon the default one will be assigned.
You are allowed to edit or delete the tag library, as well. If you'd like to change attributes of the library or choose another icon, use the right editing window of the palette editor or the option. In order to remove the tag library, right click on the library that you wish to remove and chose the option or click the Delete keyboard button.
Important:
The removal option is enabled only for custom tag libraries.
To work with a tag element
When the library folder is created, new tags can be added to it. Choose the required library and select the → option from the pop-up menu that appears after you right-click on a folder.
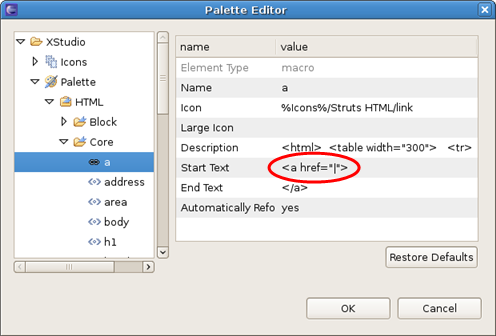
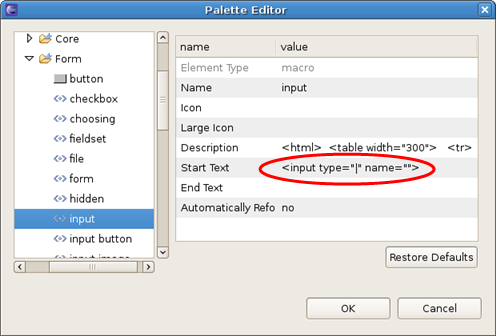
In the Add Palette Macro window you can configure the tag element. The Name attribute is mandatory, as it defines the name of the tag element. Other settings are optional. You can choose the icon and set the Start Text and the End Text for your tag element. If your tag text is too long, use the button to see it all. The pipe ("|") symbol can be used to control the cursors position for the start text and end text values.
After all the attributes are set, click the button.
Note:
If you do not choose an icon the default one will be assigned.
You are also allowed to edit or delete the tag. If you would like to change the attributes of the tag or choose another icon for it, use the right editing window of the palette editor or the option from the pop-up menu. In order to remove the tag, right click on the tag that you wish to remove and chose the option, or click the Delete keyboard button.
Important:
The removal option is enabled only for custom tags. JBoss Palette tags can not be removed but can be modified.
If you have changed any object in the tree view and you don't like the final result you can always use the button. Clicking this button will restore defaults for the object selected and for its children elements. Please remember that the button will only restore data for objects defined in the default palette. If selected object is created by you, the button will be disabled. Child objects added by you will not be removed.
When updating JBoss Tools the palette content is not updated.
is a very useful feature that allows you to control the number of tag groups that are shown on the palette.
Click the button(
 ), at the top right side of the JBoss Tools Palette.
In the dialog Show/Hide Drawers check the groups the libraries of which you want to be shown on the palette:
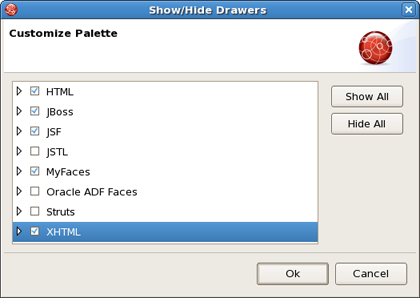
If libraries are not displayed in the palette, check whether they are selected. Click the plus sign to expand the libraries of the group and make sure that a tick is put next to the wanted libraries.
Click the button. The new groups will now be shown on the palette:
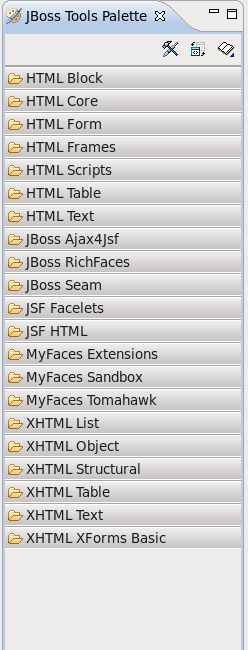
The names of the elements are compound. The first part is the group name and the second is the library name.
The button lets you add a custom or 3rd party tag library to JBoss Tools Palette. Find out more information on how to add particular tags see the Section 5.2.2.2, “Import Button” section.
A new tag can be added into any text file including JSP, HTM, HTML and XHTML.
Open your JSP file, place the cursor in a place where you would like to add a tag, and then click that tag in the palette. In the Insert Tag window that appears, you can set the value of general and advanced attributes of the tag that you choose.
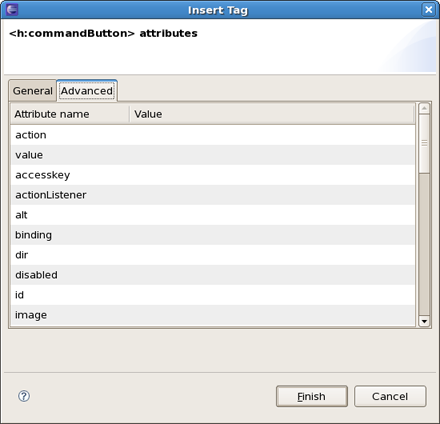
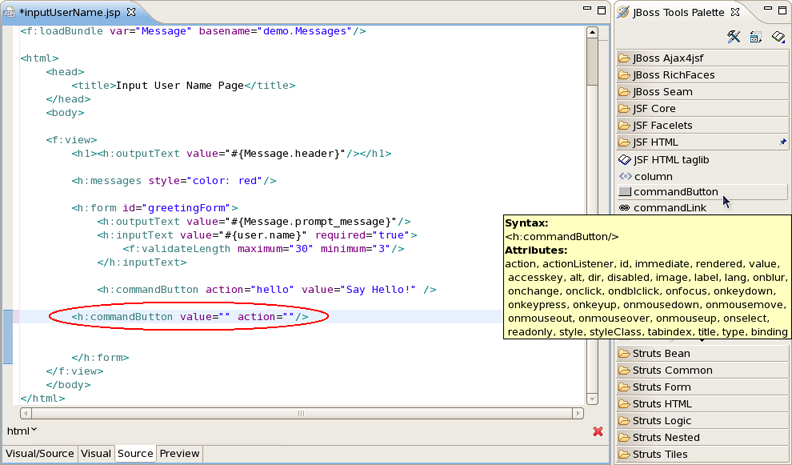
In the example below the tag has been inserted.
Tip:
If you place the cursor over any tag, a balloon hint is shown with all the tag attributes.
The cursor position after adding a tag into a file is specified by "|" symbol in the tag template on the right in the Palette Editor window.
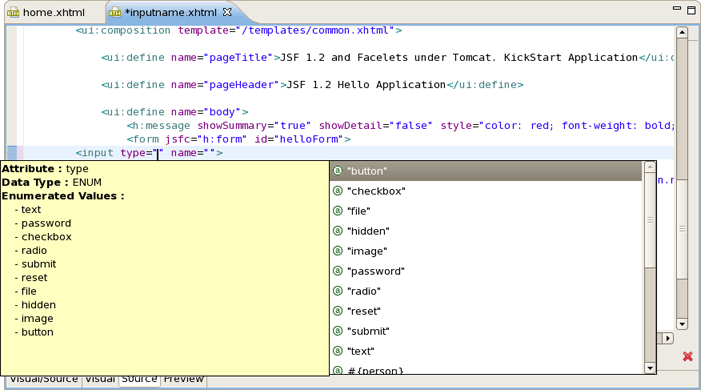
Above you can see where the cursor position for → → is set. After adding this tag into your file the cursor will be in the attribute type. At this point you can straight use the Ctrl+Space keyboard shortcut to display a list of possible values.
There are two ways to add any custom (including custom Facelets libraries) or 3rd party tag library to the JBoss Tools Palette:
Drag-and-drop from the Web Projects view
The Import button on the JBoss Tools Palette
Before you add your custom component library, you need to make sure it is included in your project. You need to either place the TLD file or the JAR that includes your tag library under the lib folder in your project. Or you can just add TLD or JAR file to the classpath and the library will be added to the Tag Library List in Web Projects View.
Switch to the Web Projects view and expand the Tag Libraries folder. If the view is not active, select → → from the menu bar.
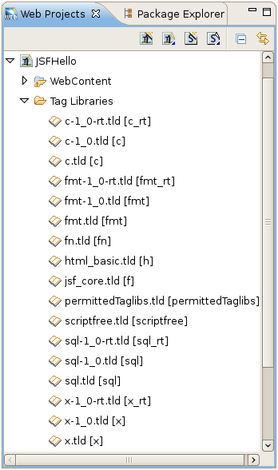
Also make sure that the JBoss Tools Palette is open. Select the tag library that you want to add and simply drag-and-drop it on to the the JBoss Tools Palette.
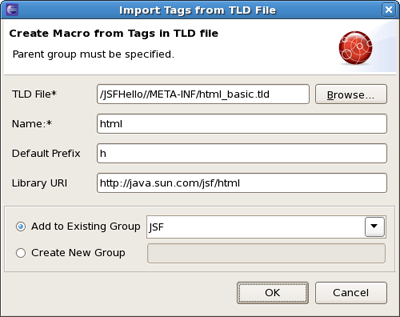
You will see the following dialog window. As you can see JBoss Developer Studio takes care of all the details. Chosen TLD file, name and prefix of the library and Library URL are detected thus just need to set the Group name to which you wish to place this tag library. You can either add this tag library to an existing Group or just create a new one.
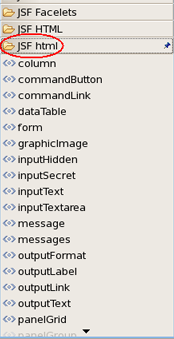
Once you are finished, you will see the new tag library added to the JBoss Tools Palette.
Tag libraries can also be imported with the button (
 ). This button is found at the top right side of the JBoss Tools Palette.
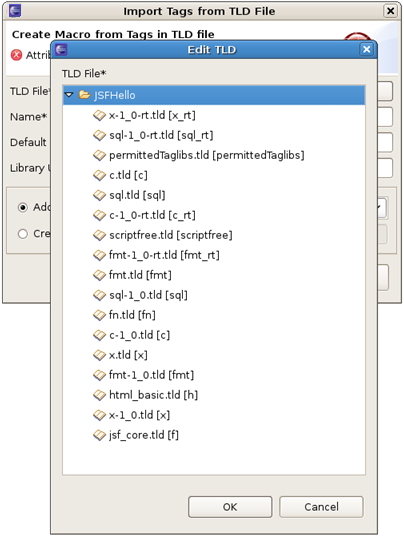
By clicking on the button you will see the Import Tag window a similar like in the Drag-and-Drop method (see Section 5.2.2.1, “Drag-and-Drop”). Set the name and prefix of the library and Library URL. You also need to set the Group name to which you'd like to add your tag library.
Like in the previous method you can add it to an existing Group or create a new one. On this Import Tag form you can use button to locate the tag library that you want to add: