In this appendix, let's go over the process to setup an application server to run web applications. At this writing, EJB3 requires JBoss Application Server (AS) 4.x+ with JDK 5.0.
You can run the java -version command from your operating system's command line to check the version of your current JDK installation. If you are running a JDK earlier than 5.0, you need to upgrade. For Linux/Unix and Windows users, you can download the latest JDK from Sun's http://java.sun.com/j2se/1.5.0/download.jsp web site. For Mac OS X users, you should download the beta version of Apple JDK 5.0 from the http://www.apple.com/java/ site.
In order to run JBoss AS successfully, you also need to set the JAVA_HOME environment variable and point it to your JDK 5.0 installation directory. On a Windows system, you can do that via the XXX tool (i.e., XXX --> XXX --> XXX --> XXX). On a Unix / Linux / Mac OS X system, you can do it via shell scripts.
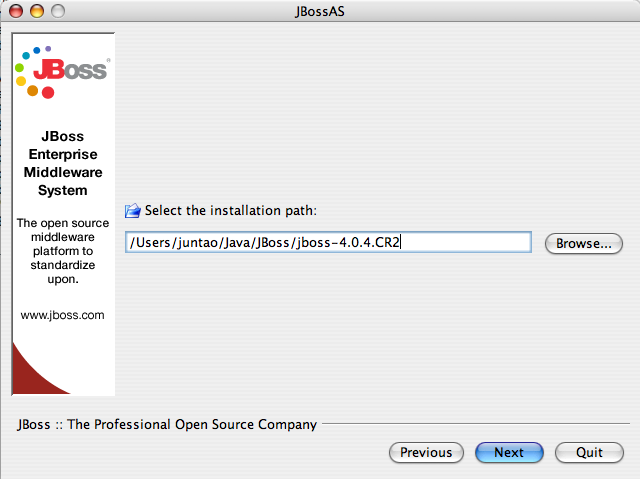
To install JBoss AS, you first have to download it from the http://labs.jboss.com/portal/jbossas/download web site. Make sure that you download the installer file (e.g., the jboss-4.0.4-installer.jar file). Run the installer with the java -jar jboss-4.0.4-installer.jar command. You will go through a series of screens to consent the license terms, and select an installation directory (see Figure A.1, “Select an installation directory”).
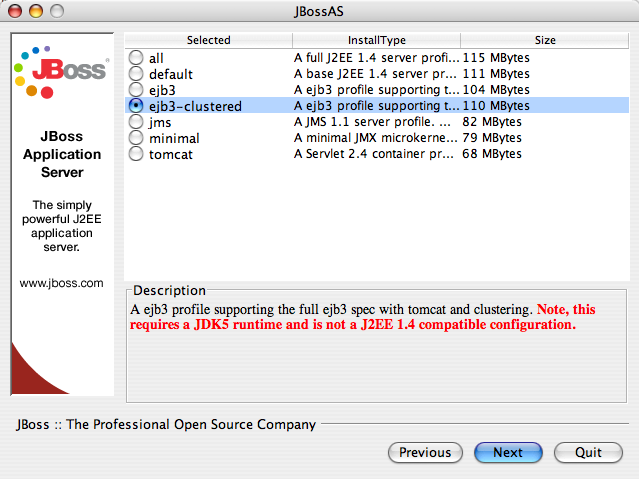
When the installer prompts you to select a server configuration, select either "ejb3" or "ejb3 with clustering" (see Figure A.2, “Select the EJB3 modules to install”).
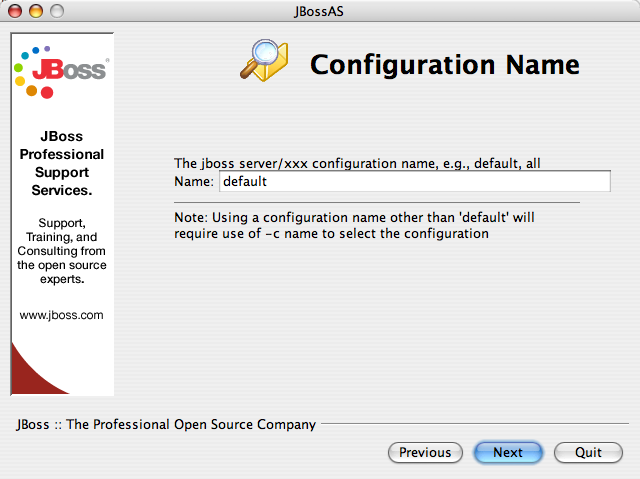
You will be asked to choose a configuration name for this installation, leave it as default (see Figure A.3, “Use "default" as the configuration name”). This way, you will be able to start the server without extra command line arguments.
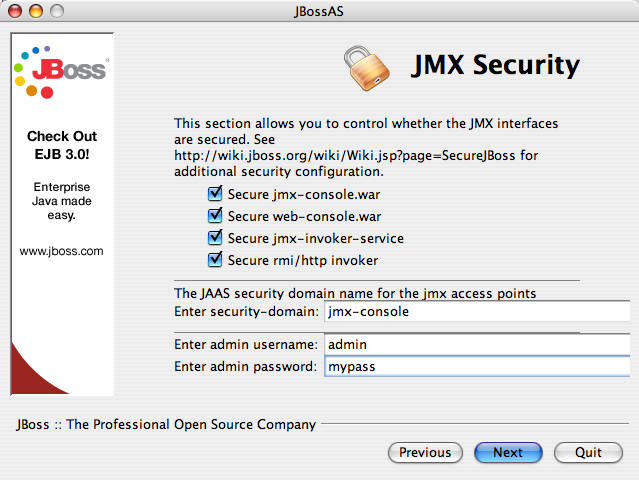
The installer will also give you options to secure JMX remote invokers. Those invokers allow remote users to look into your running server and even do things with it. Do secure all those and give a username/password combo to protect those resources (see Figure A.4, “Secure all JMX invokers”).
How about the Seam library?
Since an independent Seam container needs to be loaded for each Seam application (see ???), the jboss-seam.jar file should be included in the application EAR file.
To deploy a web application, you only need to copy the .ear application file (i.e., the build target from the source code) into the JBoss AS's server/default/deploy directory. To start the server, run bin/run.sh (or bin\run.bat on Windows). You can now access the web application URL http://localhost:8080/myapp/. Of course, replace myapp with the application URL configured in your EAR (or WAR) file.
Ant
In order to build the example application from source code, you should also have Apache Ant installed. Please refer to the Ant documentation on how to install and use it.