GateIn Portal provides users with the most familiar interface language to work with and perform all actions efficiently. The priority of the interface language is 1. User's language 2. Browser's language 3. Portal 's language. Thus to display your prefer language, you should pay attention to this order to change the language type appropriately.
You can change the interface language permanently by three ways :
This way supports you to change the interface language of the current Portal.
1. Go to GateIn Start -> Administration -> Advanced --> Edit Current portal.
2. Click !images/EditIcon.png! icon to edit portal's properties.
3. In the Portal Setting tab: You can change display language of Portal by selecting another language in the Locale field.
4. Click Save and Finish!images/FinishIcon.png! icon to take affect.
You easily change the interface language of the current Portal by following guides:
1. Go to Editor on the Toolbar --> click Edit Page. The Edit Inline Composer popup will appear:
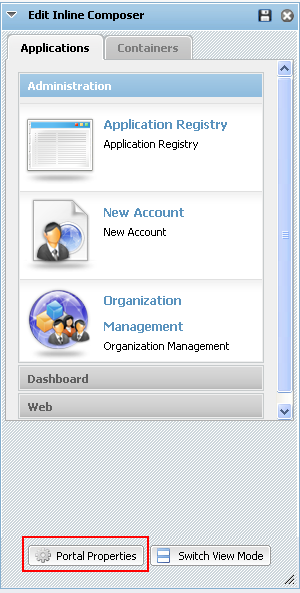
2. Click on Portal Properties to edit portal's properties.
3. In the Portal Setting tab: You can change display language of Portal by selecting another language in the Locale field.
4. Click Save and Finish!images/DiskIcon.png! icon to take affect.
If you can access GateIn Start, you can do this way to set interface language for yourself, not for interface language of Portal by these following steps:
1. Go to GateIn Start -> Administration -> Language Settings
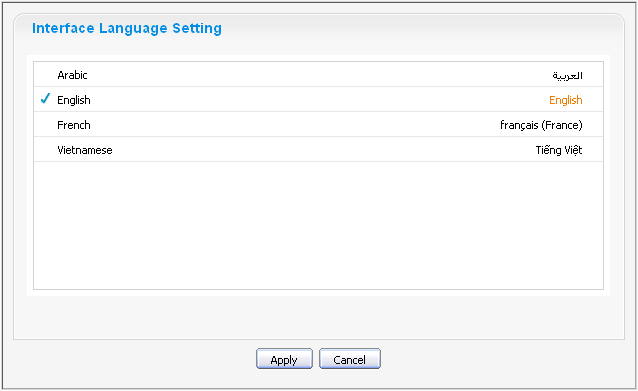
The Interface Language Setting form is displayed with a list of all supported languages. The current using language is marked by!images/MarkedIcon.png! icon.
2. Select another one by clicking on the name of language.
3. Click the Apply button and wait for few seconds to take affect.
You can set the interface language for yourself by following guides:
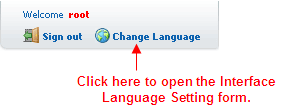
1. Go to GateIn on the Toolbar --> click Change Language

The Interface Language Setting form is displayed with a list of all supported languages. The current using language is marked by!images/MarkedIcon.png! icon.
2. Select another one by clicking on the name of language.
3. Click the Apply button and wait for few seconds to take affect.
You also set interface language for yourself, not for interface language of the Portal by this way.
1. Click Change Language on the right corner to show the Interface Language Setting form:
The Interface Language Setting form will appear:
2. Select another language in list. The selected language will be marked by !images/MarkedIcon.png! icon.
3. Click the Apply button to change the interface language and wait for few seconds to take affect or click the Cancel button to quit without changes.
There are two modes to set displaying language for a user.
- Public Mode: Displaying language of this mode depends on the language of browser that you are using.
- If you set language of browser that Portal does not support, the displaying language will be the language of Portal.
- If you set language of browser that Portal supports, the displaying language will be the language of browser.
- Private Mode: Displaying language of this mode belongs to the language of each user which is set when registering.
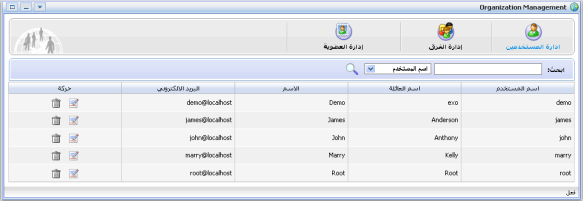
- When you sign in by a default account (root, john, demo, marry): the displaying language of these users are none, so it will belong to browser's language. If you change value in the Language field in the User Profile tab (only default user: root and john can change this value by access 'Management' page: Go to Organization--> Management page), your displaying language will be the set value. Your displaying language has also directly affect when you change language by other ways.
- When you sign in by a new registered user: by default, your displaying language is English. However, if you set by another language in the Language field in the User Profile tab when you register a new account, your displaying language is the set language.
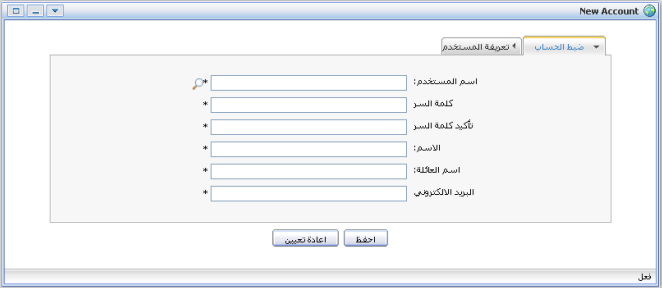
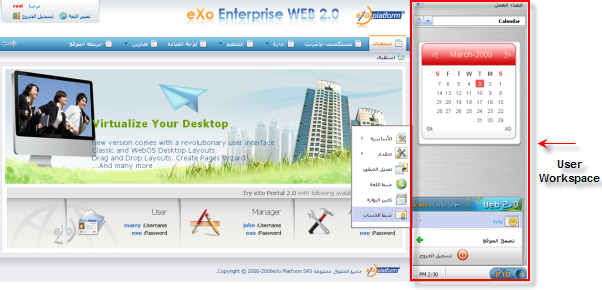
GateIn Portal supports RTL (Right to Left) to meet the demand of Arabian customers who want to use the Portal by their own language for more convenient and easy to use. When you change from other languages to Arabic or set the displaying language as Arabic, the displaying on Portal will be changed to Right to Left (RTL) direction because Arabian usually read from Right to Left.
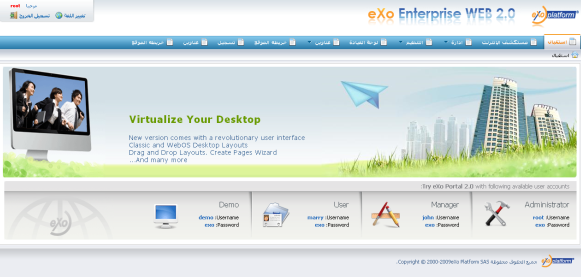
Some screen shots of Portal with RTL:
Exo Portal supports a multi-language environment for your portal. You can internationalize any menu entry on the navigation. As the navigation bar is composed by nodes so you have to modify the display names of the nodes. Instead of entering the display name in English you have to use a so called resource key. This resource key is used to define the label that is shown on the navigation bar, the menu, and the breadcrumb.
The resource key format is: #{key}
The resource key is the can contain any text that you consider to be fine. It should be human-readable and must not contain spaces.
There are three ways to create a key for a node: using the Create Page Wizard or using the Edit Page Wizard or the Edit Page and Navigation dialog.
You can follow these steps:
1. Go to GateIn Start -> Administration -> Basic --> Create Page Wizard
2. Click Next to move to step 1
3. At step 1, continue as usual, but enter a resource key in the Display Name field.
4. Click on the Next button and continue and click on the Save button. For example, create a key named "AAA".
1. Go to GateIn Start -> Administration -> Basic --> Edit Page Wizard
2. Click on the Next button to move to step 1
3. At step 1, continue as usual, but enter a resource key in the Display Name field.
1. Go to GateIn Start -> Administration -> Advanced --> Edit Page and Navigation.
2. There are two alternatives:
- Create a new node: Select the parent path, right click and click on Add new node option .
- Edit an existing node: Right click on the node you want to create/edit key and click on Edit this node in the pop-up menu.
3. A Create/Edit node dialog appears, enter a resource key in the Label field
+Note:+ You can reuse the same resource key in several nodes.
Exo Portal organizes resource keys in resource files. Each file contains a list of keys and their meanings (translations) in one specific language. Normally one resource file has one language supported by Portal. This helps to structure the resource keys. Each resource file has a name and a language attribute. One resource file only can contain translations for one single language.
Do as follows: 1. Go to GateIn Start -> Page Navigation -> Administration --> Internationalization
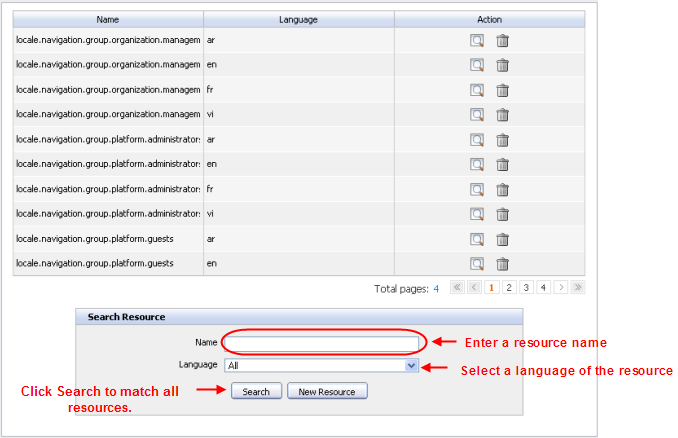
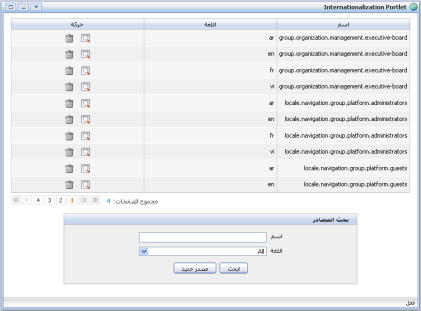
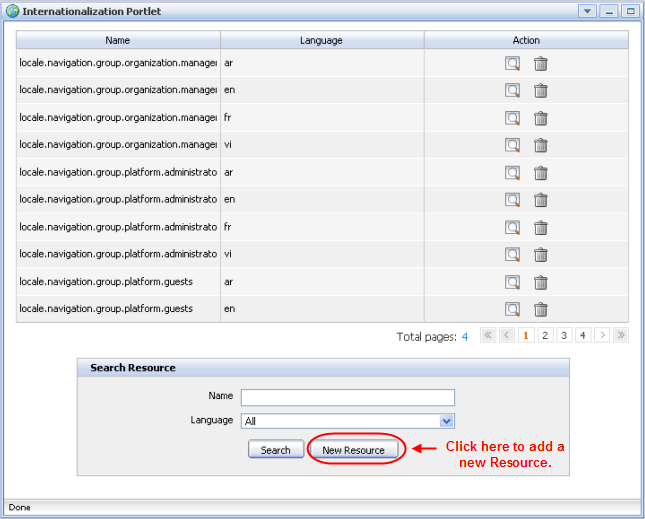
2. Select a data resource that you want to internationalize. You also may search the desired resource name with a specific language:
- Enter a resource name in the Name field in the Search Resource form
- Select a corresponding language of the resource.
- Click on the Search button to match all data resource and display the result on the table above.
- If you want to define a key for a node which belongs to a specific portal, search for a resource like:locale.navigation.portal.portal name]
+Example:+ if you want to define a key of a node of portal "classic" in language French, search resource: locale.navigation.portal.classic with value in the Language field is "fr"
- If you want to define a key for the node that belongs to a specific group, search resource like: locale.navigation.group.group path]
+Example:+ if you want to define a key for a node on navigation of "administrators" group that is the sub one of the "platform" group in language French, search resource: locale.navigation.group.platform.administrators with the value in the Language field is "fr"
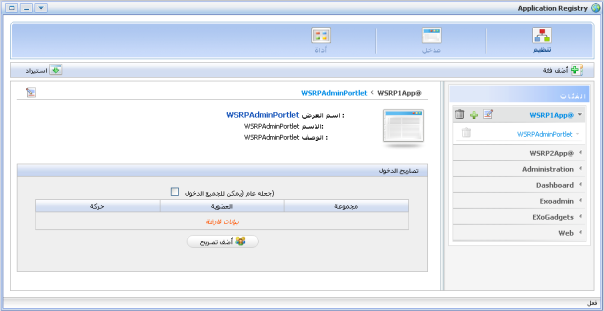
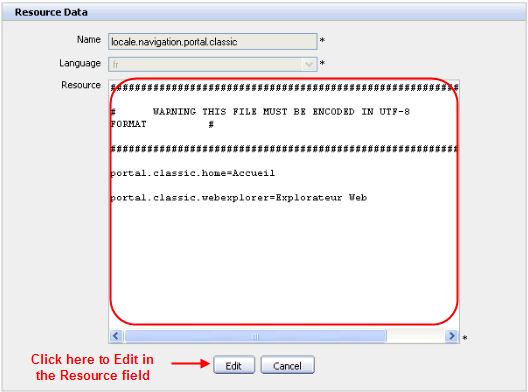
3. Click the magnifying glass!images/MagnifyIcon.png! icon corresponding to a data resource to see details of the resource file. Click the Edit button in order to modify the content.
4. Enter the resource key with the string that will be displayed as node name on the navigation bar .
5. Click on the Save button.
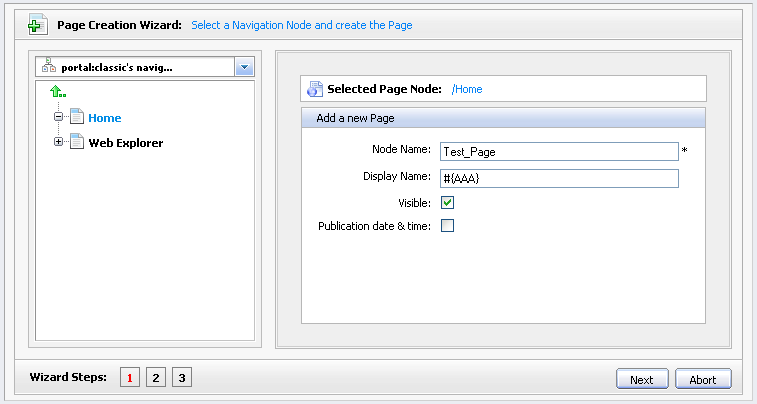
- The current language is English
- Go to Create Page Wizard, at step 1, select navigation and enter values like in the figure below:
- Click Next, at step 2 and 3, set layout for page Test button.
- After creating page with that key, the node on the navigation bar will be displayed with name #{AAA}

- And now you have to define what to display instead of displaying the key. Go to GateIn Start -> Page Navigation -> Administration --> Internationalization.
- Search resource locale.navigation.portal.classic with language French (fr)
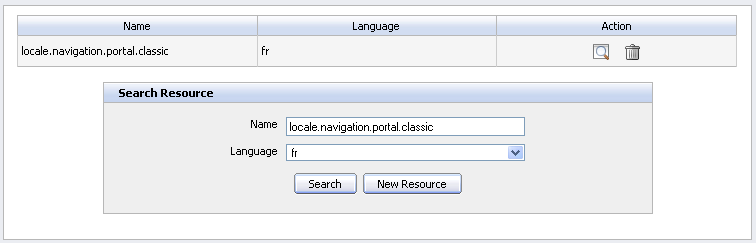
- Click the magnifying icon!images/MagnifyIcon.png! to see the content.
- Click on the Edit button to modify. In the Resource field, enter the key and assign the string to display.
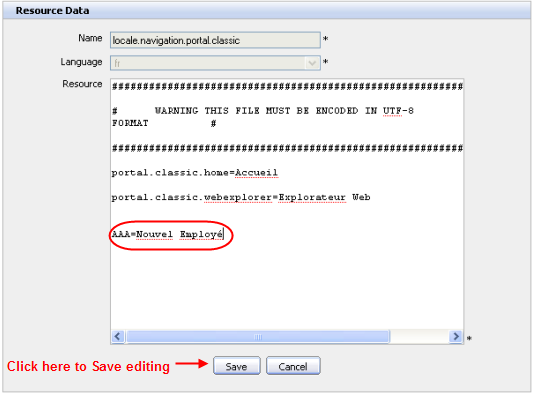
- Click on the Save button.
- Go to GateIn Start -> Administration -> Language Settings: select French --> Apply.
- The French translation of your new resource key appears on the menu.

This portlet is used to define a word or a phrase of the current language to an expected language. The form of this portlet is like:
Each resource supports a language. So, you can define a word or a phrase according to the supported language.
1. Select the New Resource button in the Internationalization Portlet form. The Resource Data form will appear:
| Name | Description |
| Name | The name of Resource. This field is required. |
| Language | The language that this resource 'll support. This field is required. |
| Resource | The word or the phrase which you want to define. |
2. Enter values into required fields.
3. Click the Save button to accept adding a new resource or the Cancel button to quit.
Click the magnifying icon !images/GlassIcon.png! corresponding to resource which you want to view. On the view form, you also can edit information again by clicking the Edit button. You only can change Resource field, then click the Save button to accept changes or click the Cancel button to quit without saving any changes.

Click the trash can icon!images/DeleIcon.png! corresponding to the resource which you want to delete. There 'll be a confirmation message, click the OK button to confirm deleting and the Cancel button to quit.
The Search Resource form displays directly on the portlet:
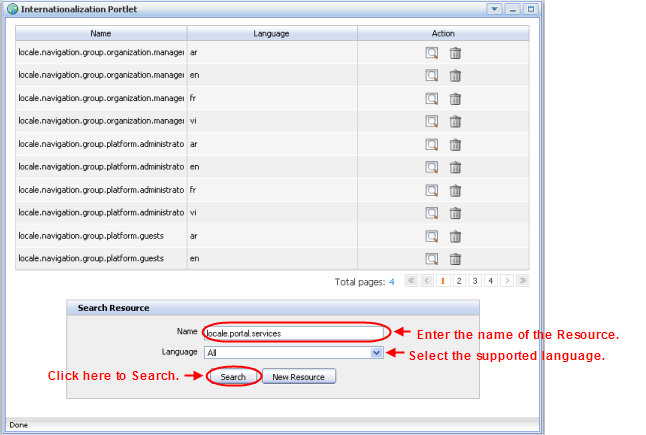
Enter the name of the resource which you want to search and select the supported language. Click the Search button to perform searching and displaying a list of the expected Resource.