- 7.1. Manage Gadgets
- 7.2. Import Portlets and Gadgets
- 7.3. Manage Portlets and Gadgets
- 7.3.1. Display Gadgets
- 7.3.2. Add a new Category
- 7.3.3. Edit a Category
- 7.3.4. Delete a Category
- 7.3.5. Add Portlets/Gadgets to the specific Category
- 7.3.6. Set Access Permission on Portlets
- 7.3.7. View detail information of the specific Portlets
- 7.3.8. Add a Gadget
- 7.3.9. Add a new Gadget to the Dashboard Portlet
- 7.3.10. Manage Gadgets
Gadgets are a small convenient applications that helps you perform private actions. provides you with some useful gadgets: todo, calendar, calculator and RSS Reader. Besides using ready-to-use gadgets, you can easily add gadgets organized in categories to meet the need of your work :
To add a gadget, you can follow these steps:
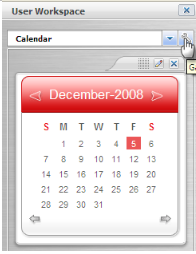
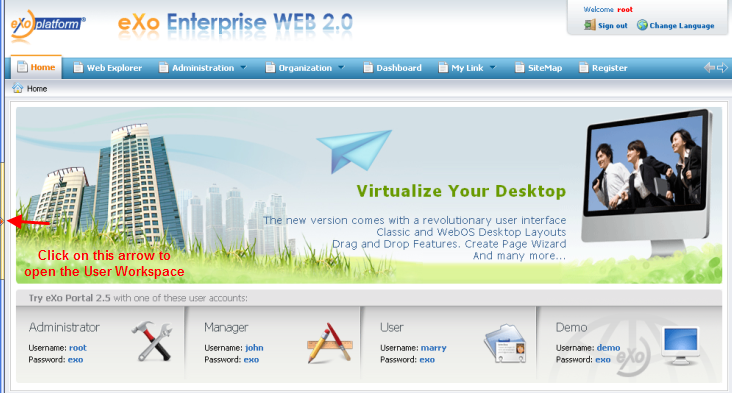
Open the User Workspace on your left pane.
Click the tool!images/Tool.png! icon to add a new category
The Gadget Containers Management dialog appears:

Click the add icon !images/AddIcon.png! to show the Gadget Container Form .
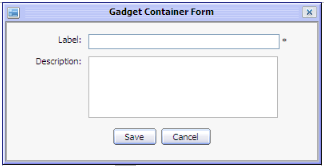
- Label
The display name of the category. This field is required and must have at least 3 characters.
- Description
The brief description of the category.A length from 0 to 255 characters is allowed. This field is not required.
Enter values for fields in the Gadget Container Form .
Click on the Save button to accept adding a new category or click Cancel to quit. After you added the new category you will see it in the dialog :
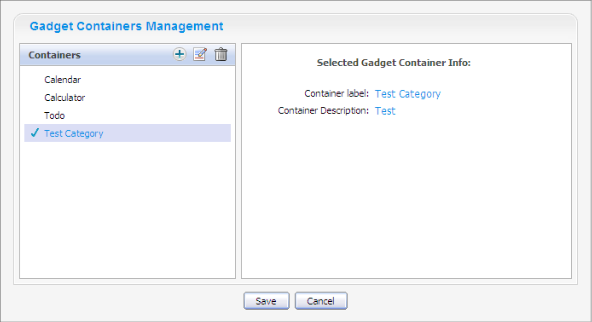
Edit the information of an existing category by selecting it from the left pane, the selected category is marked by a symbol. Then click the edit icon to show the edit form. Change the current category information and click on the button to accept changes.
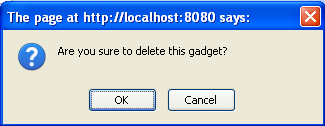
Delete an existing category by selecting it from the left pane. In the message box Click on the OK button to confirm the deletion or click the Cancel button.
Click on the Save button in the Gadget Containers Management dialog to accept or on the Cancel button to quit. Added categories will be displayed in list in the User Workspace.
4. Click the list icon!images/ListIcon.png! to see category list and select one in list.
5. Click the add icon!images/AddIcon1.png! at the bottom of the User Workspace to open the Add Application dialog:
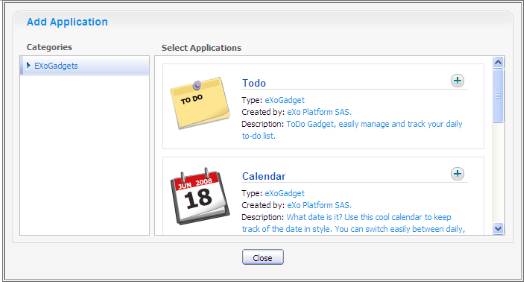
Select a gadget by clicking the add icon !images/PlusIcon.png! that is located next to the the gadget. The selected gadget is displayed immediately in the user workspace. Normally, you can see only two gadgets in the User Workspace. When there are more gadgets, some gadgets are not visible.
Click the scroll down icon !images/DownIcon.png!images/ or the scroll up icon!images/ UpIcon.png! at the bottom of the User Workspace to see the other gadgets. If there are no more gadgets to scroll to, the color of the scroll down and scroll up icon switches to gray color.
This convenient feature that helps you import default portlets/gadgets automatically in different categories and these portlets/gadgets will be listed on the left pane.
Technical Information about the Portlet Import
The Application Registry looks in all webapps of your application server for a file located at WEB-INF/portlet.xml and registers the portlets found there. When the user clicks on "Auto Import" the portlets of all webapps are imported. If there is a portlet.xml file in a webapp a new category is created whose name is the webapp war name (or the webapp folder name). All the portlets that are configured in the portlet.xml file are added to the new category.")
Go to Administration-> Application Registry page-> Organize item on the navigation bar. A form for organizing portlets/gadgets will be displayed:
Click the Auto Import button!images/Auto1.png! at upper right corner on the action bar. A pop up will be shown:
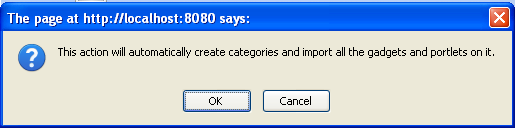
Click the OK button to accept importing gadgets automatically. All portlets/gadgets categories will be imported and listed on the left pane.
Portlets and gadgets are organized in different categories. Each category contains one or several portlets or gadgets. You can also mix portlets and gadgets into one category. By default all gadgets are placed in the ExoGadgets category.
You can change the number of columns available in the Dashboard Portlet.
Click on Site Editor : Edit Page
Click on Edit Portlet button (which is displayed a pencil icon when you mouse-over the portlet in edit mode). It will show a dialog to change the number of columns to display gadgets.
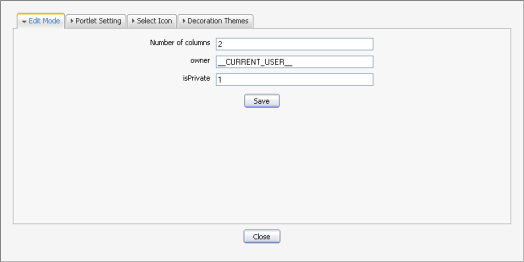
Change the number of columns and click the Save button to accept the changes.
You easily add a new category by following these guides:
Go to Administration -> Application Registry page -> Organize item.
Open a form to add a new category on the right pane by clicking the Add Category button on the action bar:
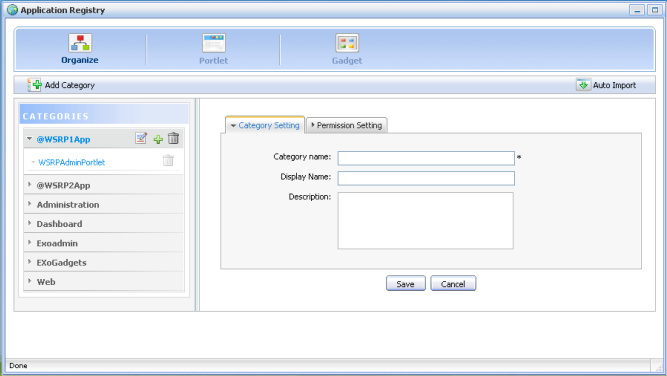
The Category Setting tab: includes common information about a category.
- Category name
The name of the category which you want to add. This field is required and its length must be between 3 and 30 characters.
- Display name
The display name of the category in list and its length must be between 3 and 30 characters.
- Description
A brief description of the category. Any length from 0 to 255 characters is allowed.
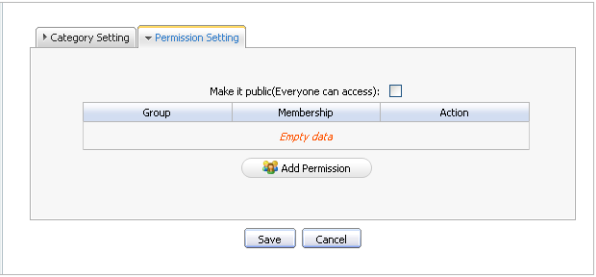
The Permission Setting tab: used to set the access permission for a category.
This access permission enters the game whenever a user creates or modifies a page. In that moment the user only can see and use portlets in those categories on which he or she has access permission (defined by groups and memberships).
Enter values for required fields in this form.
Click the Save button to accept adding a new category into a category list. The new category will be added into a list on the left pane.
You can edit a category in list by following:
Click the edit icon!images/EditIcon1.png! on the title bar of a category that you want to edit.
Change the information of the selected category.
Click the Save button to accept changes.
You also easily remove a category from a list:
Click the trash can icon!images/DeleteIcon.png! on the Title bar of the category that you want to delete.
Click on the OK button on the message to accept deleting or click on the Cancel button to quit.
You can follow these steps to add a portlet/gadget to your prefered category :
Click the "add" icon!images/AddIcon.png! on the title bar of a category to which you want to add portlets. An interface will appear in the right pane as you can see below:
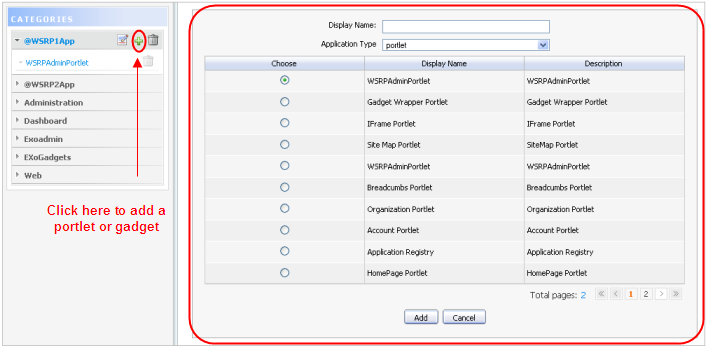
- Display name
The display name of a portlet/gadget that you want to add to a category.
- Application Type
the type of selected object.
Enter the display name and select a type for the selected portlet/gadget.
Select a portlet/gadget by checking the radio button.
Click the Save button to accept adding a portlet/gadget to a category.
You easily set an access permission on a portlet by following these guides:
Go to GateIn Start -> Page Navigations -> select Administration --> Application Registry

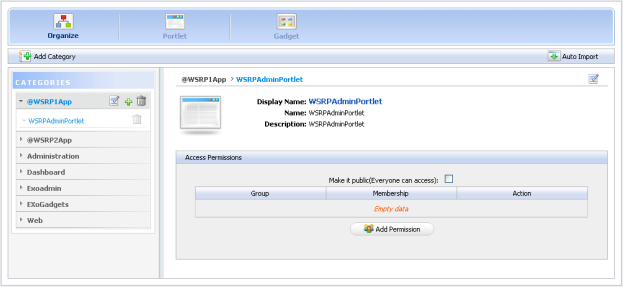
Select a category on the left pane that includes the portlet you want to set right. Then all portlets of the selected category are listed immediately and detail information of each portlet is displayed on the right pane.
To set permission for a portlet:
Click the Add Permission button to add access permissions to more groups.
Or check the Make it public check box to allow everyone to access.
Whenever the user creates or modifies a page he or she can only see and use portlets that fulfill two conditions: the portlet is in a category on which the user has access permission (see category section above) and the user has access permission on the portlet
You easily view detail information of all specific portlets by following these guides:
On the navigation bar, go to the Administration-> Application Registry page-> Portlet item . A form to view all portlets will appear:

- Left pane
lists all portlets in two parts: Local and Remote
- Right pane
shows detail information about a portlet: Name, Display name, Description and Portlet preferences.
Select one portlet in the list on the left pane. The detail information of that portlet appears on the right pane.
You can follow these steps to add a gadget to the gadget list :
1. Go to the Administration --> Application Registry and click on Gadget :
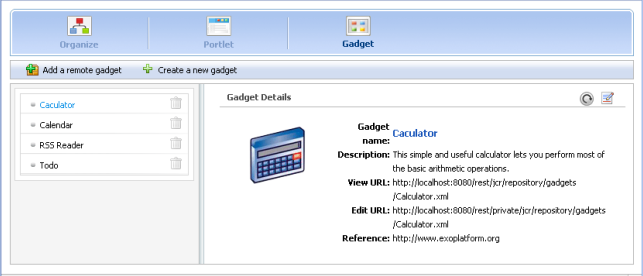
There are two ways to add gadgets:
Procedure 7.1. Add a remote Gadget
Open the form to add a remote gadget by clicking Add a remote gadget :
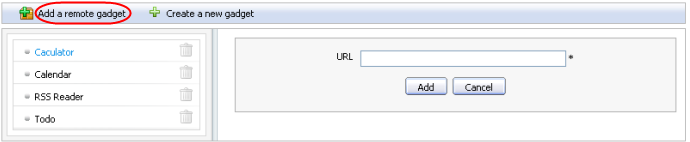
Enter a link to an .xml file in the URL field.
Click on the Add button to accept the entered URL or on the Cancel button to quit. The added gadget will be added into gadget list on left pane of the Dashboard portlet.
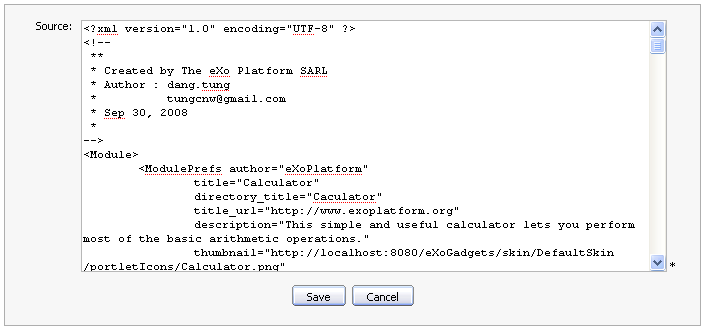
Procedure 7.2. Create a new Gadget
Show the form to add a new gadget by clicking Create a new gadget :
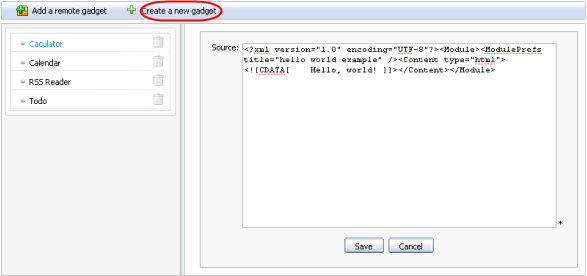
- Source
The source code to create a new gadget. This source will be a .xml file.
Enter a value for the Source field in this form.
Click the Save button to create a new gadget. The created gadget will be added to the gadget list on the left pane of the Dashboard Portlet.
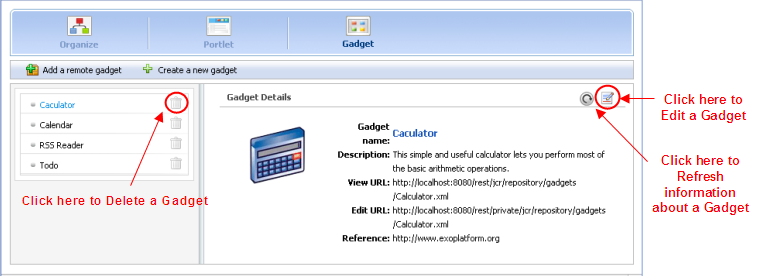
You also edit, refresh and delete a local gadget as well as a remote gadget:
You can add a new gadget to the gadget list in the Dashboard portlet :
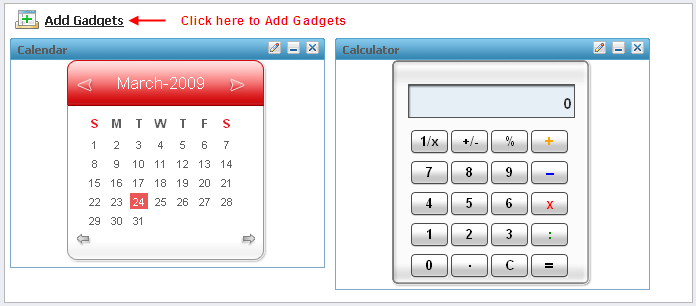
Go to the Dashboard on the navigation bar. Click on the Add Gadgets link :
The dialog to add a new gadget will appear :
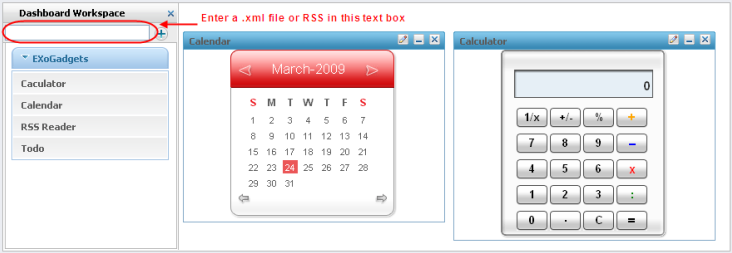
Enter a link (a .xml file or RSS) in the text box on the left pane.
Click on the icon!images/PlusIcon.png! to add a new gadget to the gadget list beneath.
Procedure 7.3. Edit a Gadget
Click the edit icon!images/EditGadget.png! . It will display a dialog:
After editing , click the Save button to accept changing or Cancel button to quit.
Procedure 7.4. Refresh a Gadget
Local gadget
After editing information about the gadget that you want to, click the icon!images/Refresh.png! to refresh all information of that gadget.
Remote gadget
When information of a remote gadget has been changed by another server, click the icon!images/Refresh.png! means it will update information of a remote gadget from that server.