GateIn 3.0, provides some form of Single Sign On (SSO) as an integration and aggregation platform.
When logging into the portal users gain access to many systems through portlets using a single identity. In many cases, however, the portal infrastructure must be integrated with other SSO enabled systems. There are many different Identity Management solutions available. In most cases each SSO framework provides a unique way to plug into a Java EE application.
In this tutorial, the SSO server is installed in a Tomcat installation. Tomcat can be obtained from http://tomcat.apache.org.
All the packages required for setup can be found in a zip file located at: http://repository.jboss.org/maven2/org/gatein/sso/sso-packaging. In this document we will call $SSO_HOME the directory where the file is extracted.
Users are advised to not run any portal extensions that could override the data when manipulating the gatein.ear file directly.
Remove $JBOSS_HOME/server/default/deploy/gatein-sample-extension.ear and $JBOSS_HOME/server/default/deploy/gatein-sample-portal.ear which are packaged by default with GateIn 3.0.
This Single Sign On plugin enables seamless integration between GateIn 3.0 and the CAS Single Sign On Framework. Details about CAS can be found here.
The integration consists of two parts; the first part consists of installing or configuring a CAS server, the second part consists of setting up the portal to use the CAS server.
First, set up the server to authenticate against the portal login module. In this example the CAS server will be installed on Tomcat.
CAS can be downloaded from http://www.jasig.org/cas/download.
Extract the downloaded file into a suitable location. This location will be referred to as $CAS_HOME in the following example.
To configure the web archive as desired, it is simpler to directly modify the sources.
To change the authentication handler to use the portal authentication handler:
The CAS Server Plugin makes secure authentication callbacks to a RESTful service installed on the remote GateIn server in order to authenticate a user.
In order for the plugin to function correctly, it needs to be properly configured to connect to this service. This configuration is done via the cas.war/WEB-INF/deployerConfigContext.xml file.
Open
CAS_HOME/cas-server-webapp/src/main/webapp/WEB-INF/deployerConfigContext.xmlReplace:
 <!--
  | Whereas CredentialsToPrincipalResolvers identify who it is some Credentials might authenticate,
  | AuthenticationHandlers actually authenticate credentials.  Here e declare the AuthenticationHandlers that
  | authenticate the Principals that the CredentialsToPrincipalResolvers identified.  CAS will try these handlers in turn
  | until it finds one that both supports the Credentials presented and succeeds in authenticating.
  +-->
 <property name="authenticationHandlers">
   <list>
     <!--
      | This is the authentication handler that authenticates services by means of callback via SSL, thereby validating
      | a server side SSL certificate.
      +-->
     <bean class="org.jasig.cas.authentication.handler.support.HttpBasedServiceCredentialsAuthenticationHandler"
           p:httpClient-ref="httpClient" />
     <!--
      | This is the authentication handler declaration that every CAS deployer will need to change before deploying CAS
      | into production.  The default SimpleTestUsernamePasswordAuthenticationHandler authenticates UsernamePasswordCredentials
      | where the username equals the password.  You will need to replace this with an AuthenticationHandler that implements your
      | local authentication strategy.  You might accomplish this by coding a new such handler and declaring
      | edu.someschool.its.cas.MySpecialHandler here, or you might use one of the handlers provided in the adaptors modules.
      +-->
     <bean
        class="org.jasig.cas.authentication.handler.support.SimpleTestUsernamePasswordAuthenticationHandler" />
   </list>
 </property>
With the following (Make sure to set the host, port and context with the values corresponding to your portal). Also available in
GATEIN_SSO/cas/plugin/WEB-INF/deployerConfigContext.xml.<!-- | Whereas CredentialsToPrincipalResolvers identify who it is some Credentials might authenticate, | AuthenticationHandlers actually authenticate credentials. Here we declare the AuthenticationHandlers that | authenticate the Principals that the CredentialsToPrincipalResolvers identified. CAS will try these handlers in turn | until it finds one that both supports the Credentials presented and succeeds in authenticating. +--> <property name="authenticationHandlers"> <list> <!-- | This is the authentication handler that authenticates services by means of callback via SSL, thereby validating | a server side SSL certificate. +--> <bean class="org.jasig.cas.authentication.handler.support.HttpBasedServiceCredentialsAuthenticationHandler" p:httpClient-ref="httpClient" /> <!-- | This is the authentication handler declaration that every CAS deployer will need to change before deploying CAS | into production. The default SimpleTestUsernamePasswordAuthenticationHandler authenticates UsernamePasswordCredentials | where the username equals the password. You will need to replace this with an AuthenticationHandler that implements your | local authentication strategy. You might accomplish this by coding a new such handler and declaring | edu.someschool.its.cas.MySpecialHandler here, or you might use one of the handlers provided in the adaptors modules. +--> <!-- Integrates with the Gatein Authentication Service to perform authentication --> <!-- | Note: Modify the Plugin Configuration based on the actual information of a GateIn instance. | The instance can be anywhere on the internet...Not necessarily on localhost where CAS is running +--> <bean class="org.gatein.sso.cas.plugin.AuthenticationPlugin"> <property name="gateInHost"><value>localhost</value></property> <property name="gateInPort"><value>8080</value></property> <property name="gateInContext"><value>portal</value></property> </bean> </list> </property>Copy
GATEIN_SSO/cas/plugin/WEB-INF/lib/sso-cas-plugin-<VERSION>.jarandGATEIN_SSO/cas/plugin/WEB-INF/lib/commons-httpclient-<VERSION>.jarinto theCAS_HOME/cas-server-webapp/src/main/webapp/WEB-INF/libcreated directory.Get an installation of Tomcat and extract it into a suitable location (which will be called
TOMCAT_HOMEfor these instructions).Change the default port to avoid a conflict with the default GateIn 3.0 (for testing purposes). Edit
TOMCAT_HOME/conf/server.xmland replace the 8080 port to 8888.Note
If GateIn 3.0 is running with Tomcat on the same machine the port 8005 should be changed to something else to avoid port conflicts.
Go to
CAS_HOME/cas-server-webappand execute the command:mvn install
Copy
CAS_HOME/cas-server-webapp/target/cas.warintoTOMCAT_HOME/webapps.Tomcat should start and be accessible at http://localhost:8888/cas. Note that at this stage login won't be available.
Copy all libraries from
GATEIN_SSO/cas/gatein.ear/libintoJBOSS_HOME/server/default/deploy/gatein.ear/lib(Or in Tomcat, into $GATEIN_HOME/lib)In JBoss AS, edit
gatein.ear/META-INF/gatein-jboss-beans.xmland uncomment this section:<authentication> <login-module code="org.gatein.sso.agent.login.SSOLoginModule" flag="required"> </login-module> <login-module code="org.exoplatform.services.security.j2ee.JbossLoginModule" flag="required"> <module-option name="portalContainerName">portal</module-option> <module-option name="realmName">gatein-domain</module-option> </login-module> </authentication>In Tomcat, edit
GATEIN_HOME/conf/jaas.confand uncomment this section:org.gatein.sso.agent.login.SSOLoginModule required org.exoplatform.services.security.j2ee.JbossLoginModule required portalContainerName=portal realmName=gatein-domain
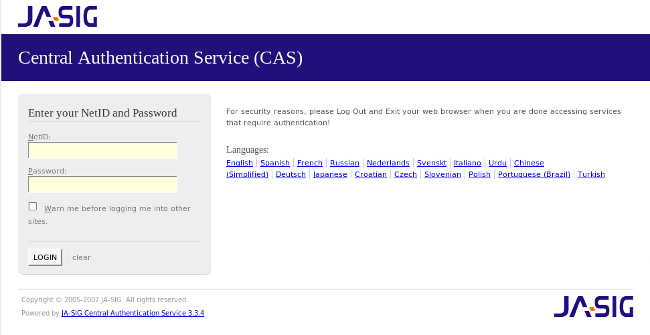
The installation can be tested at this point:
Access GateIn 3.0 (if the CAS server using Tomcat is still running) by going to http://localhost:8888/cas.
Login with the username
rootand the passwordgtn(or any account created through the portal).
To utilize the Central Authentication Service, GateIn 3.0 needs to redirect all user authentication to the CAS server.
Information about where the CAS is hosted must be properly configured within the GateIn 3.0 instance. The required configuration is done by modifying three files:
In the
gatein.ear/02portal.war/groovy/portal/webui/UILoginForm.gtmplfile replace the javascript code at the end with:<script> <%=uicomponent.event("Close");%> window.location = 'http://localhost:8888/cas/login?service=http://localhost:8080/portal/private/classic'; </script>Replace the contents of the
gatein.ear/02portal.war/login/jsp/login.jspfile with:<html> <head> <script type="text/javascript"> window.location = 'http://localhost:8888/cas/login?service=http://localhost:8080/portal/private/classic'; </script> </head> <body> </body> </html>Replace the
InitiateLoginServletdeclaration ingatein.ear/02portal.war/WEB-INF/web.xmlwith:<servlet> <servlet-name>InitiateLoginServlet</servlet-name> <servlet-class>org.gatein.sso.agent.GenericSSOAgent</servlet-class> <init-param> <param-name>ssoServerUrl</param-name> <param-value>http://localhost:8888/cas</param-value> </init-param> </servlet>
Once these changes have been made, all links to the user authentication pages will redirect to the CAS centralized authentication form.
This Single Sign On plugin enables seamless integration between GateIn 3.0 and the JOSSO Single Sign On Framework. Details about OpenSSO can be found here.
Setting up this integration happens in two distinct actions. The first part is installing or configuring a JOSSO server and the second involves setting up the portal to use the JOSSO server.
This section details setting up the JOSSO server to authenticate against the GateIn 3.0 login module.
In this example the JOSSO server will be installed on Tomcat.
JOSSO can be downloaded from http://sourceforge.net/projects/josso/files/. Use the package that embeds Apache Tomcat.
Once downloaded, extract the package into what will be called JOSSO_HOME in this example.
Copy the files from
GATEIN_SSO/josso/plugininto the Tomcat directory (JOSSO_HOME).This action should replace or add the following files to the
JOSSO_HOME/webapps/josso/WEB-INF/libdirectory:JOSSO_HOME/lib/josso-gateway-config.xmlJOSSO_HOME/lib/josso-gateway-gatein-stores.xml
and
JOSSO_HOME/webapps/josso/WEB-INF/classes/gatein.properties
Edit
TOMCAT_HOME/conf/server.xmland replace the 8080 port to 8888 to change the default Tomcat port and avoid a conflict with the default GateIn 3.0 port (for testing purposes).Port Conflicts
If GateIn 3.0 is being on a machine with Tomcat, other ports will need to be changed to avoid conflicts.
Tomcat should now start and allow access to http://localhost:8888/josso/signon/login.do but at this stage login will not be available.
Copy the library files from
GATEIN_SS)/josso/gatein.ear/libintogatein.ear/lib(Or intoGATEIN_HOME/libif GateIn 3.0 is running in Tomcat)In JBoss AS, edit
gatein.ear/META-INF/gatein-jboss-beans.xmland uncomment this section:<authentication> <login-module code="org.gatein.sso.agent.login.SSOLoginModule" flag="required"> </login-module> <login-module code="org.exoplatform.services.security.j2ee.JbossLoginModule" flag="required"> <module-option name="portalContainerName">portal</module-option> <module-option name="realmName">gatein-domain</module-option> </login-module> </authentication>In Tomcat, edit
GATEIN_HOME/conf/jaas.confand uncomment this section:org.gatein.sso.agent.login.SSOLoginModule required org.exoplatform.services.security.j2ee.JbossLoginModule requiredtm portalContainerName=portal realmName=gatein-domain
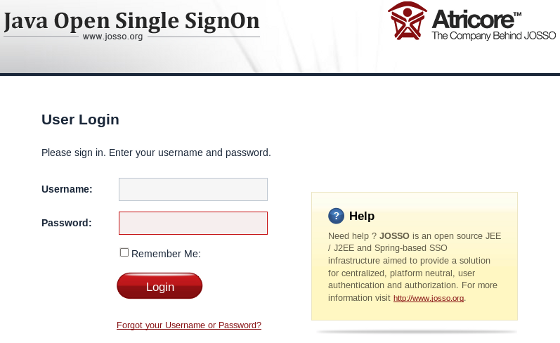
The installation can be tested at this point.
Start GateIn 3.0 (assuming that the JOSSO server using Tomcat is running) by going to http://localhost:8888/josso/signon/login.do.
Login with the username
rootand the passwordgtnor any account created through the portal.
The next part of the process is to redirect all user authentication to the JOSSO server.
Information about where the JOSSO server is hosted must be properly configured within the GateIn 3.0 instance. The required configuration is done by modifying four files:
Replace the javascript at the bottom
gatein.ear/02portal.war/groovy/portal/webui/UILoginForm.gtmplwith:<script> <%=uicomponent.event("Close");%> window.location = 'http://localhost:8888/josso/signon/login.do?josso_back_to=http://localhost:8080/portal/private/classic'; </script>Replace the entire contents of
gatein.ear/02portal.war/login/jsp/login.jspwith:<html> <head> <script type="text/javascript"> window.location = 'http://localhost:8888/josso/signon/login.do?josso_back_to=http://localhost:8080/portal/private/classic'; </script> </head> <body> </body> </html>Replace the
InitiateLoginServletdeclaration ingatein.ear/02portal.war/WEB-INF/web.xmlwith:<servlet> <servlet-name>InitiateLoginServlet</servlet-name> <servlet-class>org.gatein.sso.agent.GenericSSOAgent</servlet-class> <init-param> <param-name>ssoServerUrl</param-name> <param-value>http://localhost:8888/cas</param-value> </init-param> </servlet>Remove the
PortalLoginControllerservlet declaration and mapping ingatein.ear/02portal.war/WEB-INF/web.xml
From now on, all links redirecting to the user authentication pages will redirect to the JOSSO centralized authentication form.
This Single Sign On plugin enables seamless integration between GateIn 3.0 and the OpenSSO Single Sign On Framework. Details about OpenSSO can be found here.
Setting up this integration happens in two distinct actions. The first part is installing or configuring an OpenSSO server and the second involves setting up the portal to use the OpenSSO server.
This section details setting up the OpenSSO server to authenticate against the Enterprise Portal Platform login module.
In this example the JOSSO server will be installed on Tomcat.
OpenSSO can be downloaded from https://opensso.dev.java.net/public/use/index.html.
Once downloaded, extract the package into a suitable location. This location will be referred to as OPENSSO_HOME in this example.
To configure the web server as desired, it is simpler to directly modify the sources.
The first step is to add the GateIn 3.0 Authentication Plugin:
The plugin makes secure authentication callbacks to a RESTful service installed on the remote GateIn 3.0 server in order to authenticate a user.
In order for the plugin to function correctly, it needs to be properly configured to connect to this service. This configuration is done via the opensso.war/config/auth/default/AuthenticationPlugin.xml file.
Obtain a copy of Tomcat and extract it into a suitable location (this location will be referred to as
TOMCAT_HOMEin this example).Change the default port to avoid a conflict with the default GateIn 3.0 port (for testing purposes). Do this by editing
TOMCAT_HOME/conf/server.xmland replacing the 8080 port to 8888.Note
If GateIn 3.0 is running on the same machine as Tomcat, the port 8005 will also need to be changed to avoid port conflicts.
Ensure the
TOMCAT_HOME/webapps/opensso/config/auth/default/AuthenticationPlugin.xmlfile looks like this:<?xml version='1.0' encoding="UTF-8"?> <!DOCTYPE ModuleProperties PUBLIC "=//iPlanet//Authentication Module Properties XML Interface 1.0 DTD//EN" "jar://com/sun/identity/authentication/Auth_Module_Properties.dtd"> <ModuleProperties moduleName="AuthenticationPlugin" version="1.0" > <Callbacks length="2" order="1" timeout="60" header="GateIn OpenSSO Login" > <NameCallback> <Prompt> Username </Prompt> </NameCallback> <PasswordCallback echoPassword="false" > <Prompt> Password </Prompt> </PasswordCallback> </Callbacks> </ModuleProperties>Copy
GATEIN_SSO/opensso/plugin/WEB-INF/lib/sso-opensso-plugin-<VERSION>.jar,GATEIN_SSO/opensso/plugin/WEB-INF/lib/commons-httpclient-<VERSION>.jar, andGATEIN_SSO/opensso/plugin/WEB-INF/lib/commons-logging-<VERSION>.jarinto the Tomcat directory atTOMCAT_HOME/webapps/opensso/WEB-INF/lib.Copy
GATEIN_SSO/opensso/plugin/WEB-INF/classes/gatein.propertiesintoTOMCAT_HOME/webapps/opensso/WEB-INF/classesTomcat should start and be able to access http://localhost:8888/opensso/UI/Login?realm=gatein. Login will not be available at this point.

Copy all libraries from
GATEIN_SSO/opensso/gatein.ear/libintoJBOSS_HOME/server/default/deploy/gatein.ear/lib(Or, in Tomcat, intoGATEIN_HOME/lib)In JBoss AS, edit gatein.ear/META-INF/gatein-jboss-beans.xml and uncomment this section
<authentication> <login-module code="org.gatein.sso.agent.login.SSOLoginModule" flag="required"> </login-module> <login-module code="org.exoplatform.services.security.j2ee.JbossLoginModule" flag="required"> <module-option name="portalContainerName">portal</module-option> <module-option name="realmName">gatein-domain</module-option> </login-module> </authentication>If you are running GateIn in Tomcat, edit $GATEIN_HOME/conf/jaas.conf and uncomment this section
org.gatein.sso.agent.login.SSOLoginModule required
org.exoplatform.services.security.j2ee.JbossLoginModule required
portalContainerName=portal
realmName=gatein-domain
At this point the installation can be tested:
Access GateIn 3.0 by going to http://localhost:8888/opensso/UI/Login?realm=gatein (assuming that the OpenSSO server using Tomcat is still running).
Login with the username
rootand the passwordgtnor any account created through the portal.
The next part of the process is to redirect all user authentication to the OpenSSO server.
Information about where the OpenSSO server is hosted must be properly configured within the Enterprise Portal Platform instance. The required configuration is done by modifying three files:
Replace the javascript at the bottom of
gatein.ear/02portal.war/groovy/portal/webui/UILoginForm.gtmplwith:<script> <%=uicomponent.event("Close");%> window.location = 'http://localhost:8888/opensso/UI/Login?realm=gatein&goto=http://localhost:8080/portal/private/classic'; </script>Replace the contents of
gatein.ear/02portal.war/login/jsp/login.jspwith:<html> <head> <script type="text/javascript"> window.location = 'http://localhost:8888/opensso/UI/Login?realm=gatein&goto=http://localhost:8080/portal/private/classic'; </script> </head> <body> </body> </html>Replace the
InitiateLoginServletdeclaration ingatein.ear/02portal.war/WEB-INF/web.xmlwith:<servlet> <servlet-name>InitiateLoginServlet</servlet-name> <servlet-class>org.gatein.sso.agent.GenericSSOAgent</servlet-class> <init-param> <param-name>ssoServerUrl</param-name> <param-value>http://localhost:8888/opensso</param-value> </init-param> <init-param> <param-name>ssoCookieName</param-name> <param-value>iPlanetDirectoryPro</param-value> </init-param> </servlet>
From now on, all links redirecting to the user authentication pages will redirect to the OpenSSO centralized authentication form.