To specify the initial Organization configuration, the content of 02portal.war:/WEB-INF/conf/organization/organization-configuration.xml should be edited. This file uses the portal XML configuration schema. It lists several configuration plugins.
The plugin of type org.exoplatform.services.organization.OrganizationDatabaseInitializer is used to specify a list of membership types, a list of groups, and a list of users to be created.
The checkDatabaseAlgorithm initialization parameter determines how the database update is performed.
If its value is set to entry it means that each user, group and membership listed in the configuration is checked each time GateIn 3.2 is started. If the entry doesn't yet exist in the database, it is created. If checkDatabaseAlgorithm parameter value is set to empty, the configuration data will be updated to the database only if the database is empty.
The predefined membership types are specified in the membershipType field of the OrganizationConfig plugin parameter.
Note
See 02portal.war:/WEB-INF/conf/organization/organization-configuration.xml for the full content.
<field name="membershipType">

  <collection type="java.util.ArrayList">

    <value>

      <object type="org.exoplatform.services.organization.OrganizationConfig$MembershipType">

        <field name="type">

          <string>member</string>

        </field>

        <field name="description">

          <string>member membership type</string>

        </field>

      </object>

    </value>

    <value>

      <object type="org.exoplatform.services.organization.OrganizationConfig$MembershipType">

        <field name="type">

          <string>owner</string>

        </field>

        <field name="description">

          <string>owner membership type</string>

        </field>

      </object>

     </value>

     <value>

       <object type="org.exoplatform.services.organization.OrganizationConfig$MembershipType">

         <field name="type">

           <string>validator</string>

         </field>

         <field name="description">

           <string>validator membership type</string>

         </field>

       </object>

     </value>

   </collection>

</field>
The predefined groups are specified in the group field of the OrganizationConfig plugin parameter.
<field name="group">

  <collection type="java.util.ArrayList">

    <value>

      <object type="org.exoplatform.services.organization.OrganizationConfig$Group">

        <field name="name">

          <string>portal</string>

        </field>

        <field name="parentId">

          <string></string>

        </field>

        <field name="type">

          <string>hierachy</string>

        </field>

        <field name="description">

          <string>the /portal group</string>

        </field>

      </object>

    </value>

    <value>

      <object type="org.exoplatform.services.organization.OrganizationConfig$Group">

        <field name="name">

          <string>community</string>

        </field>

        <field name="parentId">

          <string>/portal</string>

        </field>

        <field name="type">

          <string>hierachy</string>

        </field>

        <field name="description">

          <string>the /portal/community group</string>

        </field>

      </object>

    </value>

    ...

  </collection>

</field>
The predefined users are specified in the membershipType field of the OrganizationConfig plugin parameter.
<field name="user">

  <collection type="java.util.ArrayList">

    <value>

      <object type="org.exoplatform.services.organization.OrganizationConfig$User">

        <field name="userName"><string>root</string></field>

        <field name="password"><string>exo</string></field>

        <field name="firstName"><string>root</string></field>

        <field name="lastName"><string>root</string></field>

        <field name="email"><string>exoadmin@localhost</string></field>

        <field name="groups"><string>member:/admin,member:/user,owner:/portal/admin</string></field>

      </object>

    </value>

    <value>

      <object type="org.exoplatform.services.organization.OrganizationConfig$User">

        <field name="userName"><string>exo</string></field>

        <field name="password"><string>exo</string></field>

        <field name="firstName"><string>site</string></field>

        <field name="lastName"><string>site</string></field>

        <field name="email"><string>exo@localhost</string></field>

        <field name="groups"><string>member:/user</string></field>

      </object>

    </value>

    ...

  </collection>

</field>
The plugin of type org.exoplatform.services.organization.impl.NewUserEventListener specifies
which groups all the newly created users should become members of. It specifies the groups and the memberships to use
(while group is just a set of users, a membership type represents a user's role within a group).
It also specifies a list of users that should not be processed (i.e. administrative users like 'root').
Note
The terms 'membership' and 'membership type' refer to the same thing, and are used interchangeably.
<component-plugin>

  <name>new.user.event.listener</name>

  <set-method>addListenerPlugin</set-method>

  <type>org.exoplatform.services.organization.impl.NewUserEventListener</type>

  <description>this listener assign group and membership to a new created user</description>

  <init-params>

    <object-param>

      <name>configuration</name>

      <description>description</description>

      <object type="org.exoplatform.services.organization.impl.NewUserConfig">

        <field  name="group">

          <collection type="java.util.ArrayList">

            <value>

              <object type="org.exoplatform.services.organization.impl.NewUserConfig$JoinGroup">

                <field name="groupId"><string>/user</string></field>

                <field name="membership"><string>member</string></field>

              </object>

            </value>

          </collection>

        </field>

        <field  name="ignoredUser">

          <collection type="java.util.HashSet">

            <value><string>exo</string></value>

            <value><string>root</string></value>

            <value><string>company</string></value>

            <value><string>community</string></value>

          </collection>

        </field>

      </object>

    </object-param>

  </init-params>

</component-plugin>
Token Service is used in authentication.
The token system prevents user account information being sent in clear text mode within inbound requests. This increases authentication security.
Token service allows administrators to create, delete, retrieve and clean tokens as required. The service also defines a validity period of any given token. The token becomes invalid once this period expires.
All token services used in GateIn 3.2 authentication must be implemented by subclassing an AbstractTokenService abstract class. The following AbstractTokenService methods represent the contract between authentication runtime, and a token service implementation.
        public Token getToken(String id) throws PathNotFoundException, RepositoryException;

        public Token deleteToken(String id) throws PathNotFoundException, RepositoryException;

        public String[] getAllTokens();

        public long getNumberTokens() throws Exception;

        public String createToken(Credentials credentials) throws IllegalArgumentException,NullPointerException;

        public Credentials validateToken(String tokenKey, boolean remove) throws NullPointerException;
Token services configuration includes specifying the token validity period. The token service is configured as a portal component (in portal scope, as opposed to root scope - more about that in Foundations chapter).
In the example below, CookieTokenService is a subclass of AbstractTokenService so it has a property which specifies the validity period of the token.
The token service will initialize this validity property by looking for an init-param named service.configuration.
This property must have three values.
<component>
<key>org.exoplatform.web.security.security.CookieTokenService</key>
<type>org.exoplatform.web.security.security.CookieTokenService</type>
<init-params>
<values-param>
<name>service.configuration</name>
<value>j cr-token</value>
<value>7
cr-token</value>
<value>7 </value>
<value>D
</value>
<value>D AY</value>
</values-param>
</init-params>
</component>
AY</value>
</values-param>
</init-params>
</component>
| Service name |
| Amount of time |
| Unit of time |
In this case, the service name is jcr-token and the token expiration time is one week.
GateIn 3.2 supports four time units:
SECONDMINUTEHOURDAY
GateIn 3.2 uses PicketLink IDM component to keep the necessary identity information (users, groups, memberships, etc.). While legacy interfaces are still used (org.exoplatform.services.organization) for identity management, there is a wrapper implementation that delegates to PicketLink IDM framework.
This section doesn't provide information about PicketLink IDM and its configuration. Please, refer to the appropriate project documentation (http://jboss.org/picketlink/IDM.html) for further information.
Note
It is important to fully understand the concepts behind this framework design before changing the default configuration.
The identity model represented in 'org.exoplatform.services.organization' interfaces and the one used in PicketLink IDM have some major differences.
TODO: tell more about org.exoplatform.services.organization
For example: PicketLink IDM provides greater abstraction. It is possible for groups in IDM framework to form memberships with many parents (which requires recursive ID translation), while GateIn model allows only pure tree-like membership structures.
Additionally, GateIn membership concept needs to be translated into the IDM Role concept. Therefore PicketLink IDM model is used in a limited way. All these translations are applied by the integration layer.
The main configuration file is idm-configuration.xml:
<configuration xmlns:xsi="http://www.w3.org/2001/XMLSchema-instance"
               xsi:schemaLocation="http://www.exoplaform.org/xml/ns/kernel_1_0.xsd http://www.exoplaform.org/xml/ns/kernel_1_0.xsd"
               xmlns="http://www.exoplaform.org/xml/ns/kernel_1_0.xsd">

   <component>
        <key>org.exoplatform.services.organization.idm.PicketLinkIDMService</key>
      <type>org.exoplatform.services.organization.idm.PicketLinkIDMServiceImpl</type>
      <init-params>
         <value-param>
            <name>config</name>
            <value>war:/conf/organization/idm-config.xml</value>
         </value-param>
         <value-param>
            <name>portalRealm</name>
            <value>realm${container.name.suffix}</value>
         </value-param>
       </init-params>
   </component>


   <component>
      <key>org.exoplatform.services.organization.OrganizationService</key>
      <type>org.exoplatform.services.organization.idm.PicketLinkIDMOrganizationServiceImpl</type>
      <init-params>
      <object-param>
        <name>configuration</name>
        <object type="org.exoplatform.services.organization.idm.Config">
          <field name="useParentIdAsGroupType">
            <boolean>true</boolean>
          </field>

          <field name="forceMembershipOfMappedTypes">
            <boolean>true</boolean>
          </field>

          <field name="pathSeparator">
            <string>.</string>
          </field>

          <field name="rootGroupName">
            <string>GTN_ROOT_GROUP</string>
          </field>

          <field name="groupTypeMappings">
            <map type="java.util.HashMap">
              <entry>
                <key><string>/</string></key>
                <value><string>root_type</string></value>
              </entry>

              <!-- Sample mapping -->
              <!--
              <entry>
                <key><string>/platform/*</string></key>
                <value><string>platform_type</string></value>
              </entry>
              <entry>
                <key><string>/organization/*</string></key>
                <value><string>organization_type</string></value>
              </entry>
              -->

            </map>
          </field>

          <field name="associationMembershipType">
            <string>member</string>
          </field>

          <field name="ignoreMappedMembershipType">
            <boolean>false</boolean>
          </field>
        </object>
      </object-param>
    </init-params>


   </component>

</configuration>
| The org.exoplatform.services.organization.idm.PicketLinkIDMServiceImpl service has the following options:
|
| The org.exoplatform.services.organization.idm.PicketLinkIDMOrganizationServiceImpl key is a main entrypoint implementing org.exoplatform.services.organization.OrganizationService and is dependant on org.exoplatform.services.organization.idm.PicketLinkIDMService org.exoplatform.services.organization.idm.PicketLinkIDMOrganizationServiceImpl service has the following options defined as fields of object-param of type org.exoplatform.services.organization.idm.Config:
Additionally, JBossIDMOrganizationServiceImpl uses those defaults to perform identity management operations
|
A sample PicketLink IDM configuration file is shown below. To understand all the options it contains, please refer to the PicketLink IDM Reference Guide
<jboss-identity xmlns="urn:jboss:identity:idm:config:v1_0_beta"

                xmlns:xsi="http://www.w3.org/2001/XMLSchema-instance"

                xsi:schemaLocation="urn:jboss:identity:idm:config:v1_0_alpha identity-config.xsd">

    <realms>

        <realm>

            <id>PortalRealm</id>

            <repository-id-ref>PortalRepository</repository-id-ref>

            <identity-type-mappings>

                <user-mapping>USER</user-mapping>

            </identity-type-mappings>

        </realm>

    </realms>

    <repositories>

        <repository>

            <id>PortalRepository</id>

            <class>org.jboss.identity.idm.impl.repository.WrapperIdentityStoreRepository</class>

            <external-config/>

            <default-identity-store-id>HibernateStore</default-identity-store-id>

            <default-attribute-store-id>HibernateStore</default-attribute-store-id>

        </repository>

    </repositories>

    <stores>

        <attribute-stores/>

        <identity-stores>

            <identity-store>

                <id>HibernateStore</id>

                <class>org.jboss.identity.idm.impl.store.hibernate.HibernateIdentityStoreImpl</class>

                <external-config/>

                <supported-relationship-types>

                    <relationship-type>JBOSS_IDENTITY_MEMBERSHIP</relationship-type>

                    <relationship-type>JBOSS_IDENTITY_ROLE</relationship-type>

                </supported-relationship-types>

                <supported-identity-object-types>

                    <identity-object-type>

                        <name>USER</name>

                        <relationships/>

                        <credentials>

                            <credential-type>PASSWORD</credential-type>

                        </credentials>

                        <attributes/>

                        <options/>

                    </identity-object-type>

                </supported-identity-object-types>

                <options>

                    <option>

                        <name>hibernateSessionFactoryRegistryName</name>

                        <value>hibernateSessionFactory</value>

                    </option>

                    <option>

                        <name>allowNotDefinedIdentityObjectTypes</name>

                        <value>true</value>

                    </option>

                    <option>

                        <name>populateRelationshipTypes</name>

                        <value>true</value>

                    </option>

                    <option>

                        <name>populateIdentityObjectTypes</name>

                        <value>true</value>

                    </option>

                    <option>

                        <name>allowNotDefinedAttributes</name>

                        <value>true</value>

                    </option>

                    <option>

                        <name>isRealmAware</name>

                        <value>true</value>

                    </option>

                </options>

            </identity-store>

        </identity-stores>

    </stores>

</jboss-identity>
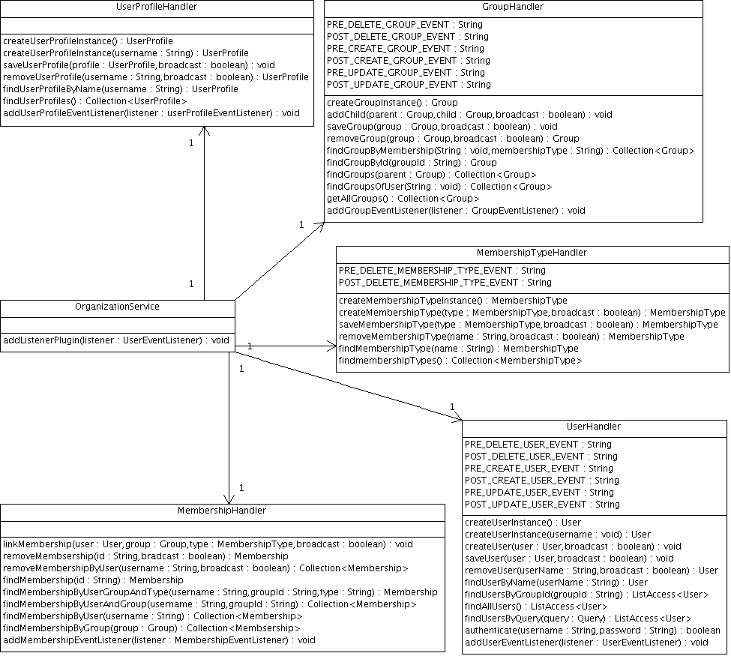
The
exo.platform.services.organization
package has five main components: user, user profile, group,
membership type and membership.
There is an additional component that serves as an entry point into
Organization API -
OrganizationService
component,
that provides handling functionality for the five components.
The
User
component contains basic information about a user - such as
username, password, first name, last name, and email. The
User Profile
component contains extra information about a user, such as user's
personal information, and business information.
You can also add additional information about a user if your application
requires it.
The
Group
component contains a group graph. The
Membership Type
component
contains a list of predefined membership types.
Finally, the
Membership
component connects a User, a Group and a Membership Type.
A user can have one or more memberships within a group, for example: user A can have the 'member' and 'admin' memberships in group /user. A user belongs to a group if he has at least one membership in that group.
Exposing the Organization API to developers the OrganizationService component provides developers with access to handler objects for managing each of the five components - UserHandler, UserProfileHandler, GroupHandler, MembershipTypeHandler, and MembershipHandler.
The five central API components are really designed like persistent entities, and handlers are really specified like data access objects (DAO).
Organization API simply describes a contract, meaning it is not a concrete implementation. The described components are interfaces, allowing for different concrete implementations. In practial terms that means, you can replace the existing implementation with a different one.
The following code retrieves the details for a logged-in user:
// Alternative context: WebuiRequestContext context = WebuiRequestContext.getCurrentInstance() ;

PortalRequestContext context = PortalRequestContext.getCurrentInstance() ;

// Get the id of the user logged

String userId = context.getRemoteUser();

// Request the information from OrganizationService:

OrganizationService orgService = getApplicationComponent(OrganizationService.class) ;

if (userId != null)

  {

  User user = orgService.getUserHandler().findUserByName(userId) ;

  if (user != null)

  {

    String firstName = user.getFirstName();

    String lastName = user.getLastName();

    String email = user.getEmail();

  }

}
Below are two alternatives for retrieving the Organization Service:
OrganizationService service = (OrganizationService)

   ExoContainerContext.getCurrentContainer().getComponentInstanceOfType(OrganizationService.class);
OrganizationService service = (OrganizationService)
PortalContainer.getInstance().getComponentInstanceOfType(OrganizationService.class);
GateIn 3.2 provides some form of Single Sign On (SSO) as an integration and aggregation platform.
When logging into the portal users gain access to many systems through portlets using a single identity. In many cases, however, the portal infrastructure must be integrated with other SSO enabled systems. There are many different Identity Management solutions available. In most cases each SSO framework provides a unique way to plug into a Java EE application.
In this tutorial, the SSO server is installed in a Tomcat installation. Tomcat can be obtained from http://tomcat.apache.org.
All the packages required for setup can be found in a zip file located at: http://repository.jboss.org/maven2/org/gatein/sso/sso-packaging. In this document we will call the directory where the file is extracted $GATEIN_SSO_HOME.
Users are advised to not run any portal extensions that could override the data when manipulating the gatein.ear file directly.
Remove $JBOSS_HOME/server/default/deploy/gatein-sample-extension.ear and $JBOSS_HOME/server/default/deploy/gatein-sample-portal.ear which are packaged by default with GateIn 3.2.
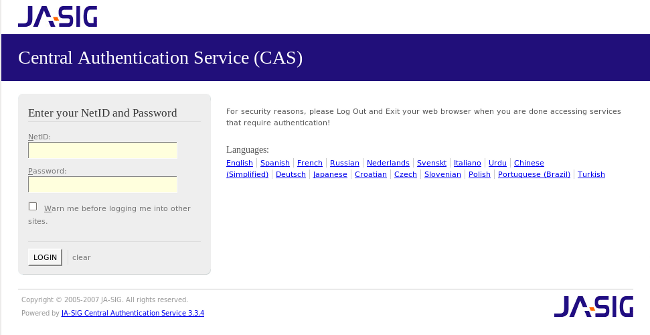
This Single Sign On plugin enables seamless integration between GateIn 3.2 and the CAS Single Sign On Framework. Details about CAS can be found here.
The integration consists of two parts; the first part consists of installing or configuring a CAS server, the second part consists of setting up the portal to use the CAS server.
First, set up the server to authenticate against the portal login module. In this example the CAS server will be installed on Tomcat.
CAS can be downloaded from http://www.jasig.org/cas/download.
Extract the downloaded file into a suitable location. This location will be referred to as $CAS_HOME in the following example.
To configure the web archive as desired, the simplest way is to make the necessary changes directly in CAS codebase.
Note
To complete these instructions, and perform the final build step, you will need the Apache Maven 2. You can get it here.
First, we need to change the default authentication handler with the one provided by GateIn 3.2.
The CAS Server Plugin makes secure authentication callbacks to a RESTful service installed on the remote GateIn server in order to authenticate a user.
In order for the plugin to function correctly, it needs to be properly configured to connect to this service. This configuration is done via the cas.war/WEB-INF/deployerConfigContext.xml file.
Open
CAS_HOME/cas-server-webapp/src/main/webapp/WEB-INF/deployerConfigContext.xmlReplace:
 <!--
  | Whereas CredentialsToPrincipalResolvers identify who it is some Credentials might authenticate,
  | AuthenticationHandlers actually authenticate credentials.  Here e declare the AuthenticationHandlers that
  | authenticate the Principals that the CredentialsToPrincipalResolvers identified.  CAS will try these handlers in turn
  | until it finds one that both supports the Credentials presented and succeeds in authenticating.
  +-->
 <property name="authenticationHandlers">
   <list>
     <!--
      | This is the authentication handler that authenticates services by means of callback via SSL, thereby validating
      | a server side SSL certificate.
      +-->
     <bean class="org.jasig.cas.authentication.handler.support.HttpBasedServiceCredentialsAuthenticationHandler"
           p:httpClient-ref="httpClient" />
     <!--
      | This is the authentication handler declaration that every CAS deployer will need to change before deploying CAS
      | into production.  The default SimpleTestUsernamePasswordAuthenticationHandler authenticates UsernamePasswordCredentials
      | where the username equals the password.  You will need to replace this with an AuthenticationHandler that implements your
      | local authentication strategy.  You might accomplish this by coding a new such handler and declaring
      | edu.someschool.its.cas.MySpecialHandler here, or you might use one of the handlers provided in the adaptors modules.
      +-->
     <bean
        class="org.jasig.cas.authentication.handler.support.SimpleTestUsernamePasswordAuthenticationHandler" />
   </list>
 </property>
With the following (Make sure to set the host, port and context with the values corresponding to your portal). Also available in
GATEIN_SSO_HOME/cas/plugin/WEB-INF/deployerConfigContext.xml.<!-- | Whereas CredentialsToPrincipalResolvers identify who it is some Credentials might authenticate, | AuthenticationHandlers actually authenticate credentials. Here we declare the AuthenticationHandlers that | authenticate the Principals that the CredentialsToPrincipalResolvers identified. CAS will try these handlers in turn | until it finds one that both supports the Credentials presented and succeeds in authenticating. +--> <property name="authenticationHandlers"> <list> <!-- | This is the authentication handler that authenticates services by means of callback via SSL, thereby validating | a server side SSL certificate. +--> <bean class="org.jasig.cas.authentication.handler.support.HttpBasedServiceCredentialsAuthenticationHandler" p:httpClient-ref="httpClient" /> <!-- | This is the authentication handler declaration that every CAS deployer will need to change before deploying CAS | into production. The default SimpleTestUsernamePasswordAuthenticationHandler authenticates UsernamePasswordCredentials | where the username equals the password. You will need to replace this with an AuthenticationHandler that implements your | local authentication strategy. You might accomplish this by coding a new such handler and declaring | edu.someschool.its.cas.MySpecialHandler here, or you might use one of the handlers provided in the adaptors modules. +--> <!-- Integrates with the Gatein Authentication Service to perform authentication --> <!-- | Note: Modify the Plugin Configuration based on the actual information of a GateIn instance. | The instance can be anywhere on the internet...Not necessarily on localhost where CAS is running +--> <bean class="org.gatein.sso.cas.plugin.AuthenticationPlugin"> <property name="gateInHost"><value>localhost</value></property> <property name="gateInPort"><value>8080</value></property> <property name="gateInContext"><value>portal</value></property> </bean> </list> </property>Copy
GATEIN_SSO_HOME/cas/plugin/WEB-INF/lib/sso-cas-plugin-<VERSION>.jarandGATEIN_SSO_HOME/cas/plugin/WEB-INF/lib/commons-httpclient-<VERSION>.jarinto theCAS_HOME/cas-server-webapp/src/main/webapp/WEB-INF/libcreated directory.Get an installation of Tomcat and extract it into a suitable location (which will be called
TOMCAT_HOMEfor these instructions).Change the default port to avoid a conflict with the default GateIn 3.2 (for testing purposes). Edit
TOMCAT_HOME/conf/server.xmland replace the 8080 port to 8888.Note
If GateIn 3.2 is running on the same machine as Tomcat, other ports need to be changed in addition to 8080 in order to avoid port conflicts. They can be changed to any free port. For example, you can change admin port from 8005 to 8805, and AJP port from 8009 to 8809.
Go to
CAS_HOME/cas-server-webappand execute the command:mvn install
Copy
CAS_HOME/cas-server-webapp/target/cas.warintoTOMCAT_HOME/webapps.Tomcat should start and be accessible at http://localhost:8888/cas. Note that at this stage login won't be available.
Copy all libraries from
GATEIN_SSO_HOME/cas/gatein.ear/libintoJBOSS_HOME/server/default/deploy/gatein.ear/lib(Or in Tomcat, into $GATEIN_HOME/lib)In JBoss AS, edit
gatein.ear/META-INF/gatein-jboss-beans.xmland uncomment this section:<authentication> <login-module code="org.gatein.sso.agent.login.SSOLoginModule" flag="required"> </login-module> <login-module code="org.exoplatform.services.security.j2ee.JbossLoginModule" flag="required"> <module-option name="portalContainerName">portal</module-option> <module-option name="realmName">gatein-domain</module-option> </login-module> </authentication>In Tomcat, edit
GATEIN_HOME/conf/jaas.confand uncomment this section:org.gatein.sso.agent.login.SSOLoginModule required org.exoplatform.services.security.j2ee.TomcatLoginModule required portalContainerName=portal realmName=gatein-domain
The installation can be tested at this point:
Start (or restart) GateIn 3.2, and (assuming the CAS server on Tomcat is running) direct your browser to http://localhost:8888/cas.
Login with the username
rootand the passwordgtn(or any account created through the portal).
To utilize the Central Authentication Service, GateIn 3.2 needs to redirect all user authentication to the CAS server.
Information about where the CAS is hosted must be properly configured within the GateIn 3.2 instance. The required configuration is done by modifying three files:
In the
gatein.ear/web.war/groovy/groovy/webui/component/UIBannerPortlet.gtmlfile modify the 'Sign In' link as follows:<!-- <a class="Login" onclick="$signInAction"><%=_ctx.appRes("UILoginForm.label.Signin")%></a> --> <a class="Login" href="/portal/sso"><%=_ctx.appRes("UILoginForm.label.Signin")%></a>In the
gatein.ear/web.war/groovy/portal/webui/component/UILogoPortlet.gtmplfile modify the 'Sign In' link as follows:<!-- <a onclick="$signInAction"><%=_ctx.appRes("UILogoPortlet.action.signin")%></a> --> <a href="/portal/sso"><%=_ctx.appRes("UILogoPortlet.action.signin")%></a>Replace the entire contents of
gatein.ear/02portal.war/login/jsp/login.jspwith:<html> <head> <script type="text/javascript"> window.location = '/portal/sso'; </script> </head> <body> </body> </html>Add the following Filters at the top of the filter chain in
gatein.ear/02portal.war/WEB-INF/web.xml:<filter> <filter-name>LoginRedirectFilter</filter-name> <filter-class>org.gatein.sso.agent.filter.LoginRedirectFilter</filter-class> <init-param> <!-- This should point to your SSO authentication server --> <param-name>LOGIN_URL</param-name> <!-- If casRenewTicket param value of InitiateLoginServlet is: not specified or false --> <param-value>http://localhost:8888/cas/login?service=http://localhost:8080/portal/private/classic</param-value> <!-- If casRenewTicket param value of InitiateLoginServlet is : true --> <!-- <param-value>http://localhost:8888/cas/login?service=http://localhost:8080/portal/private /classic&renew=true</param-value> --> </init-param> </filter> <filter> <filter-name>CASLogoutFilter</filter-name> <filter-class>org.gatein.sso.agent.filter.CASLogoutFilter</filter-class> <init-param> <!-- This should point to your JOSSO authentication server --> <param-name>LOGOUT_URL</param-name> <param-value>http://localhost:8888/cas/logout</param-value> </init-param> </filter> <!-- Mapping the filters at the very top of the filter chain --> <filter-mapping> <filter-name>LoginRedirectFilter</filter-name> <url-pattern>/*</url-pattern> </filter-mapping> <filter-mapping> <filter-name>CASLogoutFilter</filter-name> <url-pattern>/*</url-pattern> </filter-mapping>
Replace the
InitiateLoginServletdeclaration ingatein.ear/02portal.war/WEB-INF/web.xmlwith:<servlet> <servlet-name>InitiateLoginServlet</servlet-name> <servlet-class>org.gatein.sso.agent.GenericSSOAgent</servlet-class> <init-param> <param-name>ssoServerUrl</param-name> <param-value>http://localhost:8888/cas</param-value> </init-param> <init-param> <param-name>casRenewTicket</param-name> <param-value>false</param-value> </init-param> </servlet>
Once these changes have been made, all links to the user authentication pages will redirect to the CAS centralized authentication form.
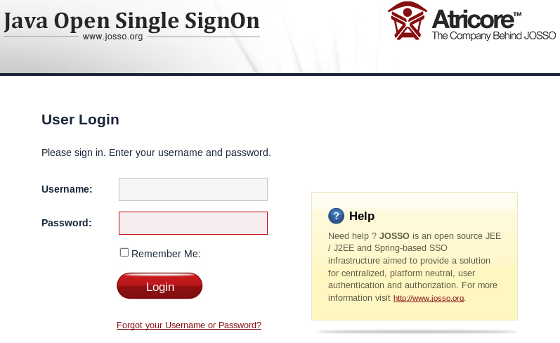
This Single Sign On plugin enables seamless integration between GateIn 3.2 and the JOSSO Single Sign On Framework. Details about JOSSO can be found here.
Setting up this integration involves two steps. The first step is to install or configure a JOSSO server, and the second is to set up the portal to use the JOSSO server.
This section details setting up the JOSSO server to authenticate against the GateIn 3.2 login module.
In this example the JOSSO server will be installed on Tomcat.
JOSSO can be downloaded from http://sourceforge.net/projects/josso/files/. Use the package that embeds Apache Tomcat. The integration was tested with JOSSO-1.8.1.
Once downloaded, extract the package into what will be called JOSSO_HOME in this example.
Copy the files from
GATEIN_SSO_HOME/josso/plugininto the Tomcat directory (JOSSO_HOME).This action should replace or add the following files to the
JOSSO_HOME/webapps/josso/WEB-INF/libdirectory:JOSSO_HOME/lib/josso-gateway-config.xmlJOSSO_HOME/lib/josso-gateway-gatein-stores.xml
and
JOSSO_HOME/webapps/josso/WEB-INF/classes/gatein.properties
Edit
TOMCAT_HOME/conf/server.xmland replace the 8080 port to 8888 to change the default Tomcat port and avoid a conflict with the default GateIn 3.2 port (for testing purposes).Port Conflicts
If GateIn 3.2 is running on the same machine as Tomcat, other ports need to be changed in addition to 8080 in order to avoid port conflicts. They can be changed to any free port. For example, you can change admin port from 8005 to 8805, and AJP port from 8009 to 8809.
Tomcat should now start and allow access to http://localhost:8888/josso/signon/login.do but at this stage login will not be available.
Copy the library files from
GATEIN_SSO_HOME/josso/gatein.ear/libintogatein.ear/lib(or intoGATEIN_HOME/libif GateIn 3.2 is running in Tomcat)Copy the file
GATEIN_SSO_HOME/josso/gatein.ear/portal.war/WEB-INF/classes/josso-agent-config.xmlintogatein.ear/02portal.war/WEB-INF/classes(or intoGATEIN_HOME/webapps/portal.war/WEB-INF/classes, orGATEIN_HOME/confif GateIn 3.2 is running in Tomcat)In JBoss AS, edit
gatein.ear/META-INF/gatein-jboss-beans.xmland uncomment this section:<authentication> <login-module code="org.gatein.sso.agent.login.SSOLoginModule" flag="required"> </login-module> <login-module code="org.exoplatform.services.security.j2ee.JbossLoginModule" flag="required"> <module-option name="portalContainerName">portal</module-option> <module-option name="realmName">gatein-domain</module-option> </login-module> </authentication>In Tomcat, edit
GATEIN_HOME/conf/jaas.confand uncomment this section:org.gatein.sso.agent.login.SSOLoginModule required org.exoplatform.services.security.j2ee.TomcatLoginModule requiredtm portalContainerName=portal realmName=gatein-domain
The installation can be tested at this point.
Start (or restart) GateIn 3.2, and (assuming the JOSSO server on Tomcat is running) direct your browser to http://localhost:8888/josso/signon/login.do.
Login with the username
rootand the passwordgtnor any account created through the portal.
The next part of the process is to redirect all user authentication to the JOSSO server.
Information about where the JOSSO server is hosted must be properly configured within the GateIn 3.2 instance. The required configuration is done by modifying four files:
In the
gatein.ear/web.war/groovy/groovy/webui/component/UIBannerPortlet.gtmlfile modify the 'Sign In' link as follows:<!-- <a class="Login" onclick="$signInAction"><%=_ctx.appRes("UILoginForm.label.Signin")%></a> --> <a class="Login" href="/portal/sso"><%=_ctx.appRes("UILoginForm.label.Signin")%></a>In the
gatein.ear/web.war/groovy/portal/webui/component/UILogoPortlet.gtmplfile modify the 'Sign In' link as follows:<!-- <a onclick="$signInAction"><%=_ctx.appRes("UILogoPortlet.action.signin")%></a> --> <a href="/portal/sso"><%=_ctx.appRes("UILogoPortlet.action.signin")%></a>Replace the entire contents of
gatein.ear/02portal.war/login/jsp/login.jspwith:<html> <head> <script type="text/javascript"> window.location = '/portal/sso'; </script> </head> <body> </body> </html>Add the following Filters at the top of the filter chain in
gatein.ear/02portal.war/WEB-INF/web.xml:<filter> <filter-name>LoginRedirectFilter</filter-name> <filter-class>org.gatein.sso.agent.filter.LoginRedirectFilter</filter-class> <init-param> <!-- This should point to your SSO authentication server --> <param-name>LOGIN_URL</param-name> <param-value>http://localhost:8888/josso/signon/login.do?josso_back_to=http://localhost:8080/portal /private/classic</param-value> </init-param> </filter> <filter> <filter-name>JOSSOLogoutFilter</filter-name> <filter-class>org.gatein.sso.agent.filter.JOSSOLogoutFilter</filter-class> <init-param> <!-- This should point to your JOSSO authentication server --> <param-name>LOGOUT_URL</param-name> <param-value>http://localhost:8888/josso/signon/logout.do</param-value> </init-param> </filter> <!-- filters should be placed at the very top of the filter chain --> <filter-mapping> <filter-name>LoginRedirectFilter</filter-name> <url-pattern>/*</url-pattern> </filter-mapping> <filter-mapping> <filter-name>JOSSOLogoutFilter</filter-name> <url-pattern>/*</url-pattern> </filter-mapping>Replace the
InitiateLoginServletdeclaration ingatein.ear/02portal.war/WEB-INF/web.xmlwith:<servlet> <servlet-name>InitiateLoginServlet</servlet-name> <servlet-class>org.gatein.sso.agent.GenericSSOAgent</servlet-class> <init-param> <param-name>ssoServerUrl</param-name> <param-value>http://localhost:8888/josso/signon/login.do</param-value> </init-param> </servlet>Remove the
PortalLoginControllerservlet declaration and mapping ingatein.ear/02portal.war/WEB-INF/web.xml
From now on, all links redirecting to the user authentication pages will redirect to the JOSSO centralized authentication form.
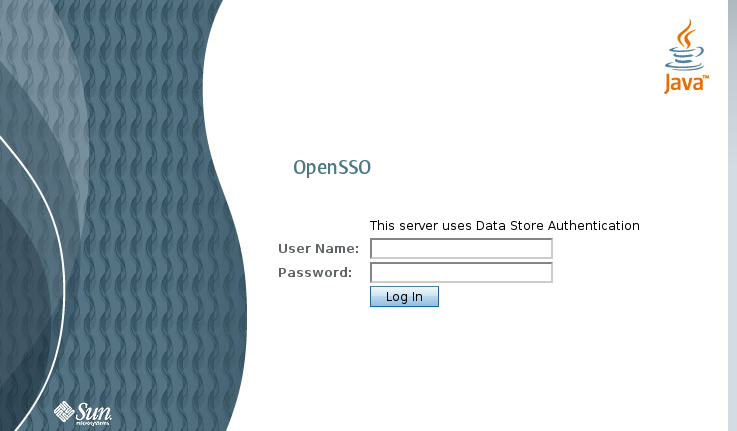
This Single Sign On plugin enables seamless integration between GateIn 3.2 and the OpenSSO Single Sign On Framework. Details about OpenSSO can be found here.
Setting up this integration involves two steps. The first step is to install or configure an OpenSSO server, and the second is to set up the portal to use the OpenSSO server.
This section details the setting up of OpenSSO server to authenticate against the GateIn 3.2 login module.
In this example the OpenSSO server will be installed on Tomcat.
OpenSSO can be downloaded from https://opensso.dev.java.net/public/use/index.html.
Once downloaded, extract the package into a suitable location. This location will be referred to as OPENSSO_HOME in this example.
To configure the web server as desired, it is simpler to directly modify the sources.
The first step is to add the GateIn 3.2 Authentication Plugin:
The plugin makes secure authentication callbacks to a RESTful service installed on the remote GateIn 3.2 server in order to authenticate a user.
In order for the plugin to function correctly, it needs to be properly configured to connect to this service. This configuration is done via the opensso.war/config/auth/default/AuthenticationPlugin.xml file.
Obtain a copy of Tomcat and extract it into a suitable location (this location will be referred to as
TOMCAT_HOMEin this example).Change the default port to avoid a conflict with the default GateIn 3.2 port (for testing purposes). Do this by editing
TOMCAT_HOME/conf/server.xmland replacing the 8080 port to 8888.Note
If GateIn 3.2 is running on the same machine as Tomcat, other ports need to be changed in addition to 8080 in order to avoid port conflicts. They can be changed to any free port. For example, you can change admin port from 8005 to 8805, and AJP port from 8009 to 8809.
Ensure the
TOMCAT_HOME/webapps/opensso/config/auth/default/AuthenticationPlugin.xmlfile looks like this:<?xml version='1.0' encoding="UTF-8"?> <!DOCTYPE ModuleProperties PUBLIC "=//iPlanet//Authentication Module Properties XML Interface 1.0 DTD//EN" "jar://com/sun/identity/authentication/Auth_Module_Properties.dtd"> <ModuleProperties moduleName="AuthenticationPlugin" version="1.0" > <Callbacks length="2" order="1" timeout="60" header="GateIn OpenSSO Login" > <NameCallback> <Prompt> Username </Prompt> </NameCallback> <PasswordCallback echoPassword="false" > <Prompt> Password </Prompt> </PasswordCallback> </Callbacks> </ModuleProperties>Copy
GATEIN_SSO_HOME/opensso/plugin/WEB-INF/lib/sso-opensso-plugin-<VERSION>.jar,GATEIN_SSO_HOME/opensso/plugin/WEB-INF/lib/commons-httpclient-<VERSION>.jar, andGATEIN_SSO_HOME/opensso/plugin/WEB-INF/lib/commons-logging-<VERSION>.jarinto the Tomcat directory atTOMCAT_HOME/webapps/opensso/WEB-INF/lib.Copy
GATEIN_SSO_HOME/opensso/plugin/WEB-INF/classes/gatein.propertiesintoTOMCAT_HOME/webapps/opensso/WEB-INF/classesTomcat should start and be able to access http://localhost:8888/opensso/UI/Login?realm=gatein. Login will not be available at this point.
Configure "gatein" realm:
Direct your browser to http://localhost:8888/opensso
Create default configuration
Login as
amadminand then go to tab "Configuration" -> tab "Authentication" -> link "Core" -> add new value and fill in the class name "org.gatein.sso.opensso.plugin.AuthenticationPlugin". This step is really important. Without it AuthenticationPlugin is not available among other OpenSSO authentication modules.Go to tab "Access control" and create new realm called "gatein".
Go to "gatein" realm and click on "Authentication" tab. At the bottom in the section "Authentication chaining" click on "ldapService". Here change the selection from "Datastore", which is the default module in the authentication chain, to "AuthenticationPlugin". This enables authentication of "gatein" realm by using GateIn REST service instead of the OpenSSO LDAP server.
Go to "Advanced properties" and change UserProfile from "Required" to "Dynamic". This step is needed because GateIn 3.2 users are not in OpenSSO Datastore (LDAP server), so their profiles can't be obtained if "Required" is active. By using "Dynamic" all new users are automatically created in OpenSSO datastore after successful authentication.
Increase the user privileges to allow REST access. Go to "Access control" -> Top level realm -> "Privileges" tab -> All authenticated users, and check the last two checkboxes:
Read and write access only for policy properties
Read and write access to all realm and policy properties
Do the same for "gatein" realm.
TODO: The above OpenSSO manual configuration could be replaced by configuration files prepared in advance
Copy all libraries from
GATEIN_SSO_HOME/opensso/gatein.ear/libintoJBOSS_HOME/server/default/deploy/gatein.ear/lib(Or, in Tomcat, intoGATEIN_HOME/lib)In JBoss AS, edit gatein.ear/META-INF/gatein-jboss-beans.xml and uncomment this section
<authentication> <login-module code="org.gatein.sso.agent.login.SSOLoginModule" flag="required"> </login-module> <login-module code="org.exoplatform.services.security.j2ee.JbossLoginModule" flag="required"> <module-option name="portalContainerName">portal</module-option> <module-option name="realmName">gatein-domain</module-option> </login-module> </authentication>If you are running GateIn in Tomcat, edit $GATEIN_HOME/conf/jaas.conf and uncomment this section
org.gatein.sso.agent.login.SSOLoginModule required
org.exoplatform.services.security.j2ee.TomcatLoginModule required
portalContainerName=portal
realmName=gatein-domain
At this point the installation can be tested:
Access GateIn 3.2 by going to http://localhost:8888/opensso/UI/Login?realm=gatein (assuming that the OpenSSO server using Tomcat is still running).
Login with the username
rootand the passwordgtnor any account created through the portal.
The next part of the process is to redirect all user authentication to the OpenSSO server.
Information about where the OpenSSO server is hosted must be properly configured within the Enterprise Portal Platform instance. The required configuration is done by modifying three files:
In the
gatein.ear/web.war/groovy/groovy/webui/component/UIBannerPortlet.gtmlfile modify the 'Sign In' link as follows:<!-- <a class="Login" onclick="$signInAction"><%=_ctx.appRes("UILoginForm.label.Signin")%></a> --> <a class="Login" href="/portal/sso"><%=_ctx.appRes("UILoginForm.label.Signin")%></a>In the
gatein.ear/web.war/groovy/portal/webui/component/UILogoPortlet.gtmplfile modify the 'Sign In' link as follows:<!-- <a onclick="$signInAction"><%=_ctx.appRes("UILogoPortlet.action.signin")%></a> --> <a href="/portal/sso"><%=_ctx.appRes("UILogoPortlet.action.signin")%></a>Replace the entire contents of
gatein.ear/02portal.war/login/jsp/login.jspwith:<html> <head> <script type="text/javascript"> window.location = '/portal/sso'; </script> </head> <body> </body> </html>Add the following Filters at the top of the filter chain in
gatein.ear/02portal.war/WEB-INF/web.xml:<filter> <filter-name>LoginRedirectFilter</filter-name> <filter-class>org.gatein.sso.agent.filter.LoginRedirectFilter</filter-class> <init-param> <!-- This should point to your SSO authentication server --> <param-name>LOGIN_URL</param-name> <param-value>http://localhost:8888/opensso/UI/Login?realm=gatein&goto=http://localhost:8080 /portal/private/classic</param-value> </init-param> </filter> <filter> <filter-name>OpenSSOLogoutFilter</filter-name> <filter-class>org.gatein.sso.agent.filter.OpenSSOLogoutFilter</filter-class> <init-param> <!-- This should point to your OpenSSO authentication server --> <param-name>LOGOUT_URL</param-name> <param-value>http://localhost:8888/opensso/UI/Logout</param-value> </init-param> </filter> <!-- place the filters at the top of the filter chain --> <filter-mapping> <filter-name>LoginRedirectFilter</filter-name> <url-pattern>/*</url-pattern> </filter-mapping> <filter-mapping> <filter-name>OpenSSOLogoutFilter</filter-name> <url-pattern>/*</url-pattern> </filter-mapping>Replace the
InitiateLoginServletdeclaration ingatein.ear/02portal.war/WEB-INF/web.xmlwith:<servlet> <servlet-name>InitiateLoginServlet</servlet-name> <servlet-class>org.gatein.sso.agent.GenericSSOAgent</servlet-class> <init-param> <param-name>ssoServerUrl</param-name> <param-value>http://localhost:8888/opensso</param-value> </init-param> <init-param> <param-name>ssoCookieName</param-name> <param-value>iPlanetDirectoryPro</param-value> </init-param> </servlet>
From now on, all links redirecting to the user authentication pages will redirect to the OpenSSO centralized authentication form.
SPNEGO (Simple and Protected GSSAPI Negotiation Mechanism) is used to authenticate transparently through the web browser after the user has been authenticated when logging-in his session.
A typical use case is the following:
Users logs into his desktop (Such as a Windows machine).
The desktop login is governed by Active Directory domain.
User then uses his browser (IE/Firefox) to access a web application (that uses JBoss Negotiation) hosted on JBoss EPP.
The Browser transfers the desktop sign on information to the web application.
JBoss EAP/AS uses background GSS messages with the Active Directory (or any Kerberos Server) to validate the user.
The User has seamless SSO into the web application.
GateIn uses JBoss Negotiation to enable SPNEGO based desktop SSO for the Portal. Here are the steps to integrate SPNEGO with GateIn.
Activate the Host authentication Under conf/login-config.xml, add the following host login module:
<!-- SPNEGO domain -->
  <application-policy name="host">
   <authentication>
      <login-module code="com.sun.security.auth.module.Krb5LoginModule"
         flag="required">
         <module-option name="storeKey">true</module-option>
         <module-option name="useKeyTab">true</module-option>
         <module-option name="principal">HTTP/server.local.network@LOCAL.NETWORK</module-option>
         <module-option name="keyTab">/home/user/krb5keytabs/jboss.keytab</module-option>
         <module-option name="doNotPrompt">true</module-option>
         <module-option name="debug">true</module-option>
      </login-module>
   </authentication>
 </application-policy>
the 'keyTab' value should point to the keytab file that was generated by the kadmin kerberos tool. See the Setting up your Kerberos Development Environment guide for more details.
Extend the core authentication mechanisms to support SPNEGO Under deployers/jbossweb.deployer/META-INF/war-deployers-jboss-beans.xml, add 'SPNEGO' authenticators property
<property name="authenticators">
         <map keyClass="java.lang.String" valueClass="java.lang.String">
            <entry>
               <key>BASIC</key>
               <value>org.apache.catalina.authenticator.BasicAuthenticator</value>
            </entry>
            <entry>
               <key>CLIENT-CERT</key>
               <value>org.apache.catalina.authenticator.SSLAuthenticator</value>
            </entry>
            <entry>
               <key>DIGEST</key>
               <value>org.apache.catalina.authenticator.DigestAuthenticator</value>
            </entry>
            <entry>
               <key>FORM</key>
               <value>org.apache.catalina.authenticator.FormAuthenticator</value>
            </entry>
            <entry>
               <key>NONE</key>
               <value>org.apache.catalina.authenticator.NonLoginAuthenticator</value>
            </entry>

        <!-- Add this entry -->
        <entry>
          <key>SPNEGO</key>
          <value>org.jboss.security.negotiation.NegotiationAuthenticator</value>
        </entry>
         </map>
      </property>
Add the JBoss Negotiation binary copy $GATEIN_SSO_HOME/spnego/jboss-negotiation-2.0.3.GA.jar to lib
Add the Gatein SSO module binaries Add $GATEIN_SSO_HOME/spnego/gatein.ear/lib/sso-agent.jar, and $GATEIN_SSO_HOME/spnego/gatein.ear/lib/sso-spnego.jar to deploy/gatein.ear/lib
Activate SPNEGO LoginModule for GateIn Modify deploy/gatein.ear/META-INF/gatein-jboss-beans.xml, so that it looks like this:
<deployment xmlns="urn:jboss:bean-deployer:2.0">
  <application-policy xmlns="urn:jboss:security-beans:1.0" name="gatein-domain">
    <!-- Uncomment this for Kerberos based SSO integration -->
    <authentication>
      <login-module
         code="org.gatein.sso.spnego.SPNEGOLoginModule"
         flag="requisite">
         <module-option name="password-stacking">useFirstPass</module-option>
         <module-option name="serverSecurityDomain">host</module-option>
      </login-module>
      <login-module
         code="org.gatein.sso.agent.login.SPNEGORolesModule"
         flag="required">
      <module-option name="password-stacking">useFirstPass</module-option>
      <module-option name="portalContainerName">portal</module-option>
      <module-option name="realmName">gatein-domain</module-option>
      </login-module>
   </authentication>
  </application-policy>
</deployment>
Integrate SPNEGO support into the Portal web archive Switch GateIn authentication mechanism from the default "FORM" based to "SPNEGO" based authentication as follows: Modify gatein.ear/02portal.war/WEB-INF/web.xml
    <!--
    <login-config>
      <auth-method>FORM</auth-method>
      <realm-name>gatein-domain</realm-name>
        <form-login-config>
          <form-login-page>/initiatelogin</form-login-page>
            <form-error-page>/errorlogin</form-error-page>
      </form-login-config>
    </login-config>
    -->
    <login-config>
      <auth-method>SPNEGO</auth-method>
      <realm-name>SPNEGO</realm-name>
    </login-config>
Integrate request pre-processing needed for SPNEGO via filters. Add the following filters to the web.xml at the top of the Filter chain:
   <filter>
      <filter-name>LoginRedirectFilter</filter-name>
      <filter-class>org.gatein.sso.agent.filter.LoginRedirectFilter</filter-class>
      <init-param>
        <!-- This should point to your SSO authentication server -->
        <param-name>LOGIN_URL</param-name>
        <param-value>/portal/private/classic</param-value>
      </init-param>
    </filter>
    <filter>
        <filter-name>SPNEGOFilter</filter-name>
        <filter-class>org.gatein.sso.agent.filter.SPNEGOFilter</filter-class>
    </filter>

    <filter-mapping>
      <filter-name>LoginRedirectFilter</filter-name>
      <url-pattern>/*</url-pattern>
    </filter-mapping>
    <filter-mapping>
        <filter-name>SPNEGOFilter</filter-name>
        <url-pattern>/*</url-pattern>
    </filter-mapping>
Modify the Portal's 'Sign In' link to perform SPNEGO authentication Modify the 'Sign In' link on gatein.war/web.war/groovy/groovy/webui/component/UIBannerPortlet.gtmpl as follows:
<!--
<a onclick="$signInAction"><%=_ctx.appRes("UILoginForm.label.Signin")%></a>
-->
<a href="/portal/sso"><%=_ctx.appRes("UILoginForm.label.Signin")%></a>
Start the GateIn Portal
sudo ./run.sh -Djava.security.krb5.realm=LOCAL.NETWORK -Djava.security.krb5.kdc=server.local.network -c spnego -b server.local.network
Login to Kerberos
kinit -A demo
You should be able to click the 'Sign In' link on the GateIn Portal and the 'demo' user from the GateIn portal should be automatically logged in