The procedure of each step will be detailed as follows:
Step 1. Copy a site's content folder with its version history.
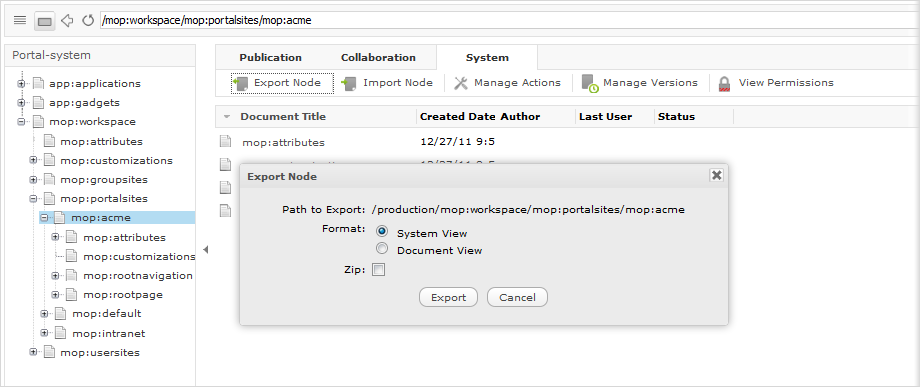
1. Go to the Sites Management drive.
2. Open the site node, for example "acme".
3. Click Export Node to export the node with its version history as below:
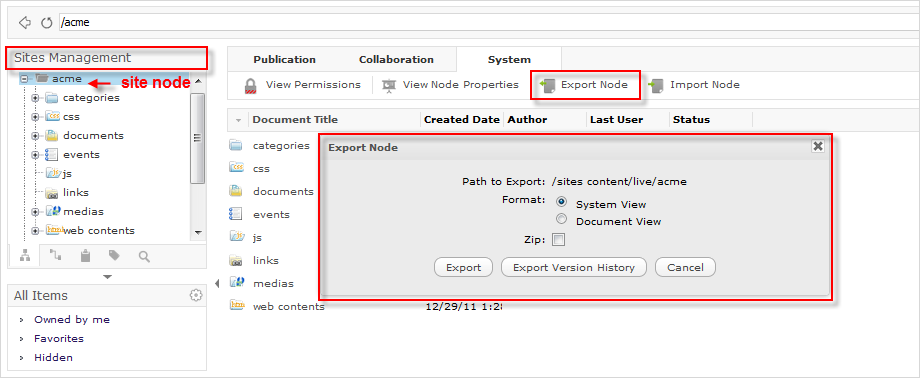
4. Select Export and Export Version History to perform the exporting.
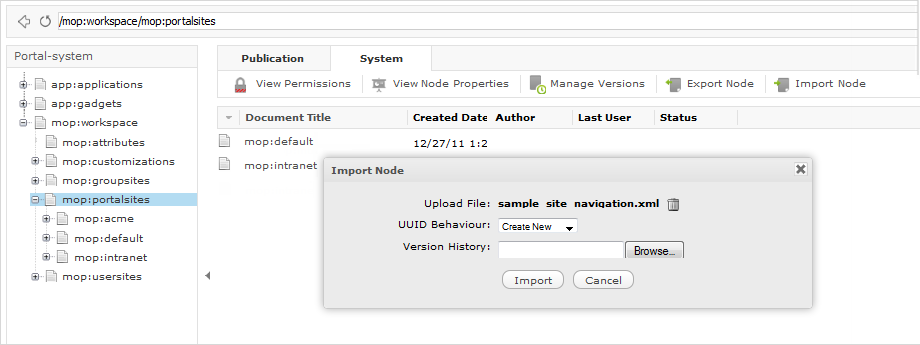
5. Navigate to the node where you want to import the file, then click Import Node to open the Import Node form.
6. Select the exported nodes and version history to be imported.
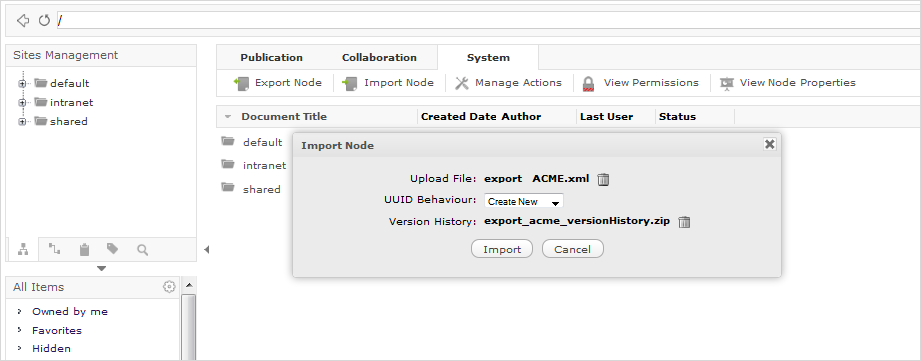
One pop-up message will appear to inform that you have imported successfully.
Step 2. Copy navigation nodes of sites.
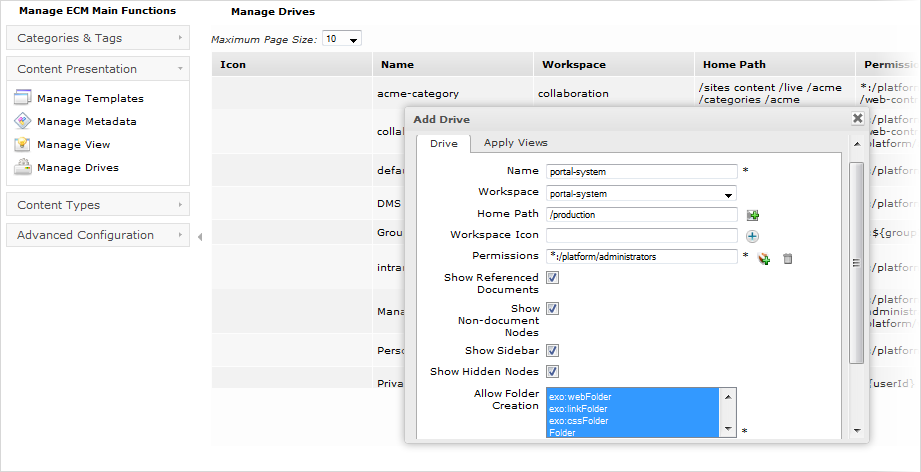
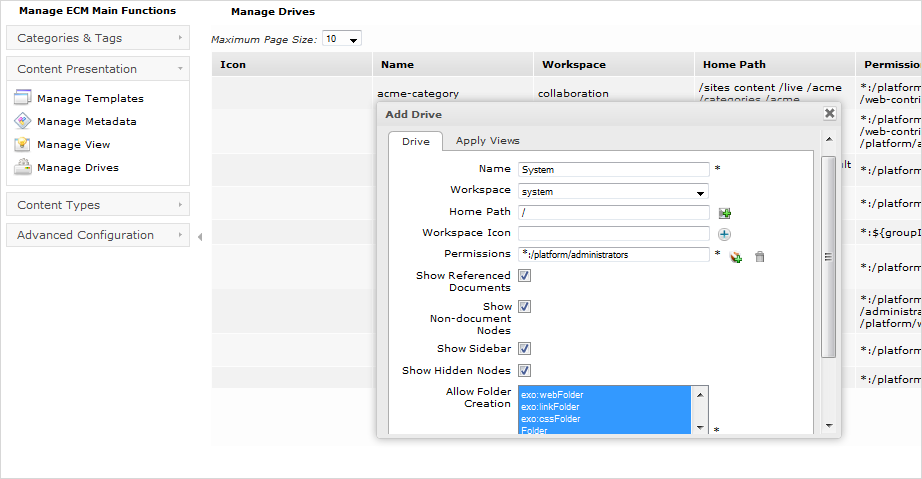
1. Go to the Content Administration page and add a new drive to both target and source servers.
2. Export the navigation node.
3. Import the nodes navigation.
Step 3. Copy templates of node types.
1. Add the System drive to both servers.
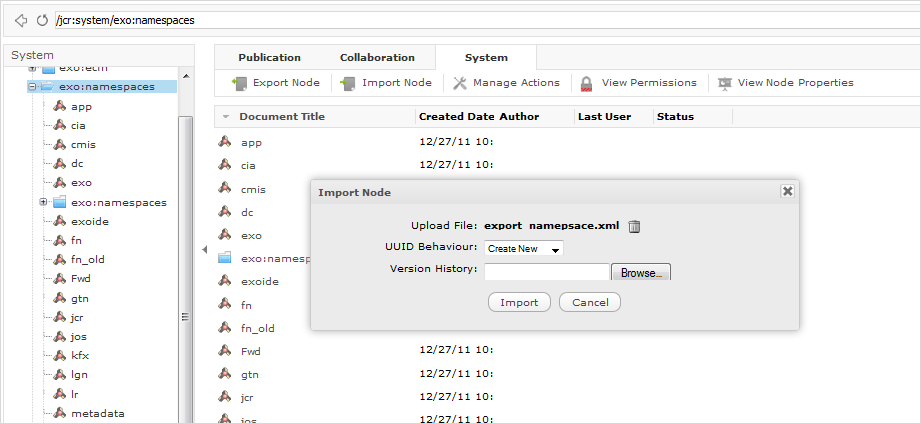
2. Open system:/jcr:system/exo:namespaces/{namespace_name}, and export it.
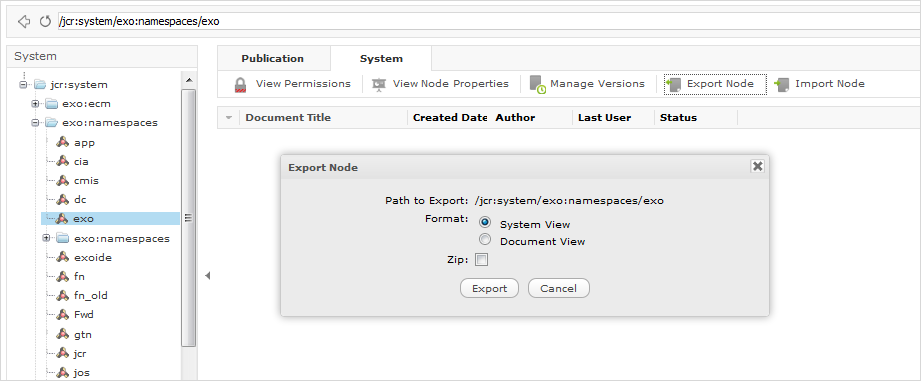
3. Open system:/jcr:system/exo:namespaces/, and import the exported file as described in Step 2 .
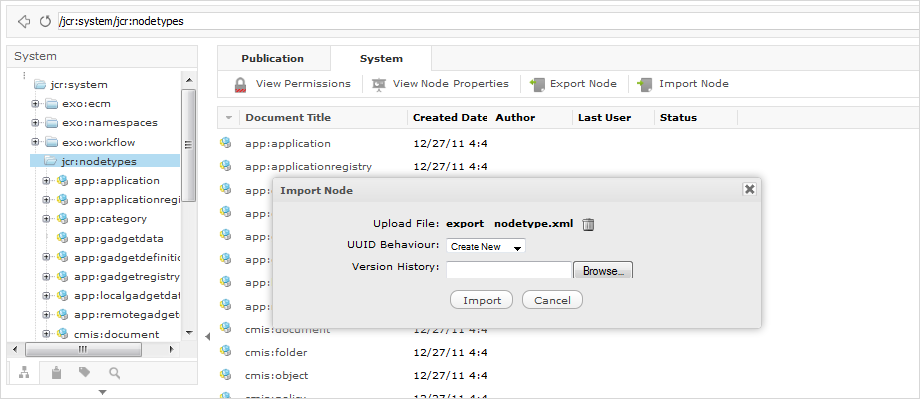
4. Open system:/jcr:system/jcr:nodetypes/{node_type}, and export it.

5. Open system:/jcr:system/jcr:nodetypes/, and import the exported file as described in Step 4 .
Note
If you have some specific JCR namespaces and node types, you need to import them into the new server.
Step 4. Copy the WCM template.
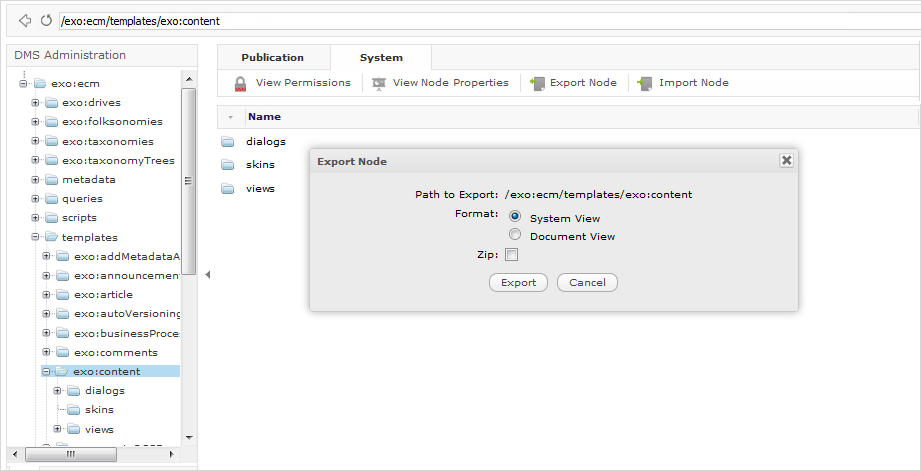
1. Open the DMS Administration drive.
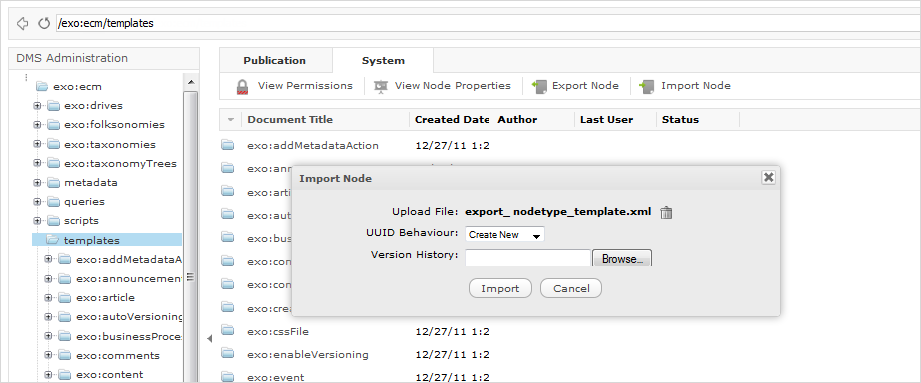
2. Open dms-system:/exo:ecm/templates/{node_type}, and export it.
3. Open dms-system:/exo:ecm/templates/, and import the exported file.
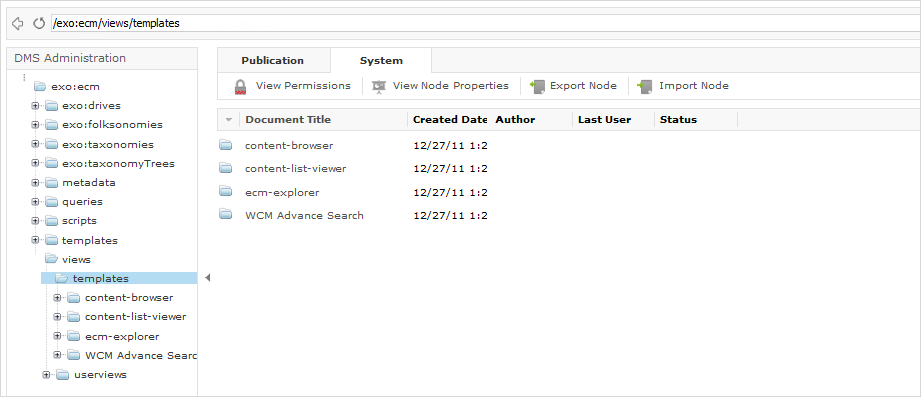
Also, for the CLV/PCLV templates, you can find all template views defined in the dms-system:/exo:ecm/views path with:
userviews: this folder contains views of Sites Explorer with a set of actions.
templates: where you can find all gtmpl templates of:
Category Navigation Portlet templates.
Content List Viewer (CLV) templates and its paginator templates.
content-browser templates (Deprecated Portlet).
ecm-explorer templates define how to display nodes in the Sites Explorer portlet, such as CoverFlow template, IconView template.
Parameterized Content List Viewer (PCLV) templates and its paginator templates.
WCM Advanced Search is used in the WCM Search portlet to define the form, layout, result and result's paginator.
If you want to reuse one of the non-predefined templates above, simply export and import it into the new server at the same place.
Note
If you have some specific WCM (CLV/PCLV) views and/or templates of node types, you will need to import them into the new server.
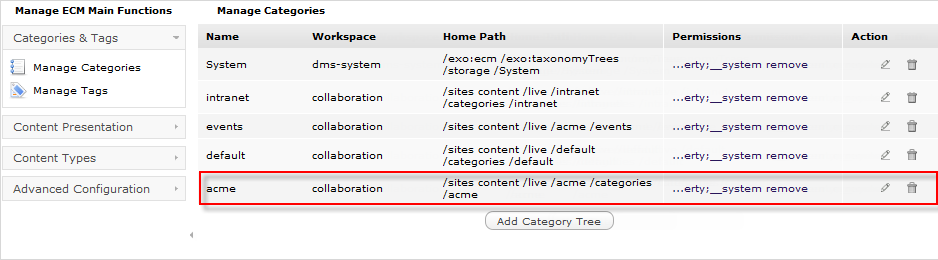
By importing the whole site as described in the Copy a site's content folder with its version history section, you will also have the Taxonomy tree imported. The default location where the site's Taxonomy is placed in a sub-folder is named category. So, you do not need to export or import them because this step is automatically done. But the Taxonomy tree definition is still not fully imported in the new server. What you need to do is to add this Taxonomy tree definition by following these steps:
1. Open the DMS Administration drive in the new server.
2. Go to dms-system:/exo:ecm/exo:taxonomyTrees/definition/.
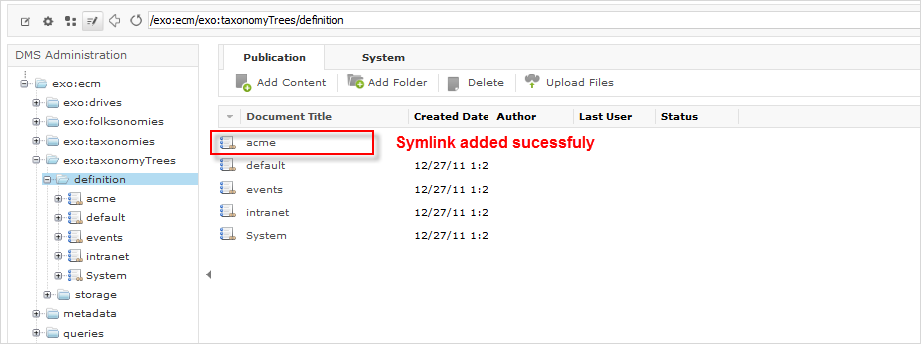
3. Add a symlink to the Taxonomy Tree Root Node, for example collaboration:/sites content/live/acme/categories/acme.
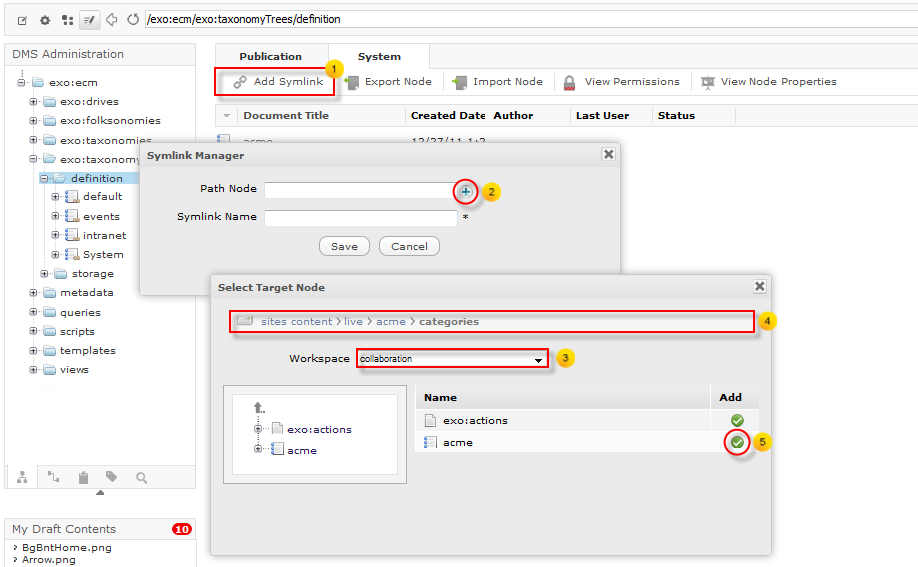
The name of symlink is displayed as "acme".

The symlink will be generated as below:
In some cases, to see changes, you need to clear the cache by disconnecting or restarting the server.
Step 6. Copy metadata templates.
1. Open the DMS Administration drive in the new server.
2. Go to /exo:ecm/metadata/{meta_data_name}.
3. Export and import it in the same location in the new server again.
1. Open the DMS Administration drive in the new server.
2. Go to /exo:ecm/queries/{query_name}.
3. Export and import it in the same location in the new server again.
1. Open the DMS Administration drive in the new server.
2. Go to /exo:ecm/scripts/ecm-explorer.
You will find three folders referring to the three types of groovy scripts in eXo Platform, including:
action: The action scripts are launched when an ECM action triggers them. For more information, refer to Actions Concept.
interceptor: Interceptor scripts are triggered before and/or after the JCR node is saved, or when a node is created or edited. They are used to either validate the value entered in a form or to manipulate the newly created node, for example, to map the new node with a forum thread or any other type of discussion areas.
widget: Widget scripts are used to fill widgets, such as a select box in a dynamic way.
3. Export your customized script in the same location in the new server.
Step 9. Copy drive configurations.
1. Open the DMS Administration drive in the new server.
2. Go to /exo:ecm/exo:drives/{drive_name}.
3. Export and import it in the same location in the new server again.
1. Open the drive that points into the Portal-System Workspace.
2. Go to your gadget by following the portal-system:/production/app:gadgets/{gadget_name} path.
3. Export and import it in the same location in the new server again.
After importing the site navigation nodes, the site may look quite broken, so you need to restart the server first. After the server is restarted, the site will look like: