The function allows you to change the behavior and the layout of Mail to your needs.
1. Click  on the Toolbar to open the Settings form.
2. Change settings for the Mail application in 4 tabs: General, Return Receipts, Layout and Delegation.
i. In the General tab, change basic information.

Details:
| Field | Description |
|---|---|
| Select a Default Account | Set the default account if you use multiple accounts. |
| Number of conversations per page | Select the number of conversations which will be displayed per page from the list: 10, 20, 30, or 70 messages. |
| Automatically check messages every | Select the time interval to automatically check the system, including 6 available options: Never, 5 minutes, 10 minutes, 20 minutes, 30 minutes and 1 hour. |
| Compose message with | Select the editor type for composing messages, including Rich Text and Plain Text. |
| Reply to message with |
Select the message type to reply, including - Original message as attachment: Reply to messages with attachments. - Original message text quoted: Reply to messages with text only. |
| Forward message with |
Select the message type to reply, including - Original message as attachment: Forward messages with attachment. - Original message text quoted: Forward messages with text only. |
| Save sent messages in the 'Sent' folder | Tick this checkbox to save sent messages in the 'Sent' folder. |
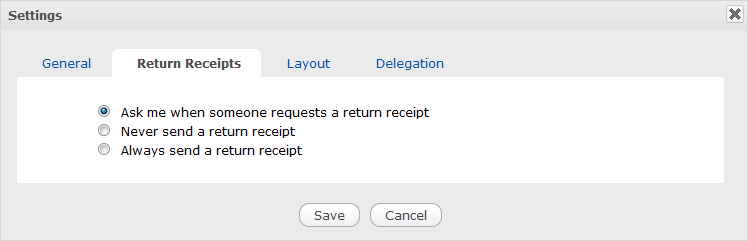
ii. In the Return Receipts tab, set options to specify what the Mail application should do when it gets a "Return Receipt" request. It means that you can determine whether to send a notification of having read the message to the sender or not.
Details:
| Field | Description |
|---|---|
| Ask me when someone requests a return receipt | If you receive a message with the Return Receipt request, the Mail application will show a pop-up message for you to decide sending a notification of having read the message to the sender or not. |
| Never send a return receipt | The Mail application will ignore all Return Receipt requests from senders. |
| Always send a return receipt | If you receive a message with the Return Receipt request, the Mail application will automatically send a notification of having read the message to the sender without asking for your permission. |
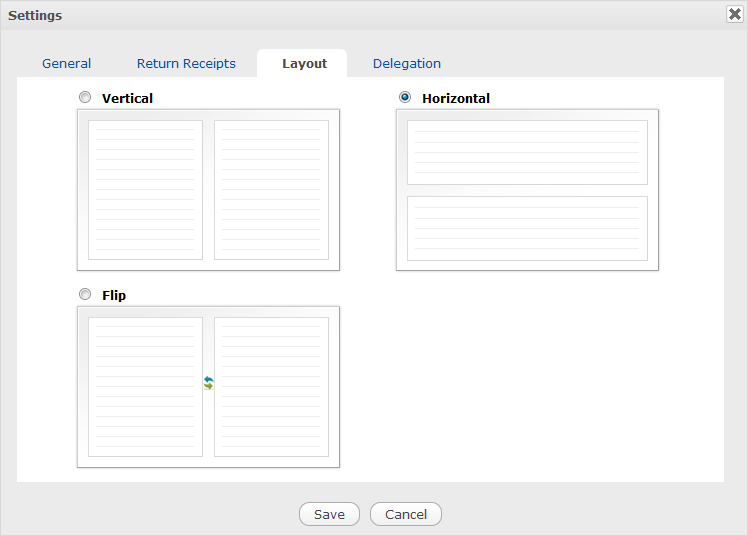
iii. In the Layout tab, personalize the Mail layout by ticking another checkbox corresponding to your desired layout. The Horizontal Split type is set by default.
iv. In the Delegation tab, delegate your account to any registered user in the system as follows:
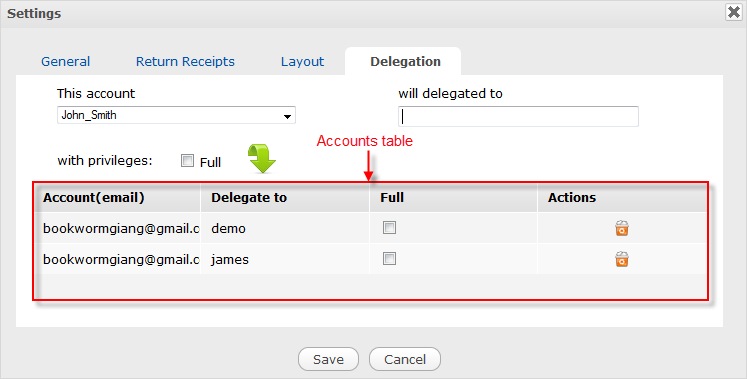
Select the account you want to delegate from the This account list by clicking
 .
.
Enter the name of user to whom you want to delegate your selected account in the will be delegated to field.
Tick the Full checkbox next to
 if you want to assign all permissions, which can be done on your selected account, to the delegated user. If this checkbox is not selected, the user can only view mails of the delegated account.
Click
to accept adding your delegated user. The delegated user will be updated in the Accounts table. In this table, you can revoke the Full permission or add the Full permission to your delegated accounts by unticking or ticking the relevant checkbox respectively in the Full column of the Accounts table.
3. Click Save to accept your changes.