This lab will help you set up the PDE (Plug-in Development Environment). It will also take you through the process of generating the Hello World template, and explain the pieces of the code where applicable.
Select the "Target Platform" page under Plug-in Developmeznt in the Window->Preferences dialog and verify the location of your target platform. This step sets the run-time workbench instance path, which is where your plug-in will be run when testing it. You don't need to change any values here, but look around to see what is available to be changed should you need it.
The first thing you should do is switch to the plug-in development perspective. To do this, select Window->Open Perspective->Other... and choose Plug-in Development. From here, the next step is to create a new plug-in project. Select File->New->Project... and choose Plug-in Project in the list of wizards shown at right. | 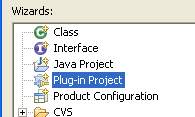 |
You should call your plug-in Example1HelloWorld. You can click next twice without making any changes. From here, select the Hello World template. | 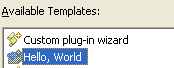 |
After expanding your project from the package manager, it should look something like this. So what has been created for us? First we see Example1HelloWorldPlugin.java, which is the actual plugin class first loaded by the eclipse platform. We also see a SampleAction.java as well. Finally, there is the MANIFEST.MF and plugin.xml files. If we look at the Example1HelloWorldPlugin class, we notice that it has a singleton instance which is used by the platform and can be used by you as well. There's no reference anywhere to the SampleAction. Most of the methods completed just complete behaviors expected by the eclipse platform. The SampleAction just pops up a dialog that says, predictably, Hello World. | 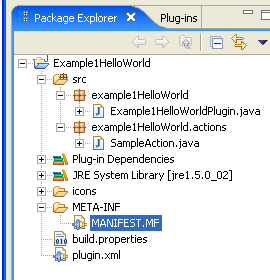 |
The MANIFEST.MF and plugin.xml files can both be modified using the same graphical editor, accessed by double-clicking on either file in the package explorer view. The plugin.xml file contains information about your plugin, how to load it, and what extensions it plans on using. You can also see the raw text for each file by clicking on their respective tabs inside their editor.
You can declare your intention to use extension points through the gui interface, which will then automatically update the MANIFEST.MF and plugin.xml files.
To run this plug-in, right click on its project, and select the run as->Eclipse Application menu item. This will invoke the runtime environment used to test your plug-in. When the new eclipse instance is loaded, you'll notice a Sample Menu menu with a Sample Action sub-menu. |  |
The code that links your plug-in with the top-level menu is the extension points your plug-in are using. Looking at your plug-in's plugin.xml file's Extensions tab shows you an extension to org.eclipse.ui.actionSets, which directs execution to the example1HelloWorld.actions.SampleAction action.
To the right is what we see when browsing the extensions tab of the plugin. What it shows is that we have one extension to the org.eclipse.ui.actionSets extension point. That extension defines a new menu, and an action to be added to that menu. The action element contains a class name field to help facilitate lazy initialization. | 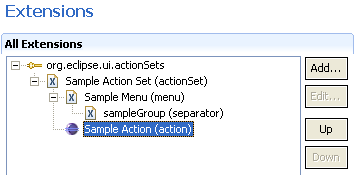 |
The xml code for this is as follows:
<extension
         point="org.eclipse.ui.actionSets">
      <actionSet
            label="Sample Action Set"
            visible="true"
            id="Example1HelloWorld.actionSet">
         <menu
               label="Sample &Menu"
               id="sampleMenu">
            <separator
                  name="sampleGroup">
            </separator>
         </menu>
         <action
               label="&Sample Action"
               icon="icons/sample.gif"
               class="example1HelloWorld.actions.SampleAction"
               tooltip="Hello, Eclipse world"
               menubarPath="sampleMenu/sampleGroup"
               toolbarPath="sampleGroup"
               id="example1HelloWorld.actions.SampleAction">
         </action>
      </actionSet>
   </extension>