The JBoss jBPM GPD comes as a plugin for the well-known Eclipse IDE. So a prerequisite to install the Designer is of course that you have a version of Eclipse up and running. The release of the jBoss jBPM GPD targeted in this document is the beta1 release. This release should work with all Eclipse 3.1 releases starting from M7. If you don't have the right Eclipse copy, you can download it from http://www.eclipse.org. The installation of the webtools project is optional as the necessary plugins are included in the JBoss jBPM GPD download. The download comes as a zipped Eclipse update site. Download the 3.0 release from http://www.jbpm.org. The 3.0 release of the designer comes bundled with the corresponding 3.0 releases of the core jBPM project and the jBPM database project.
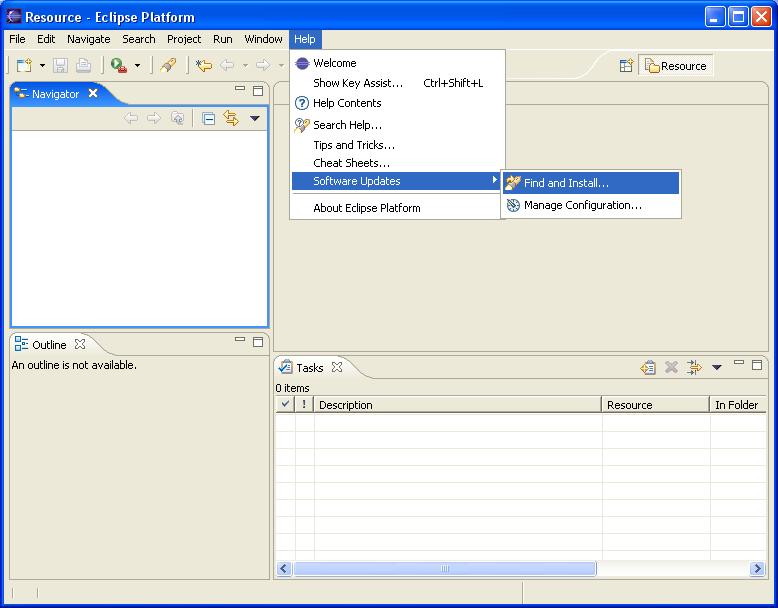
Having Eclipse up and running and the JBoss jBPM GPM package downloaded somewhere on your harddrive, let's describe the process of installing the plugin. Experienced Eclipse users will feel very comfortable with this description as it is the normal plugin installation mechanism for local archive update sites. As is illustrated on Figure 1.1, “Find and Install ” you have to navigate to the 'Find and Install...' submenu of the Help menu.
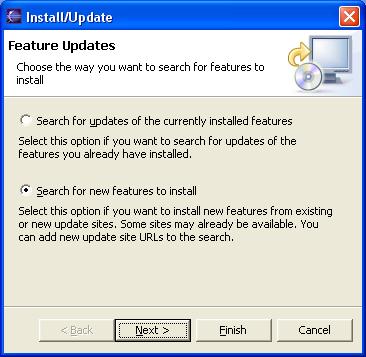
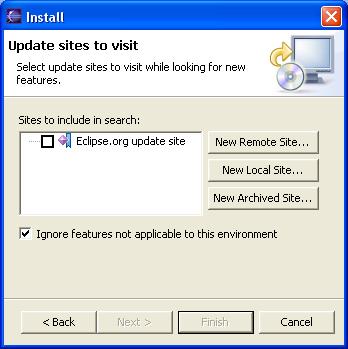
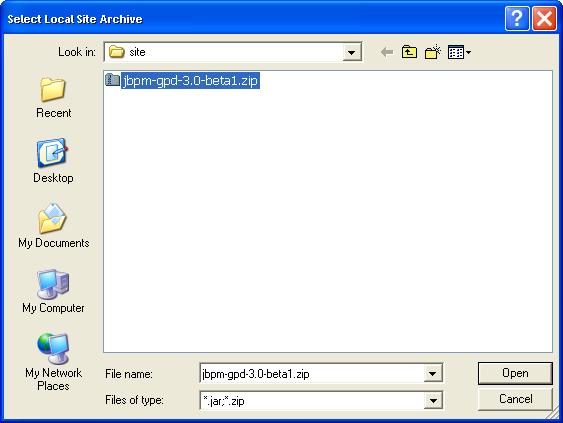
Clicking the 'Find and Install...' submenu shown above results in the opening of a wizard, as shown in Figure 1.2, “Search New Features ”. This wizard enables you to choose between searching for updates of currently installed plugins and searching for new features. This is the option we need, so we select it and push the 'Next' button. On the next page of the wizard, shown in Figure 1.3, “Update Sites to Visit ”, we click the 'New Archived Site...' button. The 'Select Local Archive Site' dialog opens (Figure 1.4, “Select Local Archive Site ”), we navigate to the freshly downloaded zipped update site and select it.
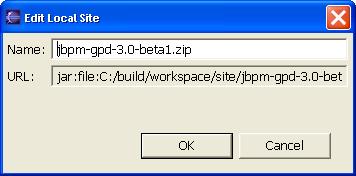
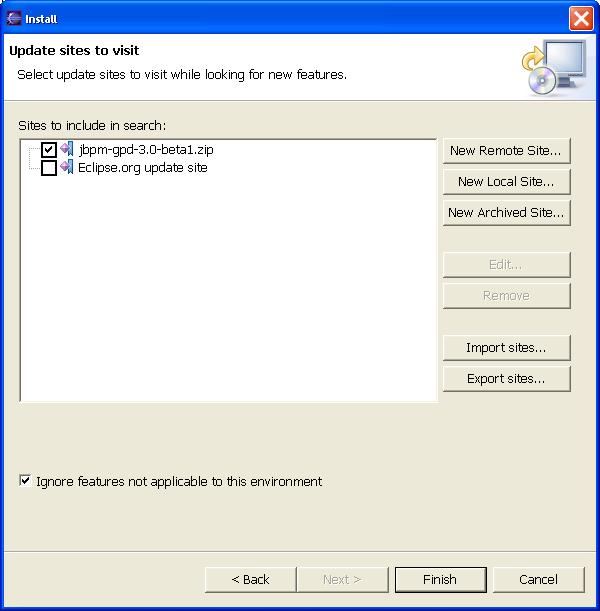
Selecting the archive file and clicking the 'Open' button brings us to another dialog that enables us to edit the name of the update site (Figure 1.5, “Edit Local Site Name ”). We accept the defaults and this brings us back to the installation wizard (Figure 1.6, “Select Update Site to Visit ”). The selected archive containing the jBPM Designer plugin site should appear. Make sure the checkbox next to it is selected before clicking the 'Finish' button.
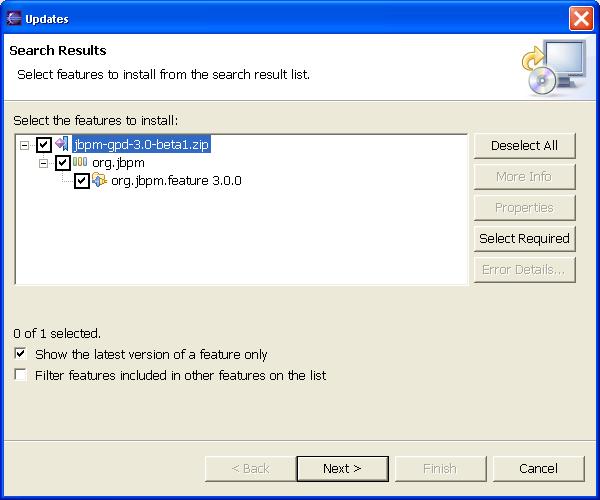
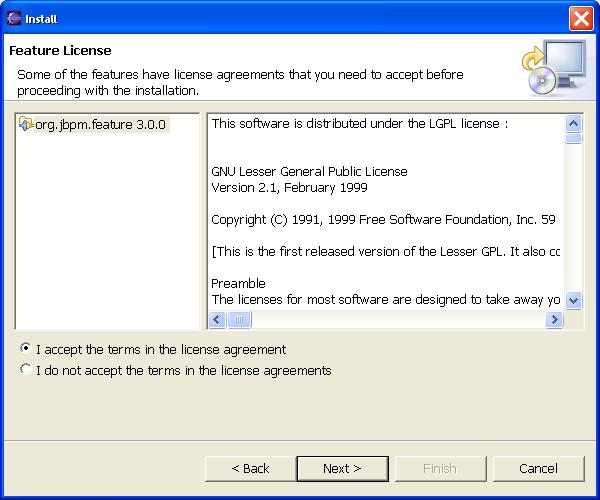
The 'Select Update Site' wizard closes but we aren't done yet as the 'Updates' wizard opens immediately (Figure 1.7, “Select the Feature to Install ”). In this wizard expand the tree of your newly added update site, select the checkbox next to the 'org.jbpm.ide.feature feature 3.0.0' feature and click the 'Next' button. We arrive on the 'Accept Feature License' page of the wizard (Figure 1.8, “Accept Feature License ”). Select 'I accept the terms in the license agreement' if you do and click the 'Next' button again.
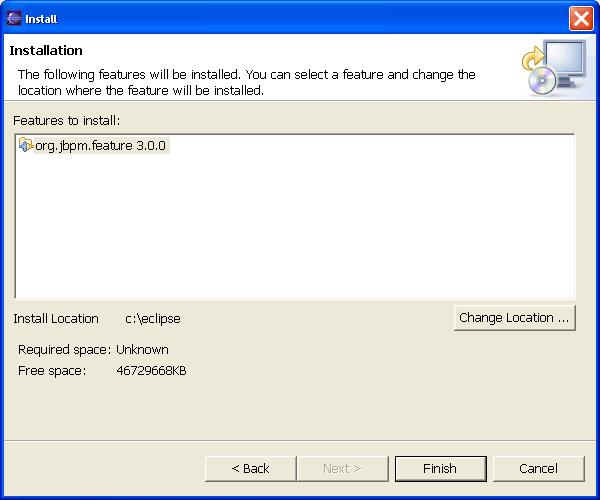
Clicking on the 'Next' button in the 'Accept Feature License' page has brought us on the final page of this installation wizard (Figure 1.9, “Install the Selected Feature ”) : the 'Installation' page. Click 'Finish' to end this wizard.
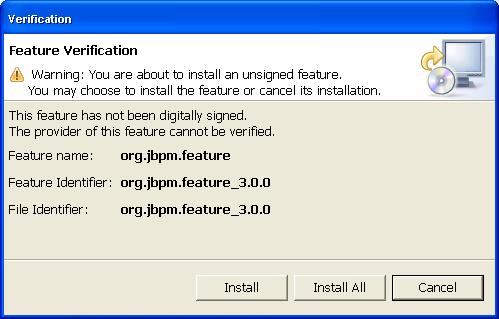
For a moment, a progress monitor appears (Figure 1.10, “Progress of the Download ”), indicating that Eclipse is busy extracting the necessary information out of the archive file to be able to install the contained plugins. After a while a new wizard appears (Figure 1.11, “Feature Verification ”).

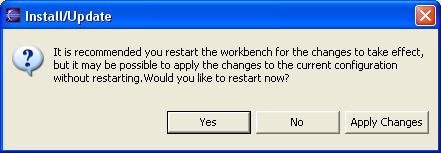
Clicking on the 'Install All' button results in a progress dialog showing up (Figure 1.12, “Installation Progress ”). After the installation is finished another dialog asks us whether or not to restart the workbench immediately (Figure 1.13, “Restart the Workbench ”. We want to be able to use the newly installed plugins immediately so we click 'Yes'.

Congratulations. The JBoss jBPM GPD plugin is installed and ready to use. Let's see how we can set up a project and create a process definition in the following chapter.