This chapter addresses migration issues from version 2.2 to 2.4 of JBoss Portal.
JBoss Portal 2.4 comes with dedicated web application for database migration. This application will migrate your existing JBoss Portal 2.2 database data to a new one, for use with JBoss Portal 2.4.
Warning
This migration process should be performed before JBoss Portal 2.4 deployment. Follow the exact steps below, in order, or ugly scary things may happen!You will need two database instances for this migration process to function:
Source JBP 2.2 database from which we migrate portal data. (You should already have this!)
Destination JBP 2.4 database to which we migrate portal data.
Before you begin the process you must create a separate database to which the data will be migrated. Note that the Migration Application performs a Hibernate SchemaExport which drops and recreates tables - It is recommended that you backup your database before starting!
For our example, we have two databases... the existing one for JBoss Portal 2.2, and the new (empty) one for JBoss Portal 2.4:
JBoss Portal 2.2 DB: jbossportal22
JBoss Portal 2.4 DB: jbossportal24
We will use the above database naming, as examples in the next chapter on configuring the datasource.
The Migration Application will need access to both databases, while its running. For this reason, we need to make available both JBoss Application Server datasource files.
You should have an existing JBoss Portal 2.2 datasource, portal-ds.xml or portal-*-ds.xml file that looks like this:
               <?xml version="1.0" encoding="UTF-8"?>
               <datasources>
                  <local-tx-datasource>
                     <jndi-name>PortalDS</jndi-name>
                     <connection-url>jdbc:mysql://localhost:3306/jbossportal22?useServerPrepStmts=false</connection-url>
                     <driver-class>org.gjt.mm.mysql.Driver</driver-class>
                     <user-name>portal</user-name>
                     <password>portalpassword</password>
                  </local-tx-datasource>
               </datasources>
Now, you will need to create a second datasource for the destination database. In our example we will create, portal-migration-ds.xml file that looks like this:
               <?xml version="1.0" encoding="UTF-8"?>
               <datasources>
                  <local-tx-datasource>
                     <jndi-name>PortalDS_2_4</jndi-name>
                     <connection-url>jdbc:mysql://localhost:3306/jbossportal24?useServerPrepStmts=false</connection-url>
                     <driver-class>org.gjt.mm.mysql.Driver</driver-class>
                     <user-name>portal</user-name>
                     <password>portalpassword</password>
                  </local-tx-datasource>
               </datasources>
The JBoss Portal Migration Application can be obtained either as a ready to deploy web application or in source form.
You can find a prepared binary at:
Download section of JBoss Portal project page
You can obtain portal sources from either:
Download section of JBoss Portal project page
CVS by running following command:
cvs -d :pserver:anonymous@anoncvs.forge.jboss.com:/cvsroot/jboss co jboss-portal-2.4
Using the second method you will always have all latest updates from portal 2.4 cvs branch
After downloading the sources you need to build the Migration Application. Before you start be sure you have JBOSS_HOME environment variable set pointing to JBoss Application Server directory. Migration Application archive can be build using following commands:
                  cd jboss-portal-2.4
                  cd build
                  ./build.sh
                  cd ..
                  cd migration
                  ./build.sh
Deployable web application archive can be found at jboss-portal-2.4/migration/output/lib/portal-migration.war
You can also deploy it automatically by executing:
                  cd jboss-portal-2.4
                  cd migration
                  ./build.sh deploy
The steps below will guide you through deploying and running the migration application:
Shut down JBoss Application Server
Undeploy/Remove JBoss Portal 2.2 (JBOSS_HOME/server/default/deploy/jboss-portal.sar)
Delete JBOSS_HOME/server/default/data/portal/cms (This directory will be created for you, once again, when JBoss Portal 2.4 initializes.
Deploy the two necessary datasource descriptors, from Section 4.1.2, “DataSource Requirements/Preparation” to JBOSS_HOME/server/default/deploy/*
Deploy the Migration Application, you obtained from Section 4.1.3, “Obtaining the Migration Application” to JBOSS_HOME/server/default/deploy/portal-migration.war
Start JBoss Application Server
After deploying Migration Application you can access it at http://localhost:8080/portal-migration . It is password protected so you need to specify:
User: admin
Password: simplePassword
Note
The Password can be changed in portal-migration.war/WEB-INF/classes/users.properties file. Remember to always change the password to a less trivial one, or undeploy the war file after the migration process.If you logged in successfully you should access this page:

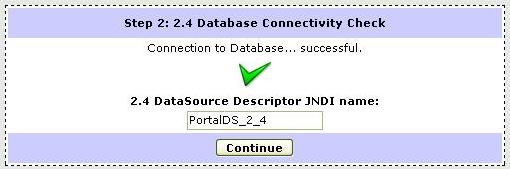
At Step 2: 2.4 Database Connectivity Check you need to provide datasouce name that points to JBoss Portal 2.4 database (the destination one)
Step 3: Create Tables

If both connections were valid and database schema was created successfully you can follow with the migration process. It is separated into following parts:
CMS Data Migration - migrates portal CMS tables content

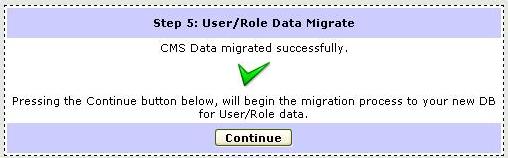
User/Role Data Migrate - migrates portal user, roles and relations beetween them
Portal Object Data Migrate - migrates whole portal objects structure. This means nodes like portals, pages and windows.

Portal Portlet Instance Data Migrate - migrates all portlet instances presented in portal. For each portlet instance its preferences are also persisted. Next, all already migrated users are iterated and user preferences related to portlet instance are migrated

Portal Security Data Migrate - migrates security data for portal objects and portlet instances.

Which should lead to a successfull end :)

Note
If any error occured during the migration process you will be provided with specific information and asked to retry that step |
 |
After running the Migration Application you need to perform some additional steps to finish the process:
Shutdown JBoss Application Server
Undeploy JBoss Portal 2.2 (jboss-portal.sar)
Undeploy the JBoss Portal 2.2 datasource descriptor
Delete JBOSS_HOME/server/default/data/portal/cms (This directory will be created for you, once again, when JBoss Portal 2.4 initializes.
Edit your 2.4 datasource file and modify the jndi name: <jndi-name>PortalDS</jndi-name>
Deploy JBoss Portal 2.4.
Start JBoss Application Server
Since 2.2 version of JBoss Portal data from portlet descriptor files are persisted in database. There is special <if-exists/> tag that describes what should portal do when he process descriptor and found data for such portlet application already in database. Therefore after database migration portal will use persisted data.
There are some differences beetween 2.2 and 2.4 descriptors. portlet-instances.xml file was reintroduced because of WSRP implementation caused portal architecture changes. Altough to avoid confusion legacy descriptors support was implemented in 2.4 so all 2.2 compiliant portlets should work out of box.
Even if your 2.2 portlets deployed successfully in 2.4 you should update their descriptors. Legacy descriptors support will expire in 2.6 and you will need to use new format to achive more complex targets.
Let's show descriptor changes using Car Demo portlet example which is a presentation of JSF portlet. It can be obtained at PortletSwap . In 2.2 prepared version it has such descriptor:
cardemo-object.xml
                  <?xml version="1.0" encoding="UTF-8"?>
                  <deployments>
                     <deployment>
                        <if-exists>overwrite</if-exists>
                        <parent-ref>default</parent-ref>
                        <page>
                           <page-name>samples</page-name>
                           <window>
                              <window-name>CarDemoWindow</window-name>
                              <instance-ref>CarDemoPortletInstance</instance-ref>
                              <region>center</region>
                              <height>0</height>
                           </window>
                        </page>
                     </deployment>
                     <deployment>
                        <if-exists>overwrite</if-exists>
                        <instance>
                           <instance-name>CarDemoPortletInstance</instance-name>
                           <component-ref>cardemo.CarDemoPortlet</component-ref>
                        </instance>
                     </deployment>
                  </deployments>
Note that as we said before you can successfully deploy it on JBoss Portal 2.4. But because such descriptor format is 2.2 specific you will end with a warning on JBoss Application Server console output:
            INFO  [PortletAppDeployment] These instances have been found in -object.xml, you should put them in the file
            c:\jboss-4.0.4.GA\server\default\.\deploy\cardemo.war\WEB-INF/portlet-instances.xml
            INFO  [PortletAppDeployment] <?xml version="1.0" encoding="utf-8" standalone="yes"?>
            <deployments>
               <deployment>
                  <instance>
                     <instance-id>CarDemoPortletInstance</instance-id>
                     <portlet-ref>CarDemoPortlet</portlet-ref>
                  </instance>
               </deployment>
            </deployments>
So all you need to do is to follow suggestion you got in the warning message :)
To have descriptors in our example portlet 2.4 valid you need to follow few simple steps:
In cardemo-object.xml file comment out whole <deployment>...</deployment> tag which contains <instance>...</instance> .
Copy the text you just commented out and put it in newly created portlet-instances.xml file.
Edit and change portlet-instances.xml file using following rules:
Surround whole file content with </deployments> tag.
Replace </instance-name> tag with </instance-id> one
Replace </component-ref> tag with </portlet-ref> one
So after updates your portlet descriptors should look like this:
cardemo-object.xml
                  <?xml version="1.0" encoding="UTF-8"?>
                  <deployments>
                     <deployment>
                        <if-exists>overwrite</if-exists>
                        <parent-ref>default</parent-ref>
                        <page>
                           <page-name>samples</page-name>
                           <window>
                              <window-name>CarDemoWindow</window-name>
                              <instance-ref>CarDemoPortletInstance</instance-ref>
                              <region>center</region>
                              <height>0</height>
                           </window>
                        </page>
                     </deployment>
                  </deployments>
portlet-instances.xml
                  <?xml version="1.0" encoding="utf-8" standalone="yes"?>
                  <deployments>
                     <deployment>
                        <instance>
                           <instance-id>CarDemoPortletInstance</instance-id>
                           <portlet-ref>CarDemoPortlet</portlet-ref>
                        </instance>
                     </deployment>
                  </deployments>