One of the stages within the architecture phase is to define the information model for the message types associated with the messages exchanges between the interacting participants.
This involves defining message schema for each example message. The schema could already exist and be reused, it could be based on existing schema and just need to be upgraded to support new requirements, or it may need to be defined from scratch.
An example of a schema associated with the purchasing model is the
store.xsd
shown here:
<?xml version="1.0" encoding="UTF-8"?>
<schema xmlns="http://www.w3.org/2001/XMLSchema" targetNamespace="http://www.jboss.org/examples/store" xmlns:tns="http://www.jboss.org/examples/store" elementFormDefault="qualified">

    <element name="BuyRequest" type="tns:BuyRequestType"></element>
    <element name="BuyConfirmed" type="tns:BuyConfirmedType"></element>
    <element name="AccountNotFound" type="tns:AccountNotFoundType"></element>
    <element name="BuyFailed" type="tns:BuyFailedType"></element>

    <complexType name="BuyRequestType">
        <attribute name="id" type="string"></attribute>
        <attribute name="product" type="string"></attribute>
        <attribute name="customer" type="string"></attribute>
    </complexType>

    <complexType name="BuyConfirmedType">
        <attribute name="id" type="string"></attribute>
        <attribute name="amount" type="integer"></attribute>
        <attribute name="deliveryDate" type="date"></attribute>
    </complexType>

    <complexType name="AccountNotFoundType">
        <attribute name="id" type="string"></attribute>
        <attribute name="reason" type="string"></attribute>
    </complexType>

    <complexType name="BuyFailedType">
        <attribute name="id" type="string"></attribute>
        <attribute name="reason" type="string"></attribute>
    </complexType>
</schema>
Once the schema has been defined, then the example messages need to be updated to reference the schema, as shown in the following
BuyRequest.xml
example message:
<tns:BuyRequest xmlns:xsi="http://www.w3.org/2001/XMLSchema-instance"
            xmlns:tns="http://www.jboss.org/examples/store"
            xsi:schemaLocation="http://www.jboss.org/examples/store ../schema/store.xsd "
            id="1" product="Laptop" customer="Joe" />
Once the association between example messages and the schema has been established, it is possible to validate the messages against the schema. Select the context menu associated with the XML file (e.g.
BuyRequest.xml
), and choose the
Validate
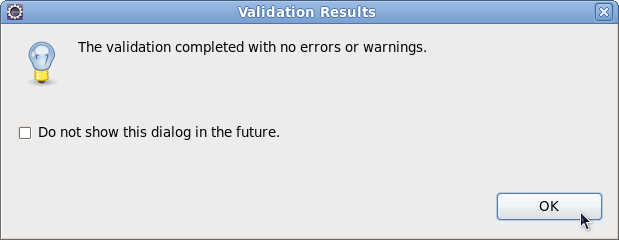
menu item. You should see the following message displayed, and no errors or warnings appear in the Problems or Markers view:
However, if we now introduce an error into this example message, for example change the attribute name 'customer' to 'customerX', and then perform the validation again, you will see an error has been reported:

Note
Don't forget to change the attribute name back to 'customer', and re-validate the XML file, before proceeding - as we will need the message be valid for the next section of the document.
For further information on how to use the validation capabilities within Eclipse, please read the Eclipse XML Validation Tutorial .
The next step in the development process is to specify a Choreography Model to implement the requirements described within the set of scenarios. Information on how to build a choreography can be found in the User Guide.
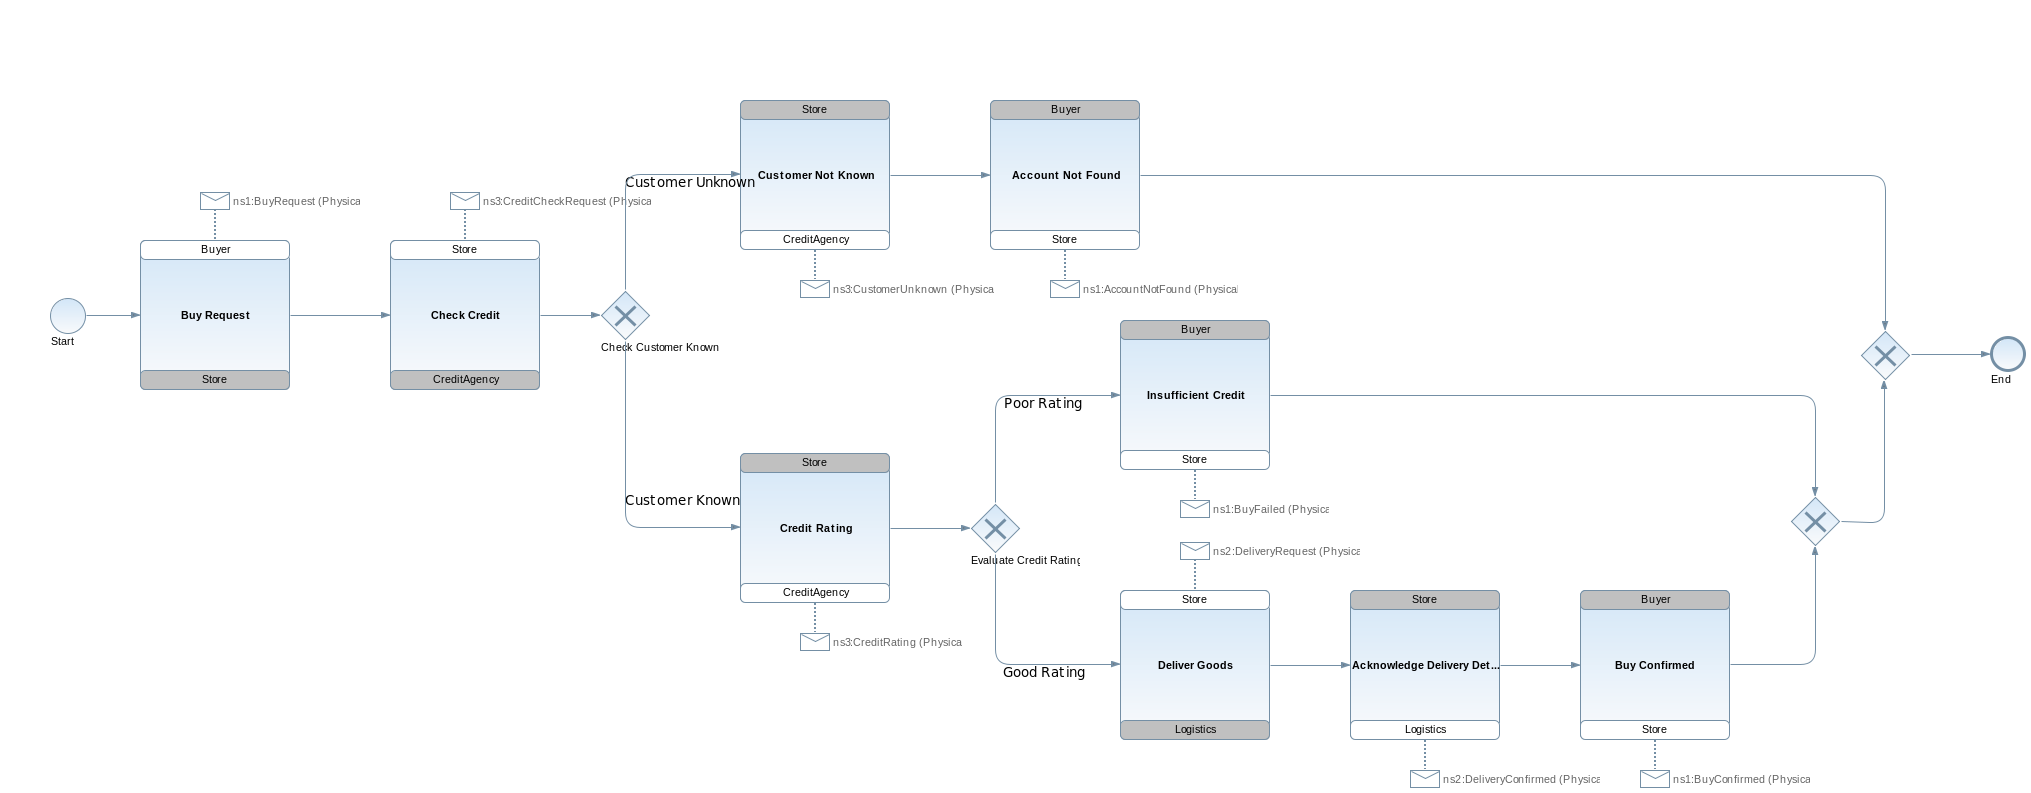
The choreography description for the Purchasing example can be found in
purchasing/architecture/PurchaseGoods.bpmn
, and looks like this:
The SAVARA tools can be used to validate the scenarios against the choreography description, to ensure that the choreography correctly implements the requirements. To test the
requirements/SuccessfulPurchase.scn
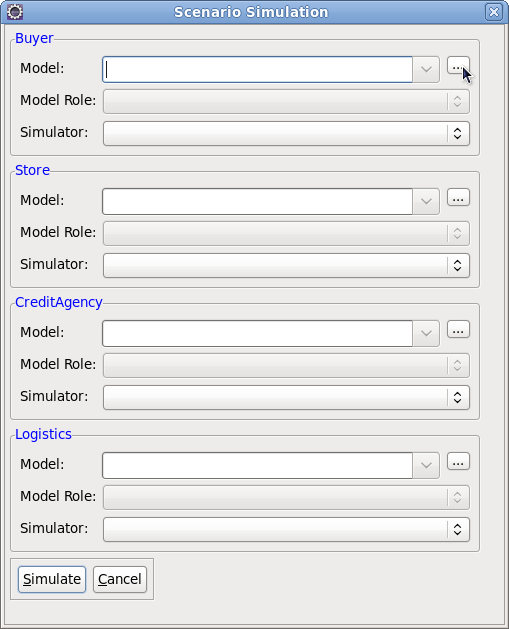
scenario against the choreography, launch the scenario editor by double-clicking on the scenario file, and then pressing the green
play
button in the toolbar. This will display a dlalog window used to configure what models and simulators are used for each role in the scenario:
When simulating all roles against a single model (i.e. a choreography), then simply browser for the model (using the ... button) - which in this case is the PurchaseGoods.bpmn file in the same Eclipse project (architecture folder), and then when asked "Should model be set for all roles", press the "Yes" button. This will setup the simulation configuration for all roles:
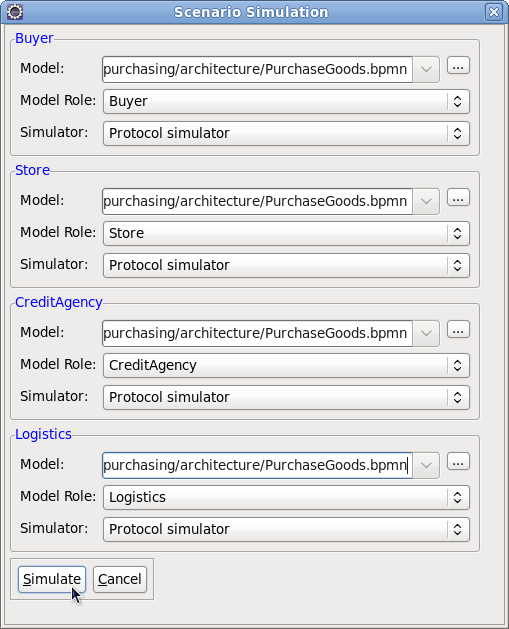
The simulators are all automatically initialised to "Protocol simulator", as this is the only simulator that supports the ".bpmn" type of model, and the model roles are initialised on a best guess basis. If the roles in the scenario are completely different names to the ones in the model (i.e. choreography), then the user will need to select the appropriate model roles to map from the scenario roles.
When the "Simulate" button has been pressed, and the simulation is complete, the scenario should look like the following image, indicating that the scenario completed successfully.
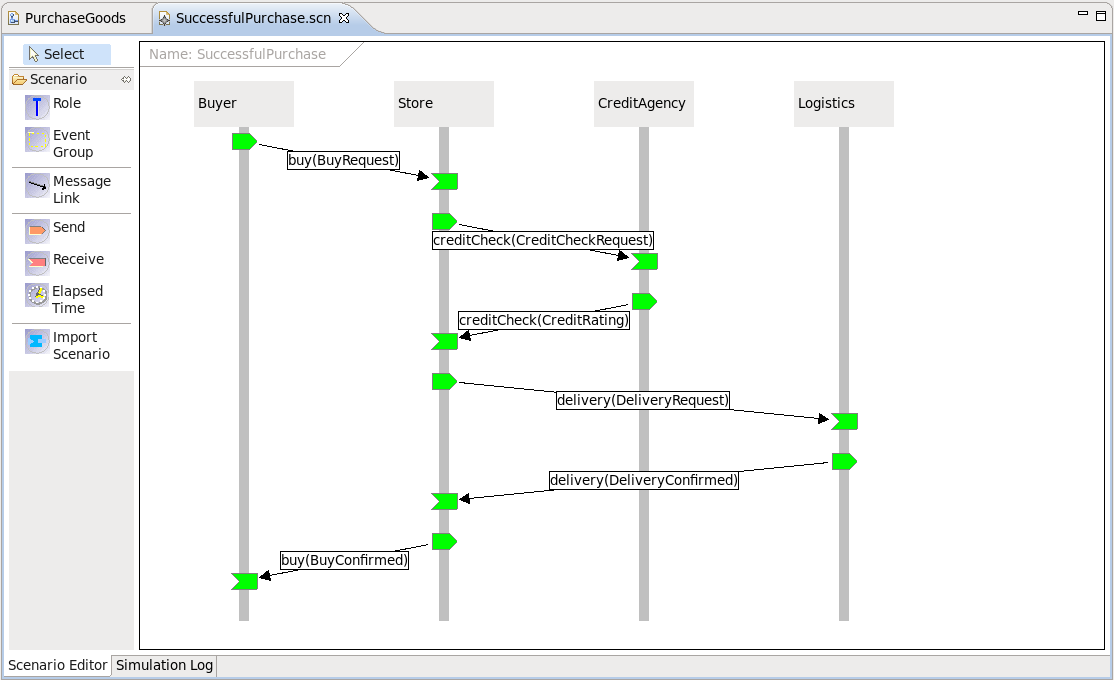
Figure 4.6. Simulation results showing the successful validation of a scenario against the choreography
To view a scenario that demonstrates a test failure, open the
requirements/InvalidStoreBehaviour.scn
scenario by double-clicking on the file, and then initiate the test using the green
play
button in the toolbar. When complete, the scenario should look like the following image.
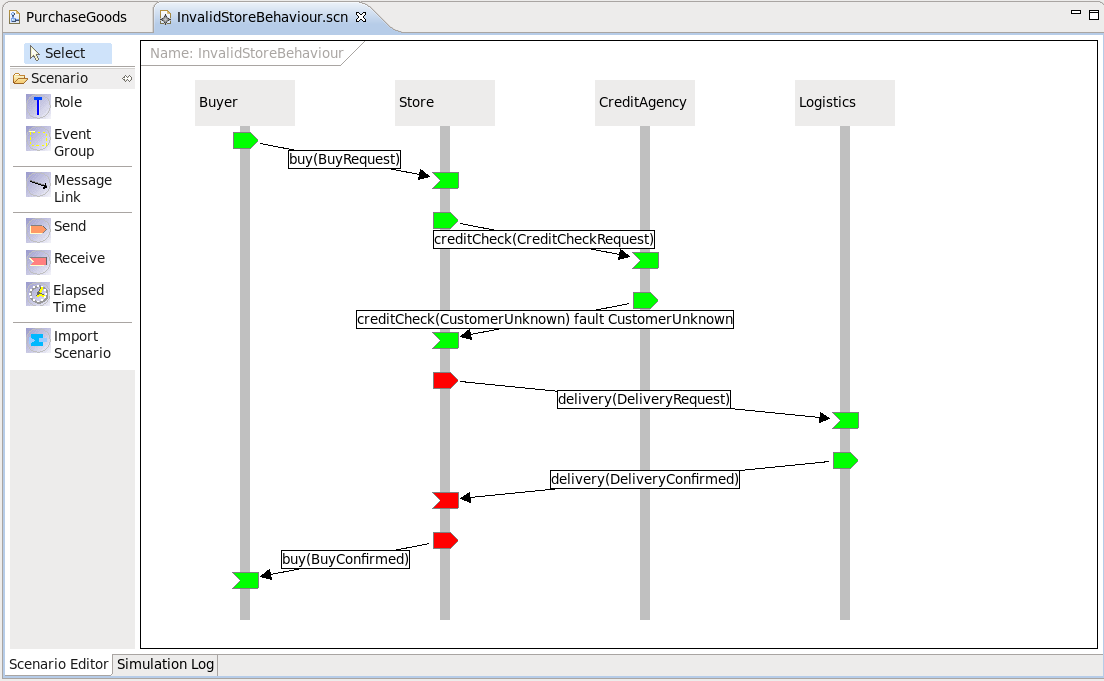
You will notice that the Store participant has a red 'send' node, indicating that this action was not expected behaviour when compared with the choreography description. The reason this is considered an error, is that the Store participant should only send an AccountNotFound message following a customer unknown response from the credit agency.
When an error is detected in a scenario, the architect can then determine whether the scenario is wrong (i.e. it does not correctly describe a business requirement), or whether the choreography is wrong and needs to be updated to accommodate the scenario.