We are going to dive right into a couple examples of common tasks in this section. These examples will give you a quick introduction to the capabilities that are built into Designer to assist you with common design tasks. Specifically, we will introduce the following concepts:
Targeting the Teiid Server
The Teiid Server is the destination for Designer's modelling. It is essential to define the correct server version that models will be deployed to. This is achieved either by setting the server version preference or defining a teiid server in the Servers View.
Guides
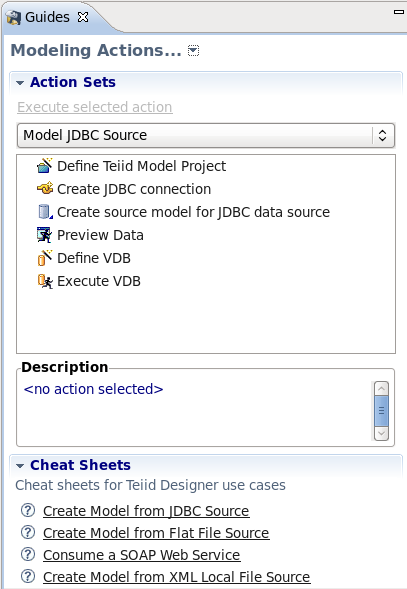
The Guides View is a good starting point for many common modeling tasks. The view includes categorized Modeling Actions and also links to Cheat Sheets for common tasks. The categorized Modeling Actions simply group together all of the actions that you'll need to accomplish a task. You can launch the actions directly from the Guides view, rather than hunting through the various Designer menus.
Cheat Sheets
The Cheat Sheets go beyond even the categorized Action Sets, and walk you step-by-step through some common tasks. At each step, the data entered in the previous step is carried through the process when possible.
After seeing the Guides and Cheat Sheets in action, subsequent chapters will offer detailed explanations of the various concepts and actions.
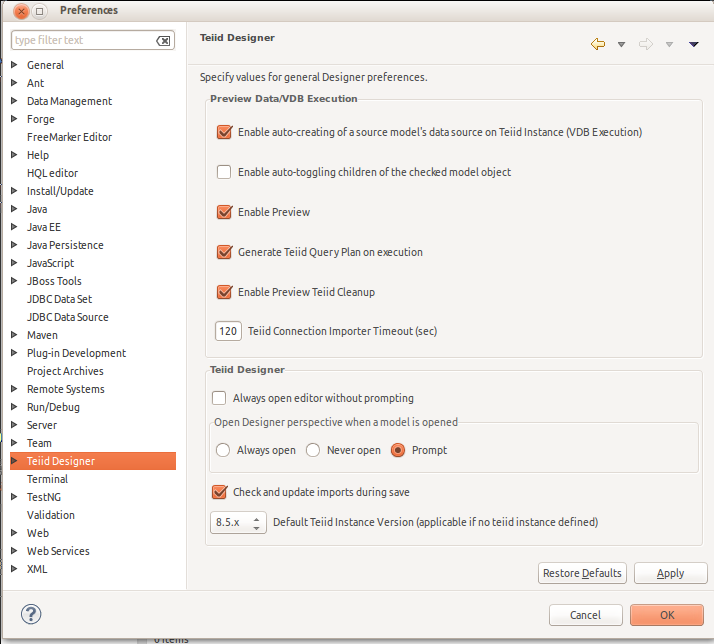
In this section, the setting of the teiid server version is demonstrated. This can be achieved by either setting a preference or by defining a teiid server.
The default server version preference allows the target server version to be changed without actually having to define a teiid server in Designer. The preference's list of possible values is determined by which teiid runtime client plugins have been installed into the application.
The defining of a Teiid Server is encouraged since it allows for models to be previewed and their deployment tested. There is no limit to the number of servers that can be defined. However, the default server will always be used for previewing and deployment, unless using the context menu actions in the Section D.2.3, “Server View”.
The Guides View provides the following Teiid Server actions.
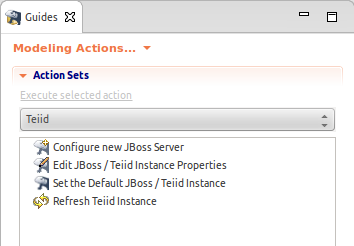
The New Teiid Server action will display the wizard outlined in ??? and steps through the process of creating both the Teiid Server and its parent JBoss server in the Server View.
Should more than one Teiid Server be defined in the Server View then the Set the Default Server action allows for the default server to be changed appropriately. If a Teiid Server is currently selected in the Server View then this will be selected as the default server. However, should nothing be selected then a dialog will be displayed inviting the user to choose which server they wish to select.
Note
The version of the defined Teiid server always takes precedence over the Section 2.1.1, “Server Version Preference”
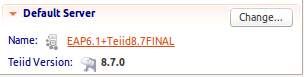
Whether the server version preference has been modified or a server defined, the server and server target version will be updated in the default server status panel. This will always reflect the current server version being targeted and the server being used to preview or deploy against.
In this section, the Guides View is demonstrated in detail by walking through a simple example. For this example, we will follow the Model JDBC Source Action Set. The actions appear in the following order:
- Define Teiid Model Project
- Create JDBC connection
- Create source model for JDBC data source
- Preview Data
- Define VDB
- Execute VDB
The action names are self explanatory. We will create a new "Model Project" in the workspace, then define our connection properties to a MySQL database. We will then connect to the database and import the 'metadata', creating a source model in Designer. Next we will 'preview' the database contents. Finally we will define a 'VDB' and then deploy it to a running Teiid Server to execute.
This section shows how to Model a Relatioanl Source, using the Guide View action set. We will connect to a MySQL database for this example, but you can use the same process to connect to any supported database.
Open Guides View
To open the Teiid Designer's Guides view, select the main menu's Window > Show View > Other... and select the Teiid Designer > Guides view in the dialog.
The Guides view is shown below, with the Model JDBC Source Action Set selected:
Define Teiid Model Project
The Define Teiid Model Project action launches the New Model Project Wizard. In the Action Set list, double-click the action (or select it, then click 'Execute selected action'). The wizard is launched as shown below:
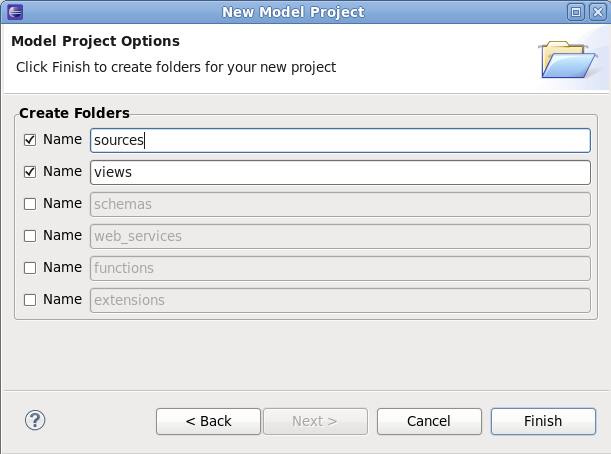
Enter a project name, e.g. 'MyProject' for the name. Then click Next. The next page of the wizard is shown below:
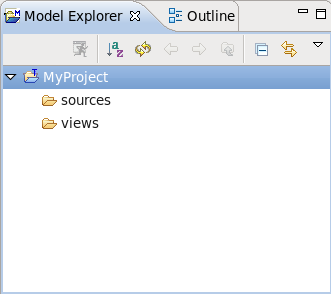
Under 'Create Folders', de-select 'schemas' and 'web_services' - we won't need them for this example. Now, click Finish to exit the wizard. The project has now been created - your Model Explorer view should like like this:
Create JDBC connection
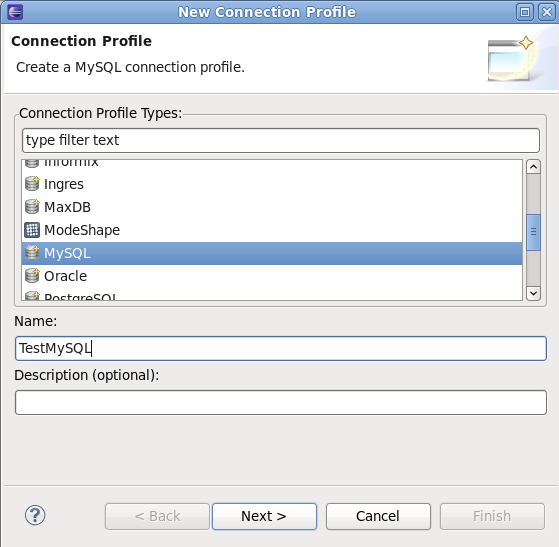
The Create JDBC connection action will create the 'Connection profile' for your database. The connection profile defines the properties and driver to be used when connecting to the database. In the Action Set list, double-click the action (or select it, then click 'Execute selected action'). The wizard is launched as shown below:
Select the type of database that you are connecting to (e.g. MySQL), and enter a name for the connection profile, e.g. 'TestMySQL'. Click Next.
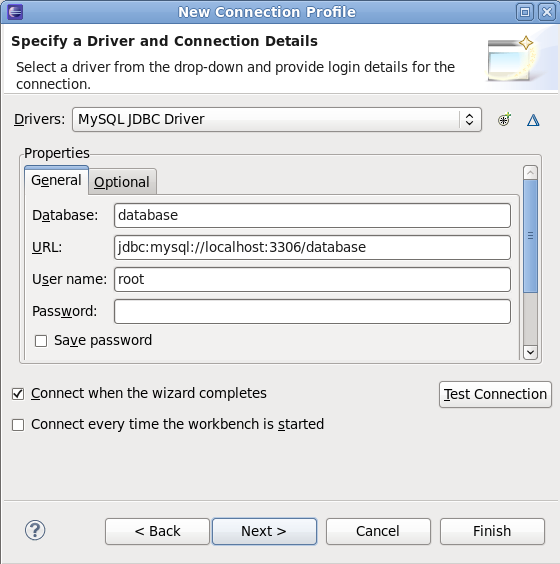
Now, select the driver and enter the login properties for your database. Click Finish to complete the profile creation.
Create source model for JDBC data source
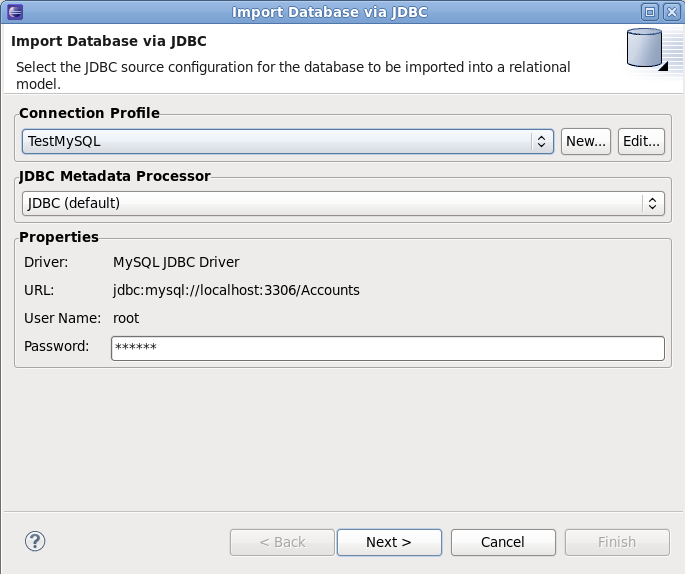
The Create source model for JDBC data source action will now utilitze the Connection profile that you just created, to import the metadata from the database to create your Teiid Source Model. In the Action Set list, double-click the action (or select it, then click 'Execute selected action'). The wizard is launched as shown below:
On this page, select the 'TestMySQL' Connection profile that you created in the previous step. Click Next.
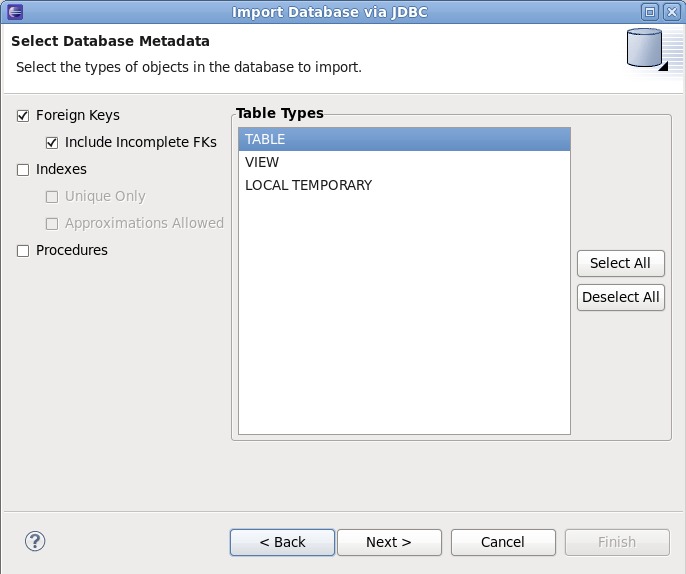
On this page, select the database metadata that you want to import. When finished, click Next.
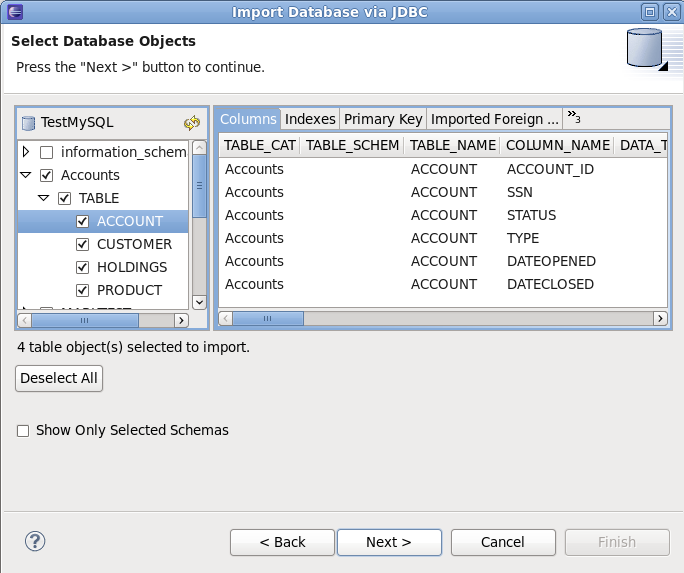
On this page, select the specific objects from the database that you want to import. When finished, click Next.
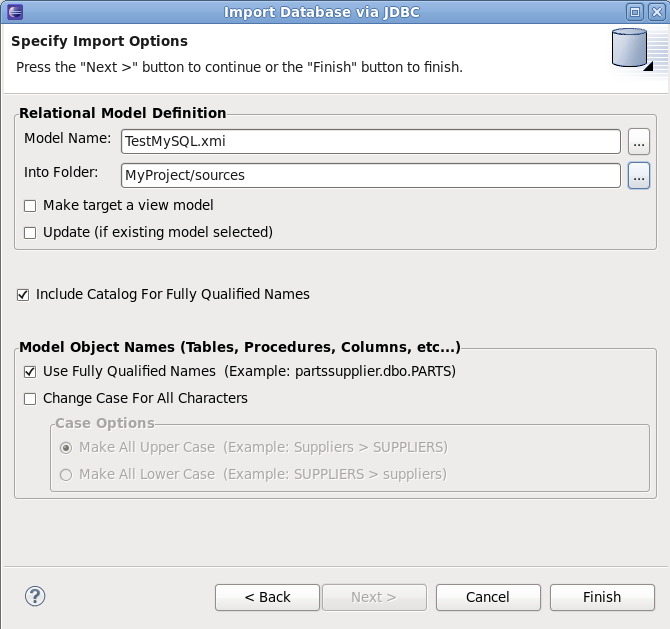
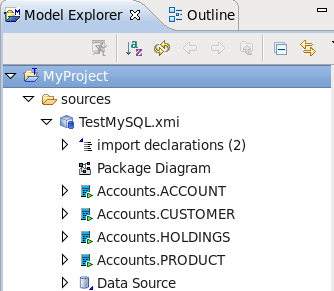
Finally, choose the name for the model to be created (defaults to 'profileName'.xmi). The 'Into Folder' field defines the target location for your new model. Select the 'MyProject/sources' folder. Now, click Finish. The source model has now been created - your Model Explorer view should like like this:
Preview Data
All execution capabilities in Designer (Preview Data, VDB execution) require you to connect to a running Teiid Server. See Chapter 3, Server Management for instructions on establishing a Teiid Server connection. Once you are connected to a Teiid Server, you can proceed with the following steps.
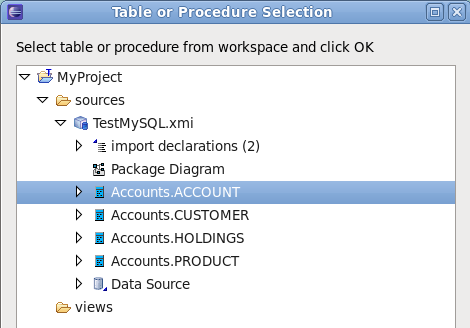
The Preview Data action allows you to preview a sample of data rows from your source. In the Action Set list, double-click the action (or select it, then click 'Execute selected action'). In the dialog, select the source table you want to preview, as shown below:
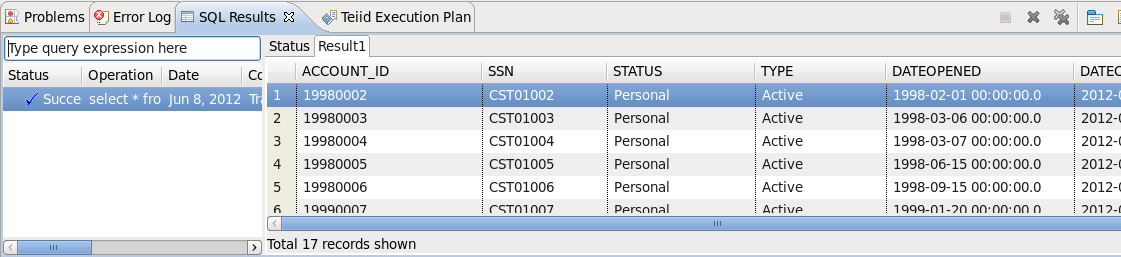
After selecting the table, click OK. Now, the preview results will be displayed:
Define VDB
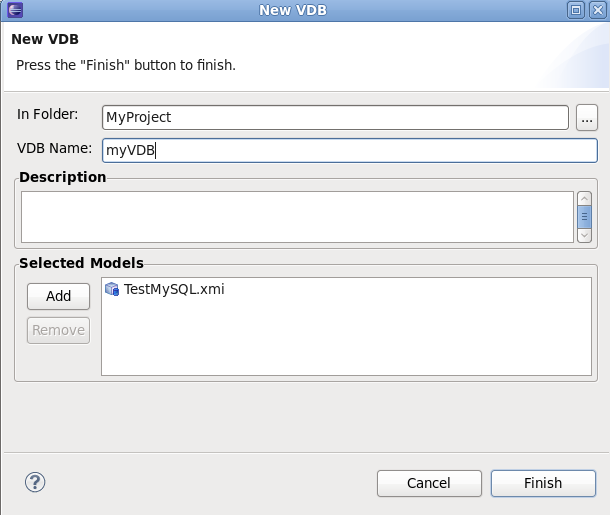
The Define VDB action allows you to create a VDB (Virtual Database) artifact for deployment to a Teiid Server. In the Action Set list, double-click the action (or select it, then click 'Execute selected action'). The following dialog is displayed:
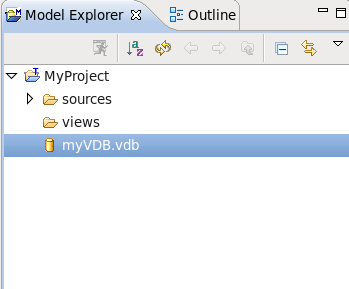
In the dialog, select the target 'In Folder' location where the VDB will be placed. Enter a Name for the VDB, for example 'myVDB'. Finally, select the models that will be included in the VDB. When finished, click Finish. The VDB will be created in your Teiid Model Project - as shown in the following figure.
Execute VDB
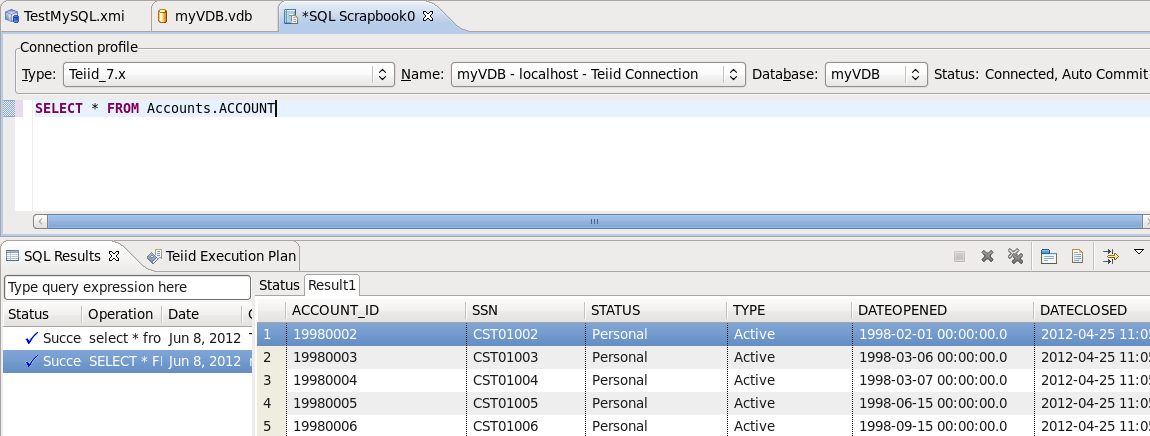
Finally, the Execute VDB action allows you to execute your VDB and run sample queries against it. In the Action Set list, double-click the action (or select it, then click 'Execute selected action'). In the dialog, select the VDB you want to execute, then click OK. The VDB will be deployed and executed, and the perpective will switch to the 'Database Development' perspective. You can now run queries against the VDB, as show in the following example:

In this section, we introduce Cheat Sheets by walking through a simple example. For this example, we will follow the Consume a SOAP Web Service Cheat Sheet.
This section shows how to consume a SOAP Web Service, using a Cheat Sheet. We will demonstrate connection to a publicly accessible web service. You can use this process as an example for modeling other web services
Open the Cheat Sheet
You can access the Cheat Sheet from the Designer Menu. From the Designer main menu, select Window > Show View > Other..., then select Help > Cheat Sheets in the dialog.
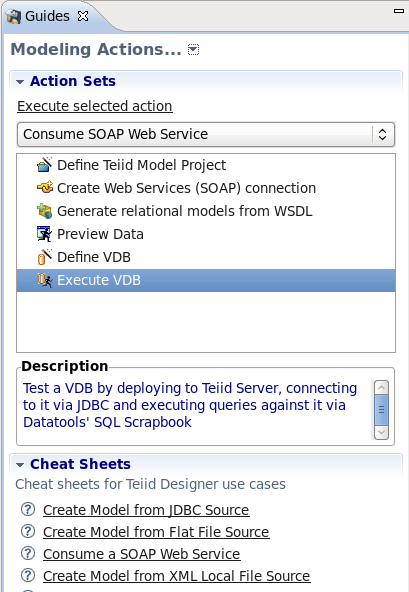
Alternately, you can access the Cheat Sheet from the Guide View. A sample Guide view is shown below, with the Consume a SOAP Web Service Action Set selected:
To open the Cheat Sheet from the Guide View, expand the Cheat Sheet section in the lower portion of the Guide View, then select the Consume a SOAP Web Service link.
Begin the Cheat Sheet
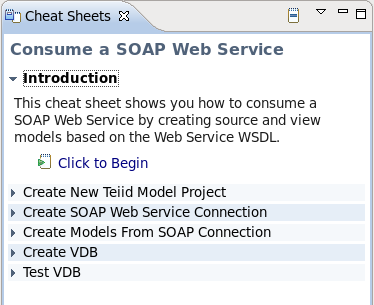
The Consume a SOAP Web Service Cheat Sheet is shown below:
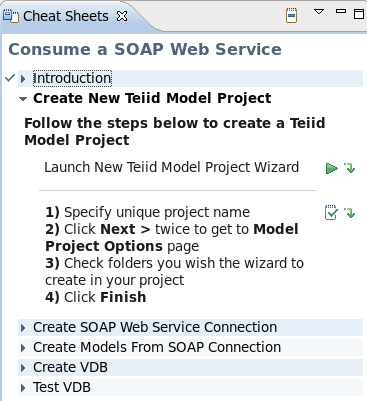
To start the Cheat Sheet process, expand the Introduction section, then select Click to Begin. The Create New Teiid Model Project section opens, as shown.
Note
Each section of the sheet has basic instructions outlining what to do at each step.
Click
 next to Launch New Teiid Model Project Wizard to launch the 'New Project' wizard.
Follow the wizard to create a new Model Project. For this example, we will use SOAPProj for our project name. On the second page of the wizard, select the 'sources' and 'views' folders. Click Finish. The new project is created.
In the Cheat Sheet, you can advance to the next step - once the wizard has completed. Click
 to advance to the next step.
Create SOAP Web Service Connection
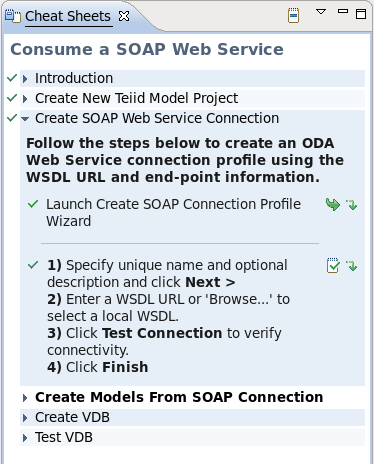
This section of the Cheat Sheet provides instructions for creating a connection profile for the SOAP Web Service, as shown below:
Click
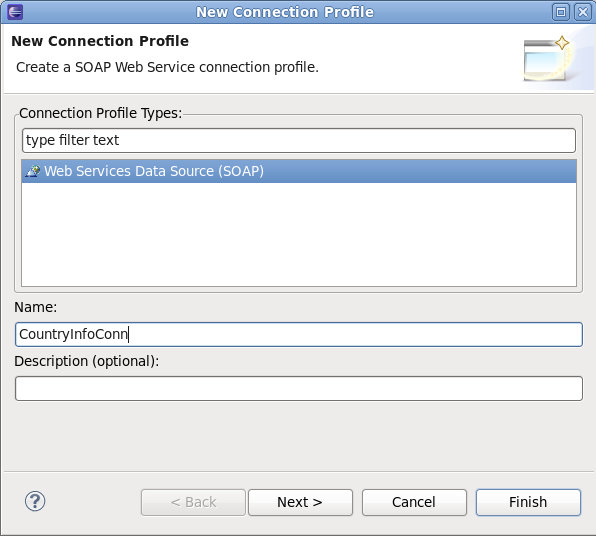
next to Launch Create SOAP Connection Profile Wizard to launch the wizard. The first
page of the wizard is shown below:
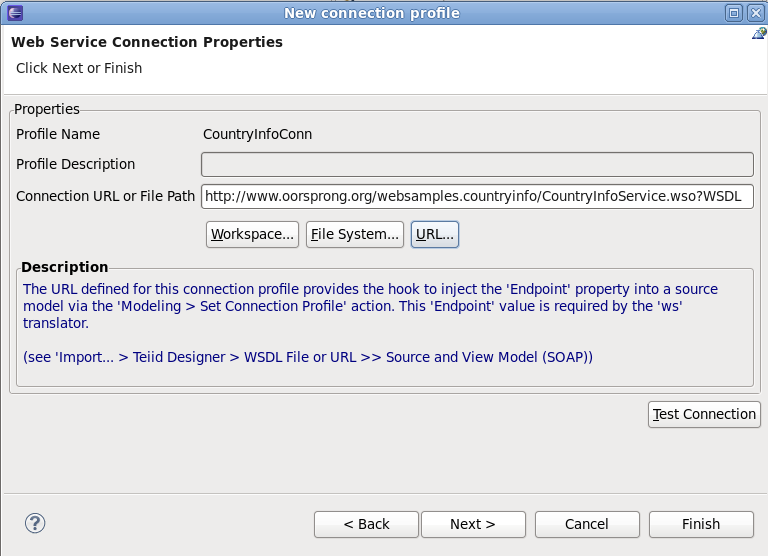
The Web Services Data Source (SOAP) profile type will be selected. Enter CountryInfoConn for the profile name, then click Next. The next page of the wizard is shown below:
The connection profile properties are entered on this page. Click on the URL... button, then enter the following URL: http://www.oorsprong.org/websamples.countryinfo/CountryInfoService.wso?WSDL
Select 'None' for SecurityType, then click OK to complete the wizard. In the Cheat Sheet, you can now continue - once the wizard has completed. Click
to advance to the next step.
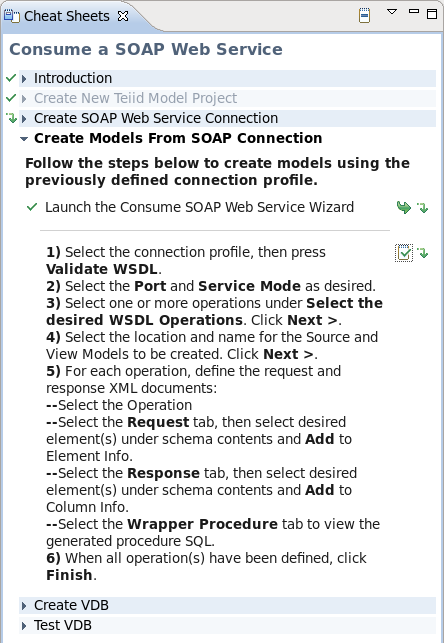
Create Models from SOAP Connection
This section of the Cheat Sheet provides instructions for creating relational models using the previously-created connection profile for the SOAP Web Service, as shown below:
Click
next to Launch the Consume SOAP Web Service Wizard
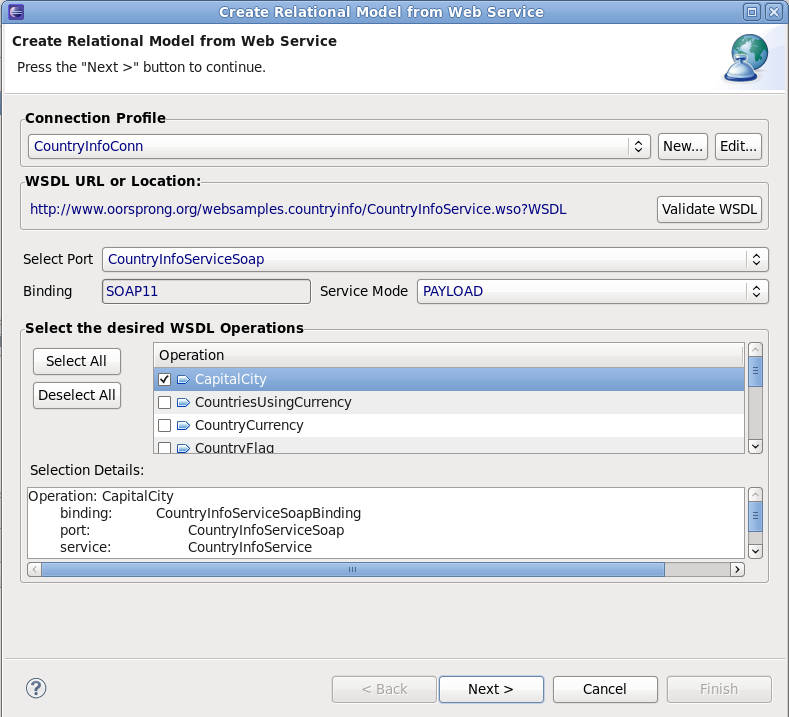
to launch the wizard. The first page of the wizard is shown below:
For Connection Profile, select the previously-created CountryInfoConn profile. The available WSDL Operations will then be displayed under Select the desired WSDL Operations. Select only the first CapitalCity Operation for this example. Click Next to proceed to the next page, as shown below:
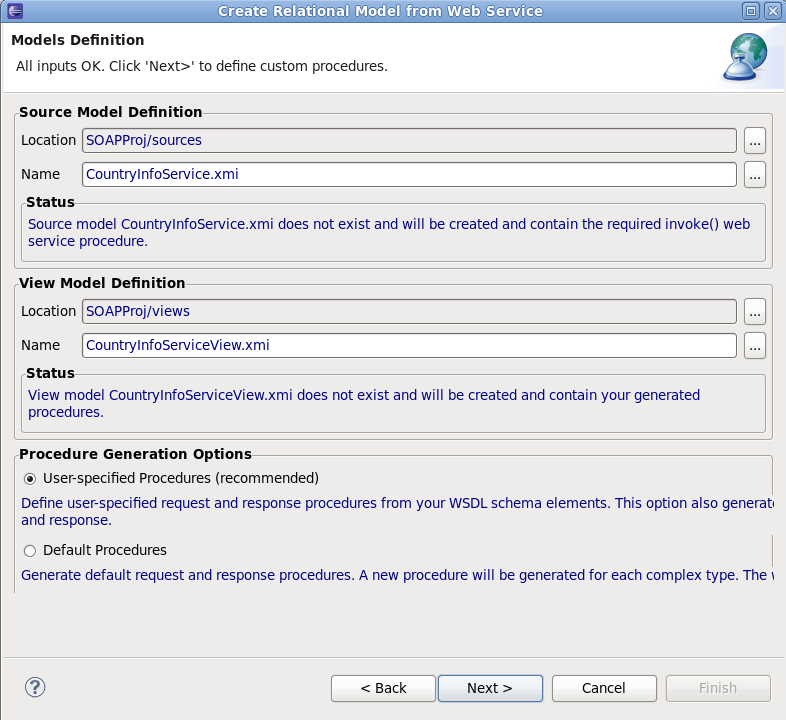
On the Model Definition page, the source and view model info section will be pre-filled. We will keep the names and location defaults for the source and view models. Click Next to proceed to the next page, as shown below:
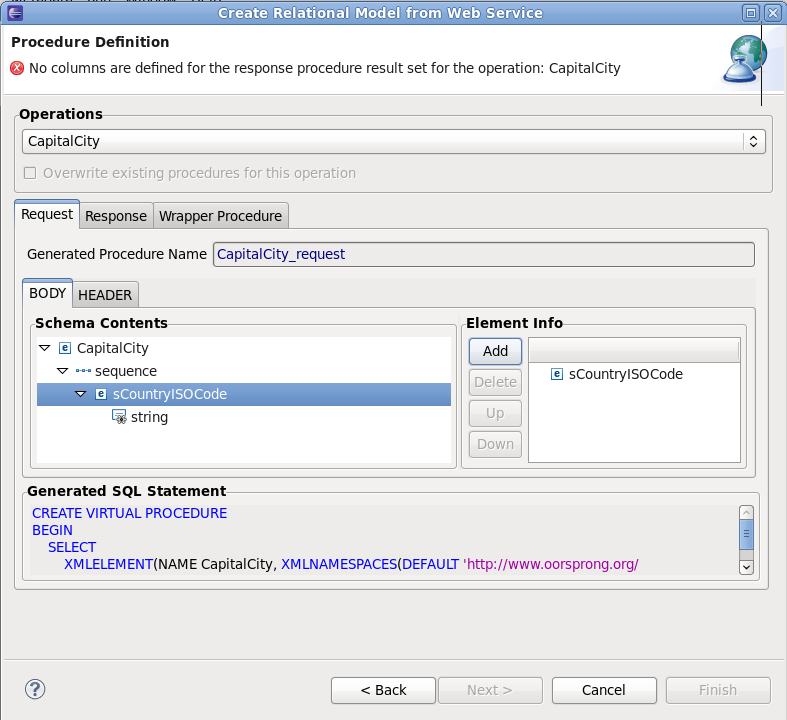
On the Procedure Definition page, the CapitalCity Operation will be selected since it is the only one used for this example. On the Request tab, select the sCountryISOCode element - then click the Add button. This will add the selected element to the request. Now select the Response tab, as shown below:
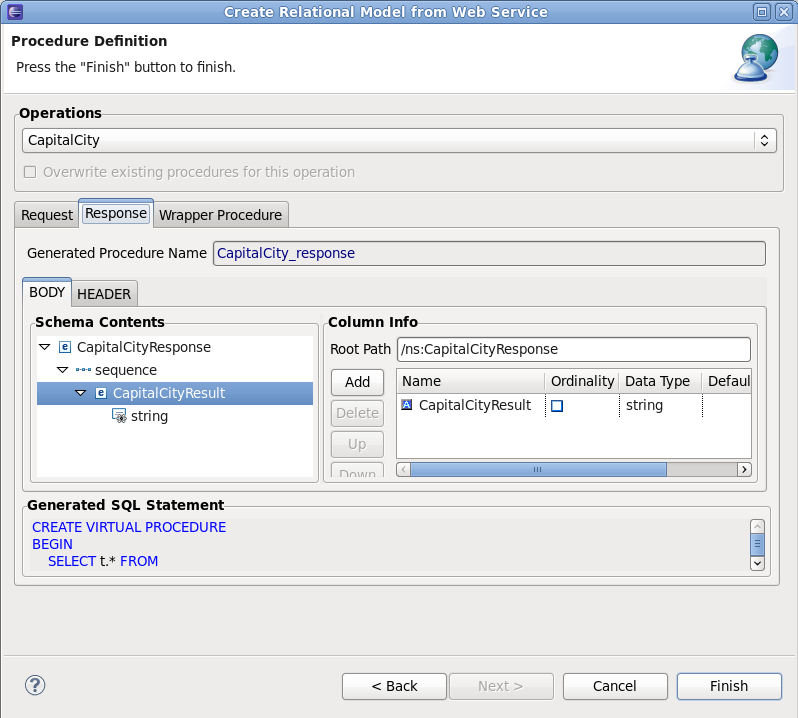
On the Response tab, select the Body sub-tab. In the Schema Contents, select the CapitalCityResult, then click the Add button. This will add the selected element to the response.
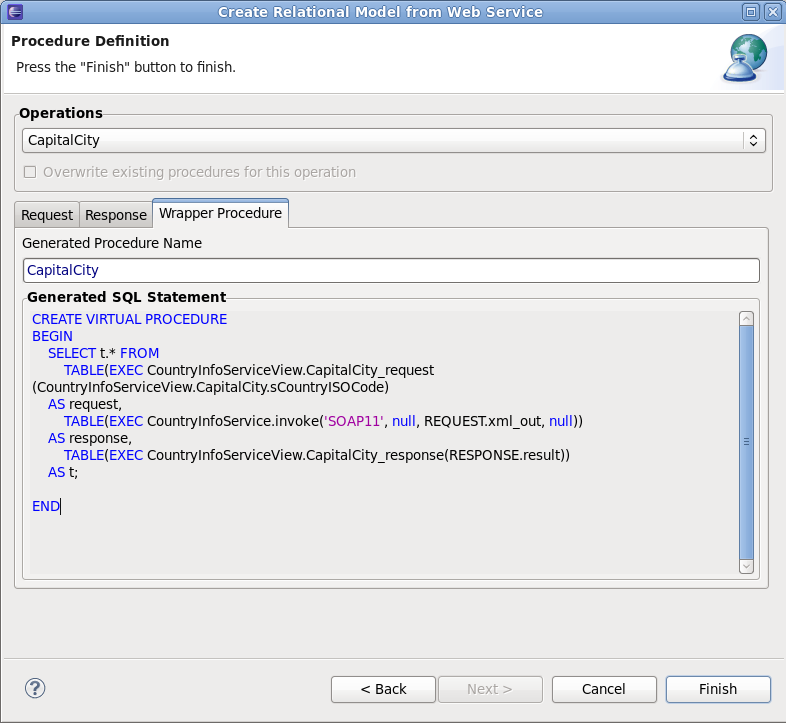
Select the Wrapper Procedure tab to see the full Generated Procedure SQL, as shown below.
Click Finish to exit the wizard. In the Cheat Sheet, you can now continue. Click
to advance to the next step.
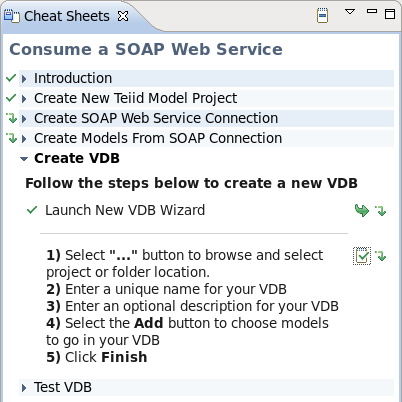
Create VDB
This section of the Cheat Sheet provides instructions for creating a VDB using the models that you created in the previous step. The Cheat Sheet section is shown below:
Click
next to Launch New VDB Wizard to launch the wizard.
Follow the steps to create a VDB in your workspace. When complete, exit the wizard.
In the Cheat Sheet, you can now continue. Click
to advance to the next step.
Test VDB
This final section of the Cheat Sheet provides instructions for executing the VDB created in the previous step. Click
next to Launch Execute VDB Dialog to launch
the wizard. Select the previously-created VDB to execute it.