Go To: Table of Contents
Introduction
The Designer includes the ability to create named relationships between almost any two or more modeling elements.
The Relationship metamodel is one way to define arbitrary associations between two or more metadata entities. Using the Relationship metamodel, the Designer provides users the ability to view, add, and edit associations between metadata entities.
But the Generic Relationships functionality can define relationships between metadata entities from different metamodels. For example, it is possible to create a generalized relationship between a Relational Column and a UML Package.
Users can even define their own relationship types that constrain the numbers and types (metaclasses) of objects that can be related.
Once the existing relationships are defined, the Designer provides a number of mechanisms that will make use of those relationships. This includes navigating to a related object, searching for relationships based on some criteria, or diagramming the relationship of various sets of objects
To create a relationship in a diagram:
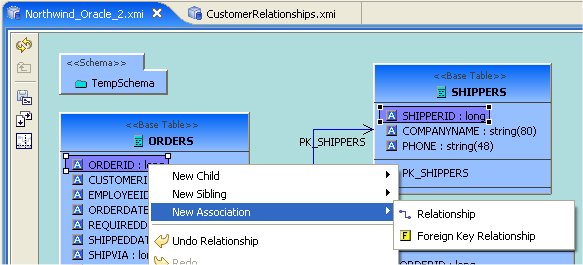
Step 1 - First select the source element of the relationship.
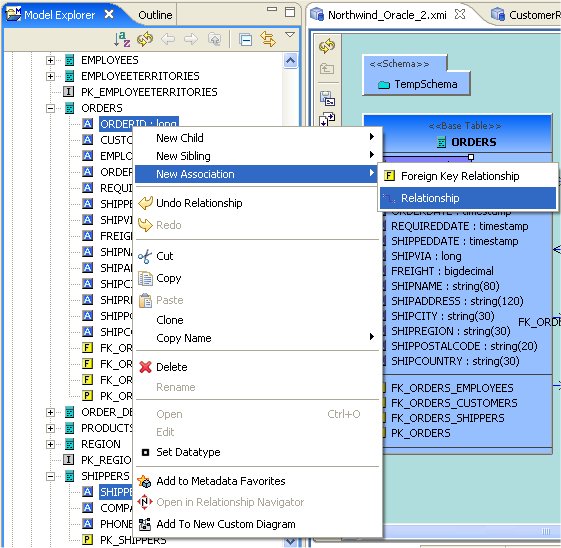
Step 2 - Then Shift+Click on the second target element. Right-click and select New Association > Relationship.
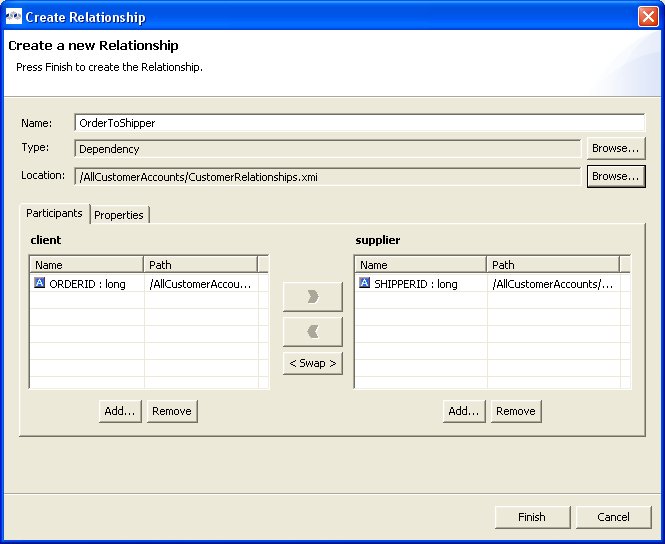
Step 3 - In the Create Relationship dialog, supply a valid name for your relationship, Browse... and select a relationship type.
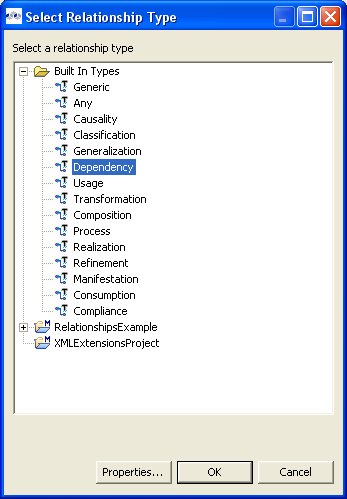
Step 4 - Click the Browse... button adjacent to the Type field and open the Select Relationship Type dialog and select an existing relationship type that best describes your relationship.
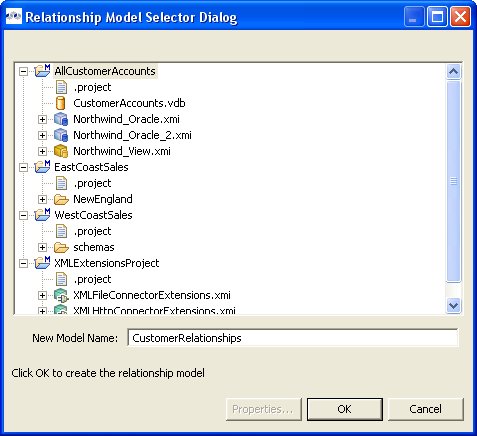
Step 5 - Click the Browse... button adjacent to the Location field and open the Relationship Model Selector Dialog. If a relationship model already exists, you can select it and click OK. If not, select a valid project or folder and provide a valid name for a new relationship model which will be created for you, then click OK.
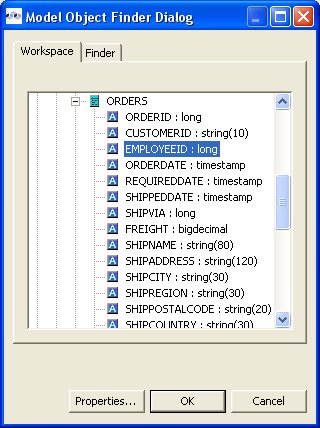
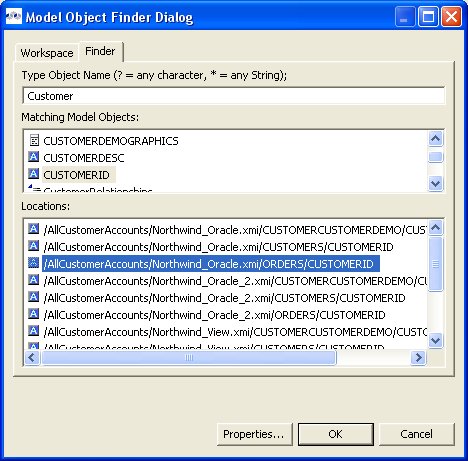
Step 6 - If you wish to add additional objects to either your source or target participants, click the Add... button to display the Model Object Finder dialog. You can either browse your workspace (Workspace tab) and select objects within models, or click on the Finder tab and type in known object names to search for specific objects by name. Click OK to add selected objects to the participant lists.
Step 7 - You can also edit your relationship properties by selecting the Properties tab in the Create Relationship dialog.
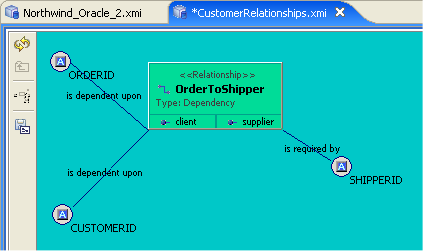
Step 8 - Click Finish to complete the relationship. The new relationship will be displayed in a relationship diagram.
To create a relationship from the Model Explorer tree, select two or more objects in the tree, right-click select New Association > Relationship action and follow Steps 3 thru 8 described above.
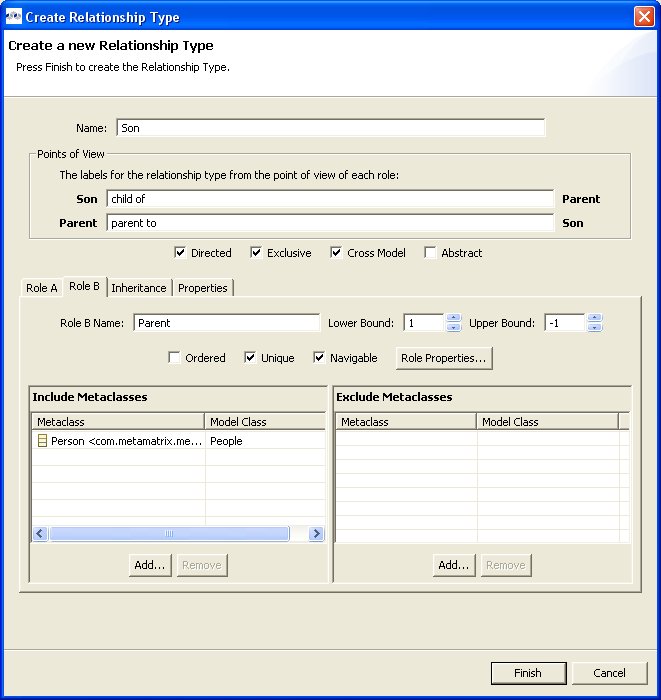
To create a new relationship type:
Step 1 - Select an existing Relationship model in the Model Explorer or a folder within the model. If a Relationship model does not yet exist, create one. See New Model Wizard.
Step 2 - Right-click select the New Child > Relationship Type action.
Step 3 - In the Create Relationship Type dialog, supply a name for your new relationship type.
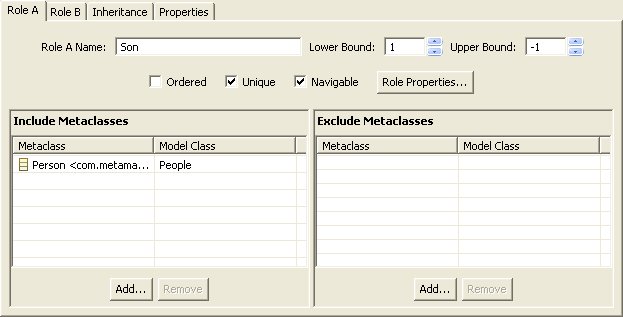
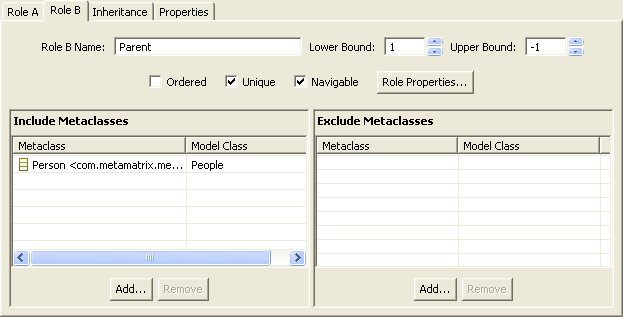
Step 4 - Select on Role A and Role B tabs in the dialog and specify role names, Add... any Metaclasses you wish to specifically Include as possible participants. You can also specifically Exclude metaclasses.
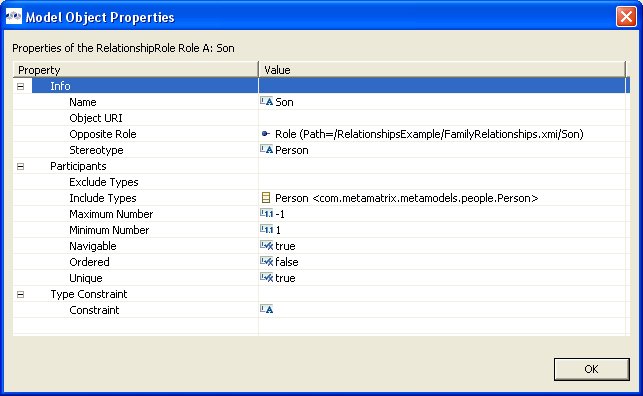
You can also change role properties via the Role Properties... button which launches a properties editor dialog.
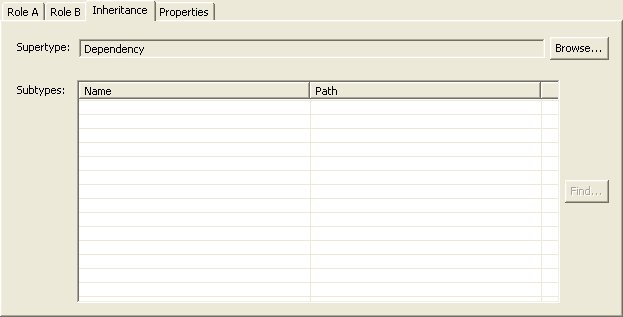
Step 5 - Select the Inheritance tab.
Step 6 - Launch the Select Relationship Type dialog via the Browse... button. Choose a base relationship type that best describes your category of relationship. Click OK.
Step 7 - Select the Properties tab and change/set relationship type property values.
Step 8 - Click Finish to create relationship type.

A Relationship Navigator view provides a unique way of viewing and navigating your relationships. It can be very useful in understanding associations between complex and visibly unrelated data.
To open the Relationship Navigator you can select the Window > Show View > Relationship Navigator action (if available) or open the Show View dialog via Window > Show View > Other... and open the Designer folder and select Relationship Navigator .
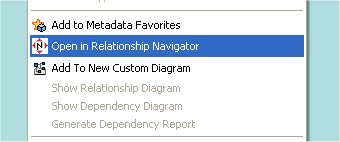
You can also quick-launch the navigator by selecting any object in the Model Explorer or a Model Editor and right-click select the Open in Relationship Navigator action.
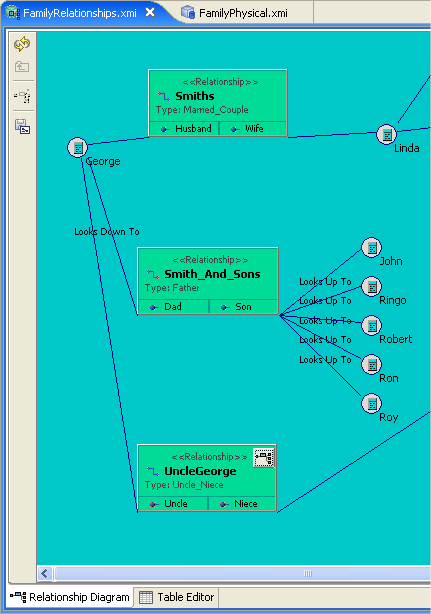
In the example presented here, the diagram below illustrates the standard role-based relationships defined for a family.
This action opens the Relationship Navigator in the same panel as the Properties and Description views.
The visible detail in the navigator is limited in order to simply navigation. You can, however, show detailed information about the navigation/relationship nodes by hovering your mouse and showing tooltips.
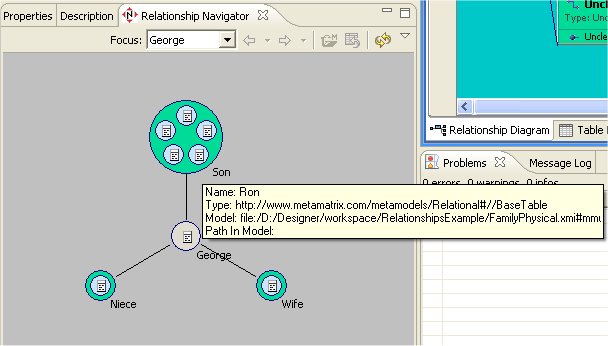
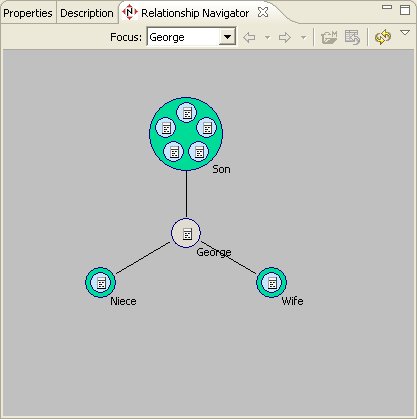
At the center of the navigator is the focused node, which represents the base or frame of reference for the displayed navigation. In this sample above, George has a wife, a niece and 5 sons. The relationship diagram shown below illustrates the role based view of these same relationships.
You can navigate to through your relationships by double-clicking an end-node in one of the relationships. For instance, double-click the Son Ron in the upper end-node and the navigator now focuses on Ron and his relationships. You can also right-click and select the Follow Relationships action.

As you navigate, a blue ball will animate the direction of the relationship flow first too the focused object then into the end of the relationship containing the initial focused object.
The navigator also provides toolbar and right-click menu actions to perform various functions in the navigator.