This chapter describes how to manage installed JBoss Servers™ via the JBoss Perspective. The Servers view will primarily be discussed.
The Servers view is built on the Common Navigator Framework allowing extensions and is using label decorators that make the UI compact enough without loosing the vital information.
Let's have a detailed look at the Servers view and its constituent components.
In the right top corner of the Servers view there is a special toolbar which provides a quick access for starting a server (in the debug mode, run mode, or profile mode), restarting a server, stopping a server and a publishing to a server.

In order to debug your applications or EJB's that are deployed to the server, the server must be started in debug mode. By starting the server in debug mode, Eclipse will allow you to set breakpoints on code in your workspace and step through the code.
The button will republish any modules where it has determined that the workspace is out of synchronization with the server. It will attempt to do an incremental publish if the module in question is capable of doing one.
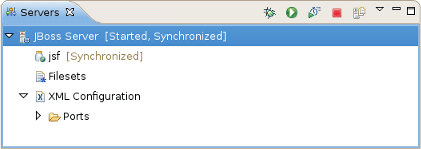
The Servers view displays all defined servers as well as their current status (that is whether they are started or stopped) in square brackets next to the server name.
The following table lists possible server statuses.
Table 4.1. Server Publish Status
| Status | Description |
|---|---|
|
Republish |
The status which allows you to see if changes are awaiting |
|
Publishing... |
The status which shows if changes are being updated |
|
Synchronized |
The status which allows you to see if changes are synchronized |
You can control a server behavior as well as adjust a number of server preferences through the context menu.
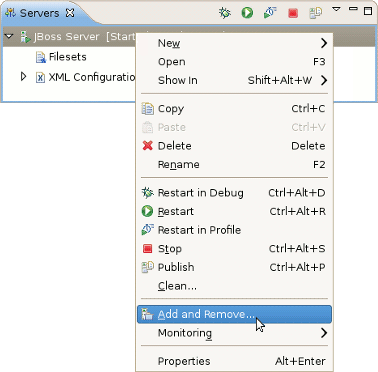
All available context menu commands are described in the following table.
Table 4.2. Server Properties through the Context Menu
|
Name |
Description |
|---|---|
|
New Server |
The option allows you to define a new server |
|
Open |
The option opens the Server editor |
|
Show In |
This option provides easy access to the Console, Debug, Server Log or MBean Explorer views |
|
Show In -> File Browser |
This action uses the native OS file explorer to browse the deploy destination of a local server. |
|
Delete |
Standard option that allows you to delete the chosen server |
|
Start |
This will start the server in a run mode |
|
Debug |
This will start the server in a debug mode |
|
Stop |
This will stop the server |
|
Publish |
This will synchronize the publish information between the server and workspace |
|
Add and Remove Projects |
This option will publish a new project to the server (if it's type is supported) |
|
Monitoring |
Allows you to add ports to be monitored on the current server |
|
Properties |
Opens a window that allows you to adjust the current server preferences |
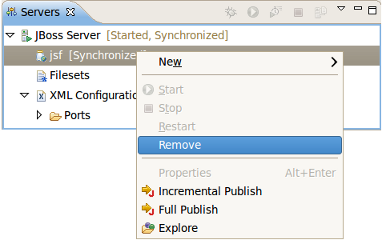
Under the server element in the Servers view, you can see modules that are currently deployed to the server and some server extensions that provide additional information on the server.
The context menu for any module allows you to remove it from the server and force a full or incremental republish upon it.
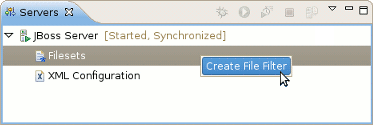
The Filesets category in the Servers view provides a way to filter files.
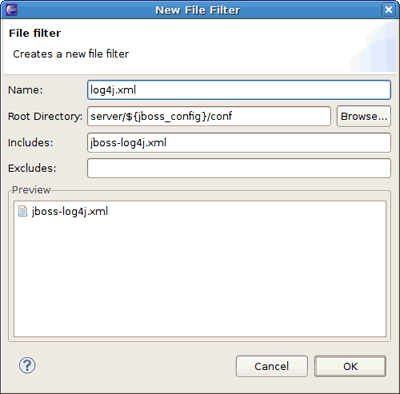
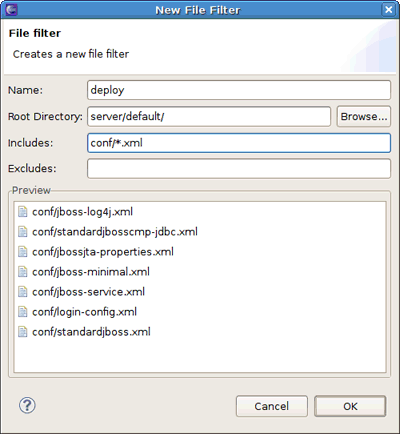
To add a new file filter, right-click the Filesets category and select the option.
The New File Filter wizard should appear.
The wizard asks you to enter the filter name and add includes and excludes patterns. The preview box underneath provides a list of files matched to the defined patterns (see the figures bellow).
In order to set up a default fileset relative to the fixed configuration of the server runtime, use the following variable: ${jboss_config}, i. e. you should enter server/${jboss_config}/ in the Root Directory option. This allows you to modify the runtime's configuration and not have to manually update paths.
Notice, that the Browse button still returns an absolute path:
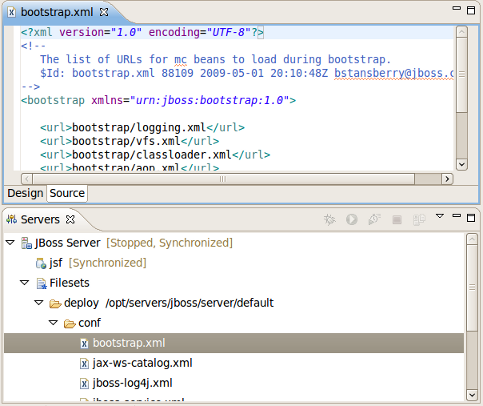
After the filter is created, you can explore it by expanding the Filesets category in the Servers view.
It is now possible to edit files directly from the Filesets category. Double clicking on a file from Filesets opens up the editor automatically, or you can use the context menu command.
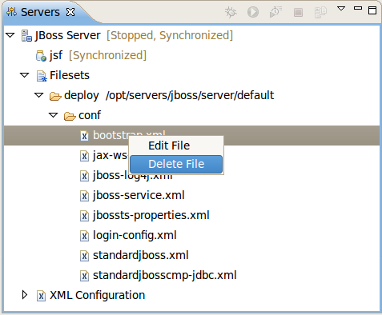
To delete a file filter (or just a file) from the Filesets, right-click a file filter or file and select the or command.
If you want to set filesets for some server types, select → and then select → from the categories available on the left.
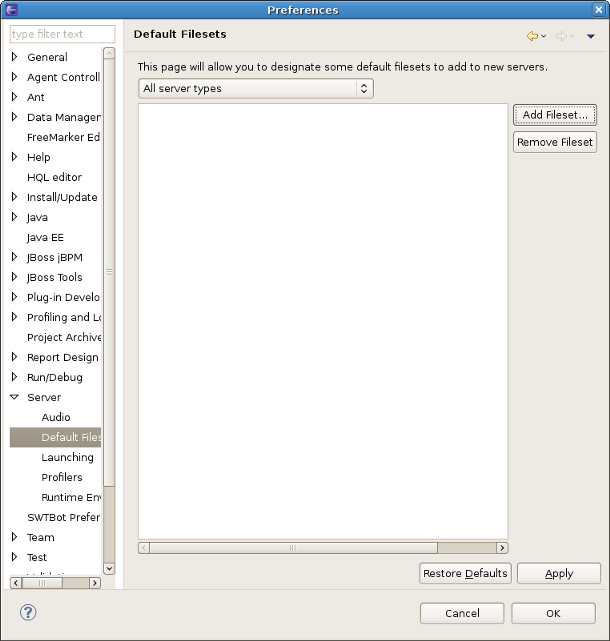
On this preference page you can add a fileset to any server type or to all servers at once. To do this you should select the server type in the combo box and click the button. In the opened New File Filter wizard follow the steps described in Section 4.1.2.1, “Filesets” and finally click the button on the preference page.
The defined file filter will be automatically added to new servers during their creation.
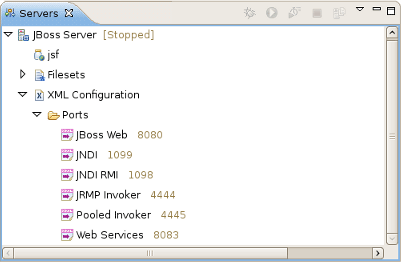
The XML Configuration category allows you to quickly browse to descriptor files in your server's deploy directory and check or change the values. Basically, XML Configuration includes XML XPaths, where an XPath is a path used to access some specific part of an XML document.
Note:
This document assumes that you are familiar with XPath. If not, we highly suggested that you look through an appropriate manual or tutorial on the topic.
The XML Configuration category itself contains only a list of categories. Ports are provided by default and display many of the most commonly used ports in the JBoss Server™.
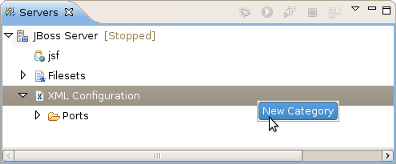
By right-clicking on the XML Configuration node you can create a new category. Besides, context menu for XML Configuration category makes possible to disable it. You can disable any category in the bottom part of the Servers view. Look for them in the Inactive Categories afterwards to re-enable.
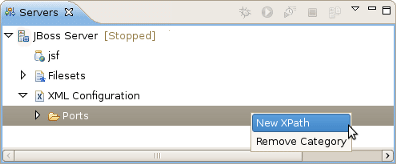
By right-clicking on the Ports category, or any other category in XML Configuration, you can create a new XPath.
After that, the dialog shown below will appear.
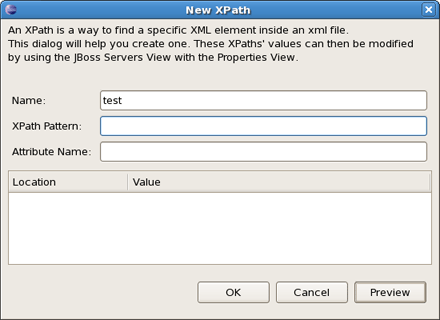
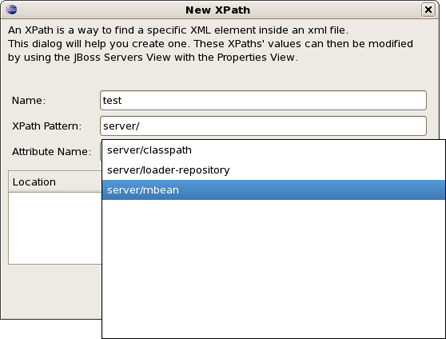
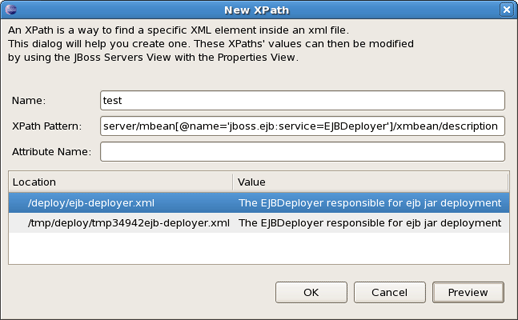
The goal here is to get an end result where the XPath matches up with a necessary property. With that in mind, let's look how it works. If the property you want to reach is the value of the name attribute in the element <mbean>, then your XPath Patten should end with mbean and your Attribute Name should be name, as demonstrated in the next figure.
...
<server>
...
    <mbean code="org.jboss.ejb.EJBDeployer"
                   name="jboss.ejb:service=EJBDeployer" xmbean-dd="">

     <!-- Inline XMBean Descriptor BEGIN -->
         <xmbean>
             <description>
                    The EJBDeployer responsible for ejb jar deployment</description>
               ...
         </xmbean>
     </mbean>
</server>
Tip:
Notice when you type the fields autocomplete to help you locate exactly what XPath you're looking for.
If your desired field is the text of an element <description>, your XPath Patten should end with description and Attribute Name field should be left blank. When finished, click the button to see how many matches are found for that particular XPath.
The Servers view supports drag-n-drop of deployable and runnable projects and resources.
With drag-n-drop the following actions can be performed:
Dragging a project to a server will deploy it to the server and run it by showing the main page in a browser.
Dragging an
.xhtmlfile from theWebContentfolder will do the same and show the corresponding page in a browser.Dragging a deployable resource (i.e. a datasource
-ds.xmlfile that has been made deployable) will simply deploy that resource directly to the server.
In short, the feature does the same thing as if you used the or option in the context menu of the server.
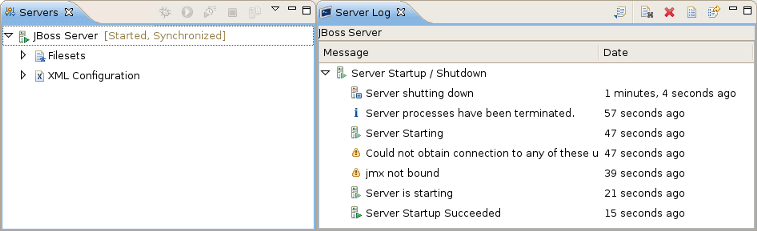
You can monitor the current server behavior with the help of the Server Log. To open a server in the Server Log view you should right-click on the server and follow to → .
The Server Log view shows relevant information to your server's startup, shutdown and publish processes. This allows you to keep an eye on what's going on (such as automatic incremental deployment if you have it enabled).
The Server Log view toolbar contains several icons that perform the following actions:
Table 4.3. Server Log Toolbar Icons
|
Name |
Description |
|---|---|
|
Export Log |
Allows you to export the log into a text file |
|
Clear Log Viewer |
This option clears the current server log |
|
Delete Log |
Click to delete the server log |
|
Open Log |
Click to open the server log text file |
|
Restore Log |
Click to restore the server log |
Find more about XPath in the XPath Documentation.