This chapter describes how to manage and change the settings and behaviour of an existing JBoss AS-Tools Server Adapter. The server editor is the primary vehicle for users to modify the behavior and settings for their server, including what launch arguments to use, how to discover if the server is started, and many others.
By double-clicking on any server, an window will appear allowing you to edit the servers settings.
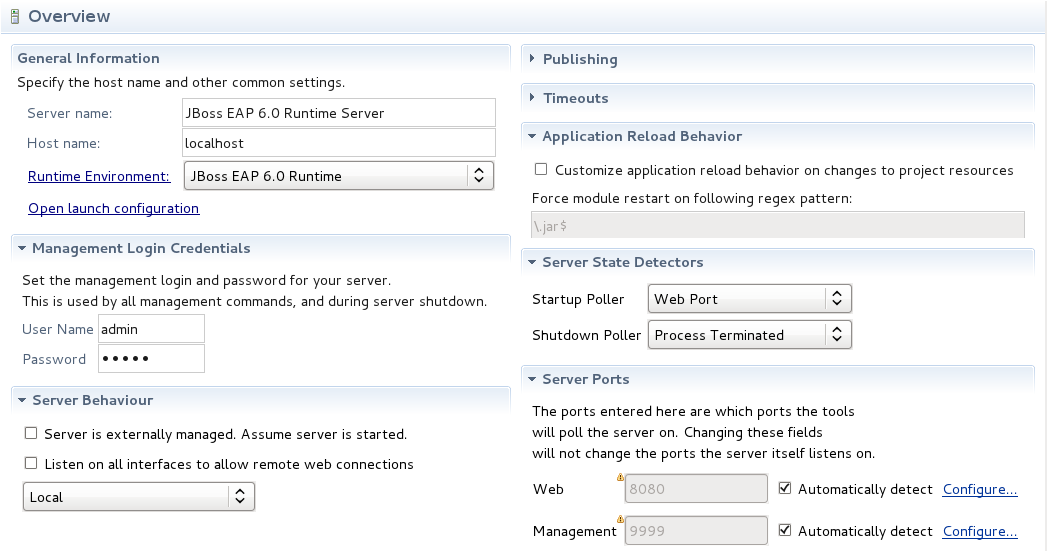
The Overview page is an important entry-point to modify settings for your server. This page has the following sections.
General Information
Management Login Credentials
Server Behavior
Publishing
Timeouts
Application Reload Behavior
Server State Detector
Server Ports
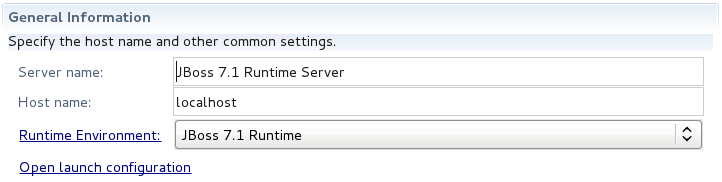
The General Information section provides you with your server name, host name, a link to your runtime, and the ability to open and customize your launch configurations. In general, changing any of these values should be safe, but it is not reccommended to rename your server or modify your runtime's name.
You can modify the settings of your runtime by clicking on the Runtime Environment hyperlink. This will open the Edit Runtime wizard. This wizard looks identical to the New Runtime Wizard, and allows you to modify any settings on your runtime. Be aware, however, that changes made here may modify behavior of any other servers that target the same runtime. Caution is advised.
By clicking the Open Launch Configuration hyperlink, you can see and modify the launch behavior of your server adapter. In this way, you can customize the start arguments. More details will be provided later on.
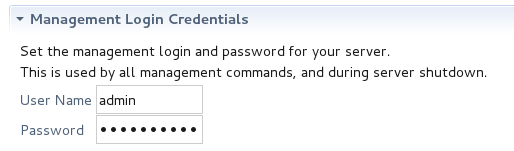
To connect to your server's management services, you'll need to provide your credentials in this text field. For your protection, the password field is obscured. The password field is also stored in Eclipse Secure Storage, so you'll never have to worry about the security of your credentials.
These credentials are used to access your server's management services. For earlier versions of JBoss AS or JBoss EAP, this would be a connection to JMX. For recent versions, it's credentials for the management service provided by that runtime. If you're noticing strange behavior, or if the tools are not recognizing that a server is started, it may be caused by incorrect management credentials. In general, though, such errors will be displayed to the user to allow a chance to fix the problem.
The Server Behaviour settings tab allows you to set how tool interaction with the server should be undertaken.
When you created the server, if you selected that it was a local server then you will notice that the option Server is externally managed. Assume server is started is unchecked and the combo-box displays .
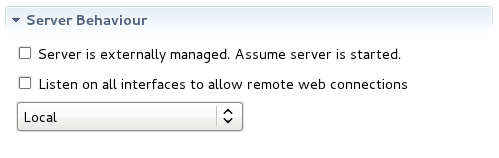
If you created a remote server then you will see that the combo-box displays Remote System Deployment. Also populated will be the Host and Remote Server Home settings.
You are also able to change a servers behaviour from Local to Remote System Deployment through this settings tab. In doing so you will see that the Host is not set by default, but the other fields contain default values.
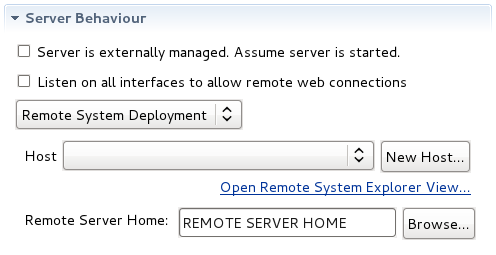
You can select the Listen on all interfaces to allow remote web connections when using JBoss Application Server 3 to 7 or JBoss Enterprise Application Platform 4 to 6. This option will force the server to launch with the option -b 0.0.0.0. This option will change the host address to 0.0.0.0, useful for testing web applications on your local machine. JMX commands and web browser activities will still use the host set in the General Information section.
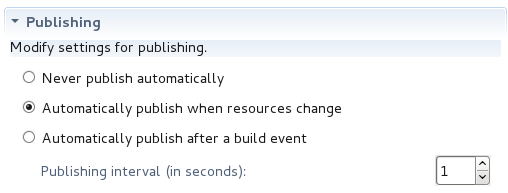
The Publishing section allows you to specify the autopublish behavior for your server. There are three options available. The first option is to disable autopublishing entirely. The second is to fire the autopublisher only when a workspace resource has changed. The final option would be to only fire the autopublisher if a build event has occurred. Depending on your personal development style, any of these options may fit your wishes.
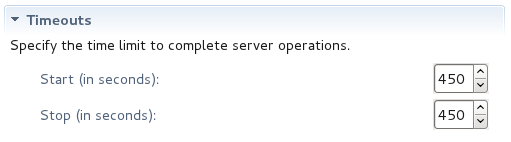
The Timeouts section allows you to specify a time limit for the server to complete operations within. If an operation does not start or fails to finish before the times you specify, that operation will be cancelled to avoid server failure.
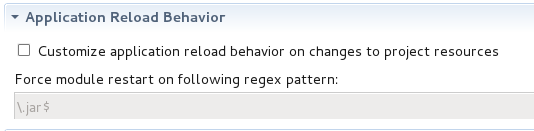
This section of the Server settings allows you to customize the reload behavior of your application, depending on server and module changes. Typically, a module will be forcefully restarted if an inner library such as a .jar file is modified. However, some users may prefer to reload the module even if any .class file changes. This section takes a regex pattern which matches against modified files during a publish. When finding a match, the module will be forcefully restarted after the publish is complete.
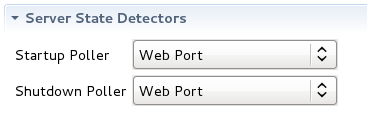
Upon trying to start or stop a server, the tooling attempts to recognize the state the server is in. During these operations, the tools will periodically poll the server to verify it's state. This section allows you to select which method the tools should use to verify the state of the server. The most common and safest type is the Web Port Poller, which simply pings the web port on your server's host to see if a server responds. (More details on "Ports" can be seen in the next section.)
Startup and Shutdown pollers can be selected independently. Possible polling mechanisms include polling JMX, the JBoss Management service, or a simple ping on the Web Port. Another option called the Timeout Poller waits for a specified duration and then simply declares the start or stop operation a success, performing no actual verification at all. Finally, the shutdown poller may also be set to the "Process Terminated" poller. This poller checks to see if the server process is still alive, and, when terminated, will set the server state to Stopped.
Important
The "Process Terminated" polling mechanism should not be used for servers operating with a Remote System Explorer behavior.
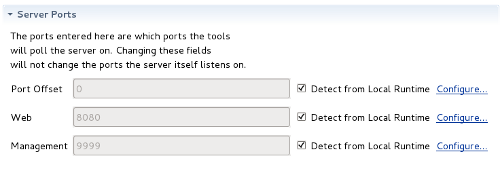
The server adapter tries to automatically detect the ports it needs for integrating with a JBoss Server by default. It does this typically by parsing through configuration files, searching for some XPath, and using the values found as the chosen port. The Server Ports section in the Server editor provides fields to customize the ports that the tooling will use to communicate with the server. Above, you see a name, a text box with an integer value representing the port, a checkbox toggling automatic detection, and a hyperlink to dive deeper into the discovery details. Sometimes, it is necessary to override this automatic detection if you are using a custom configuration. As shown above, the tools need to know how to accurately discover the web port and the management port. Recent servers allow for more accurate detection by also discovering the port offset setting.
A Note on Port Offsets
The JBoss Application Servers allow for a port offset to be declared. Essentially, a port offset is an integer to be added to all ports on startup. So if your server is set to have a web port 8080, but you provide a port offset of 200, the web port (and all other ports) will be 200 higher. This allows you to start multiple servers on the same machine without port conflicts.
The simplest way to ensure that the tooling is pinging or communicating on the correct port is to uncheck Detect Automatically. This sets the text field as editable, and you can simply type the correct port. To look deeper at the actual settings of how the port is discovered, or to modify this behavior, click the Configure... link to bring up the wizard for adjusting the settings for the ports.
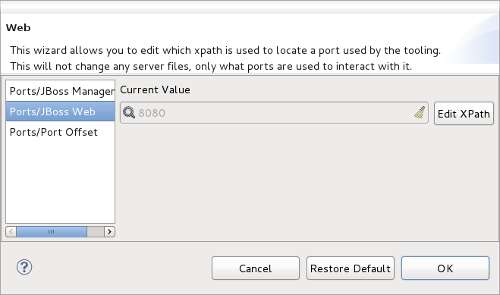
Click the Edit XPath button for the chosen port to configure its XPath's values.
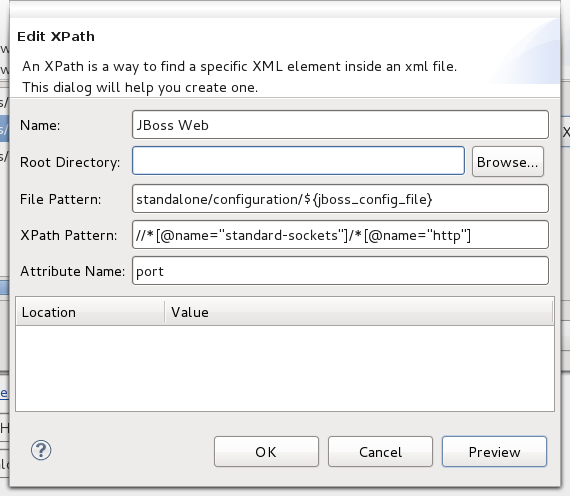
In this dialog, you can customize the XPath and an optional attribute name to discover the proper port string. The dialog provides a preview button to see the results that match the XPath. Ideally, you'll want to craft an XPath that matches only one result. You can limit the files to be searched by use of a fileset pattern. This will help limit other files from matching the result set, and ensuring an accurate detection of the proper port.
The Server editor window also allows you to modify the server's launch configuration. The settings are available by clicking the the Open launch configuration link in the General Information section of the editor. The resulting window provides tabs for setting command line arguments, main, classpaths and other things that are relevant to launching the server.
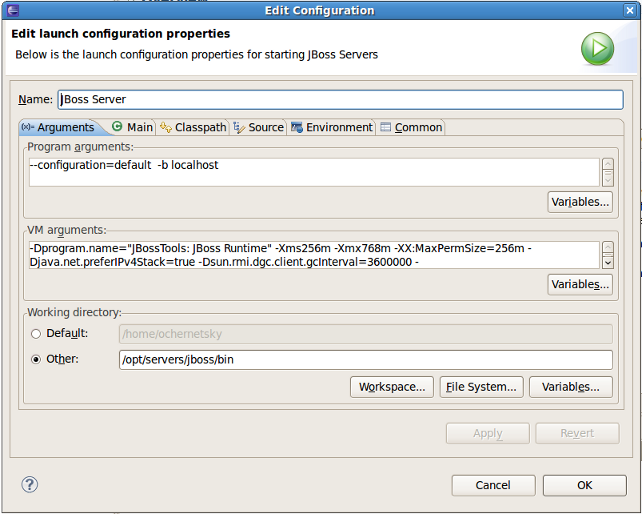
The first tab shows the JBoss server arguments
Note:
Please note that some of the values in the Launch Configurations for JBoss Servers are strictly enforced in order to avoid inconsistencies between server's and their configured runtime.
For example, if you change the launch configuration program arguments to "-c myConfig" but do not change the targeted runtime configuration, then your program arguments will be ignored. The configuration of the server runtime "wins" so to speak. This ensures consistency. Therefore, if you change the location of the runtime, your launch configurations will automatically pick that up.
Non-critical or custom arguments can be passed in or overridden with no problem at all. It is only arguments that otherwise conflict with the data in the runtime that will not be respected.
On the second tab you find the main class used for launching JBoss AS (the default is org.jboss.Main). This value can be changed if necessary.
Until JBoss Tools 3.0.0.GA the servers classpath was read only, but that caused problems for users wanting to add their own JARs in the startup classpath. That is relevant if you need to patch the server, add a custom charset or other tweaks that require early access to the classpath.
Now all servers have a custom 'server runtime classpath container', which is there by default and point to the default JARs in JBoss. You can now adjust the classpath. Then just make sure this container is there if you want the classpath to be picked up.
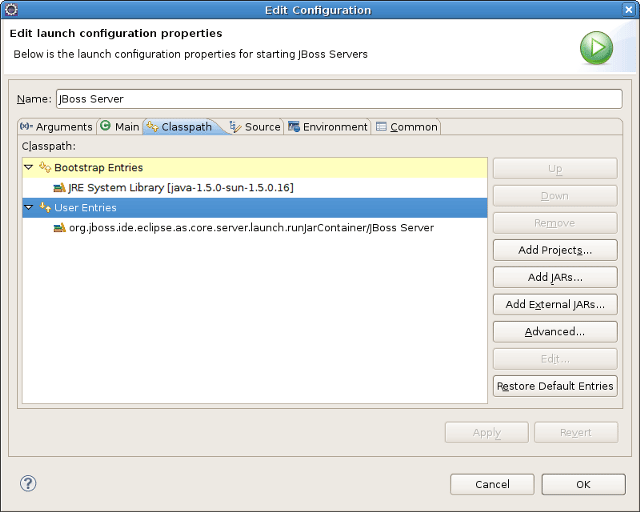
If for some reason you have a launch configuration without this container, the button should add it properly. Also, the button will remove any extra entries you added yourself.
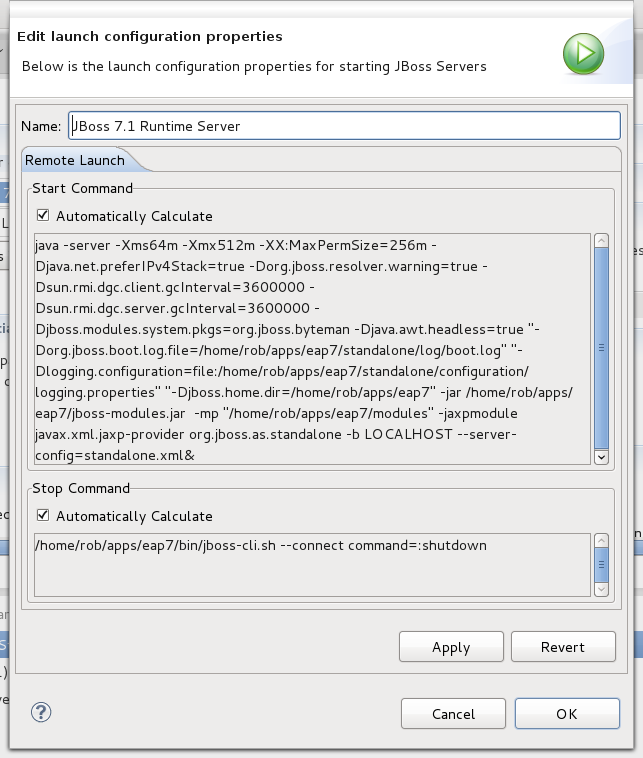
For servers representing a remote server, the launch configuration window allows for a complete customization of the remote launch startup and shutdown commands if the user chooses. The top half of the window represents the commands to be issued during server startup; the bottom is used for shutting down the server. These commands are executed as a remote command over SSH. Both sections include a checkbox marked Automatically Calculate. If this box is checked, the commands are not editable, but all critical arguments are generated using information not from the runtime, but rather from the Server Behavior section of the Server Editor, where your remote server home and configurations are declared.
Important
If you opt to uncheck the Automatically Calculate checkbox, there will be no overwriting of any critical paths at all. The user will have 100% control over this, and the tools will no longer attempt to helpfully overwrite important paths as they do for the local servers.
Using Deployment tab you configure local deployment settings.
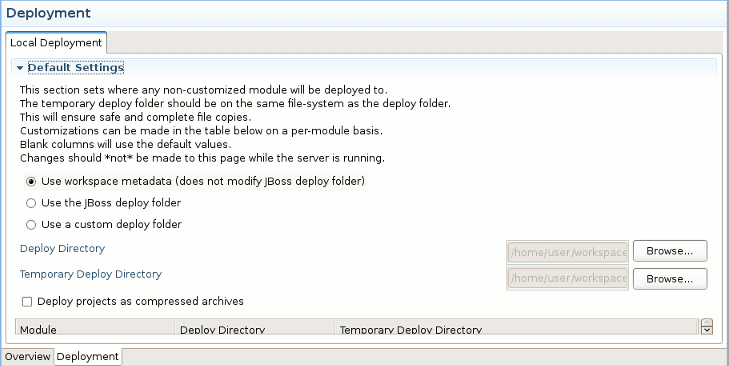
Using the group of radio buttons in the Default Settings section a user can set where the application will be deployed to. By default it is deployed to a folder inside the user's workspace metadata, located inside [workspaceDirecotry]\.metadata\.plugins. If you would like the application to be deployed to your JBoss server's deploy folder, select the Use the JBoss deploy folder option. The option to specify a custom deploy folder is also available.
You should also see a checkbox available labeled Deploy projects as compressed archives. This option forces all of your publish operations to result in a zipped archive output file. Rather than an exploded directory war, for example, you would end up with a zipped .war file.
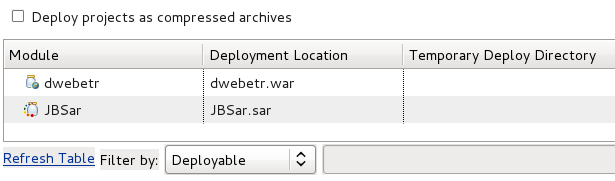
As shown above, the bottom section of this editor page allows customizations on a per-module basis. For example, if you want one of your modules to be published to a custom directory, while the rest live happily inside the server's deploy folder, you can now override this setting here. If you'd like to change the output file name from the assumed MyProject.war to the OtherName.war, this is also possible.
To begin editing these values, simply click on the cell you wish to edit. All paths should be absolute, or, relative to the default deploy directory as chosen in the top section of the editor page. Be aware that when publishing, we require the temporary folder to be on the same filesystem as the final deploy location. If this constraint is not satisfied, publish will often fail. Do not forget to save the editor before these results can take effect.