Follow the instructions in these workshops to broaden your knowledge and understanding of JBoss Developer Studio.
In this RESTEasy workshop we will provide an example of how to solve the problem of creating new customers for an online store. This will be achieved through the creation of a shopping application and adding customer records through a web browser.
Prerequisites
The following technologies are necessary for this workshop:
JBoss Developer Studio 5.0
JBoss Enterprise Application Platform 6 or JBoss Service Orientated Architecture Platform 6
Firefox 2.0 or higher web browser
REST Client Firefox plug-in available from https://addons.mozilla.org/en-US/firefox/addon/9780
Make sure JBoss Developer Studio is open with the application server running. For simplicity it will be assumed for the rest of the workshop that you are running the JBoss Enterprise Application Platform 5, however the steps will be the same if you are using the JBoss Service Orientated Architecture Platform 5.
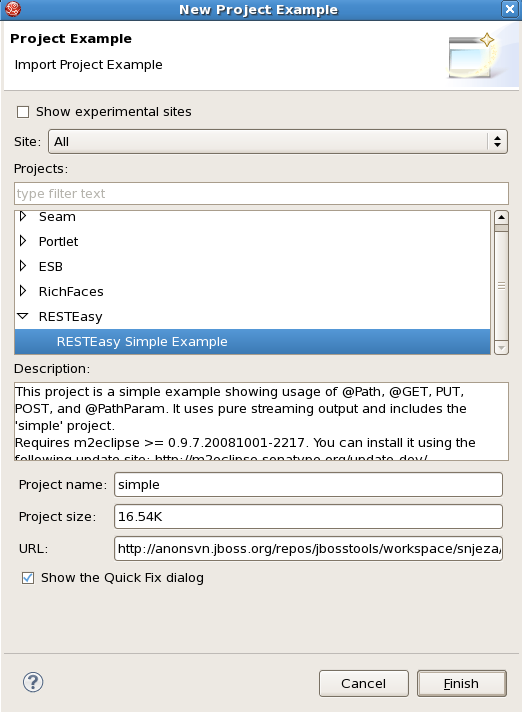
In JBoss Developer Studio navigate to → .

In the menu dialog box, scroll to → and click the button.
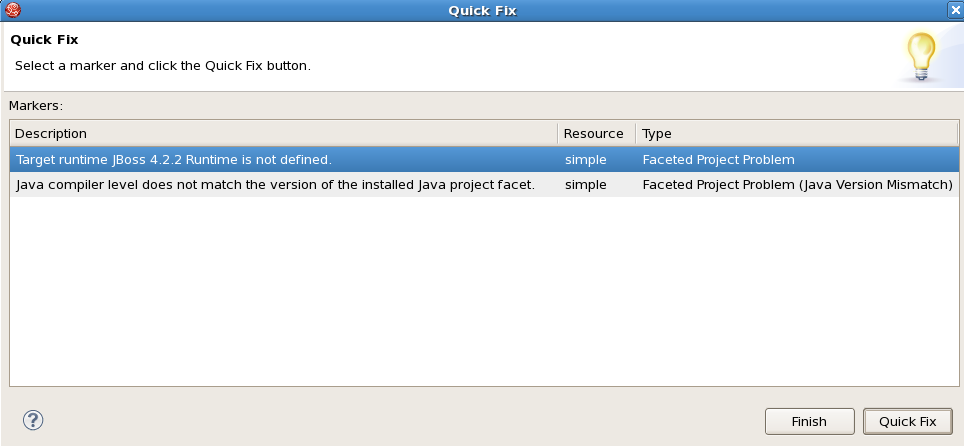
There may be two issues to fix before you can continue. The description for these issues are Target runtime JBoss 4.2.2 Runtime is not defined and Java compiler level does not match the version of the installed Java project facet. If they do not appear skip to Figure 6.7, “Completed fixing the issues”. If they do appear, the following steps will resolve these issues.

To fix the first issue with the description Target runtime JBoss 4.2.2 Runtime is not defined click on this description and then click the button.
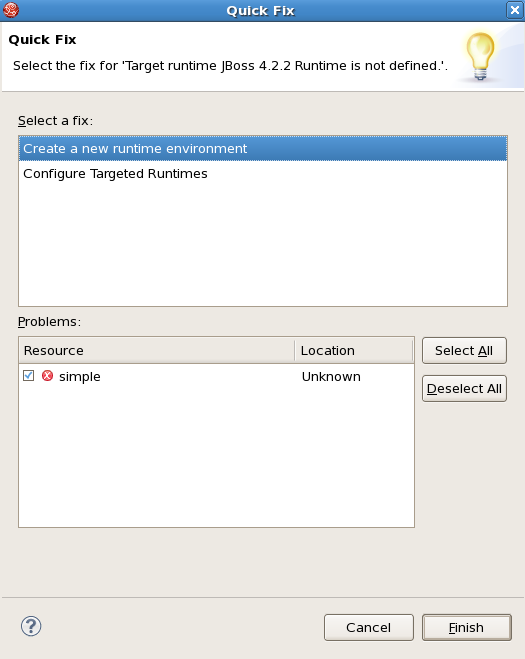
The next dialog box will display two runtime issues to fix, however by fixing the second one, labeled as Configure Targeted Runtimes, both issues will be corrected.
Select the issue called Configure Targeted Runtimes and click the button.
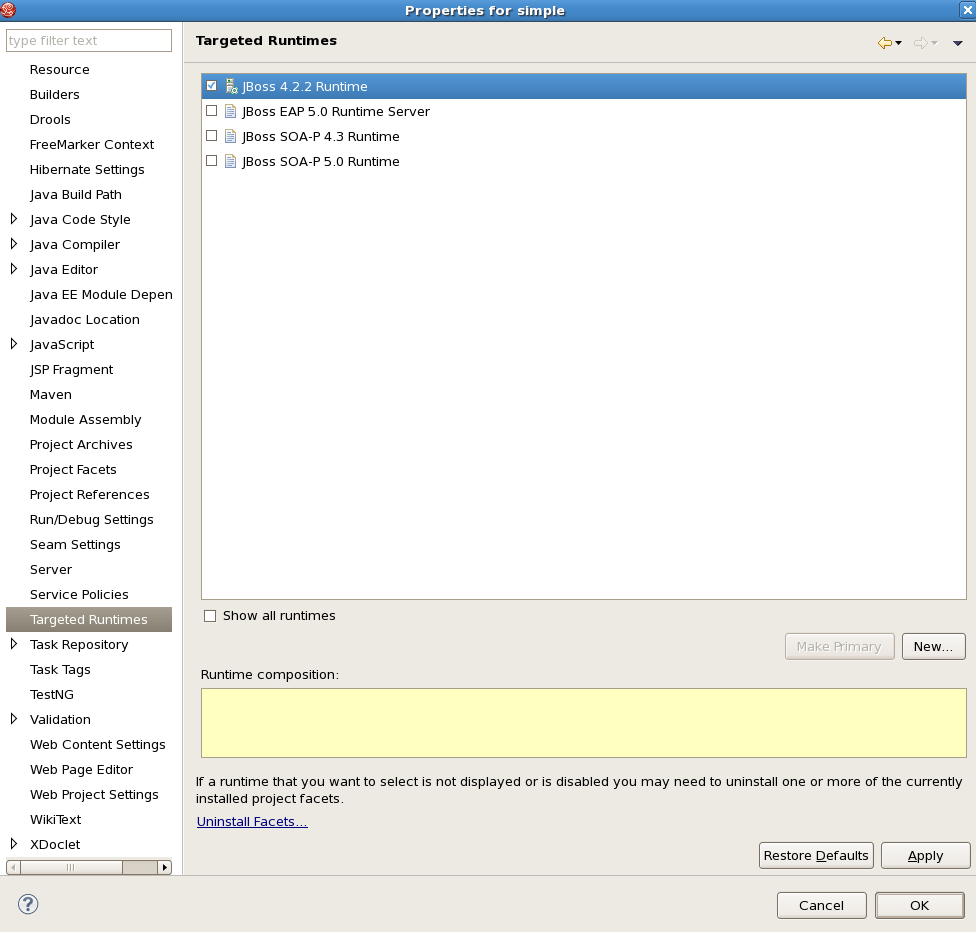
A large dialog box will open displaying a long list of property categories on the left hand side. Navigate down to and click on the property title. To the right of the menu where the JBoss 4.2.2 Runtime box is selected, deselect it and then select the name of your JBoss Enterprise Application Platform 5 runtime.
Once the JBoss Enterprise Application Platform 5 is selected and the old runtime deselected, click the button and then the button.
Note
In Figure 6.6, “Selecting the correct runtime”, the runtime that will be used is the one called JBoss EAP 5.0 Runtime Server, though the name will depend on what you called it when you configured the server for use with JBoss Developer Studio.
To fix the second issue with the description Java compiler level does not match the version of the installed Java project facet, click on its description and then click the button.
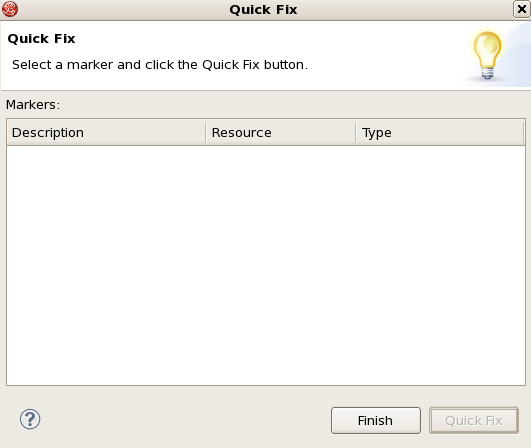
After clicking the button the Java compiler issue should disappear because the JBoss Developer Studio has made the necessary changes in the background to fix it.
The Quick Fix dialog box should now be empty. Click the button.
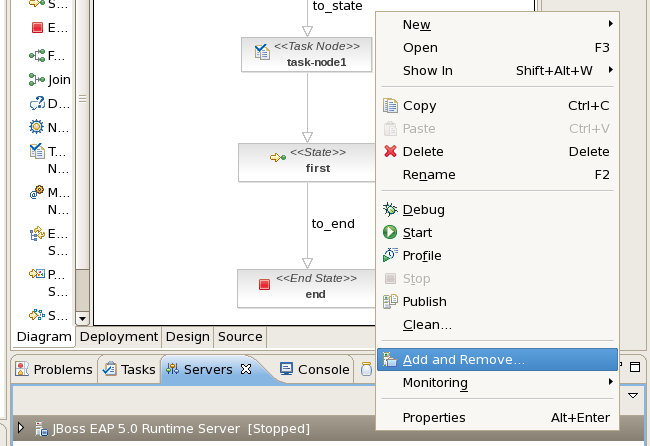
To add the project to the JBoss Enterprise Application Platform 5 server right click (or Control-click on Mac OS) on the server name in the view in the bottom section of your workbench. Click on the option.
From the Add and Remove dialog box ensure the box labeled If server is started, publish changes immediately is ticked. In the left-hand menu, highlight the project you just created called simple by clicking on it.
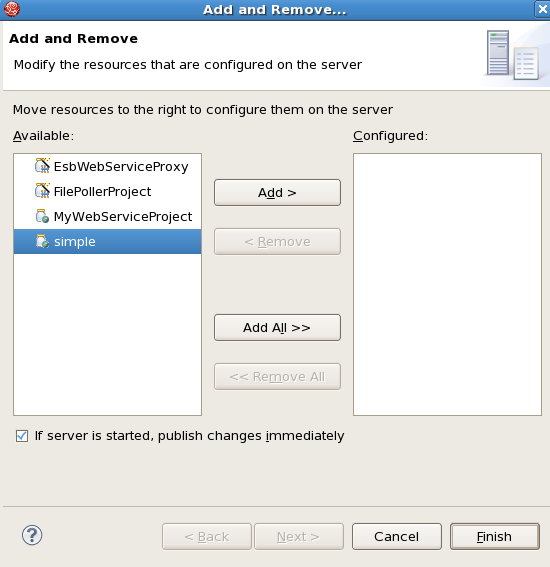
Click the button to move it from the left-hand menu labeled Available to the right-hand menu labeled Configured. Once this is completed click the button.
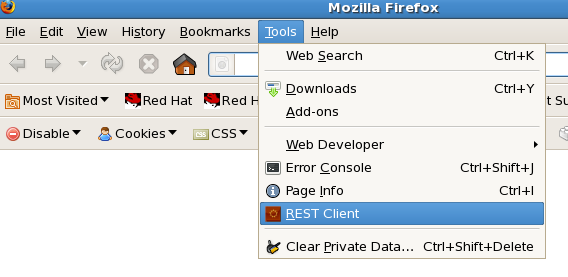
Your RESTEasy project has now been deployed onto your server. We will now test the application by using the REST Client plug-in within the Firefox web browser.
Open your Firefox web browser and navigate to → .
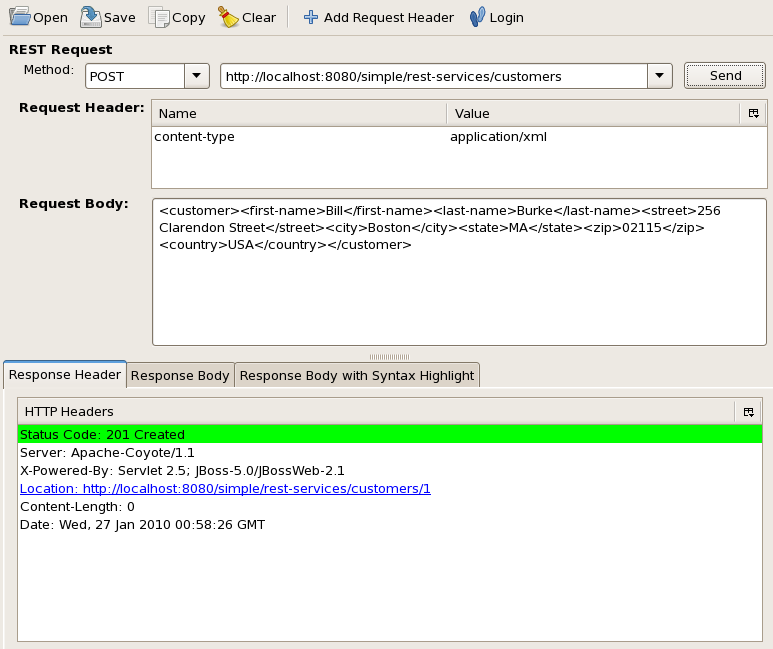
In the REST Client click on the button and type content-type for the Name and application/xml for the Value. This will ensure that the content will be consumable by the Plain Old Java Object (POJO) service at the server.
Select from the Method drop-down menu, copy http://localhost:8080/simple/rest-services/customers into the drop-down menu beside the Method and paste the following into the Request Body:
<customer><first-name>Bill</first-name><last-name>Burke</last-name><street>256 Clarendon Street</street><city>Boston</city><state>MA</state><zip>02115</zip><country>USA</country></customer>
The XML for the Request Body must not contain any spaces between XML tags to avoid exceptions occurring at the server end.
Click the button to add the customer information.
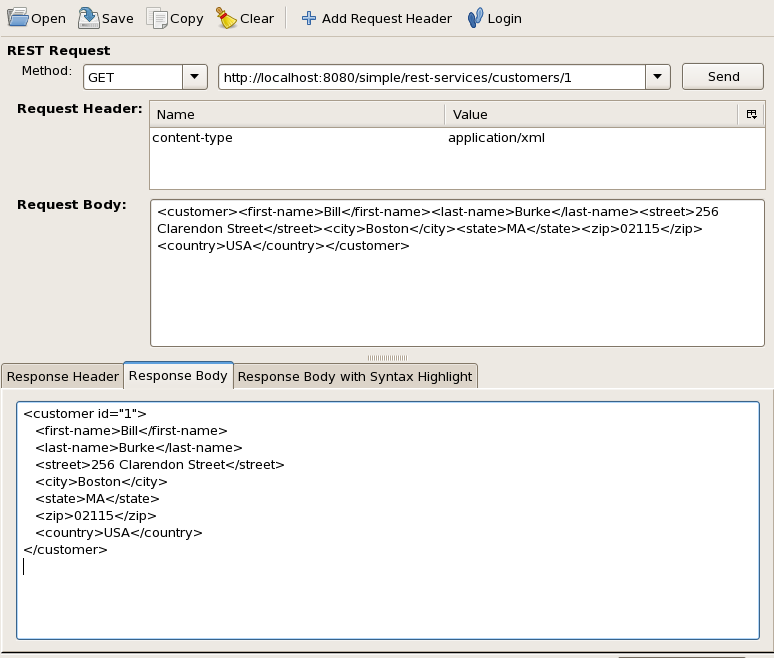
To ensure the customer details were added, change the Method type to and the URL address to http://localhost:8080/simple/rest-services/customers/1. The /1 is added to the URL to select the customer with the customer id of 1, since that is the number that was given to the customer.
Click the button to retrieve the information. Select the Response Body tab beneath the Request Body section to view the returned information.
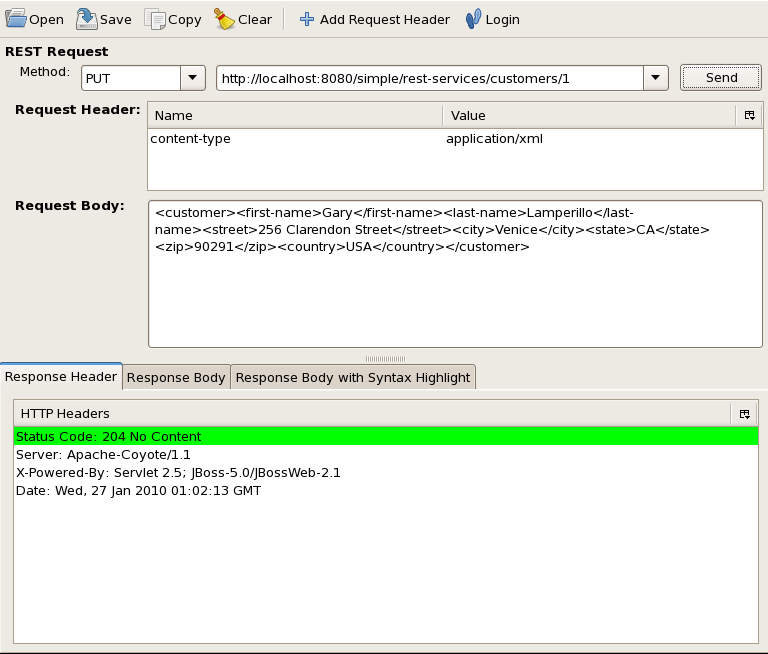
We have added a customer and retrieved their information; now we will update their information. To achieve this change the Method to and copy the following into the Request Body (overwriting anything that may be in the Request Body already):
<customer><first-name>Gary</first-name><last-name>Lamperillo</last-name><street>256 Clarendon Street</street><city>Venice</city><state>CA</state><zip>90291</zip><country>USA</country></customer>
Remember to make sure there are no spaces between the XML tags when you copy the information into the Request Body.
Check to make sure the URL still reads http://localhost:8080/simple/rest-services/customers/1 from when you retrieved the customer information. By using the URL that references the ID of the customer you are updating that customer's record.
Click the button to update the information.
To verify that the record has been updated change the Method type to , ensure the URL still references customer ID 1 and click the button.
Select the Response Body tab beneath the Request Body section to view the returned information.
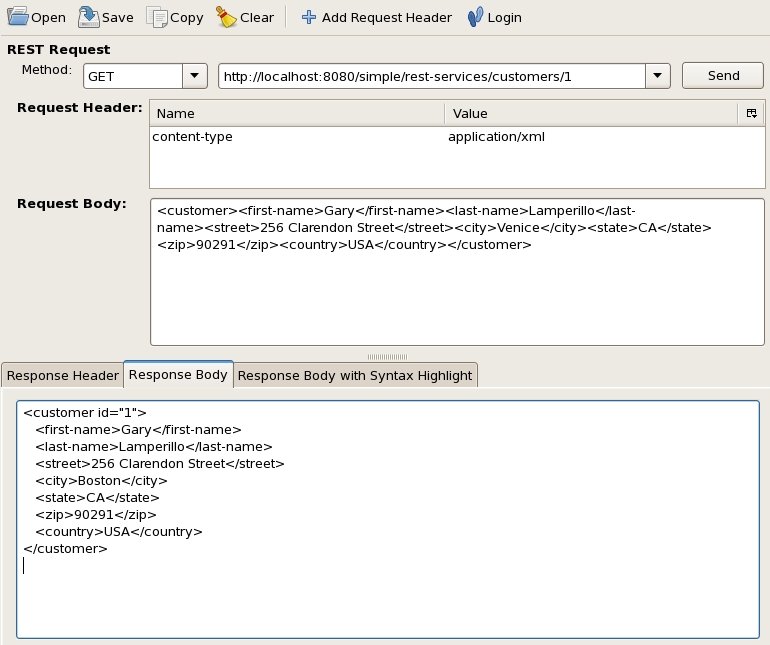
The RESTEasy workshop is now complete.