JBoss Tools provides a view to test web services. The Web Services Test View can be displayed by following the steps in Web Services Test View.
Procedure 4.1. Web Services Test View
Access the Show View dialog
Select → →
Result:
The Show View dialog displays.
Click on the Web Services Tester label by expanding the JBoss Tools Web Services node and click .
Result:
The Web Services test view displays.
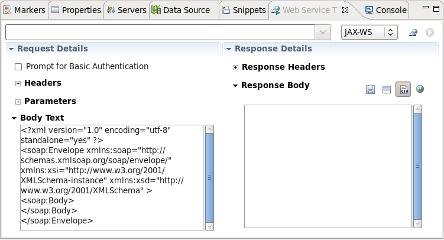
The main components of the Web Service Tester View are:
WSDL path/button bar (Table 4.1, “WSDL path/button bar”)
Request details panel (Table 4.2, “Request details panel”)
Response details panel (Table 4.3, “Response details panel”)
Table 4.1. WSDL path/button bar
Component Description Editable dropdown list Enter the location of the WSDL file or HTTP address of the service to be tested. The combo box requires the path to the WSDL in a URI format. Combo box Select the type of service to test. The options are JAX-WS or any other option to test a JAX-RS service using HTTP request methods ( PUT,GET,POST,DELETEorOPTIONS).Toolbar button - Get From WSDL Click this button to display the Select WSDL dialog. Enter the , location or Eclipse location of the WSDL file. Given a valid file, the dialog will allow selection of the Port and Operation to test. Once selected, the request details will be displayed in the Request Details panel. Toolbar button - Invoke Once the WSDL file has been selected, the service can be invoked by clicking this button. Response details will be displayed in the Response Details panel. Table 4.2. Request details panel
Component Description Prompt for Basic Authentication Select this check box to send a username and password with the request. Entering the user details for each subsequent request is not necessary as the details are stored in memory. Headers Enter () one or more name=valuepairs. These headers will be passed with the invocation request at the HTTP level where possible.Parameters As for header information, enter one or more name=valuepairs by clicking the button.Body Enter the JAX-WS SOAP request messages or input for JAX-RS service invocations in this text box. Table 4.3. Response details panel
Component Description Response headers The headers returned by the service invocation will be displayed in this panel. Response body The JAX-WS and JAX-RS response bodies will be displayed in this box. The raw text returned from the web service invocation can be displayed by clicking the button. The output will be embedded in a html browser by clicking the button. The output can alternatively be displayed in the Eclipse editor as xml or raw text (depending on the response content type) by clicking the button. Parameters As for header information, enter one or more name=valuepairs by clicking the button.Body Enter JAX-WS SOAP request messages and input for JAX-RS service invocations in this text box.
The following sections describe testing JAX-RS web services, including the necessary preliminary steps.
The following procedure describes the steps to perform before testing a web service.
Procedure 4.2. Testing a web service
Preliminary steps
Prior to testing a web service:
The Web Service Test View should be opened as described in Web Services Test View;
Result:
The Web Service Test View displays.
A web service has been deployed to the
deploydirectory of the chosen server profile.The server has been started with
run.sh -c <profile>
Testing a RESTful ( JAX-RS ) web service is achieved by following a similar procedure to testing a JAX-WS web service. Instead of selecting the JAX-WS option in the combobox, the JAX-RS service is invoked by sending HTTP method requests of the form OPTIONS, GET, POST, PUT and DELETE. As there is no WSDL file associated with a JAX-RS service, the available options can be determined by selecting OPTIONS in the combobox.
A JAX-RS web service can be tested by using the Web Service Tester View displayed in Figure 4.1, “Web Service Test View”. The JAX-RS test is specified by:
The test procedure is discussed in the following sections for both the RestfulSample and the RESTEasy sample projects developed earlier.
Procedure 4.3. RestfulSample test
Query the available options
Select OPTIONS from the available combobox options.
Enter the url of the web service in the editable drop-down list: http://localhost:8080/RestfulSample/MyRESTApplication.
Click the Invoke button
Result:
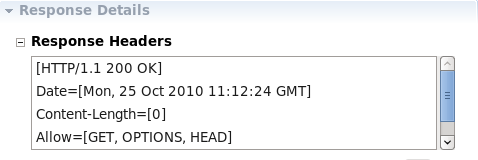
The Response Headers text area indicates that the allowed options are
[GET, OPTIONS, HEAD]as shown in Figure 4.3, “JAX-RS Response Header Text”.
Test the GET request
Having established that the GET request is valid, select GET from the available combobox options.
Click the Invoke button.
Result:
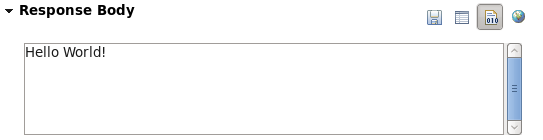
The Response Body text area displays the expected “Hello World” text as shown in Figure 4.4, “JAX-RS Response Body Text”.
Procedure 4.4. Testing a JAX-RS web service- POST and GET requests
Query the available options
Following the preliminary steps described in Testing a web service, select the OPTIONS method from the operations text area.
Enter the url of the web service in the editable drop-down list http://localhost:8080/simple/rest-services/customers.
Click the Invoke button
Result:
The Response Headers text area indicates that the allowed options are
[POST, OPTIONS]as shown in Figure 4.5, “JAX-RS RESTEasy project Body Text”.
Test the POST option
Select POST method in the the operations drop-down list.
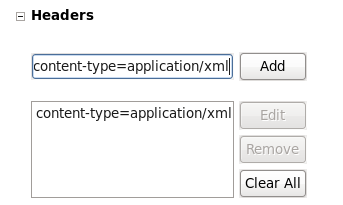
We will post xml data to this particular web service. Complete the header details by entering
content-type=application/xmlin the text area and click to add it to the Headers list.Result:
The content-type is added to the Headers list as shown in Figure 4.6, “content-type header”.
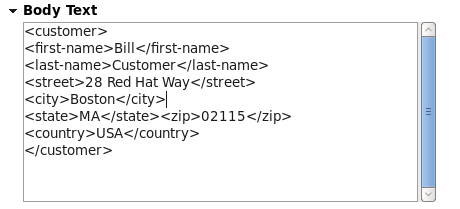
Enter customer details
Enter the customer details in the Body Text area as displayed in Figure 4.7, “Customer data”.
Click the button.
Result:
The Response Headers area indicated that a record was created and lists the location as http://localhost:8080/simple/rest-services/customers/1 as shown in Figure 4.8, “Customer added”.
The console also indicates the successful creation of the customer:
10:44:33,846 INFO [STDOUT] Created customer 1
Test the GET option
Select the GET method in the the operations drop-down list.
We will retrieve the record created in the previous step. Enter the url for the record returned in the previous step http://localhost:8080/simple/rest-services/customers/1
Click the button.
Result:
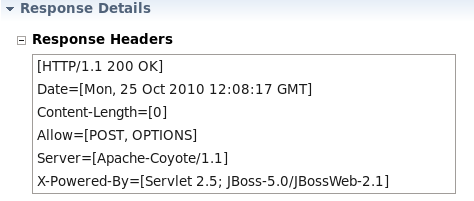
The Response Headers area indicates a
[HTTP/1.1 200 OK]response and the customer data is retrieved and displayed in the Response Body area as shown in Figure 4.9, “GET response”.
Test the PUT option
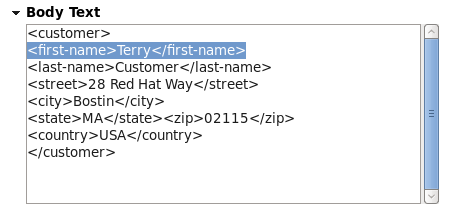
Editing a record is achieved by using the PUT method. Select the PUT method in the operations drop-down list.
Enter the url of the record to be edited http://localhost:8080/simple/rest-services/customers/1
Enter the data in the Body Text area. Replace the first-name with a different entry as in Figure 4.10, “Updated customer data”
Ensure that the
content-type=application/xmlheader is in the Headers list.Click the button.
Result:
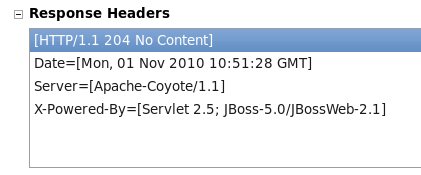
The Response Headers area indicates a No Response (
[HTTP/1.1 204 No Content]) Figure 4.11, “Response header following PUT”.In this instance, the console does not indicate an update was performed, however, the console may provide useful information following an operation.
Check the updated data with a GET
Perform a GET operation by following the steps in Step 3.
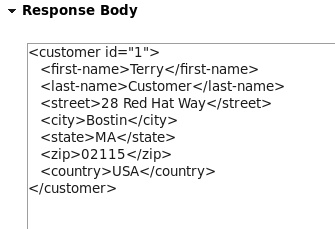
Result:
The Response Body area displays the updated data.
Test the DELETE option
Deleting a record is a similar process to posting. Select the DELETE method in the operations drop-down list.
Enter the url of the record to be deleted http://localhost:8080/simple/rest-services/customers/1
Click the button.
Result:
The Response Headers area indicates a No Response (
[HTTP/1.1 204 No Content]) as was the case for the PUT operation in Figure 4.11, “Response header following PUT”.Once again, the console does not indicate an update was performed, however, the console may provide useful information following an operation.
Check the DELETE operation with a GET
Perform a GET operation by following the steps in Step 3.
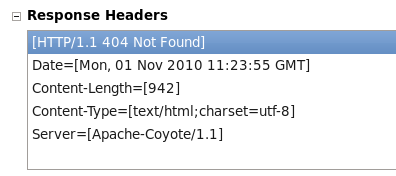
Result:
The Response Body area returns an error report indicating that
The requested resource () is not availableand the Response Headers area returns a[HTTP/1.1 404 Not Found].The response header and body messages indicate that the data was successfully deleted.