- 7.1. Overview of Hybrid Mobile Tools and CordovaSim
- 7.2. Features of Hybrid Mobile Tools and CordovaSim
- 7.2.1. Features Overview
- 7.2.2. Create a Hybrid Mobile Project
- 7.2.3. Enable Cordova Plug-ins for an Application
- 7.2.4. Manage Cordova Settings of a Hybrid Mobile Project
- 7.2.5. Run a Hybrid Mobile Application on Devices and Simulators
- 7.2.6. Manage Hybrid Mobile Project Run Configurations
- 7.2.7. Export a Hybrid Mobile Project
- 7.3. Customizing Hybrid Mobile Tools and CordovaSim
Apache Cordova is a framework for hybrid mobile application development. It simplifies mobile application development by enabling developers to use device-independent APIs, in place of native code, to access device functionality.
Cordova consists of plug-ins, each providing a wrapper API to gain access to corresponding native device APIs. Cordova APIs are available for a range of device functionality, including cameras, accelerometers, and filesystems. All of the Cordova APIs have a JavaScript interface and native backing code to support a variety of different device operating systems, including Android and iOS.
The JavaScript interface of Cordova APIs provides consistent methods for accessing native device functionality regardless of operating system. Applications using Cordova are written once and packaged using native software development kits (SDKs) to produce hybrid mobile applications.
Cordova applications have a distinctive project structure:
An essential
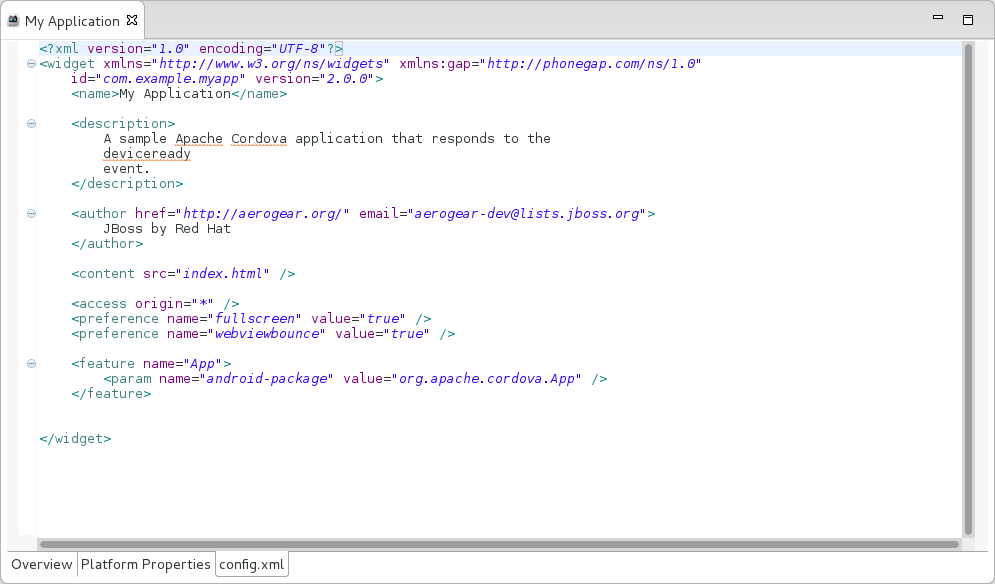
config.xmlfile holds information about the application. It specifies features, preferences and access details that affect how the application works, for example whether the application responds to orientation changes.An application is implemented as a web page. The default starting page is
index.htmland device-independent resources are stored in awwwdirectory.An application must reference the
cordova.jsfile, which holds necessary API bindings that enable the application to interact with device features.
Apache Cordova is an open source project, of which there are various distributions. PhoneGap, in addition to being the originator of Cordova, and IBM Worklight are such distributions.
Hybrid Mobile Tools provides tooling for developing Cordova-based hybrid mobile applications within the IDE. It simplifies the process of getting started with the Cordova technology that can be used for these types of applications and provides workflows for developing Cordova-based hybrid mobile applications.
Hybrid Mobile Tools consists of the Apache Cordova API and wizards, a dedicated editor and actions for developing Cordova-based hybrid mobile applications for Android and iOS operating systems:
The Hybrid Mobile Application project wizard creates a sample project to demonstrate the Cordova project structure and provides you with a template from which to create your own applications.
The Cordova Configuration Editor offers simplified management of
config.xmlfiles, with dedicated tabs for adding and editing project descriptions, features, preferences and access. An additional tab enables direct editing ofconfig.xmlfiles.The Cordova Plug-in Discovery wizard assists you to add Cordova plug-ins to your projects. Plug-ins can be installed from the Cordova registry, Git locations and system directories. Information displayed in the Project Explorer view is extended to show installed plug-ins and enable their management.
Actions are provided for calling external Android and iOS SDKs to package Cordova-based hybrid mobile projects into native applications and subsequently run them on their associated simulators or connected Android devices.
Export wizards are available for exporting Cordova-based hybrid mobile projects from the IDE workspace as Cordova-enabled Android or iOS projects and ready-to-sign applications.
Hybrid Mobile Tools, together with CordovaSim, provides a rounded hybrid mobile development and testing environment.
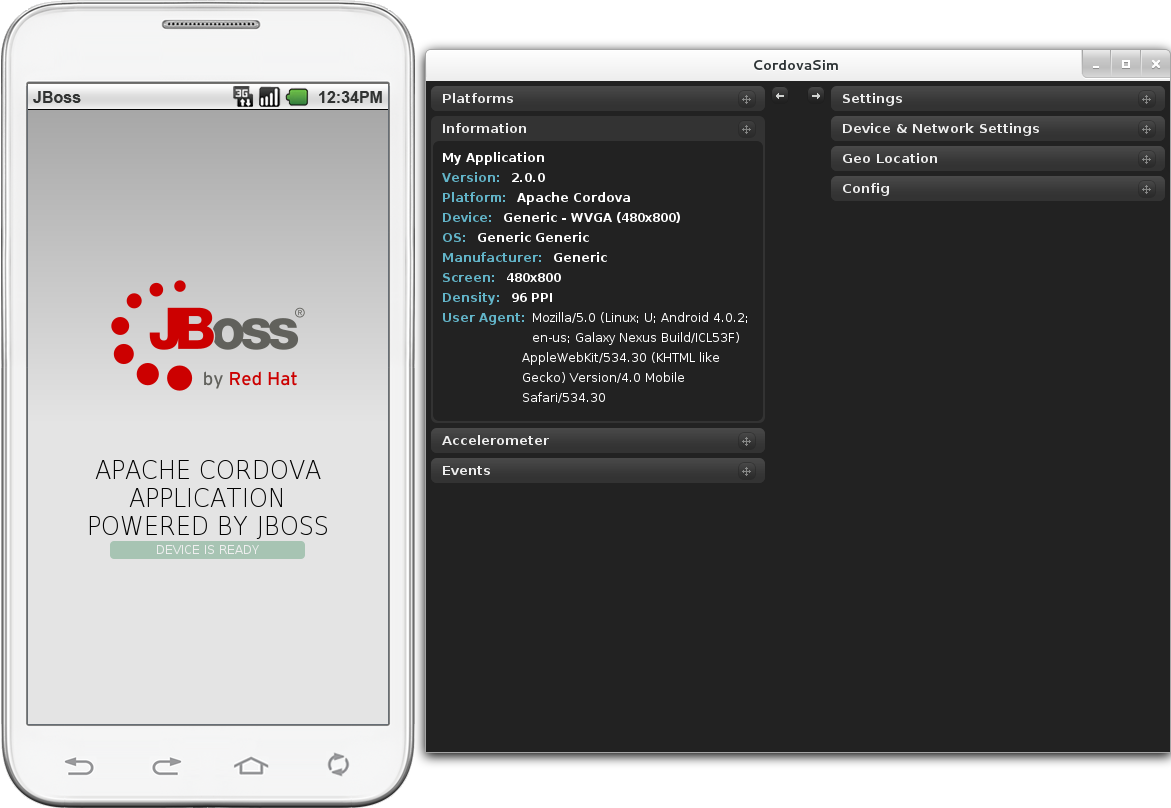
CordovaSim is a mobile application simulator. It enables you to view and test Cordova-based hybrid mobile applications through a mobile device simulator.
CordovaSim consists of a device input panel based on an extended version of Apache Ripple, teamed with BrowserSim. The input panel provides the ability to give sample input for device features to the application, such as camera, geolocation and accelerometer data. BrowserSim displays and enables user interaction with the application.
Extensions to the device input panel for CordovaSim include the following:
CordovaSim supports a range of Cordova API implementations: the core Apache Cordova plug-ins, several PhoneGap plug-ins and custom plug-ins. Supported PhoneGap plug-ins include
BarcodeScanner,InAppBrowserandChildBrowser. (Note that exceptions to the supported core Apache Cordova plug-ins areFileand thecaptureAudioandcaptureVideomethods ofCapture.)CordovaSim automatically injects an up-to-date version of the
cordova.jslibrary into your project code at simulation time in the case that it is missing. Typically this file is added when a project is built with a native SDK. This response by CordovaSim enables it to simulate applications of Cordova-based hybrid mobile projects and Cordova-enabled Android projects without requiring native SDKs.The use of BrowserSim for displaying the application extends the functionality of the mobile application simulator to encompass all of the BrowserSim functionality. This functionality includes skins, screen captures and LiveReload.
The overall system requirements of JBoss Tools are applicable for Hybrid Mobile Tools and can be viewed at https://community.jboss.org/wiki/MatrixOfSupportedPlatformsRuntimesAndTechnologiesInJBossToolsJBDS on the JBoss Tools website. But, as reiterated below, there are additional system requirements and restrictions when using Hybrid Mobile Tools.
Hybrid Mobile Tools actions involving Android and iOS require the associated SDKs to be installed on your system.
Note
CordovaSim is a standalone simulator for mobile device operating systems, including Android and iOS. It does not require native SDKs to be installed in order to simulate successfully.
- Android SDK (including emulator)
This is available as part of Android Development Tools. For further information see http://developer.android.com/sdk/index.html on the Android Developers website. Note that for Android actions in Hybrid Mobile Tools it is only necessary to install the Android SDK, which includes the Android Emulator.
Once downloaded, you must use the included Android SDK Manager to further download necessary APIs and set up Android virtual devices (AVDs).
Important
You must have Android API 17 or later installed on your system to use the Hybrid Mobile Tools Run on Android Emulator action. You are prompted by an error message when only Android API 16 or earlier is available. In the event that multiple Android API of 17 and later are available, Hybrid Mobile Tools uses the latest version.
Further, once Hybrid Mobile Tools is installed, you must set the Android SDK location in the IDE before you can use Hybrid Mobile Tools actions involving Android.
- iOS SDK (including simulator)
This is available as part of Apple XCode. For further information see https://developer.apple.com/xcode/ on the Apple website.
The overall system requirements of JBoss Tools are applicable for CordovaSim and can be viewed at https://community.jboss.org/wiki/MatrixOfSupportedPlatformsRuntimesAndTechnologiesInJBossToolsJBDS on the JBoss Tools website. But CordovaSim uses BrowserSim and, as reiterated below, there are additional system requirements and restrictions when using BrowserSim on Microsoft Windows operating systems.
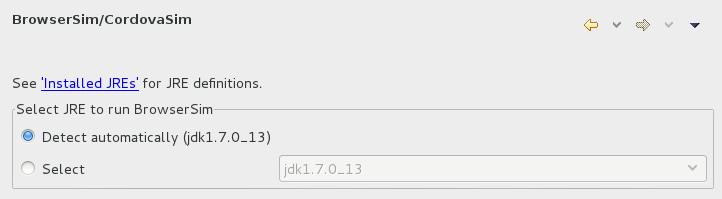
BrowserSim depends on WebKit and, consequently, requires Apple Safari to be installed on Microsoft Windows operating systems. Only a 32-bit version of Apple Safari is available for Microsoft Windows operating systems. To work around this restriction for 64-bit Microsoft Windows operating systems, you must set BrowserSim to use a 32-bit JVM when running in 64-bit versions of Eclipse. Note that 32-bit JVM choice is limited to Oracle 32-bit JRE 1.6, JDK 1.6, or JDK 1.7 on Microsoft Windows operating systems because Oracle 32-bit JRE 1.7 is incompatible with Apple Safari.
If BrowserSim is already installed, it can be set to use a 32-bit JVM either before or after installing CordovaSim. To set BrowserSim to use a 32-bit JVM, click →. Expand JBoss Tools and select BrowserSim/CordovaSim. Under Select JRE to run BrowserSim, click Select and from the list select a 32-bit JRE or Java developer kit. Click and click to close the Preferences window.
Hybrid Mobile Tools and CordovaSim are not packaged as part of JBoss Tools installations. These plug-ins must be installed independently through JBoss Central, as detailed in the procedure below.
Procedure 7.1. Install Hybrid Mobile Tools and CordovaSim
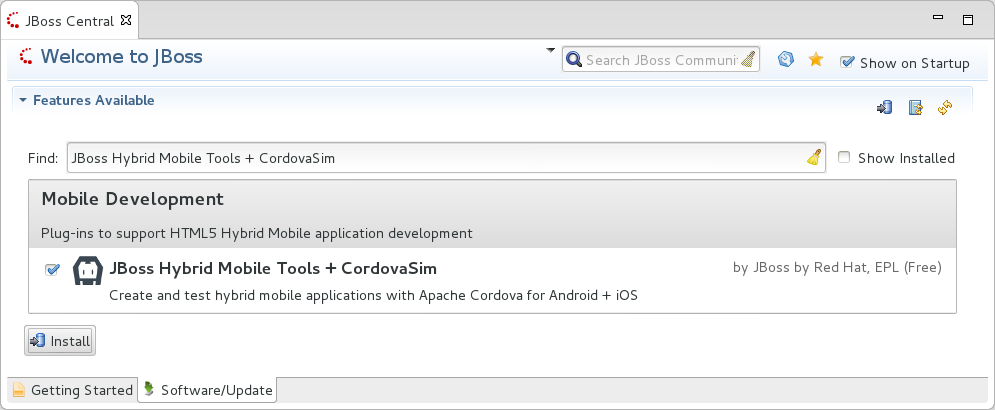
To install these plug-ins, drag the following link into JBoss Central: http://download.jboss.org/jbosstools/central/install?connectors=org.jboss.tools.aerogear.hybrid. Alternatively, in JBoss Central select the Software/Update tab. In the Find field, type JBoss Hybrid Mobile Tools or scroll through the list to locate JBoss Hybrid Mobile Tools + CordovaSim. Select the corresponding check box and click .
In the Install wizard, ensure the check boxes are selected for the software you want to install and click . It is recommended that you install all of the selected components.
Review the details of the items listed for install and click . After reading and agreeing to the license(s), click I accept the terms of the license agreement(s) and click . The Installing Software window opens and reports the progress of the installation.
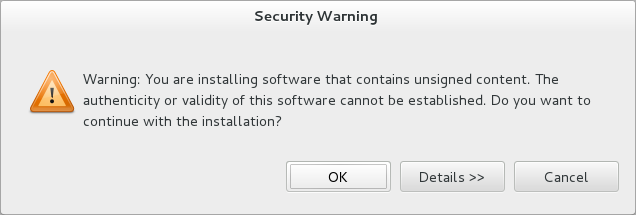
During the installation process you may receive warnings about installing unsigned content. If this is the case, check the details of the content and if satisfied click to continue with the installation.
Once installing is complete, you are prompted to restart the IDE. Click to restart now and if you need to save any unsaved changes to open projects. Note that changes do not take effect until the IDE is restarted.

Once installed, you must inform Hybrid Mobile Tools of the Android SDK location before you can use Hybrid Mobile Tools actions involving Android.
The aim of this section is to guide you in using Hybrid Mobile Tools and CordovaSim:
Create the basis of new hybrid mobile projects using the project wizard
Add and remove Cordova plug-ins from your applications
Manage the Cordova functionality of applications using the Cordova Configuration Editor
Run and test hybrid mobile applications with CordovaSim or call external Android and iOS SDKs to run applications on their associated simulators and, in the case of Android, attached devices
Customize the settings used by CordovaSim, Android and iOS simulators for running hybrid mobile applications
Export workspace applications as Cordova-enabled native projects or ready-to-sign applications
A project wizard is available to assist you in generating new hybrid mobile applications, as demonstrated in the procedure below. It creates a Cordova project with structure compatible with projects generated by the Cordova command-line interface (CLI).
Procedure 7.2. Create a Hybrid Mobile Project
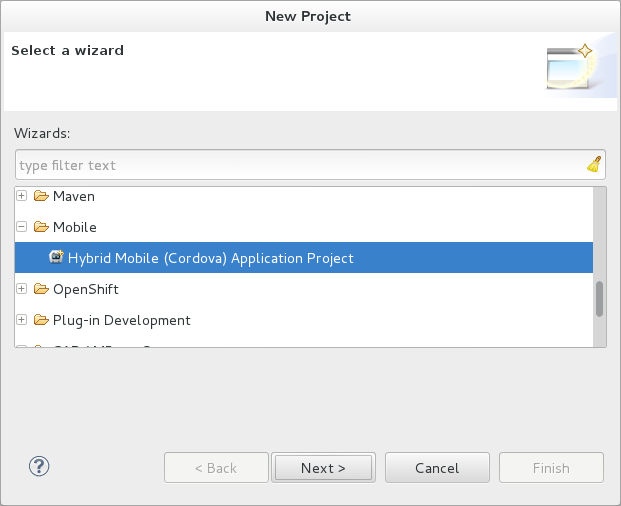
Click →→.
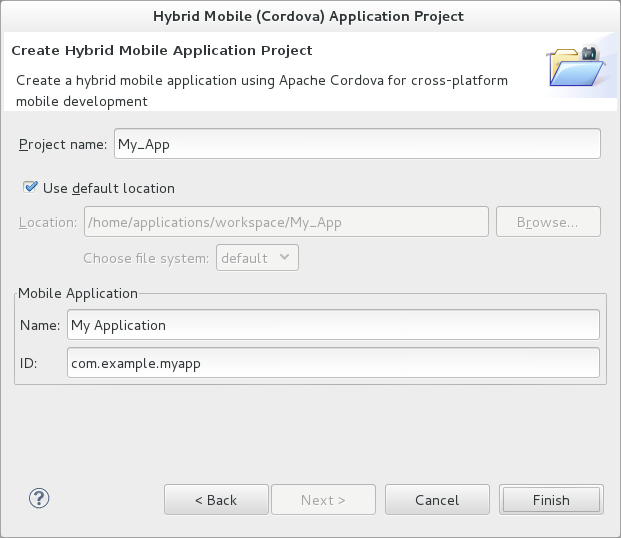
Expand Mobile, select Hybrid Mobile (Cordova) Application Project and click .
Complete the following fields:
In the Project name field, type a name for the project. This value is the name of the directory to be created and in which the source files for the application are stored, for example
My_App.In the Name field, type a name by which the hybrid mobile application is to be known. This value is the display text used to represent the application in listings and device home screens, for example
My Application.In the ID field, type an ID for the hybrid mobile application. The value is typically a reverse domain-style identifier, for example
com.example.myapp, and for applications that are to be distributed through device platform application stores the ID value will be provided by the store.Note
There are restrictions on the ID you can use for an application. IDs must consist only of alphanumeric characters and dots. IDs must begin with an alpha character and contain at least one dot.
By default, the project is created in a subdirectory of the workspace that is named according to the project name. To change the default location, clear the Use default location check box. From the Choose file system list, select the default or RSE (Remote System Explorer) as appropriate. In the Location field, type the path where the project is to be created or click to navigate to the location.
To create the project, click .
During project creation, the wizard imports project dependencies and populates a config.xml file. Once created, the project is listed in the Project Explorer view and the config.xml file is automatically opened in the Cordova Configuration Editor.
Note
The project created by Hybrid Mobile Tools has some IDE-specific items, namely a .settings directory and a .project file. All other items in the Hybrid Mobile Tools generated project have the same purpose as those in projects created by the Cordova CLI.
Plug-ins, or features, provide the application with access to the necessary Cordova APIs at runtime. Hybrid Mobile Tools provides actions for installing and removing plug-ins associated with applications, as detailed here.
- Add a plug-in
In the Project Explorer view, right-click the
pluginsfolder of the project and click .The Cordova Plug-in Discovery wizard opens. The Cordova Plug-in Discovery wizard can install Cordova plug-ins from Cordova registries, Git locations and system directories:
In the Registry tab, in the Find field enter the name of the feature or scroll through the list to find the plug-in. Select the check box of the plug-in and click . Check the details of the selected plug-in and use the drop-down list next to the plug-in name to select the version to be installed. Click .
In the Git tab, in the URL field type the URL that specifies the plug-in location. Click .
In the Directory tab, in the Directory field type the path of the plug-in or click to navigate to the location. Click .

Figure 7.7. Example of a Cordova Plug-in Selected in the Registry Tab of Cordova Plug-in Discovery Wizard
After installing the plug-in, configuration files are automatically updated with relevant settings for the plug-in. Note that the
config.xmlfile is only updated with features and param entries if an installed plug-in has native parts.Important
Some plug-ins require you to define preference values. At the time of installing such a plug-in, Hybrid Mobile Tools creates an item in the Preference table with the appropriate preference name but with a value of PLEASE_DEFINE. You must edit the preference and provide the required value.
- Remove a plug-in
In the Project Explorer view, in the plugins folder right-click the plug-in and click .
Note
Alternatively, you can add and remove plug-ins by using the Platform Properties tab of the Cordova Configuration Editor.
The Cordova Configuration Editor is available for managing the settings of Cordova projects that are specified in the config.xml file. This editor has three tabs: Overview, Platform Properties, and config.xml. As described below, the first two tabs provide interfaces for configuring the settings specified in the config.xml file and the third tab enables direct editing of the file.
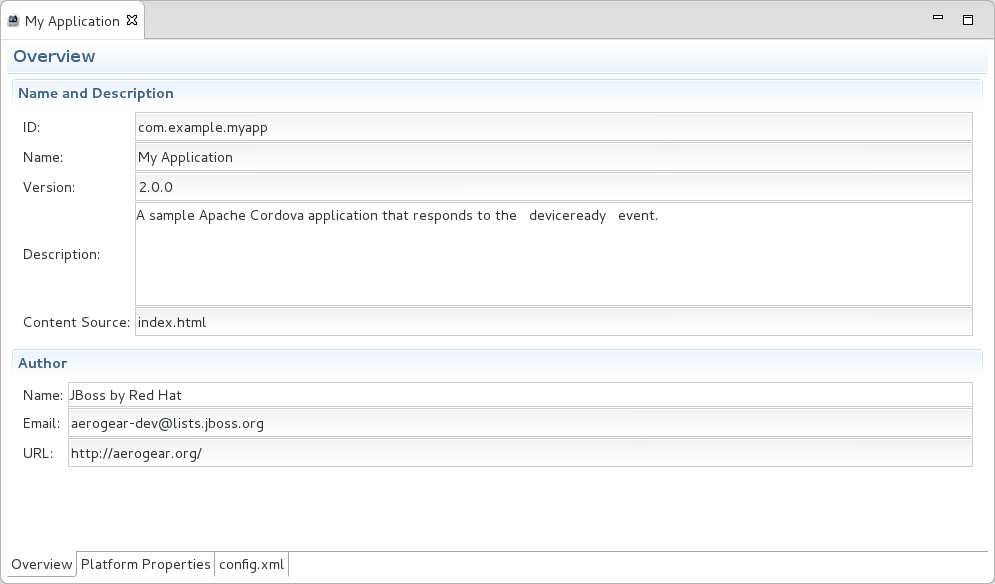
The Overview tab details explanatory application information. Within this tab you can specify the name and description of the project, the content source of the application, and author details.
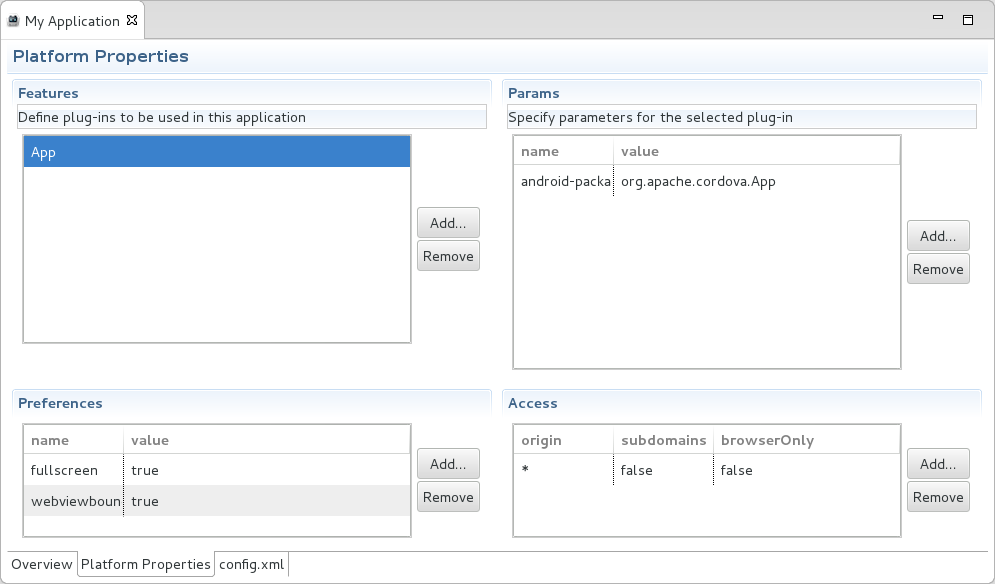
The Platform Properties tab specifies Cordova project functionality, such as features (plug-ins and parameters), preferences and access.
The config.xml tab provides an editor in which to view and modify the config.xml file directly.
To open the Cordova Configuration Editor for a specific hybrid mobile project, in the Project Explorer view right-click the config.xml file. Click Open With→Cordova Configuration Editor. All changes to the Cordova settings of a project must be saved before the results take effect. To save, press Ctrl+S.
The Overview tab of the Cordova Configuration Editor enables you to edit the application information of a hybrid mobile project. Information pertains to the name, description and author of the application. More specifically, the Name and Description section details the application ID, name, version, description and content source or home page. The Author section holds the author name, email and URL. All field values can be edited as detailed below.
- Change the value of a variable
Click the appropriate field and edit the content.
All changes to config.xml must be saved before the results take effect. To save, press Ctrl+S.
The Platform Properties tab of the Cordova Configuration Editor enables you to specify the Cordova settings in your hybrid mobile project. Features, parameters, preferences and access can be added and removed as detailed below.
- Add a feature
Features are the Cordova API plug-ins required by the application in order to access native APIs at runtime. Examples include
Camera,ContactsandGeolocation.To add a feature, click for the Features table. The Cordova Plug-in Discovery wizard opens. Follow the instructions as appropriate for the plug-in source:
For the Cordova registry, click the Registry tab. In the Find field, enter the name of the feature or scroll through the list to find the plug-in. Select the check box for the plug-in and click . Check the details of the selected plug-in and use the drop-down list next to the plug-in to select the version to be installed.
For a Git location, click the Git tab. In the URL field, type the URL that specifies the plug-in location.
For a system directory, click the Directory tab. In the Directory field, type the path of the plug-in or click to navigate to the location.
To add the feature, click .
- Add a parameter
All parameters are associated with a feature and provide information about the specific mapping of Cordova and native APIs.
To add a parameter, from the Features table select an item for which to create a parameter. For the Params table, click . In the name and value fields, type the service name and Java class full name (including namespace), respectively. To add the parameter, click .
- Add a preference
Preferences details the global, cross-platform and platform-specific behaviors for the web view of the hybrid mobile application.
To add a preference, click for the Preference table. Complete the name and value fields as appropriate. To add the parameter, click .
By default for an application created with the Hybrid Mobile Tools project wizard, the Preferences table has two entries. The
fullscreenandwebviewbounceelements specify whether the application is fullscreen and bounces when pulled down in iOS devices, respectively. For a full list of available preferences see http://cordova.apache.org/docs/en/edge/config_ref_index.md.html#The%20config.xml%20File on the Apache Cordova website.- Add access
Access entries specify the external network resources to which the application has access, also referred to as whitelisting.
To add an access entry, click for the Access table. In the required Origin field, type the URL to which access is granted, using
*as a wildcard character. Select the Allow Subdomains and Browser Only check boxes as appropriate. These items enable access to subdomains and cause links to open in browsers rather than the application window, respectively. To add the access entry, click .By default for an application created with the Hybrid Mobile Tools project wizard, the Access table has an entry allowing access to all networks,
<access origin="*" />. You are advised to declare access to specific network resources.- Remove a feature, parameter, preference or access
In the appropriate table, select the item to be removed and click . Note that removing a feature also removes the associated parameters.
All changes to config.xml must be saved before the results take effect. To save, press Ctrl+S.
You can use the actions of Hybrid Mobile Tools to run applications on devices and simulators, as detailed below.
- Run on an Android device
In the Project Explorer view, right-click the project name and click →. This option calls the external Android SDK to package the workspace project and run it on an Android device if one is attached. Note that Android APIs and AVDs must be installed and the IDE correctly configured to use the Android SDK for this option to execute successfully.
- Run on an Android emulator
In the Project Explorer view, right-click the project name and click →. This option calls the external Android SDK to package the workspace project and run it on the Android emulator. Note that Android APIs and AVDs must be installed and the IDE correctly configured to use the Android SDK for this option to execute successfully.
Important
You must have Android API 17 or later installed on your system to use the Run on Android Emulator action. You are prompted by an error message when only Android API 16 or earlier is available. In the event that multiple Android API of 17 and later are available, Hybrid Mobile Tools uses the latest version.
- Run on iOS Simulator
Important
This option is only displayed when using OS X operating systems, for which iOS Simulator is available. For information about iOS Simulator see https://developer.apple.com/xcode/index.php on the Apple Developer website.
In the Project Explorer view, right-click the project name and click →. This option calls the external iOS SDK to package the workspace project into an XCode project and run it on the iOS Simulator.
- Run with CordovaSim
In the Project Explorer view, right-click the project name and click →. This opens the application in CordovaSim, which is composed of a BrowserSim simulated device and a device input panel.
Note
JavaScript output for applications running on CordovaSim, including error messages, can be reviewed in the Console view.
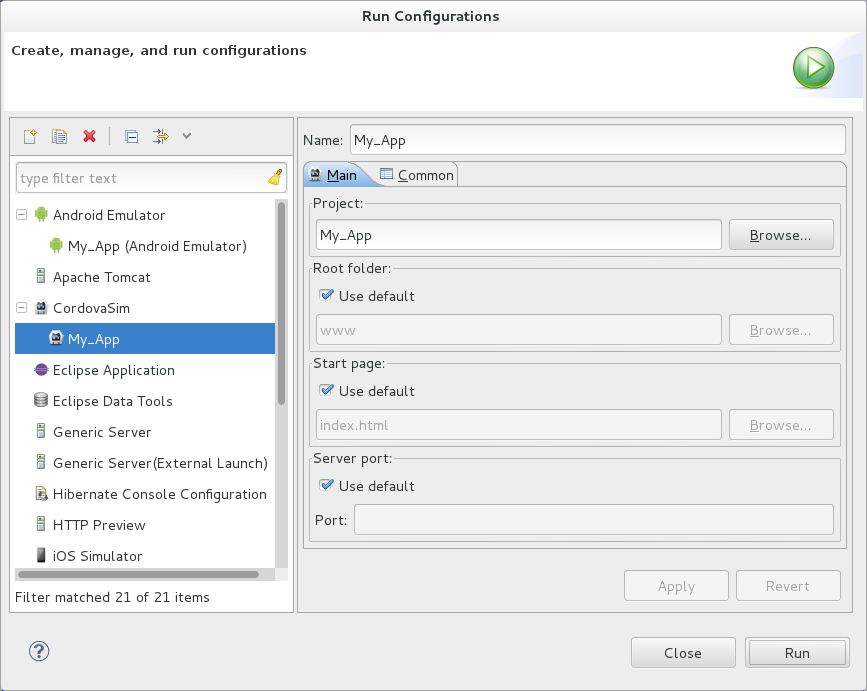
Run configurations inform simulators how to run the application associated with a project. Hybrid Mobile Tools generates a default run configuration for a project the first time it is run by a specific simulator. This default run configuration is simulator-specific and named according to the project name. You can create and customize multiple run configurations for your projects using the Run Configurations manager.
The information below details how to manage run configurations using the Run Configurations manger. To open the Run Configurations manger for a project, in the Project Explorer view right-click the project name and click Run As→Run Configurations. Note that run configurations are organized by simulator within the Run Configurations manager, namely CordovaSim, Android and iOS Simulator.
- Create a run configuration
From the list of run environments, right-click the simulator and click . Complete the fields as appropriate. To save the new run configuration, click .
- View and edit a run configuration
From the list of run environments, expand the simulator. This shows a list of the run configurations associated with the simulator.
Details for a run configuration are organized in tabs. All simulators have the same Common tab. These options include where to save the run configuration information and how standard input and output are managed. Additional customizable options vary according to simulator:
For Android, you can specify details about the virtual device to be used by the emulator and the values of environment variables. Additionally, you can customize which of the information returned by the Android emulator is shown in the IDE console.
For CordovaSim, you can customize default values including the location of the root folder containing key device-independent files, the application start page opened when CordovaSim starts, and the server port used by CordovaSim to host the application.
To change the value of any variables listed in the tabs, click the appropriate field and edit the content. To save changes, click .
- Run an application using a run configuration
From the list of run environments, expand the simulator and select a run configuration. Click . This starts the simulator, which runs the application associated with the project using the specified configuration settings.
Hybrid Mobile Tools provides actions for exporting workspace projects from the IDE. Projects can be exported as native projects and ready-to-sign applications, as detailed in the procedure below.
Important
Android and iOS APIs must be installed and the IDE correctly configured to use the Android SDK for this procedure to execute successfully.
Procedure 7.3. Export a Hybrid Mobile Project
In the Project Explorer view, right-click the project name and click .
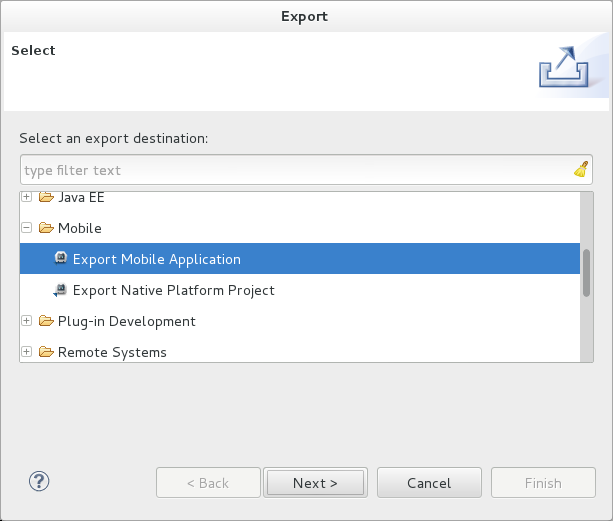
Expand Mobile, select the export type as appropriate and click :
To export as an application, select Export Mobile Application.
To export as a native project, select Export Native Platform Project.
Complete the following fields:
From the Select Projects list, select the check boxes of one or more workspace projects to be exported.
From the Select Platforms list, select the check boxes of one or more operating systems for which you want to export the selected project. Only operating systems with installed SDKs are listed.
In the Directory field, type the path to which the projects are to be exported or click to navigate to the location.
Click . Projects are exported to the specified location. Exported native projects are organized with subdirectories for each selected operating system.

The aim of this section is to guide you in customizing Hybrid Mobile Tools and CordovaSim:
Specify an Android SDK location
You must inform Hybrid Mobile Tools of the Android SDK location before you can use Hybrid Mobile Tools actions involving Android.
To set the Android SDK location, click → and select Hybrid Mobile. In the Android SDK Directory field, type the path of the installed SDK or click to navigate to the location. Click and click to close the Preferences window.
