CRUD is an acronym for the four basic types of SQL commands: Create, Read, Update, Delete. Most applications have some kind of CRUD functionality, and we can assume that every programmer had to deal with CRUD at some point. A CRUD application is one that uses forms to get data into and out of a database.
In the next chapter we will create Seam Web application, connect it to the PostgreSQL database and add CRUD support.
Create a new Seam Web Project using New Project wizard or main menu File > New > Seam Web Project.

Name your project as crudapp and follow the next wizard steps keeping default settings.
Please have a look here how to create Target Runtime and Seam Runtime in order to get started creating, running, and debugging J2EE applications.

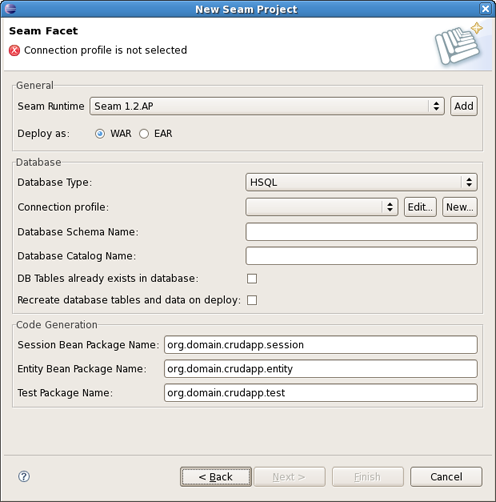
On Seam Facet page click New... to create a new Connection profile.
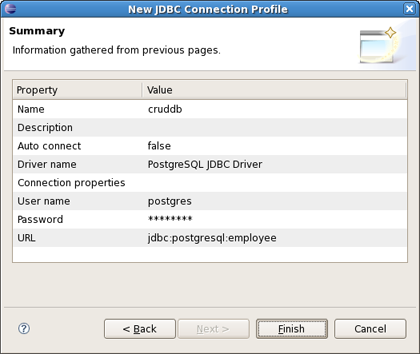
On New Connection Profile dialog select the PostgreSQL JDBC Connection type and click Next.

Name your profile as cruddb and press Next.

On the next page click ... to select a database driver.

On Driver Definitions dialog select the PostgreSQL->8.x and click Add....

Set the location of JDBC driver and fill all other necessary fields (URL, Database Name, Password, User Id) and click OK.

Click OK on the next dialog with newly created driver.

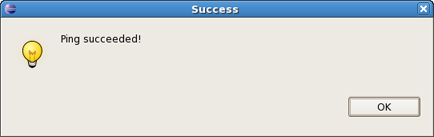
Click Test Connection on the next dialog and observe that connection can be established.

Validate JDBC Connection profile settings and press Finish or Back if something is wrong.
Observe that newly created profile has been selected on Seam Facet page and click Finish.
This will create 2 projects - crudapp and crudapp-test.

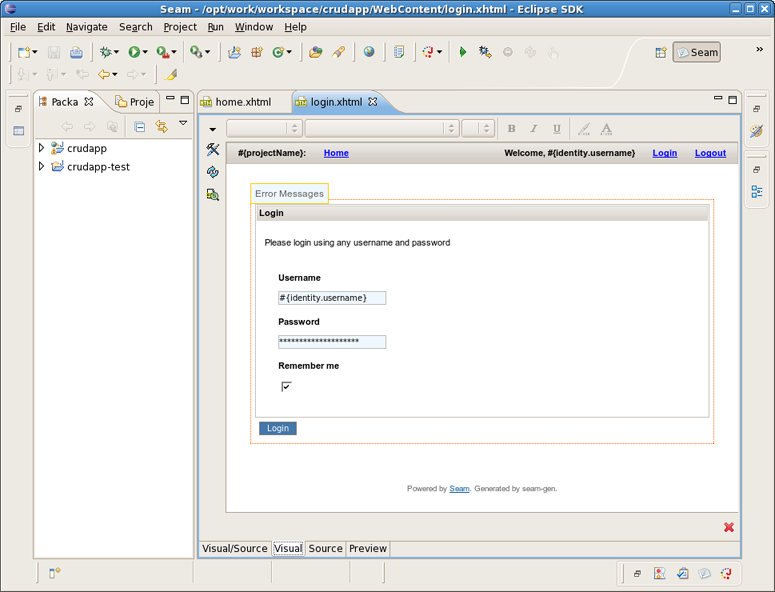
Have a look at the created projects. You can expand WEB_CONTENT folder and open home.xhtml or login.xhtml with JBoss Visual Editor.
Switch to Database Development perspective with Window->Open Perspective->Other... and connect to the cruddb database.

Expand cruddb nodes to view its Schemas, Tables, Columns etc.

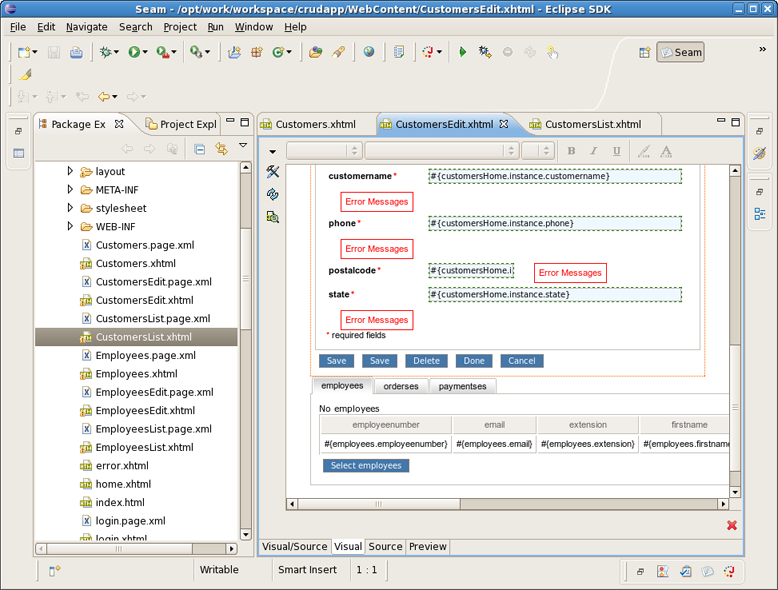
Switch back to the Seam perspective. From the toolbar select New->Seam Generate Entities to create a set of CRUD Seam components and web pages based on existing tables in the database. In the Generate Seam Entities dialog keep everything by default and press Finish.

Under WebContent folder you can find a lot of generated xhtml files:
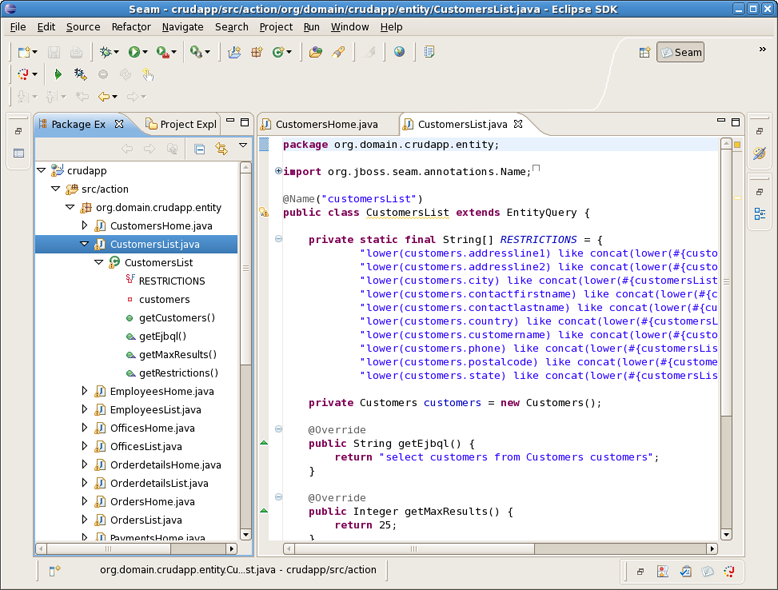
And under src folder java classes are created.
Switch to Hibernate perspective with Window->Open Perspective->Other.... On Hibernate Configurations view expand the crudapp configuration. Right click on Customers and select Open Mapping Diagram from the popup menu.

Observe that Mapping Diagram is opened in the editor. Here you can see the relations between models and database tables. Select Customers entity model, right click and select Open Source File.

This will open the Customers.java file in the java editor.

After that you are ready to deploy your application to J2EE application server. This is described in the next chapter.