This chapter covers the basics of working with the JBoss Server. If you already have installed JBoss server and runtime you can quickly learn how to configure, start, stop the server, to know deployment and archiving processes. How to install runtimes and servers read in the Runtimes and Servers in the JBoss AS plugin chapter.
To start working with JBoss AS, select a JBoss AS Perspective via Window > Open Perspective > Other > JBoss AS.
Starting JBoss Server is quite simple. You can control the server behaviour with the help of a special toolbar in the JBoss Server View where you could start it in a regular or debug mode, stop it or restart it, publish to the server, clean the server.
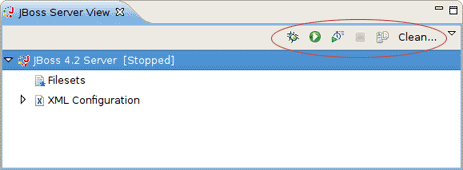
To launch the server click the green-with-white-arrow icon on the JBoss Server View or right click server name in this view and select Start. If this view is not open, select Window > Show View > Other > Server > JBoss Server View.

To stop the server, click the Stop icon in the JBoss Server View or right click the server name and press Stop.
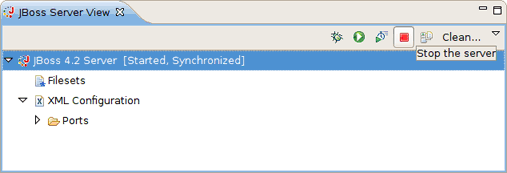
When the server is stopped you will see Stopped state next to its name in the square brackets.
Learn more about the JBoss Server View here.
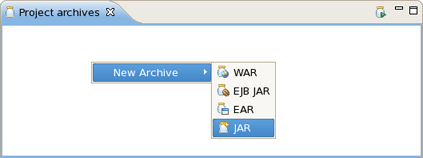
JBoss Tools comes with our own archives tool. The Project Archives plugin consists primarily of a view to set up each packaging configuration ( Window > Show View > Other > JBoss Tools > Project archives).
Right clicking in the Project archives view you can create War, EJB War, EAR or JAR archive.
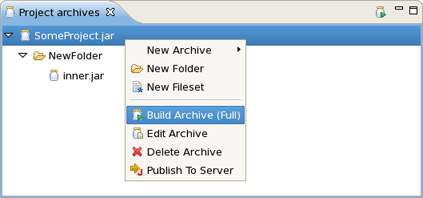
Using the context menu on the item you can initiate a full build on archive, edit, delete or publish it.
Learn more about the Project Archives View here.
There are two times to deploy your application:
While creating it
After it already exists
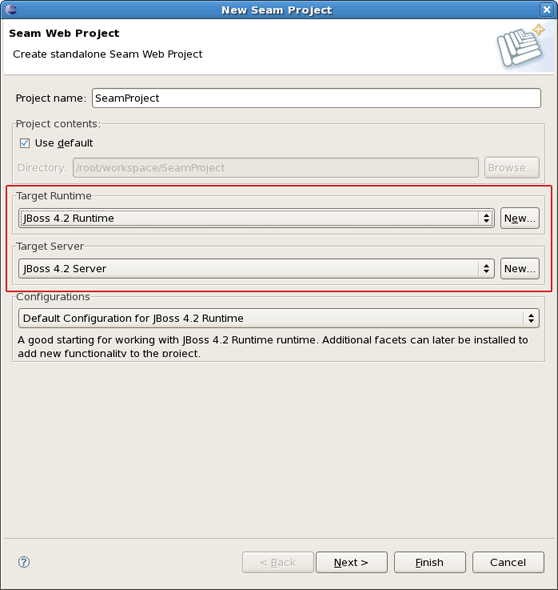
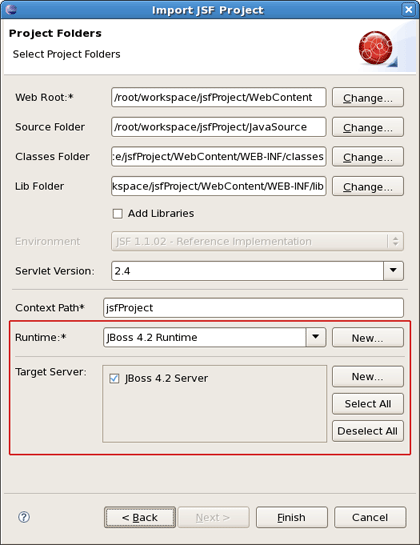
When you create a new project (Seam, JSF or Struts) with the New Project or Import Project wizards, the one of wizards steps has a Target Runtime and Target Server sections. You can deploy the application through the appropriate selection in these sections.
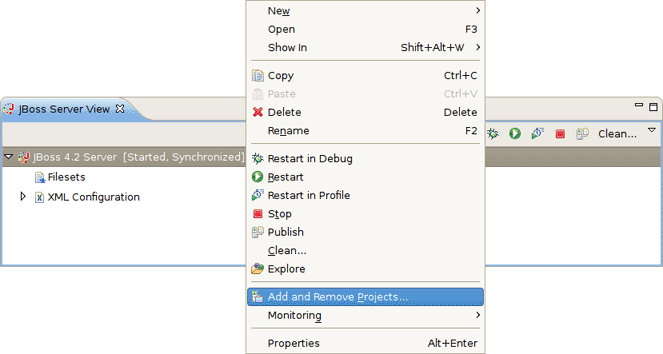
You can deploy an existing application to a server by right-clicking the target defined server in the JBoss Servers View and then selecting Add and Remove Projects from the context menu.
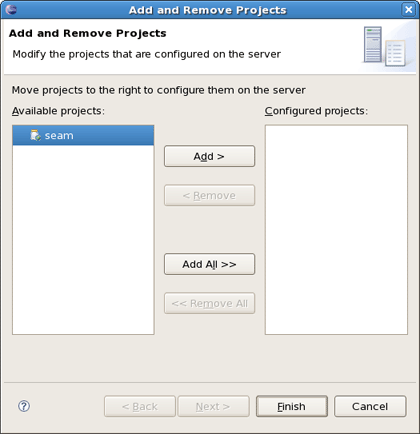
If this application is not assigned to a server, it will be in the left-hand available projects list. Clicking on the Add > button will add it to the right-hand configured projects list and deploy the application to this server.
Here, we have just performed the basic steps you should know to quick start with JBoss server. In fact, there are more functionalities which you can make use of. Further we will talk about them in detail.