Create new JBoss Tools Documentation Jira issue

This will launch the Jboss Tools Jira page - to complete your feedback please login if needed, and submit the Jira.
JBoss.orgCommunity Documentation
This chapter describes the main tasks a user can be faced during Smooks tools usage.
Select the project where you want to create new Smooks Configuration File and right-click on it, select in the menu New > Other, then find Smooks > Smooks Configuration File. Click the Next button.
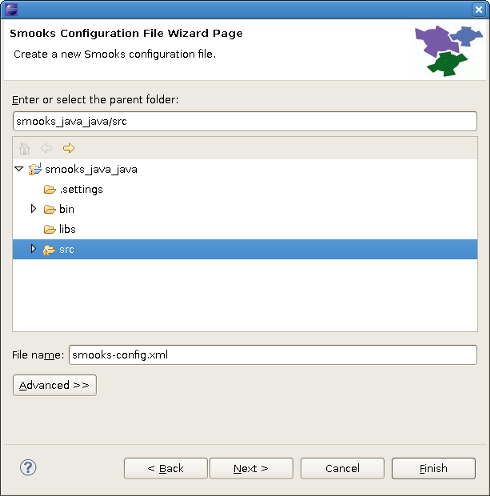
The first wizard page is a file path creation page. Select the src folder to be the files container, and input the name smooks-config.xml. Click Next.
The second wizard page allow you to select Smooks configuration file version. Select the appropriate one and click Finish to complete the wizard.
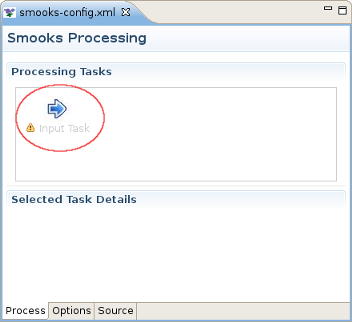
Input task configuring is an obligatory step for your smooks project creation. You can configure it on the Process page of the editor: look for the "Input Task" in the Process Map at the top of the page.
Select it and you will see all the properties to set for the Input reader of your Smooks configuration. "Input type" corresponds to the type of data that you will be working with. For example, to work with incoming CSV (Comma-separated Values) data, you would specify "CSV" in the drop-down list. Each reader type has slightly different configuration details that must be set in the "Input configuration" area. For instance, the CSV reader requires you to specify details such as the encoding, quote character, separator character, and the list of incoming fields. The EDI reader requires the encoding and the path to the Mapping Model describing the incoming data. In the Input data section, you specify some sample data that conforms to your reader configuration.
Once you've specified your reader configuration and sample data, you can see the input model rendered in a tree form in the Input model section. On the picture below you can see the correct configuration of some XML input task.
Though there are many options in Smooks as far as what you can do with input data such as transformation, routing, and persistence, this version of the Smooks Configuration Editor focuses only on these areas: mapping to java and applying templates to create different output formats. If you have a set of Java classes you want to use the incoming data for, you can use the "Java Mapping" task to specify those classes and use drag and drop to map between the input model generated by the reader and elements in the output model. Or if you simply want to transform your output to one or more formats, you can use the "Apply Template" task to map it to a CSV file, XML or XSD file (and other formats in the future).
Now you can't transform your output directly, using only Input and Template tasks. You should use Mapping as an interagent between these tasks.
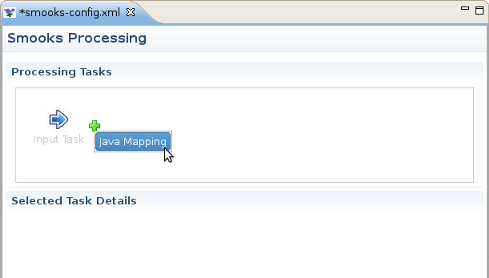
If you decide to do Java Mapping, you need to make sure that your Input reader has been set up and you have some sample data specified. Then you should select Input Task in the Process tab and click the plus (+) sign to the right of the icon. Select Java Mapping from the popup menu and it will appear to the right, connected to Input Task. Then select Java Mapping task.
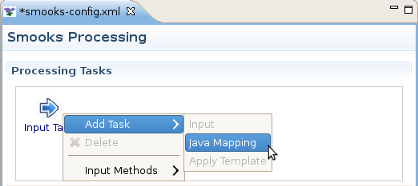
Another method of adding Java Mapping element to the canvas in the Processing Tasks section is to right click Input Task element and select Java Mapping in the popup menu
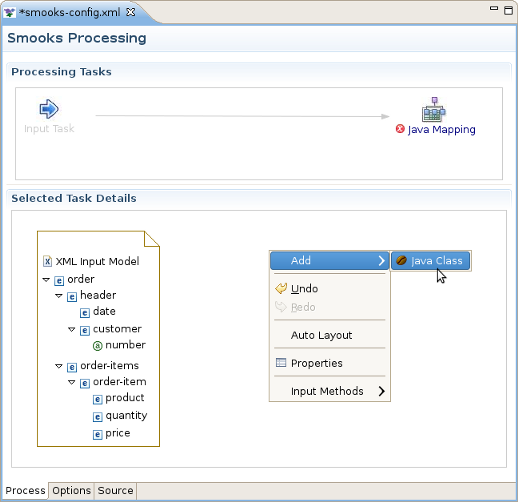
Right-click on the canvas in an empty space and select "Add ->Java Class".
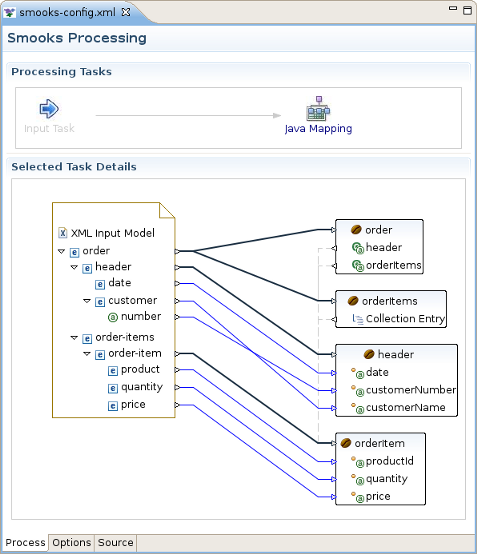
Java Bean Creation wizard appears. Specify a unique identifier for the new class, the class path, whether it's an array or not, and if it is a collection, also specify the collection class. If the Java class is specified, you'll see a list of the properties in the box below. Click Finish when you're done. Now with the input and output models on the canvas, you can click and drag from the various input elements to corresponding output elements. Make sure to connect collection elements to corresponding collection elements. Finally your mapping should look nearly like the one on the picture below.
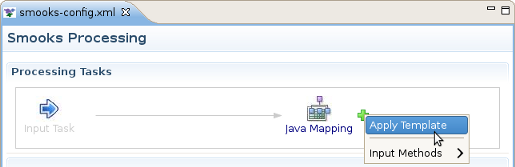
The "Apply Template" task works very similarly to the "Java Mapping" task, where you map between an input model and an output model. Select the Java Mapping task you want to use as the input model in the Process Map pane and click the plus (+) sign to the right of the icon.
Select "Apply Template" from the popup menu and it will appear to the right, connected to the task you created it from. Then select the "Apply Template" task. Once you've defined your template model, you can click and drag from the various input elements to corresponding output elements in the template. Make sure to connect collection elements to corresponding collection elements
This option is intended to view the results of Smooks transforming procedure. For more detailed information about this option please go here.