Create new JBoss Tools Documentation Jira issue

This will launch the Jboss Tools Jira page - to complete your feedback please login if needed, and submit the Jira.
JBoss.orgCommunity Documentation
JBoss Developer Studio is a set of eclipse-based development tools that are pre-configured for JBoss Enterprise Middleware Platforms and Red Hat Enterprise Linux. Developers are not required to use JBoss Developer Studio to develop on JBoss Enterprise Middleware and/or Red Hat Linux. But, many find these pre-configured tools offer significant time-savings and value, making them more productive and speeding time to deployment.
This guide covers the first steps to get started working with JBoss Developer Studio. You will learn how to install and configure necessary software for your OS (currently Linux, Microsoft Windows or Mac OSX).
Thus this guide will provide you with detailed info on how to start JDK, JBDS and JBoss Tools.
For a start, we propose you to look through the table of main features of JBoss Developer Studio:
Table 1.1. Key Functionality of JBoss Developer Studio
| Feature | Benefit |
|---|---|
JBoss Enterprise Application Platform | JBoss Developer Studio includes and integrates JBoss Enterprise Application Platform, the same version of the middleware platform that Red Hat supports in production for 5 years. |
New Seam Tools | JBoss Developer Studio includes brand new tools for Seam. They provide wizards for creating new Seam projects, validation tools, expression language code completion, testing tools, and wizards for generating entity objects. |
Visual Page Editor | JBoss Developer Studio includes a Visual Page Editor for combined visual and source editing of Web pages. The Visual Page Editor even renders AJAX-enabled RichFaces components. |
AJAX Capabilities | JBoss Developer Studio includes a Technology Preview of JBoss RichFaces. RichFaces provides nearly 70 skinnable components, including calendar, tree, dropdown menu, drag-and-drop components, and more. JBoss Developer Studio’s Visual Page Editor can render RichFaces components. |
JBoss Tools Palette | The JBoss Tools Palette contains a developer’s project tag libraries and enables inserting tags into a JSP with one click. The Tools Palette supports custom and 3rd party tags. |
JBoss jBPM Tools | JBoss Developer Studio includes jBPM tooling for defining Seam page flows. |
Spring Tools | JBoss Developer Studio includes Spring IDE for developing Spring applications. |
Struts Tools | JBoss Developer Studio includes Struts tools for Struts 1.x applications. |
Optimized JBoss Application Server adapter | JBoss Developer Studio’s advanced JBoss AS adapter includes features like incremental deployment for fast development and is pre-configured for the included JBoss Application server. |
Red Hat Enterprise Linux and RHN Access | JBoss Developer Studio includes access to Red Hat Enterprise Linux, Linux development tools, and Red Hat Network for development purposes. |
Project Examples | Tooling for easy installation of Examples. |
JBossWeb Service | JBoss WS is a web service framework developed as a part of the JBoss Application Server. It implements the JAX-WS specification that defines a programming model and run-time architecture for implementing web services in Java, targeted at the Java Platform, Enterprise Edition 5 (Java EE 5). |
Usage reporting | The usage plug-in anonymously gathers information on how you use the provided tools. This information is used to improve and shape the JBoss Developer Studio product to better cater to your needs. For more information refer to Section 1.9, “Usage Reporting”. |
JBDS requires JDK 5+ (JDK 6 in case of EAP 5.0). Also it's important that the JVM's architecture matches the particular JBDS build, i.e. if you're on a 64-bit system and use the 64-bit JVM, you need the 64-bit JBDS.
For the 32-bit version of JBDS use the 32-bit JVM or just use -vm flag to
tell JBDS to use 32-bit java if the 64-bit one is found as the default.
On Linux system with 64-bit JVM the visual editor may fail to start. In this case you need the libstdc++.so.5 library.
See also the FAQ.
You must have a working installation of JDK before you install JBoss Developer Studio. Thus in this guide we will show you how to install a 32-bit Sun JDK 5.0 on a Linux Platform and Microsoft Windows Platform.
To install 32-bit Sun JDK 5.0 on Linux and configure it, you should follow the next steps:
Download the Sun JDK 5.0 (Java 2 Development Kit) from Sun's website. Choose "JDK 5.0 Update <x>" (where "x" is the latest update number) for download and then select "Red Hat Package Manager in self-extracting" file for Linux. Read the instructions on Sun's website for installing the JDK.
If you don't want to use SysV service scripts you can install the "self-extracting file" for Linux instead of choosing the "RPM in self-extracting" file. In that case you can skip the next step mentioned here. But it is recommended to use the SysV service scripts for production servers.
Download and install the appropriate -compat RPM from JPackage here. Please ensure you choose a matching version of the -compat package to the JDK you've installed.
Create an environment variable that points to the JDK installation directory and call it JAVA_HOME. Add $JAVA_HOME/bin to the system path to be able to run java from the command line. You can do this by adding the following lines to the .bashrc file in your home directory.
#In this example /usr/java/jdk1.5.0_11 is the JDK installation directory.
export JAVA_HOME=/usr/java/jdk1.5.0_11
export PATH=$PATH:$JAVA_HOME/bin
If you have JDK already installed and added in your system path, you should add $JAVA_HOME/bin before the old $PATH (not after it) so that the new version of JDK can be found first, i. e. export PATH=$JAVA_HOME/bin:$PATH This way, the machine will pick up the new JVM first. You only need to run "alternative" as a safe guard for the right JVM.
Set this variable for your account doing the installation and also for the user account that will run the server.
If you have more than one version of JVM installed on your machine, make sure you are using the JDK 1.5 installation as the default java and javac. You can do this using the alternatives system. The alternatives system allows different versions of Java from different sources to co-exist on your system.
As a root user, type the following command at the shell prompt and you should see something like this:
[root@vsr ~]$ /usr/sbin/alternatives --config java
There are 2 programs that provide 'java'.
Selection    Command
-----------------------------------------------
   1           /usr/lib/jvm/jre-1.4.2-gcj/bin/java
*+ 2           /usr/lib/jvm/jre-1.5.0-sun/bin/java
Enter to keep the current selection[+], or type selection number:
Make sure the Sun version [jre-1.5.0-sun in this case] is selected (marked with a '+' in the output), or select it by entering its number as prompted.
Repeat the same for javac and java_sdk_1.5.0.
[root@vsr ~]$ /usr/sbin/alternatives --config javac
There is 1 program that provides 'javac'.
	Selection   Command
-----------------------------------------------
*+ 1           /usr/lib/jvm/java-1.5.0-sun/bin/javac
Enter to keep the current selection[+], or type selection number:

[root@vsr ~]$ /usr/sbin/alternatives --config java_sdk_1.5.0
There is 1 program that provide 'java_sdk_1.5.0'.
	Selection   Command
-----------------------------------------------
*+ 1           /usr/lib/jvm/java-1.5.0-sun
Enter to keep the current selection[+], or type selection number:
You should verify that java, javac and java_sdk_1.5.0 all point to the same manufacturer and version.
You can always override this step by setting the JAVA_HOME environment variable as explained in the previous step.
Make sure that the java executable is in your path and that you are using an appropriate version. To verify your Java environment, type "java -version" at the shell prompt and you should see something like this:
[root@vsr ~]$ java -version
java version "1.5.0_11"
Java(TM) 2 Runtime Environment, Standard Edition (build 1.5.0_11-b03)
Java HotSpot(TM) Client VM (build 1.5.0_11-b03, mixed mode, sharing)
To install and configure 32-bit Sun JDK 5.0 on Microsoft Windows, follow these steps:
Download the Sun JDK 5.0 (Java 2 Development Kit) from Sun's website. Choose "JDK 5.0 Update <x>" (where "x" is the latest update number) for download and then select your Windows Platform options to perform the installation.
Create an environment variable called JAVA_HOME that points to the JDK installation directory, for example: C:\Program Files\Java\jdk1.5.0_11\
In order to run java from the command line, add the jre\bin directory to your path, for example:
C:\Program Files\Java\jdk1.5.0_11\jre\bin
To do this, open the Control Panel from the Start menu, switch to Classic View if necessary, open the System Control Panel applet ( System ), select the Advanced Tab, and click on the Environment Variables button.
Now, when 32-bit Sun JDK 5.0 has been successfully installed, we can pass on to the next step.
This chapter will provide you with detailed information on how to install JBoss Developer Studio.
JBDS comes with a simple installer, bundled with tested/pre-configured versions of Eclipse, WTP, JBossEAP, Seam, and SpringIDE. Thus, to start perform the next steps:
First of all you need the appropriate installation file for your platform from Red Hat website.
Then run in console:
java -jar jbdevstudio-eap-linux-gtk-3.0.0.GA.jar
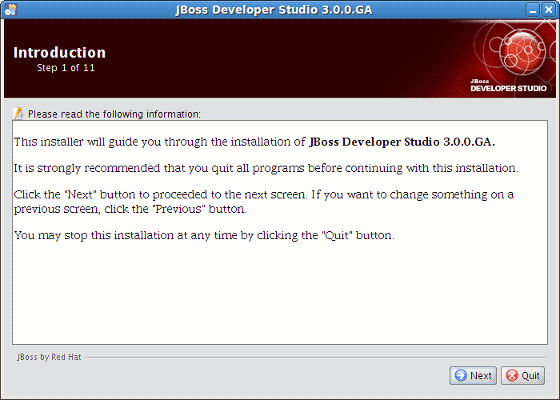
Follow the instructions presented by the installation wizard:
Provide the installation path
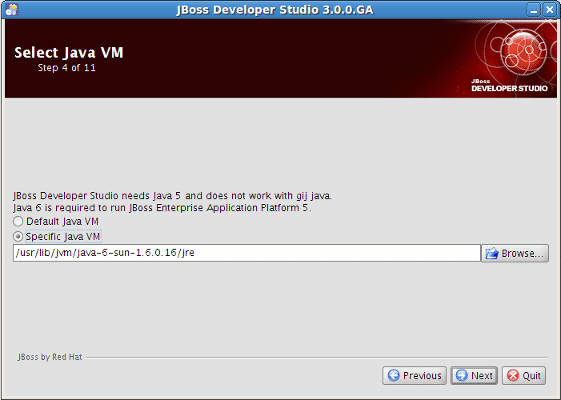
Select Java VM
By selecting Default Java VM you set default Java VM of your system (to verify your Java environment, type "java -version" in console).
Selecting Specific Java VM you can provide the path to non-default Java VM.
JBoss Developer Studio 3.0 comes integrated with JBoss EAP 5.0 that requires JDK 6.0 to run and "gij" isn't available on every platform.
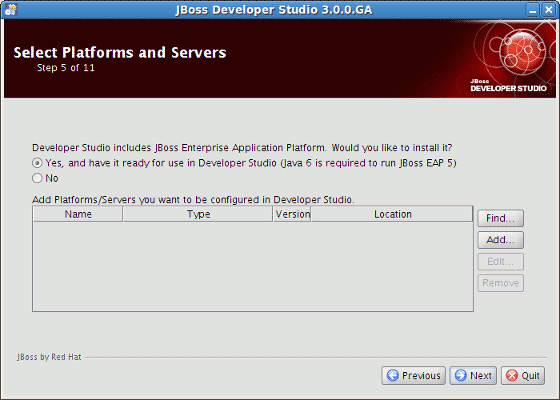
Installation process includes JBoss Enterprise Application Platform. Select Yes to use it in JBoss Developer Studio.
Like in the previous version of JBDS, JBDS 3.0.0.GA comes integrated with JBoss EAP 5.0 that supports EAP 5 adapter and Seam 2.2.
This step lets you configure locally available JBoss Application Servers:
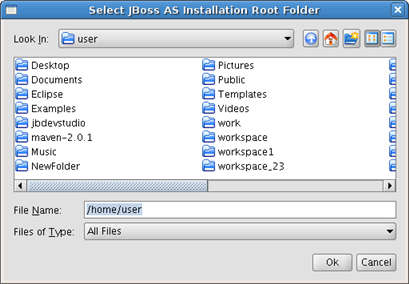
You can fill the list automatically using the Find button: click Find, select a folder where search of available JBoss Application Servers should be started and click on Ok:
All available servers in the selected directory will be added to the list with the following information specified: Name, Type, Version and Location.
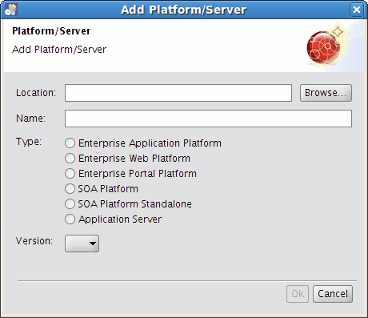
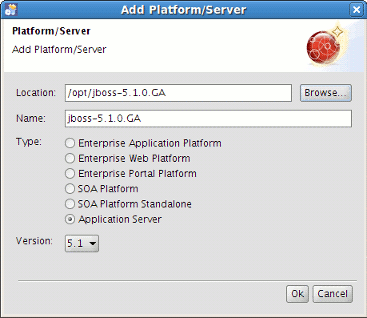
You can also add servers one by one using the Add button:
Click on Browse and select the server location. Fields Name, Type and Version will be filled in automatically:
Click on Ok. The server is added to the list with the details on its type, version and location.
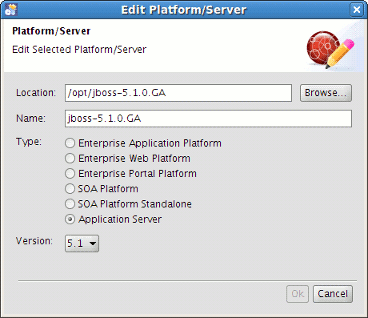
The Remove button will the remove the selected server from the list. If necessary, you can edit the server details clicking on the Edit button:
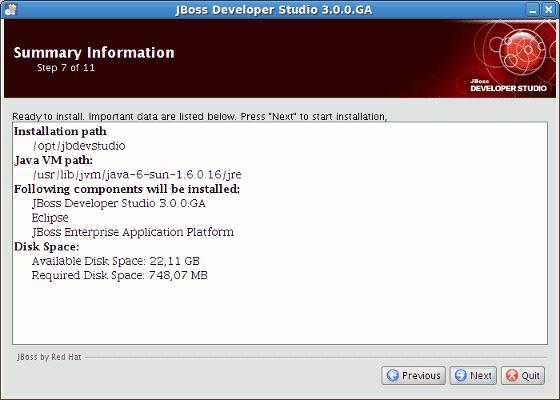
Click Next. Check your installation paths and see the components to install. If you'd like to change something, press the Previous button. Click Next to start installation.
This section uncovers the points on the differences between JBoss Developer Studio and JBoss Tools and provides the steps on JBoss Tools installation as well.
JBoss Tools is what went into our JBoss Developer Studio which comes as an easy-to-install Eclipse based IDE fully configured and ready to run with the bundled JBoss Enterprise Application Platform.
In short JBoss Tools are just a set of Eclipse plugins and JBoss Developer Studio adds:
An installer
Eclipse and Web Tools preconfigured
JBoss EAP with JBoss AS and Seam preconfigured
3rd party plugins bundled and configured
Access to RHEL and Red Hat Network
Access to the JBoss/Red Hat supported software
For additional information see JBoss.com
Here, let's consider the installation of the JBoss Tools modules.
JBoss Tools is an umbrella project for the JBoss developed plugins that will make it into JBoss Developer Studio. The JBoss Tools modules are:
JBoss AS Tools
Seam Tools
Hibernate Tools
Visual Page Editor
JST Tools
JBPM Tools
Smooks Tools
To install the JBoss Tools plugins for Eclipse, you need the following:
Get Eclipse and Web Tools (make sure you have the appropriate version of Eclipse).
The current version of JBoss Tools (3.1.0.GA) targets at Eclipse 3.5.2 Galileo JEE Bundle which is available from eclipse.org.
We recommend you do not use Eclipse.org update site to go from old version of Eclipse to new one. Instead we suggest that you download the full binary from here.
If you can only use Eclipse 3.3 use JBoss Tools 2.1.2, but JBoss Tools 2.x will not have any of the new features.
Remember to choose the download that matches your OS and use Java 6 when you run it.
If you need to install any standalone plug-in from JBoss Tools visit a JBoss Tools Wiki page to read about dependencies between standalone plug-ins.
For more information about how to install JBoss Tools 3.0 and JBoss Tools 3.1 please read the following docs:
Instead of downloading installation/updating manually, it's also possible to get the latest release of JBoss Tools from one of our update sites:
Stable Updates: http://download.jboss.org/jbosstools/updates/stable
Development Updates: http://download.jboss.org/jbosstools/updates/development
Nightly Builds: http://download.jboss.org/jbosstools/updates/nightly/trunk/
During the JBT installation/updating process using some of Jboss update sites No repository found containing... error can appear.It is a Eclipse P2 bug.To work around it try:1.Restart your Eclipse. 2. Add the update site again. 3. Do the update again.
To install/update Jboss Tools from one of the update sites you should follow the steps:
First, download the correct version of Eclipse for your platform which is compatible with the version of JBoss Tools you plan to install.For example if you want to install 3.1.0.GA Eclipse 3.5.2 Galileo JEE Bundle is required.
If you do not already have Java 5 or 6 installed and in your path, download and install it.
When Eclipse is started, go to
Help->Software Updates... ->Available Software->Manage Sites...->Add...(Eclipse 3.4)
Help->Install New Software->Add..(Eclipse 3.5)
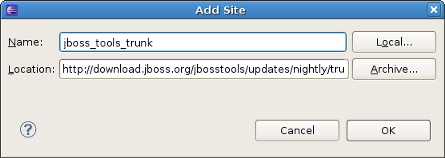
After clicking Add button Add Site View should appear. In the Location field you should paste one of the update sites described above.On some platforms, you can also drag and drop the link from your browser directly into Eclipse.In Name you can write any name you like. In the end press the Ok button.
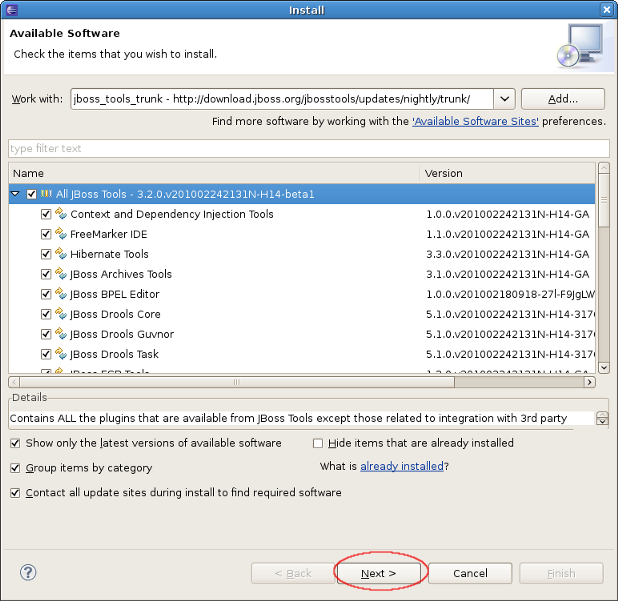
In the Install View select features to install, then click Next.
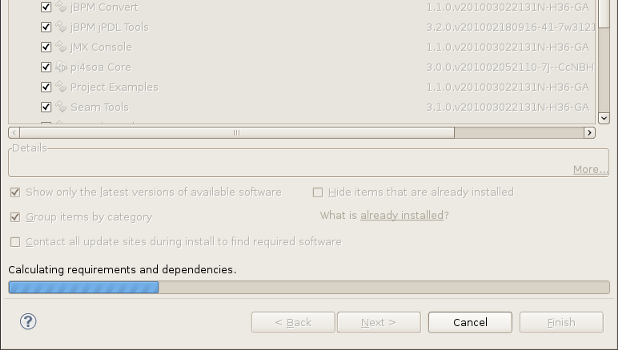
And the system checks whether all necessary requirements and dependencies are installed on your Eclipse.
If some of them are missing an error message will appear and the installation process will be terminated.
Sometimes when a user changes the list of plugins for download and clicks Next, after required dependences check, the list of missing dependencies of the previous attempt is showed. In this case the completely close of the Install New Software dialog can help.
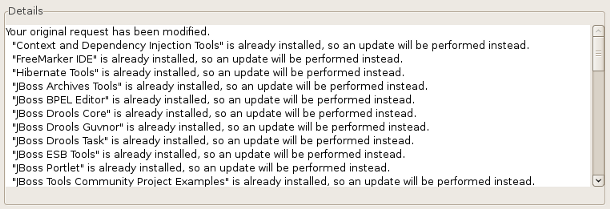
If Jboss Tools are already installed on your Eclipse and you are doing updating but not installation the following messages will appear in your Details section. Ignore them and press Next.
When you click Finish the prosses of Installation/Updating starts up.
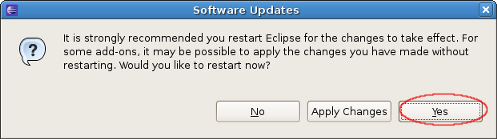
Install. Restart when prompted.
After fetching all the features and plugins for installation, you may be prompted that your selection contains unsigned jars. This is normal,simply accept the warning and continue.
While installing JBoss Tools on GNU/Linux (64-bit) through the eclipse installation manager you may run into some problems which can interrupt your installation process. Please, read the Manual installation of JBoss Tools 3.1.x on Eclipse 3.5 on GNU/Linux (64-bit) wiki article which provides you with the necessary steps to do it correct.
Now you can install JBoss Tools using Eclipse P2 update manager and a common zip file which is one installer for all platforms.
You can download Jboss Tools in a zip file from one of the pages below:
Stable Releases: http://www.jboss.org/tools/download/stable.html
Development Updates: http://www.jboss.org/tools/download/dev.html
Nightly Builds: http://download.jboss.org/jbosstools/updates/nightly/
When you downloaded Jboss Tools Zip please DO NOT UNZIP IT and follow the steps described below:
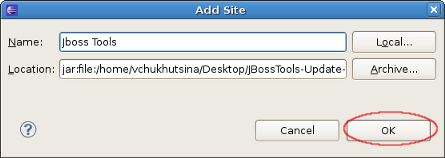
When Eclipse is started, go to Help -> Install New Software... -> Add... -> Archive...
Browse for the update site zip.In the Name field you can write any name you like. In the end press Ok button.
All the other steps are the same as it was described in the Installation From Update Site section.
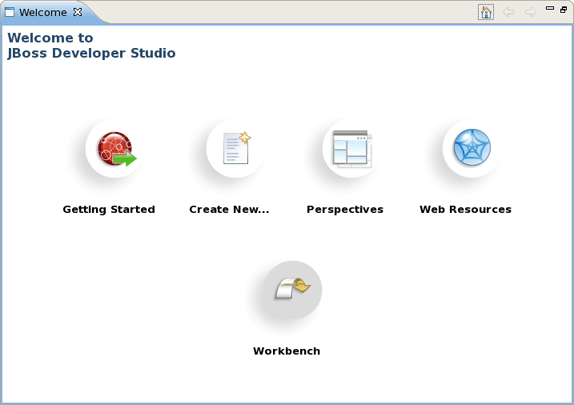
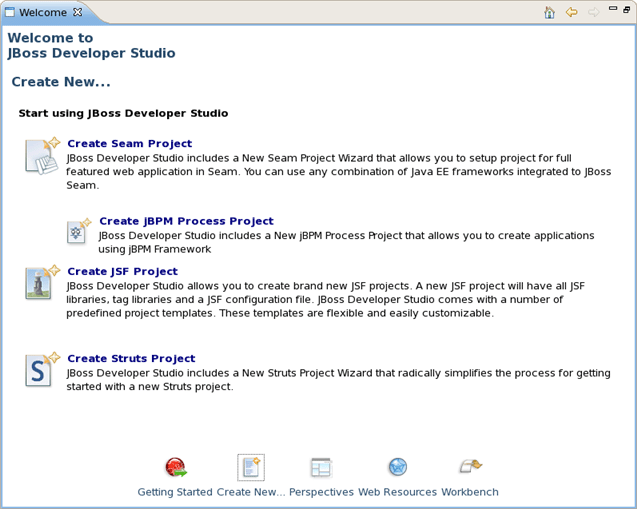
In this section we'll show you how to work with the welcome page of the JBoss Developer Studio.
The welcome page is the first page you see when you first launch JBoss Developer Studio.
With the help of its page you will be able:
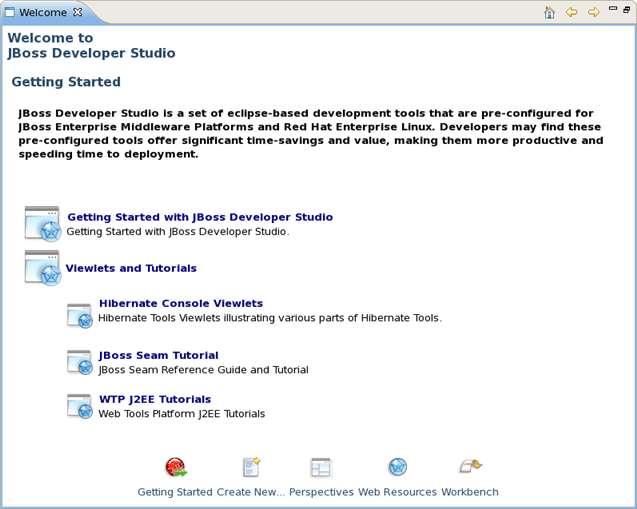
to get quick access to Getting Started Documentation (guides, tutorials and viewlets)
to create new Seam projects, jBPM Process, JSF or Struts projects using JBDS wizards
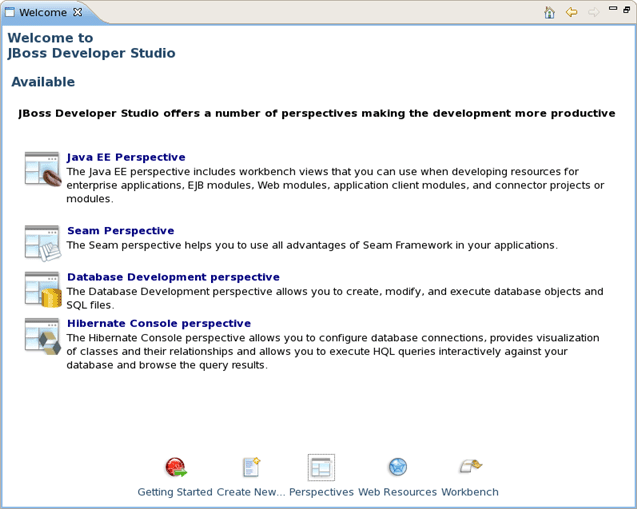
to get short description of perspectives that JBDS offers for more productive development
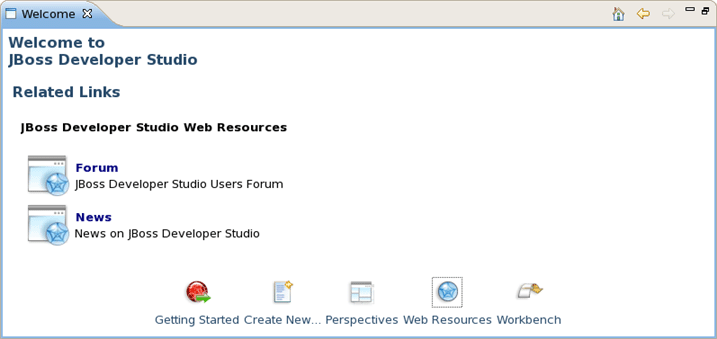
to visit JBoss Developer Studio web resources.
Start work with JBoss Developer Studio by clicking on Workbench button or simply close the Welcome page.
As opposed to upgrading your JBDS from 2.0 to 2.1 using the update site, to upgrade your JBDS from 2.1 to 3.0 you have to uninstall your 2.1 version and install the new one because of some platform change.
Make sure JBoss Developer Studio is not running
Uninstall your current version of JBoss Developer Studio by running Uninstaller
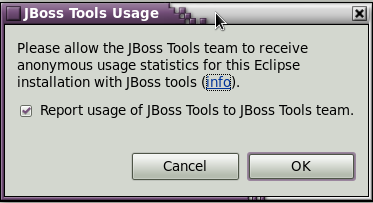
The JBoss Developer Studio now includes a usage plug-in that anonymously reports information back to JBoss. The plug-in is not enabled by default. To enable, make sure the Report usage of JBoss Tools to JBoss Tools team. box is ticked.
Once enabled, the plug-in will remain active until turned off. To turn the active plug-in off, navigate to → → → .
The gathered data allows JBoss to see how the tools are being used and where they are being used geographically. Currently we are looking into the operating systems being used, screen resolution and how often the tooling environment is started. In the future geographic information will assist in focussing translation resources to areas where the developer environment is most used.
The plug-in uses Google Analytics to track and report data by acting as if you were visiting the site http://jboss.org/tools/usage/. To view the type of information being collected, refer to Section 1.9.1, “Collected usage information guide”.
To view the sourcecode of the usage plug-in visit http://anonsvn.jboss.org/repos/jbosstools/trunk/usage/.
Outlined is the information type being reported and the Goolge Analytics fieds implemented to gather this information.
The Keyword field has been modified to report the installed JBoss Tools components. Sample returned values include: JBoss AS, Drools, Teiid and ModeShape.
The Visitor type field reports if the current user is new or returning.
The Language field reports the localized language the product is being used in. Sample returned values include: en-US, de-DE and fr-FR.
The Locations field reports the geographical location where the product is being used. Sample returned values include: Munich, Wroclaw and Moscow.
The Browser field has been modified to report the Eclipse interface and version being used. Sample returned values include: JBoss Developer Studio: 3.0.0 and JBoss Developer Studio: 3.0.1.
The Operating System field reports the Operating System the product is running on. Sample returned values include: Linux, Macintosh and Windows.
The Screen colors field reports the color depth being used. Sample returned values include: 32-bit and 24-bit.
The Screen resolution field reports the resolution being used. Sample returned values include: 2048x1536 and 1920x1080.
The Flash version field has been modified to report the Java version used. Sample returned values include: 1.6.0_20 and 1.5.0_9.
The Connection speed field reports the type of internet connection being used. Sample returned values include: T1, Cable and DSL.
If you have comments or questions, you can discuss them at our JBoss Developer Studio Forum.
When writing to the forum for questions, please include the following information:
JBoss Developer Studio version
Exact error message
Steps to reproduce the issue
JBDS subscribers can get necessary support on our Support Portal.
JBDS on RedHat: JBoss Developer Studio
Forum: JBoss Forum
Wiki: JBossToolsWiki
Subscription: JBDS Subscription
The latest documentation builds are available here.
Matrix of supported platforms, runtimes and technologies in JBossTools/JBDS