
This "Quick Start" will show how to use the Smooks tools to create/edit the Smooks configuration file for Java2Java data transformation.
This chapter should give you a brief understanding of the Smooks dev tools.
Visit here to download the "java-to-java" example project.
Tip:
The example project is base on Maven, you suggest you to create a new eclipse Java project and copy the example code and .jar files from the example project paste them into the eclipse Java project.
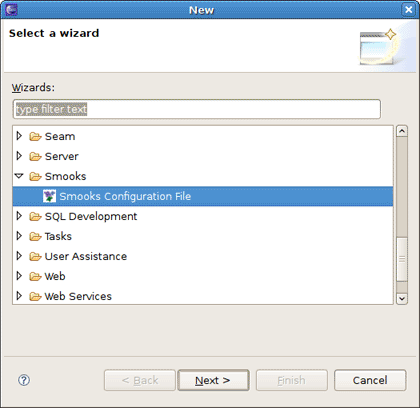
Select the Smooks Java-to-Java example project what you created and right-click, select the menu New > Other, then find Smooks > Smooks Configuration File. Click the Next button.
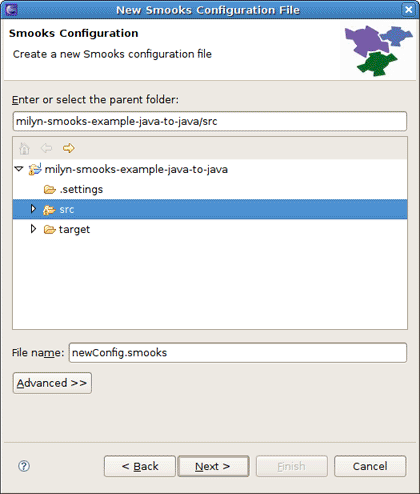
The first wizard page is a file path creation page. Select the src folder to be the files container, and input the name newConfig.smooks. Click Next.
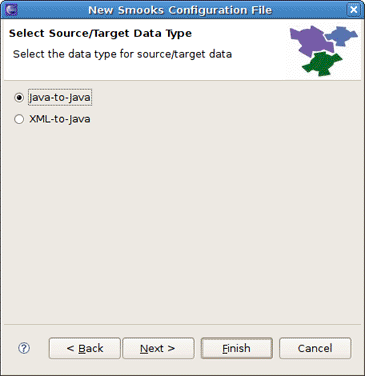
The second wizard page is a transform data type choose page.
As the quick start introduces how to create/edit the Java-to-Java Smooks configuration file, let's select the Java-to-Java type as the source/target transform data type.
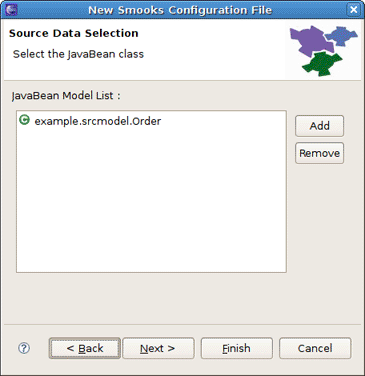
On the next page you are prompted to choose the source data for transformation. Let's select the Order class from the example project as the source JavaBean class.
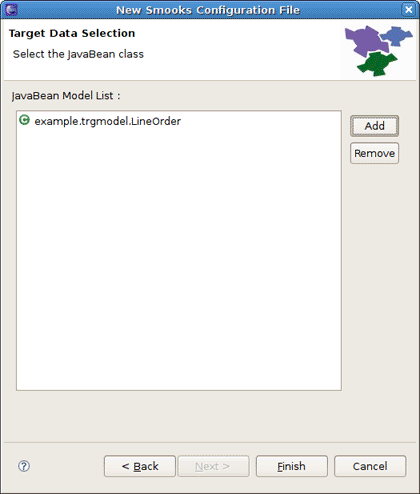
Then the wizard page asks you to choose the target data for transformation. We select the ListOrder class as the target JavaBean class.
Tip:
You can omit two these steps and just press Finish. This will open the empty Smooks Configuration file. It's possible to select source/target data afterwards in the Smooks Graph editor.
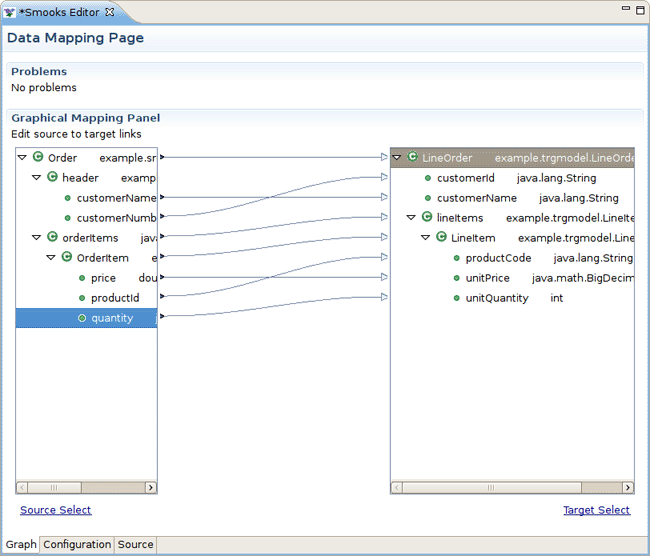
When all the wizard steps are passed, a new Smooks Configuration file is created and the Smooks Editor will be opened automatically:

This editor contains several parts:
Table 2.1. The Smooks Editor Parts
| Editor feature | Functionality |
|---|---|
|
Problems area |
If there are any errors when you are editing the file, the Problems area will display them |
|
Source data tree |
The tree will display the structure of transformed source data |
|
Target data tree |
The tree will display the structure of transformed target data |
|
Mapping graphical area |
Show the data mapping connection lines |
|
Source/Target data selection links |
Click the link, and Data Selection wizard will be opened helping you to choose the source/target data |
To choose the transform data you should make use of the data selection links:
Source Select for selecting source data
Target Select for selecting target data
After clicking the link the Data Type Selection wizard will be opened, and there are two data types on the list: Java and XML.
Note
There will be more and more data types on the list as the development went on.

Select the Java data type and click Next, you will see the JavaBean class selection page:
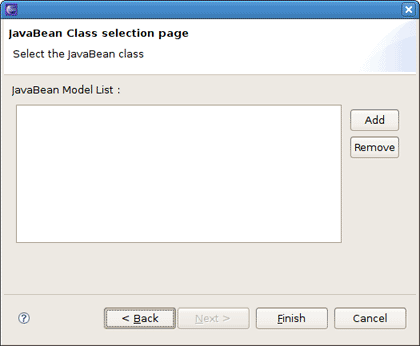
When you select all the necessary java classes, click Finish and the structure of the java class will be displayed on the source/target data tree.
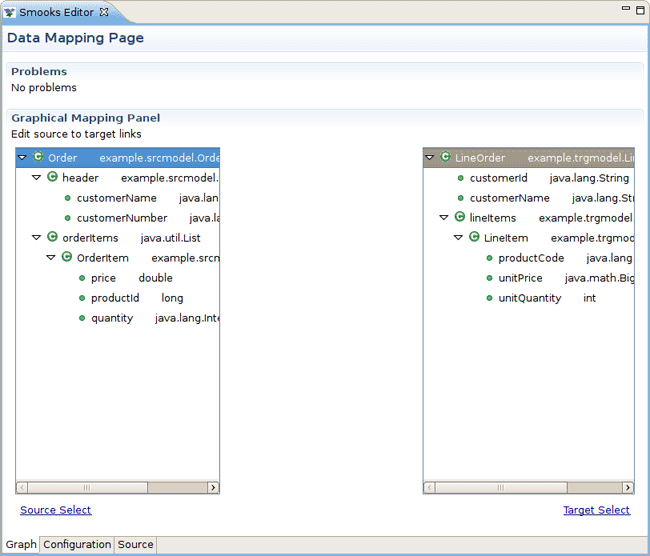
As you see, the source/target data tree displays the structure of the java class.
How to map it?
First, you should know what to transform:
Bind the "customerName" property of the Order#header to the "customerName" property of LineOrder.
Bind the "customerNumber" property of the Order#header to the "customerId" property of LineOrder.
Bind the "price" property of the OrderItem to the "unitPrice" property of LineItem.
Bind the "productId" property of the OrderItem to the "productCode" property of LineItem.
Bind the "quantity" property of the OrderItem to the "unitQuantity" property of LineItem.
Make sense?
OK, let's select the "customerName" item of the "header" item on the source data tree and start to drag it. When the drag item crosses the Mapping graphical area, you will see a connection line. Drop the item onto the "customerName" of the LineOrder on the target data view.
Now a dialog is opened asking you to connect the root node:
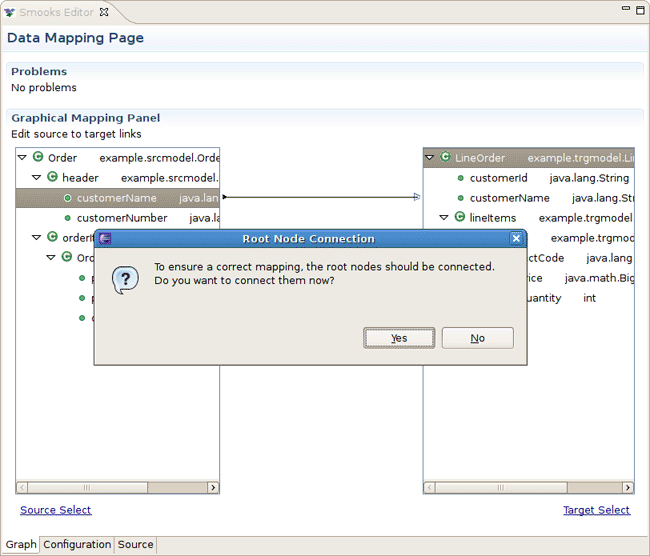
Please, click Yes to connect the root node. If you don't do that, this dialog will be opened again when you connect other nodes.
Note:
Please, remember that: The root nodes of the source data and target data *MUST* be connected.
This rule is not only for Java-to-Java, but the same is also relevant for XML-to-Java
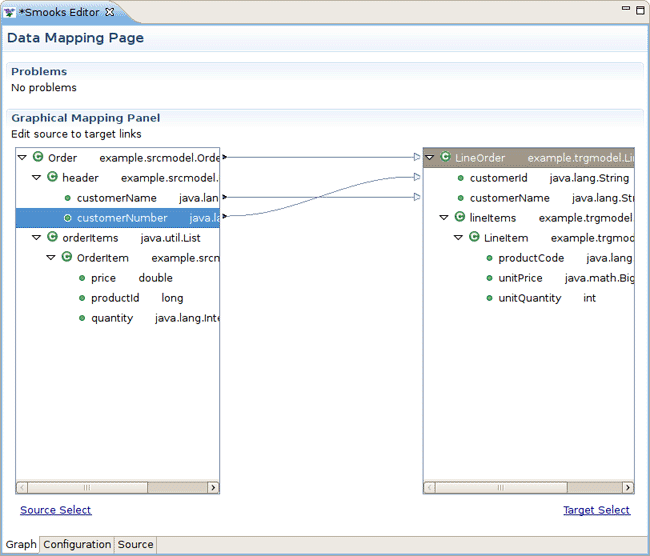
Now let's do the same operation with the "customerNumber", that is what you should see:
Next, you are going to bind the properties of the OrderItem to the properties of the LineItem.
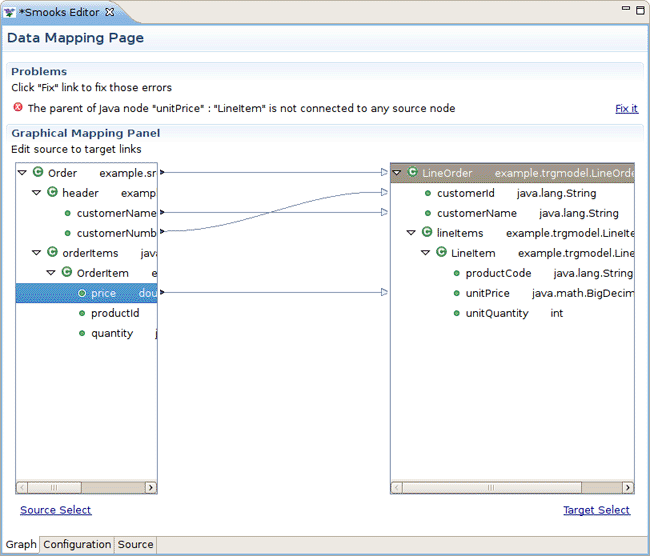
Select the "price" and drag it onto the "unitPrice" of the other side tree viewer. The Problems area will show an error:
How to deal with the error?
Please click the Fix it link, a menu is popped-up with several resolve methods on it.
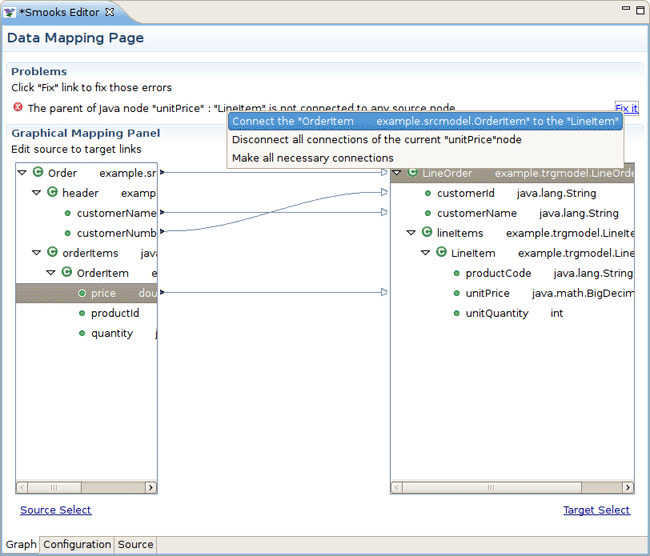
Select the first resolve method: 'Connect the "OrderItem" to the "LineItem" '. As the result the "OrderItem" is connected with the "LineItem".
But the notify message area still shows some other errors:
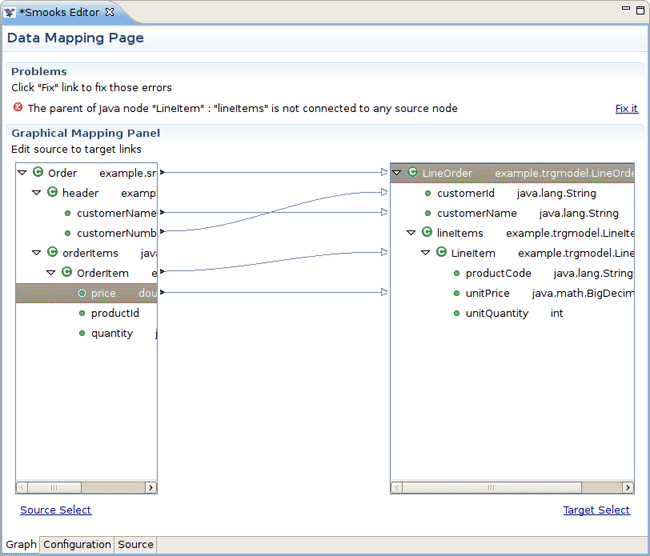
OK, let's deal with the fire error. Click the Fix it link and select the first resolve method. The "orderItems" is connected with the "lineItems".
Tip:
Why does the error occur?
You will find that, if you only connect the property node without connecting the parent node of the property, the "connection error" occurs.
The connection of the "price-to-unitPrice" is the "Binding Connection", but it needs an "Instance Creation Connection" - the connection of the "OrderItem-to-LineItem".
After that, connect "quantity" to the "unitQuantity" and "productId" to the "productCode":
Now, you should save the file and the Smooks tools will generate the correct configuration file content.
OK, let run the test class: example.Main. (Please, make sure that the Smooks engine loads the correct configuration file).
Success!