In this chapter we will discuss how to install runtimes and servers.
First of all it is necessary to mention that the JBoss AS plugin makes use of WTP. This includes starting and stopping servers in run or debug mode. It also includes targeting WTP projects, such as Dynamic Web Projects, to certain server runtimes in order to ensure that the proper JARs from a specific server are added to the project's classpath properly.
In order to get started creating, running and debugging J2EE applications, we should create our runtime and server instances.
In JBoss Tools, the main purpose of Server Runtimes is to point to a server installation somewhere on disk. In our case, this will be a JBoss installation. It can then be used for two primary purposes:
Providing classpath additions to WTP projects that require them.
For JBoss server at least, it provides the necessary information to allow the server to be started and stopped and provides information on which JARs to run and which configuration to use.
You can install runtimes into Eclipse by selecting → menu and then selecting → from the categories available on the left.

From this preference page you can see all declared runtimes along with their types. Here, it is possible to edit or remove existing runtimes, as well as add a new one.
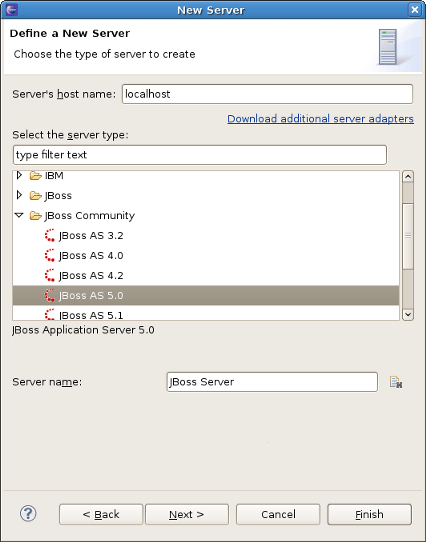
To create a JBoss runtime click the button and choose the appropriate type of runtime from the JBoss Community category.
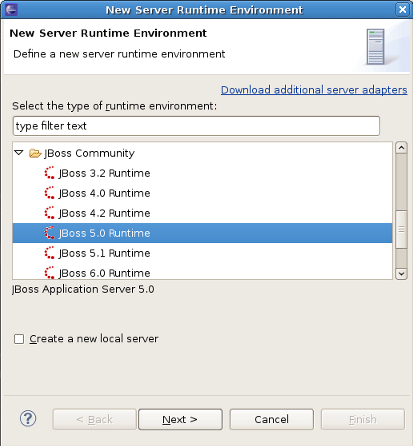
Note:
Now there is a separation between .org servers (the JBoss Community category) and product server that comes with JBoss EAP in JBDS ( the JBoss Enterprise Middleware category).
As you can see, JBoss Tools™ provide its own adapters such as JBoss 3.2, 4.0, 4.2 and 5.0 as well. The last one comes a new safer incremental deployment feature, which prevents partial deployments to be picked up by the server. It means that scanning for auto-deployment is suspended while files are being copied to the deployment location and resumed when the copy is completed.
Note:
Currently we recommend you to use a fully supported JBoss 5.0 server adapter.
You will also note a Deploy-Only Runtime type. This type does not provide a classpath for WTP projects. It is used solely by it's server type for the purpose of setting up a deploy directory for users who do not wish to make use of starting, stopping, or debugging their projects inside Eclipse.
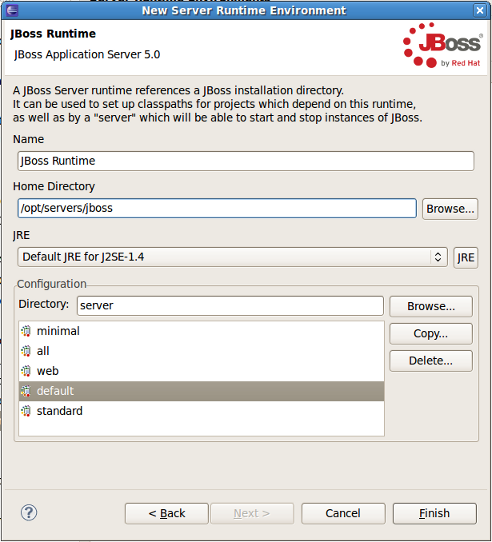
The following table describes all the available options of the current wizard page.
Table 2.1. Server Runtime Wizard Parameters
|
Name |
Description |
|---|---|
|
Name |
The name of a new Runtime for a chosen server. We suggest that you do not leave the default value for this field. It is better to give descriptive names that will help to distinguish one runtime from another. |
|
Home directory |
The path to a directory where the runtime is installed. |
|
JRE |
The proper Java Runtime Environment. Because of the open-source nature of JBoss, a user is likely to want to modify and repackage some of the configuration-specific JBoss JARs and create their own configuration. So rather than forcing you to copy your entire JBoss installation, the structure of the wizard allows to create a new configuration instead. |
|
Directory |
The path to a directory where the configurations are installed. |
|
Configuration |
The list of configurations (all, default, minimal), which is updated as soon as you browse to a valid runtime installation folder. |
As a result of having each runtime represent a specific configuration rather than the server installation as a whole, it is very likely you will create several different runtimes to test each of your configurations. So it becomes important to ensure your runtimes and later your servers, are given descriptive names that help you to remember which is which.
Click the button to see your new runtime in the list.
Note:
If you edit the configuration of a runtime, the changes don't affect the settings of the servers that currently use the runtime. To apply the changes to them also, you should double left click on the server, select → , make sure that necessary configuration is chosen, click the button and then button.
JBoss Tools features the ability to search, detect and add existing JBoss server runtimes installed on your system. If you don't have an existing runtime Section 2.1.1, “Installing a new runtime” will guide you through the creation process. To begin searching for your existing JBoss runtime select → → → .
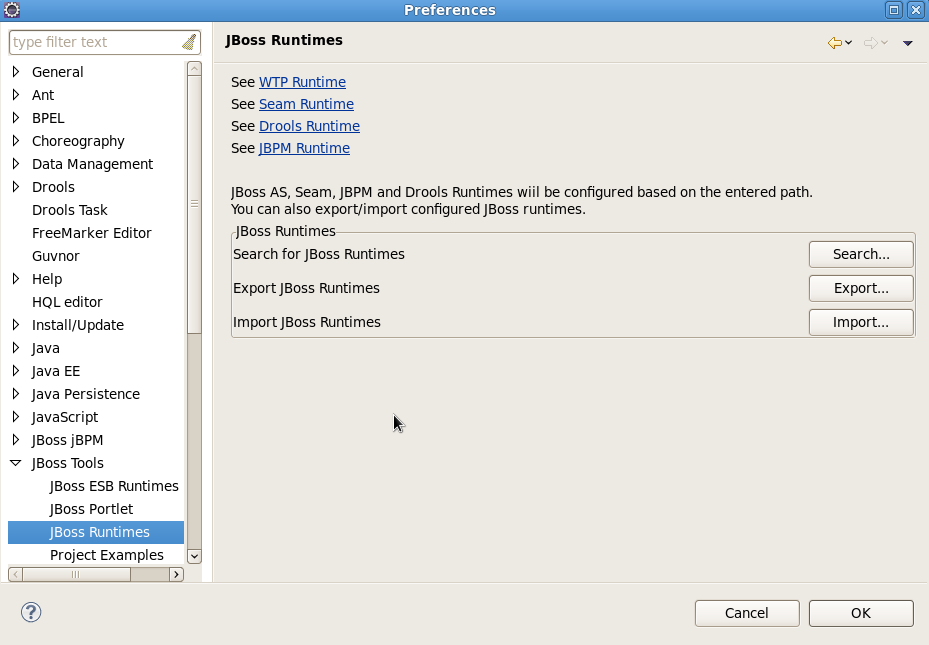
The JBoss Runtimes preference page allows you to perform three different actions: for a JBoss runtime installation, a JBoss runtime configuration and the configuration of a JBoss runtime.
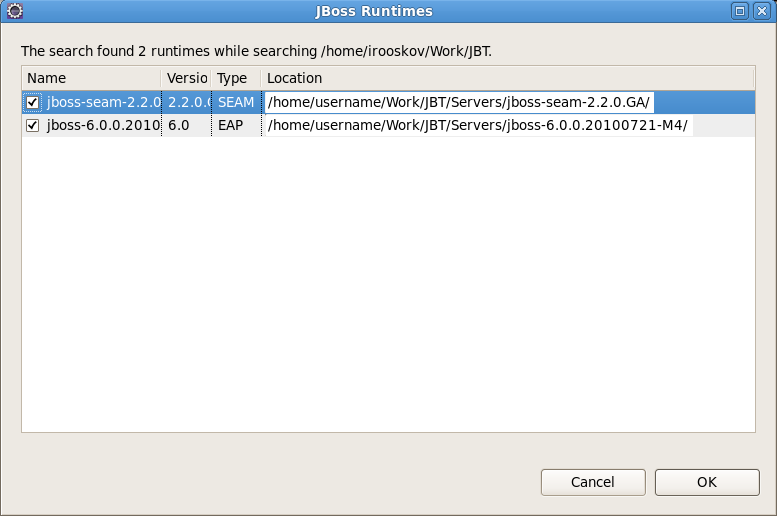
The button opens a file system browser window. Select the directory where you wish JBoss Tools to begin recursively searching for JBoss runtimes and upon completion it will return all those found. From the returned list, choose the runtimes you wish to make available to your JBoss Tools instance by clicking the box beside each runtime and clicking the button.
The Preferences interface seen in Section 2.1.2, “Detecting an existing runtime” also allows you to export and import your runtime preferences. You can navigate to the page by selecting → → → .
The button opens the Export Preferences dialog. The Export all box will automatically be selected, however you can choose to only export specific preference settings (such as only those related to your JBoss runtime) by selecting individual entries from the displayed list.
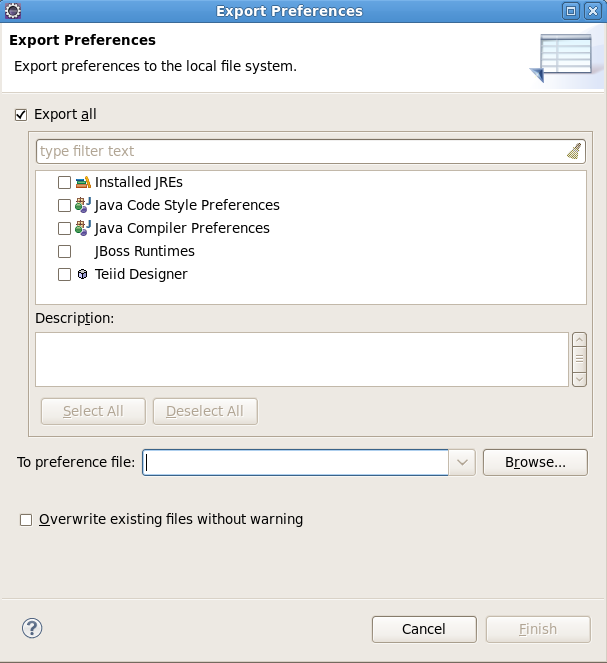
To export the preference settings you must specify the preference file that the information will be written to. This file, once exported, can be used to reapply your settings by clicking on the Import button.
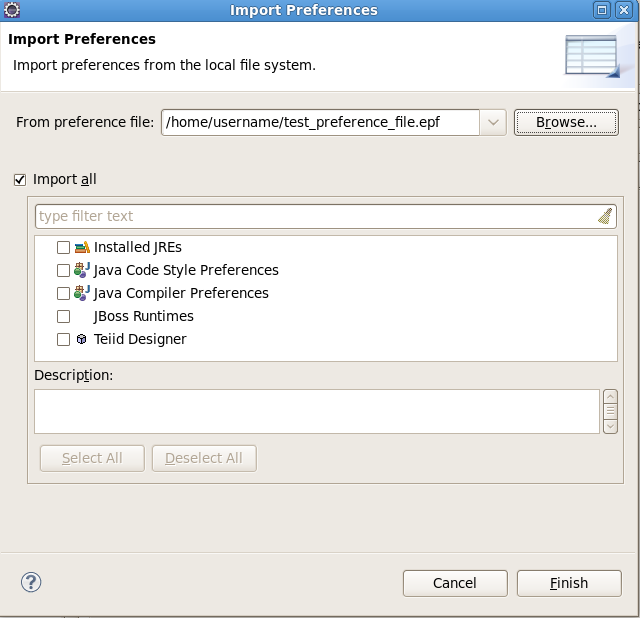
The button opens the Import Preferences dialog. The Import all box will automatically be selected, however you can choose to only import specific preference settings (such as only those related to your JBoss runtime) by selecting individual entries from the list that displays after using the button to select your exported preference file (for example: preference_file.epf).
While installing a new runtime you can copy the configuration from the existing one. To do this you should perform all the steps in Section 2.1.1, “Installing a new runtime”, with the exception of clicking the button in the New Server Runtime Environment menu.
Make sure that you browse to a valid runtime folder and can see the list of configurations (all, default, minimal) in the Configuration section. Then choose appropriate Configuration from the list and click the button.The next dialog should appear.
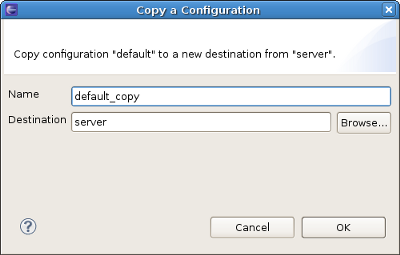
Change the name, click the button and select your configuration location or leave as it is if you want it to be located together with other runtime configurations.
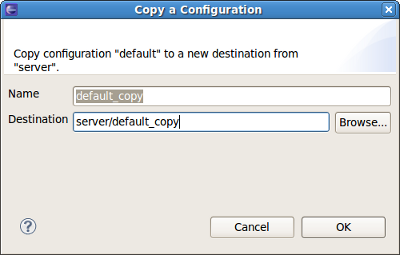
Click the button and you should see the next wizard with the newly copied configuration.
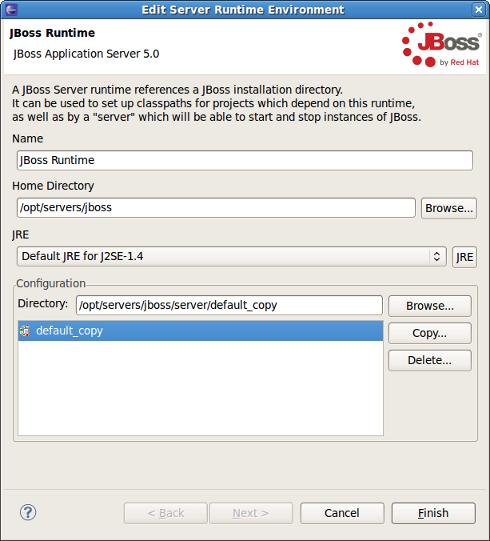
Click the button and you will see your new runtime in the list.
You can also change the configuration of existing runtime to a copied one in the same way by selecting → → → and clicking the button.
WTP servers are Eclipse-representations of a back end server installation. They are used to start or stop servers, deploy to servers, or debug code that will run on the server. They keep track of the modules (JARs, WARs, etc) you deploy to the server and also allow you to undeploy those modules (see Section 5.1.1, “Deploying with Run On Server Wizard”).
Servers can be started or stopped with different command-line arguments. They are often backed by a runtime object representing that server's location.
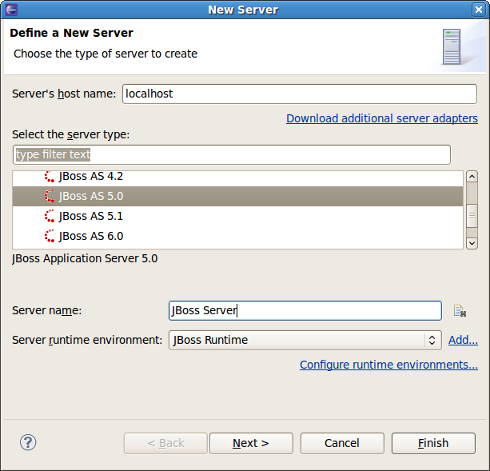
There are many ways to get to the new server wizard. One way is to select → → → . This should show the wizard like below.
A server object keeps track of things like command line arguments when starting or stopping and the runtimes keep track of the location of the installation. Thus, each server instance must be backed by an appropriate runtime.
The New server wizard allows you to name the server via the Server name field, or you can use a generated default name .If it is necessary to restore the default name, click the button ( ).
).
You can select the appropriate runtime from the Server runtime environment combo box. If there is no runtime that matches your needs just press the Add... link nearby to bring up the wizard for creating a new runtime (see Figure 2.3, “Adding a JBoss 5.0 Runtime”). To configure an existing runtimes you should go to server preferences by pressing the Configure runtime environments... link.
If the server you want to create does not have any installed runtime yet, the combo box and the links are absent.
In this case the next page of the wizard which has the same form as in the previous section and will ask you to create the associated runtime.
Either way, after targeting your server to a runtime, the final screen in this wizard presents a summary of the selected options, giving you a chance to verify that you have selected the appropriate runtime.
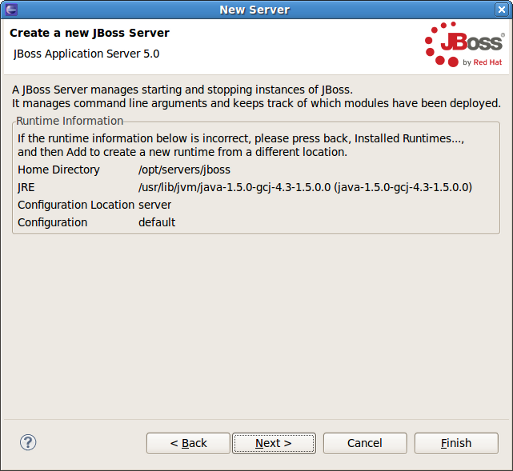
Click the button to complete the process of the server creation.
Now that we have created our runtimes and servers, we can explore the services and tools provided by the JBoss Server Manager.
We hope this guide helped you to get started with the JBoss Tools server manager. For additional information you are welcome on JBoss forum.