This wizard is used to create new jBPM project. It is available by selecting → → → .
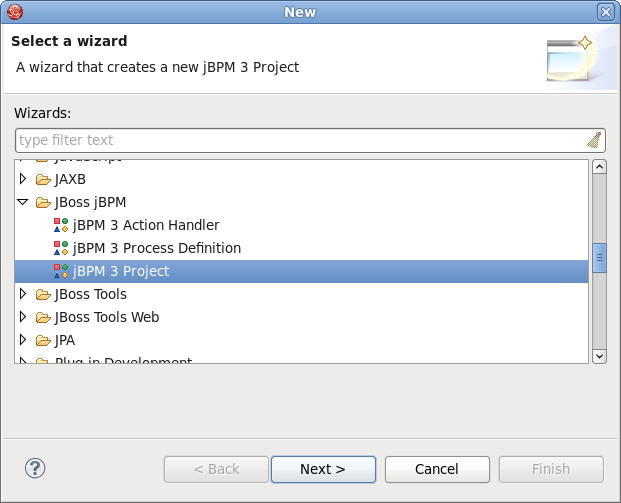
It consists of several pages:
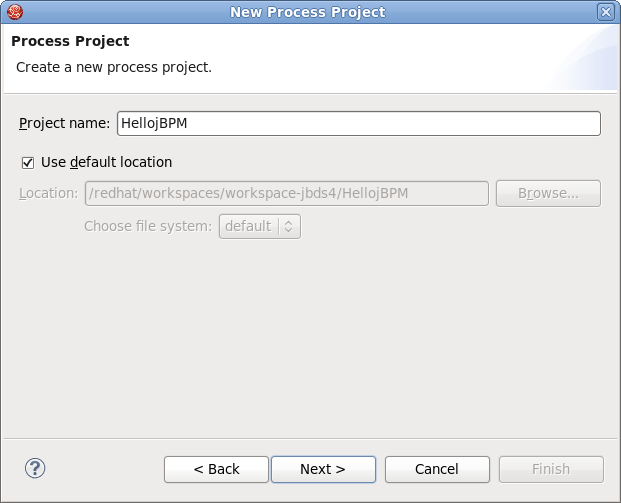
On the first page you can adjust the name of the project and the directory where it will be created.
If the Use default option is checked the output directory will be the workspace, otherwise the user should specify the location by clicking the button.
On the second page you should point the location of your jbpm runtime.
The last page is only available for enabling and disabling Generate simple process definition,action handling and Unit test. If you enable the option all the mentioned code will be generated automatically.
This wizard is available by selecting → → → .
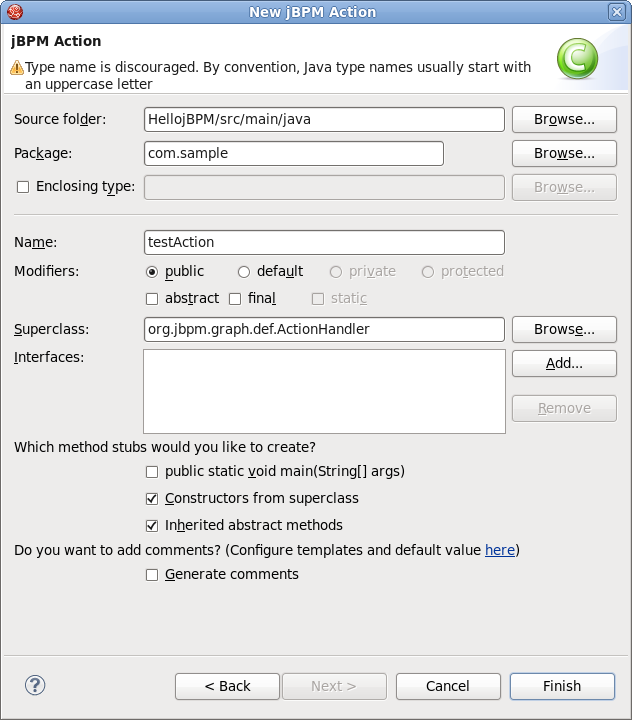
It includes the next options to adjust:
Table 3.1. New JBPM Action Wizard. Options.
| Option | Description | Default |
|---|---|---|
| Source folder | The path to the source folder relative to the selected project | The source folder of the project selected in the Project field |
| Package | Enter a package to contain an Action Handler. Either type a valid package name or click the to select a package via the dialog box. | <blank> |
| Enclosing type | Select the enclosing type of your jBPM action click the button. | <blank> |
| Modifiers | Select the modifiers that will be added to the generated class. | Public |
| Name | Type a name for a new Action Handler | <blank> |
| Superclass | Type or click the button to select a superclass for an Action Handler | org.jbpm.graph.def.ActionHandler |
| Interface | Type or click the button to select an interface/interfaces for an Action Handler | org.jbpm.graph.def.ActionHandler |
| Which method stubs you would like to create? | Select the stubs that you would like to be created automatically. |
|
| Do you want to add comments? | Select Generate comments check box if you want comment mask to be generated before the class definition. | <blank> |
Here, it will be explained how to work with views and editors provided by JBDS.
The views are used to represent and navigate through the resources you are currently working on. One of the advantages of all the views is that they immediately reflect all modifications made in the current active file. Let's explore the views that the jPDL perspective provides in more detail.
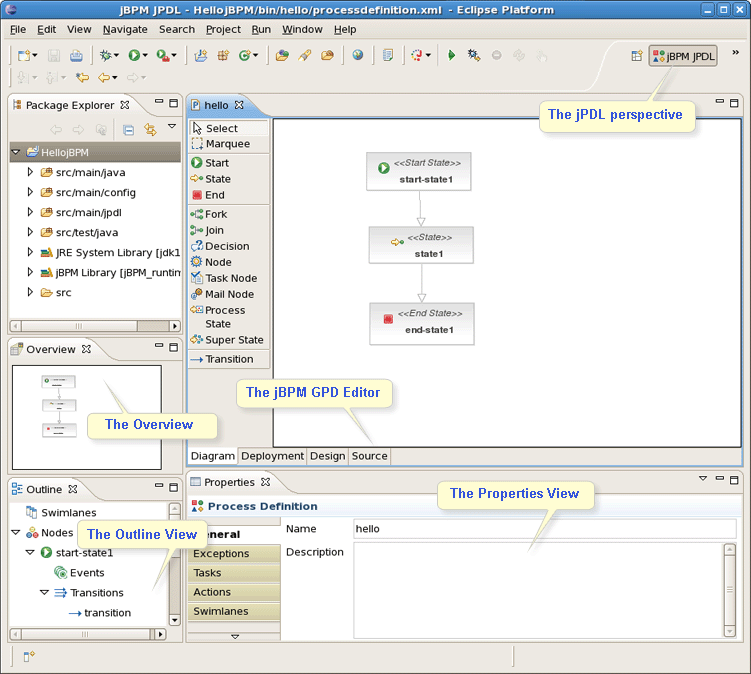
As you can see in the picture above, the jPDL perspective contains a complete set of functionality that's necessary for working on the jBPM project.
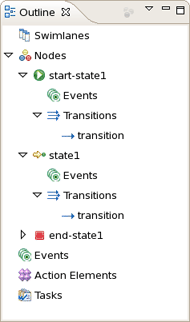
The Outline view provides a classical tree that allows you to quickly view the outline of a process. If it is not visible select → → .
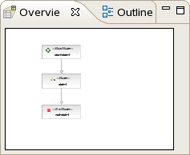
This view provides a visual representation of the entire current developing process. The Overview comes as a scrollable thumbnail which enables a better navigation of the process structure if it is too large.
Here, we dwell on the JBDS Properties view.
The Properties view can be displayed by selecting → → .
This view will list the relevant properties of the selected item in the tabbed form. Every item has its own set of properties, which can be directly edited in the Properties view or by brining up the context menu.
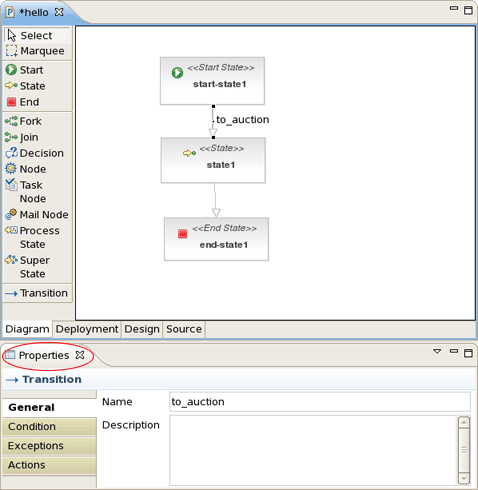
For example, on the picture above the Properties view displays all the properties for a selected transition. Its name has been changed to to_auction. We have done it directly in active General tab of the view. The same way let's change the name for the second transition to to_end.
If no one item is selected, the view represents the properties of the whole process definition.
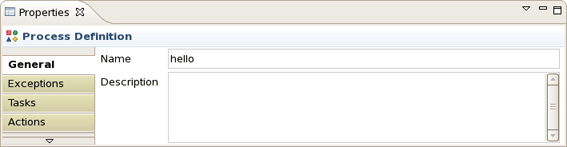
In this case, it contains six tabs. The first one is the General. It allows to specify a process name and add necessary description. To illustrate let's change the process definition name to jbay.
The jBPM GPD editor includes four modes: Diagram, Deployment, Design and Source, which are available as switchable tabs at the bottom of the editor.
In this mode we define the process in the form of a diagram using the tools provided on the left-hand side of the jBPM GPD.
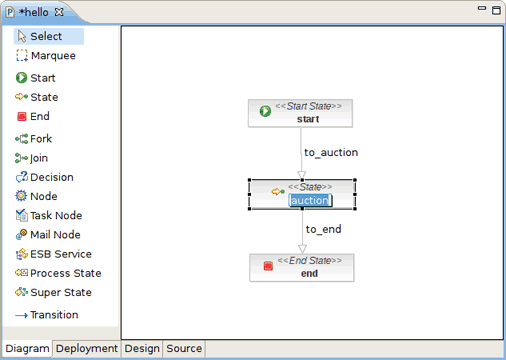
Some properties can be directly edited in the Diagram mode of the graphical editor. One example of this is the name property of nodes. You can edit this directly by selecting the node of which you want to change the name and then clicking once inside this node. This enables an editor in the node. We then change the name of the node to auction.
Now, that we have defined a simple process definition, we can have a look at the XML that is being generated under the covers. To see this XML click on the Source tab of the graphical process designer editor.
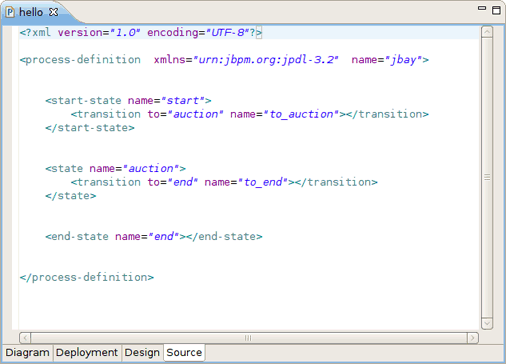
The Source mode provides a way to easily manipulate the raw XML source. In addition, here you can take advantage of content assist.
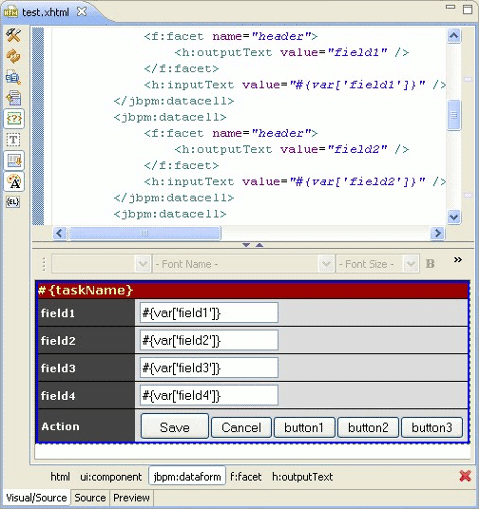
A template is added to better render the jBPM task forms in the Visual editor. Now the jBPM Graphical Process designer can create facelets that are associated with tasks and are rendered in the jBPM console.
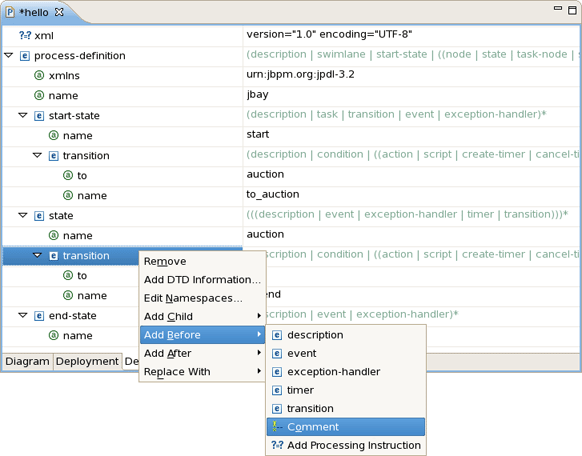
One more way to edit your file is to use the Design mode. This mode is shown in the next picture:
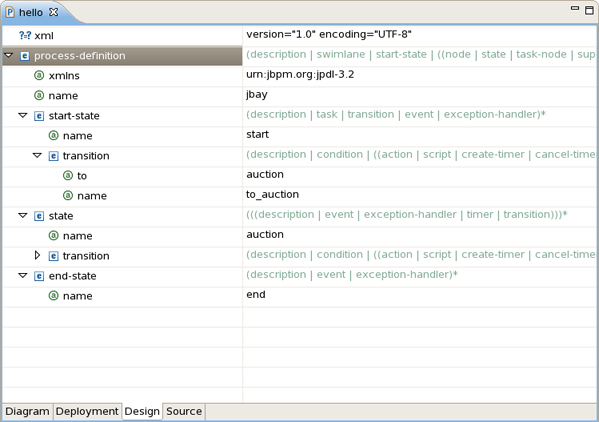
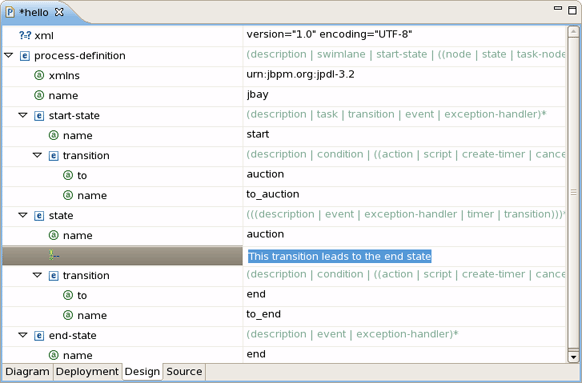
The Design mode presents a table. The process structure is shown in the first column. Here, you can also insert, remove and edit elements or attributes, moreover add comments and instructions. Their values can be directly edited in the second column of the Design mode table.
For instance, let’s add a comment on the second transition. For that, you should bring up the context menu for it and select → .
Then, we can enter the text This transition leads to the end state in the right column as its value.
Finally, to adjust the deployment settings of the project you should select the tab that opens the Deployment mode. On the picture below the Deployment mode is performed with default settings. Here, you can easily modify them or, if the settings do not match your needs, to reset them to their defaults.
