To take an advantage of JSF you will need to perform one of the next steps:
Create new JSF projects
Import (open) existing JSF projects
Add JSF capability to any existing Eclipse project
Import and add JSF capability to any existing project created outside Eclipse.
This section will go into more detail for each step.
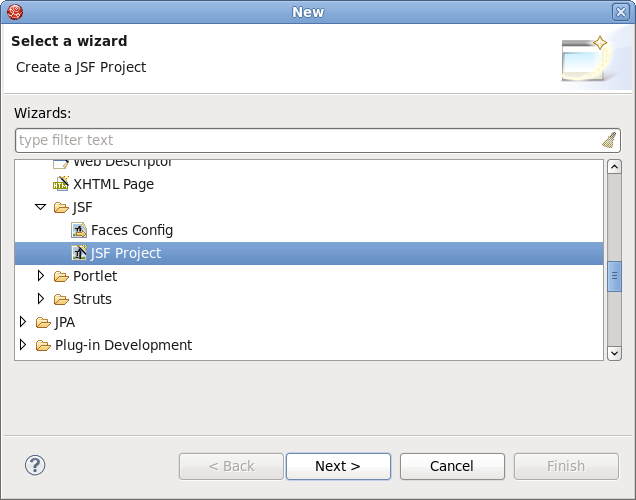
It is easy to create a new project that contains all the JSF libraries, tag libraries and JSF configuration file with the aid of a special wizard. To get it, select → → → → → and click the button.
On the next page you will be prompted to enter the Project Name and select a location for the project (or just leave a default path).
The JSF Version option also allows you to specify the JSF implementation to use.
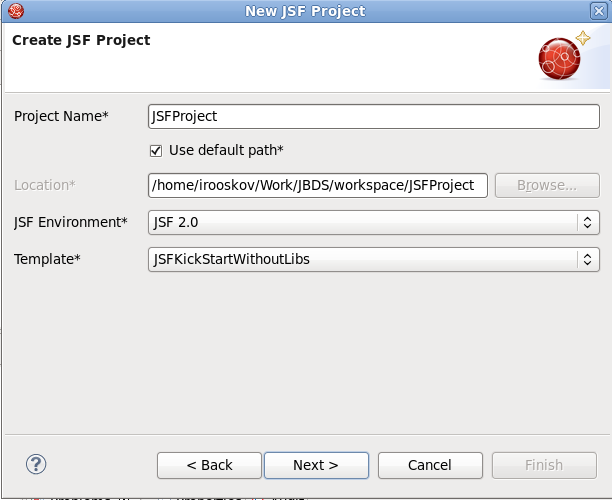
There are a number of predefined project templates that are both flexible and easily customizable. You can pick a different template on which the projects Importing Existing should be based on. Almost all templates come in two variations: with and without JSF libraries.
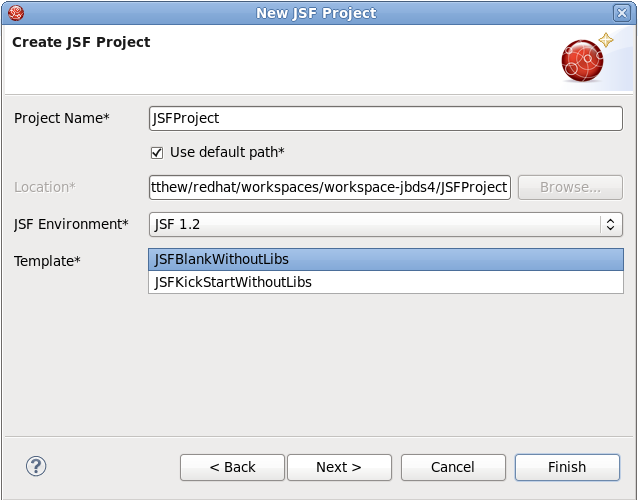
The table below provides description for each possible JSF template.
Table 3.1. JSF Project Templates
|
Template |
Description |
|---|---|
|
JSFBlankWithoutLibs |
This template will create a standard Web project structure with all the JSF capabilities. Use a template without libs to avoid library conflicts when your server already has JSF libraries installed. |
|
JSFKickStartWithoutLibs |
This template will create a standard Web project structure, and also include a sample application that is ready to run. Use a template without libs to avoid library conflicts when your server already has JSF libraries installed. |
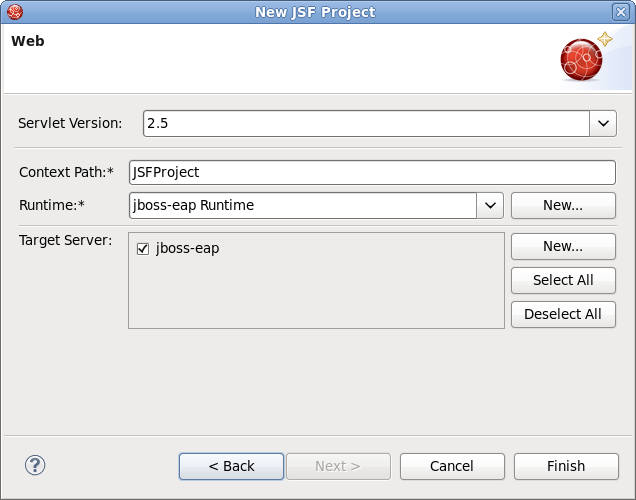
On the next page you need to select which Servlet version to use, and specify whether or not to register this application with JBoss AS (or other server) in order to run and test your application.
The Context Path option defines the name under which the application will be deployed.
The Runtime value tells Eclipse where to find the Web libraries necessary to build (compile) the project. It is not possible to finish the project creation without selecting a Runtime. If you do not have any values, click the button to add new Runtime.
The Target Server option allows you specifying whether or not to deploy the application. The Target Server corresponds to the Runtime value selected above. If you do not want to deploy the application, uncheck this option.
When you are all done, you should see that the project has appeared in the Package Explorer view:
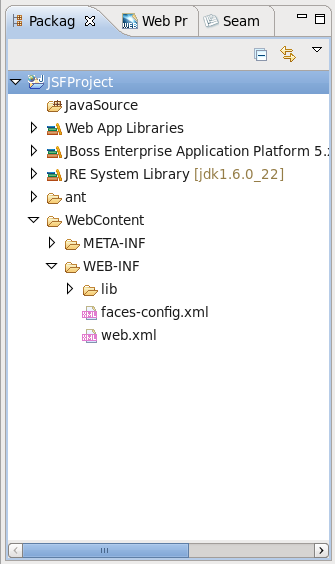
At this point you can open the faces-config.xml file and start working on your application. There are a lot of features available when developing JSF applications. These features will be discussed in more detail later in this document.
For detailed information on migration of JSF projects into a workspace see the Migration Guide.
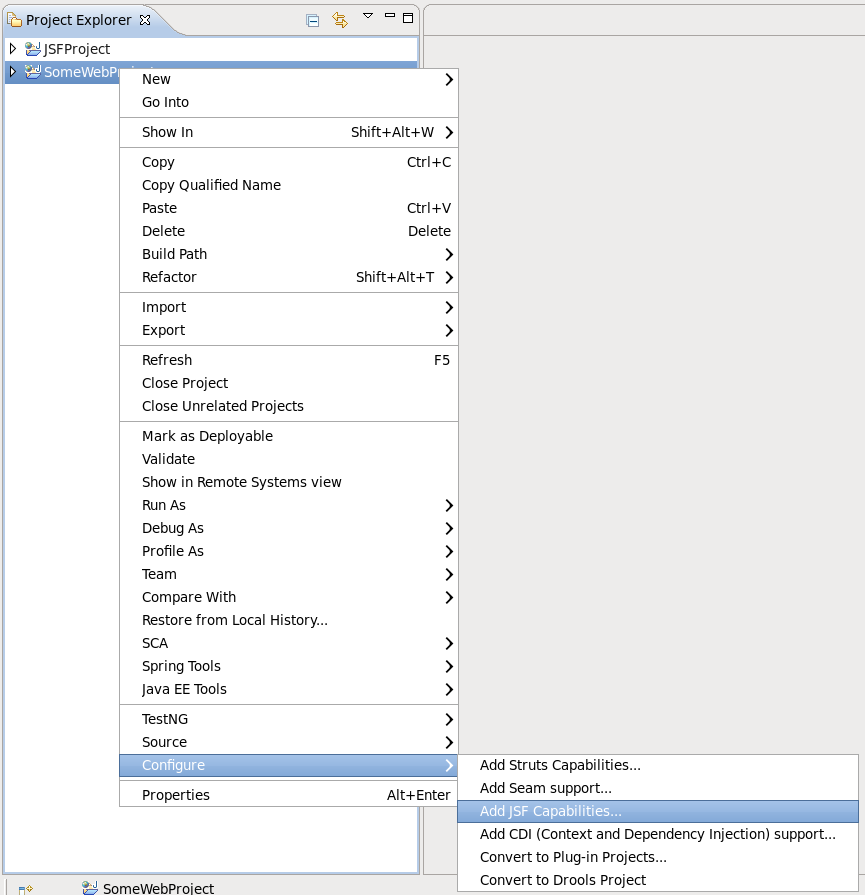
It is also possible to add JSF™ capabilities (JSF libraries, tag libraries) to any existing Eclipse project in your workspace. After that you will be able to make use of features such as the JSF configuration editor, JBoss Tools JSP editor and any others.
Right click the project and select → from the context menu. This will start the process of adding the necessary libraries and files to convert the project into a Web JSF project.
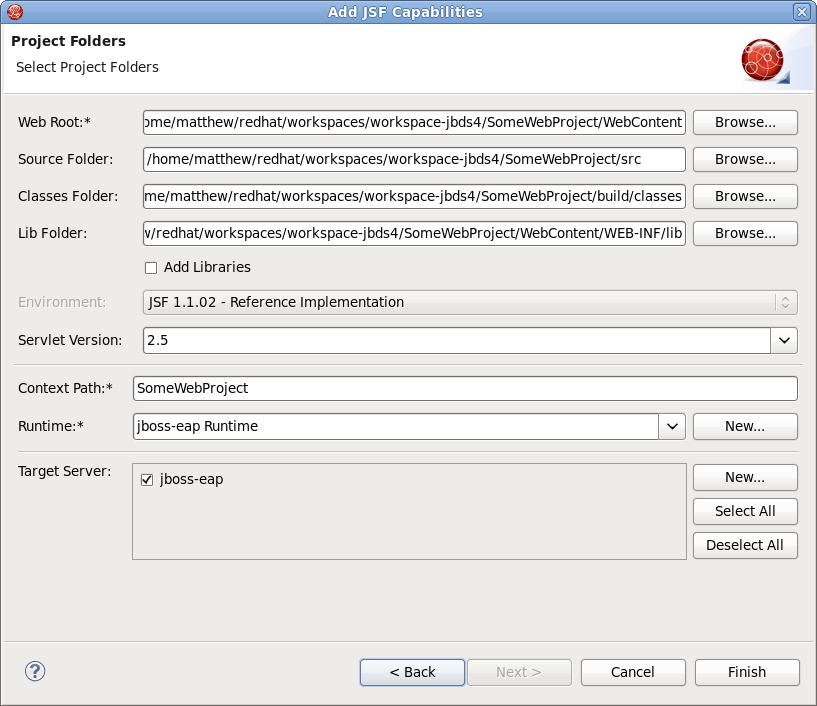
The wizard will first ask you to define location of the web.xml file and the project name.

On the last page you can specify the different folders for your project as well as register this application with a servlet container.
Make sure to select the Add Libraries option to add all required JSF related libraries into your project.
The Context Path option defines the name under which the application will be deployed.
The Runtime value tells Eclipse where to find Web libraries necessary to build (compile) the project. It is not possible to finish project import without selecting the Runtime. If you don not have any values, click the button to add a new Runtime.
The Target Server option allows you to specify whether or not to deploy the application. The Target Server corresponds to the Runtime value selected above. If you do not want to deploy the application, uncheck this value.
Once your project is imported you can see that JSF related libraries jsf-api.jar and jsf-impl.jar have been added to your project.
Note:
Some application servers provide their own JSF implementation libraries. To avoid conflicts you should not add JSF libraries while adding JSF capabilities.
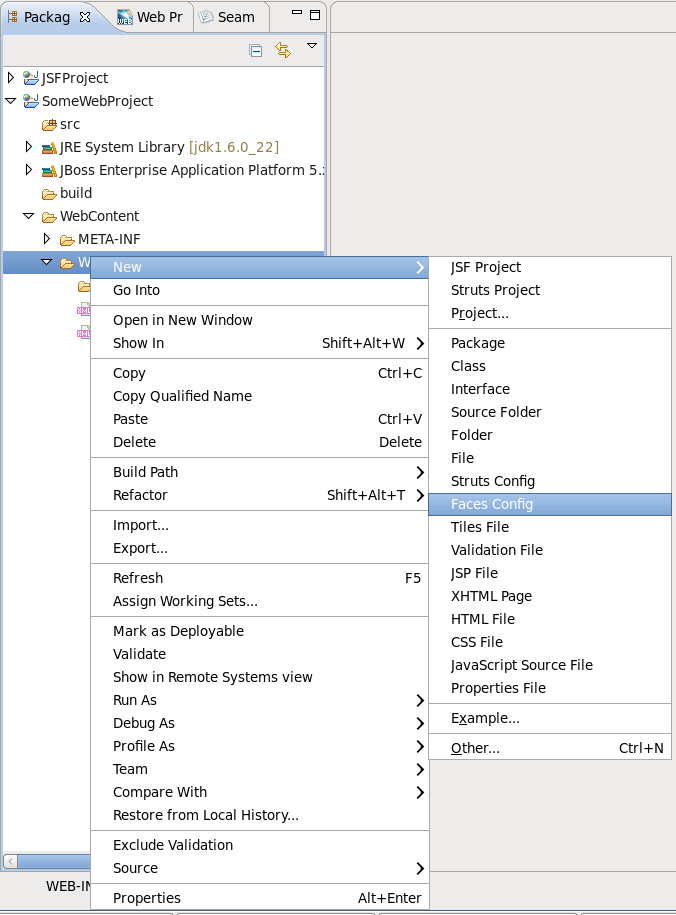
You are now ready to work with JSF by creating a new JSF configuration file:
Once the file has been created, it should be opened in a special editor (see Chapter 5, JSF Configuration File Editor).
A template is a set of files that is provided as a basis when creating a new project. Project templates provide content and structure for a project.
JSF Tools provides powerful template capabilities which allow you to create new templates and import existing Struts and JSF projects. This templating facility has a variety of aspects to consider. Let's start with the most straightforward case and consider the process of creating a template from your existing JSF project.
Let's say you have a project that you want to use as the basis for a new template. The following steps will show you how to achieve this:
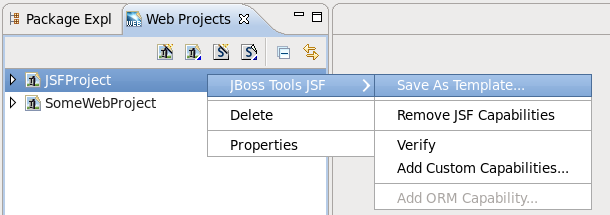
In the Web Projects view, right-click the project and select →
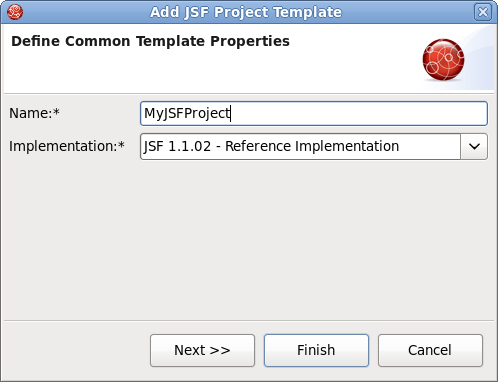
In the first dialog box, you can specify a name for the template (it will default to the project name) and confirm what run-time implementation of the project technology will be used.
When you click the button a dialog box will be presented with your project structure displayed, along with a number of check boxes. Here you can select only those parts and files in your project directory that should be part of the template.
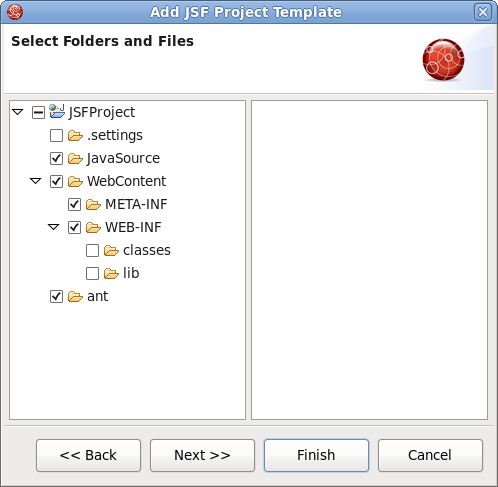
At this point, unless you want to designate some extra files as having Velocity template coding inside them, you should click the button.
That's it. This template can be used with any new or imported project that uses the same run-time implementation as the project you turned into a template.
At this point you have a fully configured project. Now you can add some additional logic to it starting with the JSF configuration file.