This chapter contains additional information related to the JBoss jBPM.
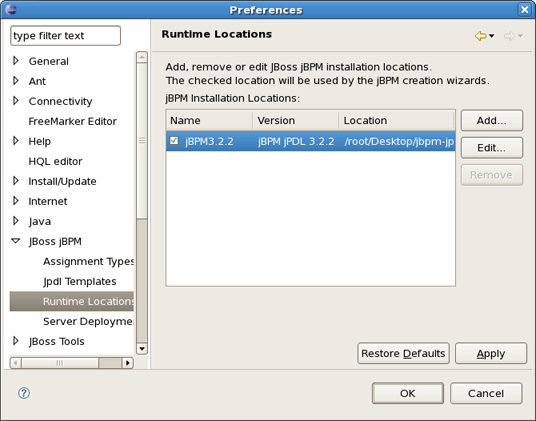
You can change the default jBPM installation by means of the Eclipse preference mechanism. Open the Preferences dialog by selecting Window > Preferences and select the JBoss jBPM > Runtime Location category. Using this page you can add multiple jBPM installation locations and change the default one. The default installation is used for the classpath settings when creating a new Process Project. Changing the preferences has no influence on already created projects. Getting rid of a jBPM installation that's being referenced by a project however will cause the classpath to contain errors.
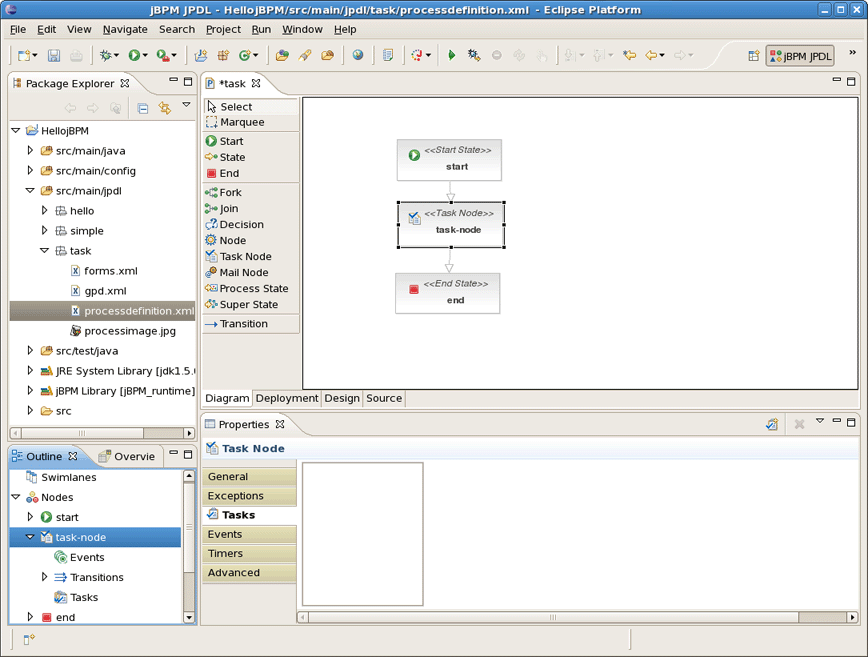
Here, we'll examine how you can configure the Task nodes in jBPM jPDL GPD.
You can add Tasks to Task nodes and then configure them in a similar manner as the Action configuration mechanism. Let's consider the process definition similar to the previous one that contains three nodes: Start state, Task node and End state. The Properties view for selected Task node includes several tabs.
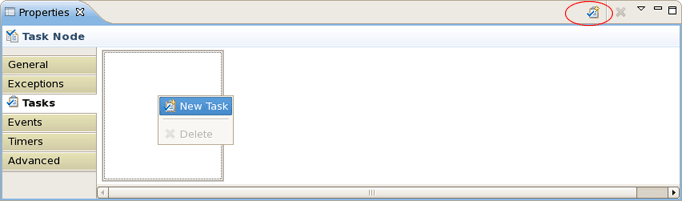
We should choose the Task tab and then bring up the context menu or click the button in the top right corner of the view to add a Task to our Task node.
Every added Task has its own configuration possibilities. You can access them through the Properties view as well.

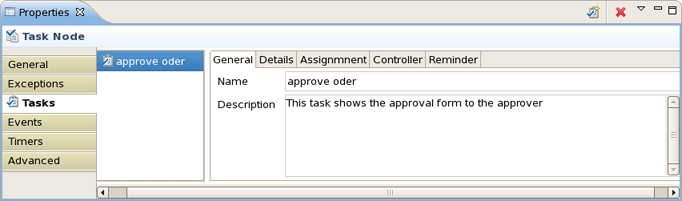
The General page is a place where you can specify the name of a Task and its description. For instance, let it be approve oder with appropriate description that you can see in the figure below.
Now, look at Details page. First, you should specify the due date that is a mandatory property for the Task. The due date is the date on which the task should be accomplished. Here you can also set a Task priority as well as signalling, notifying or blocking. The Blocking attribute indicates that the process will not be able to continue if this task is still unaccomplished. The Generate Form... button is for creating a simple task form that can be rendered by the jBPM console.
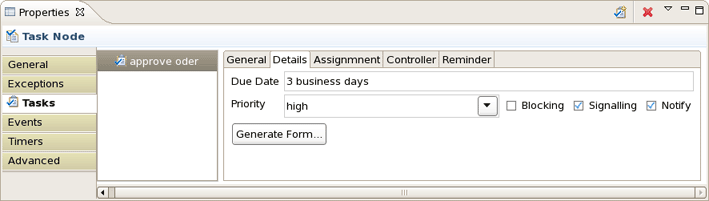
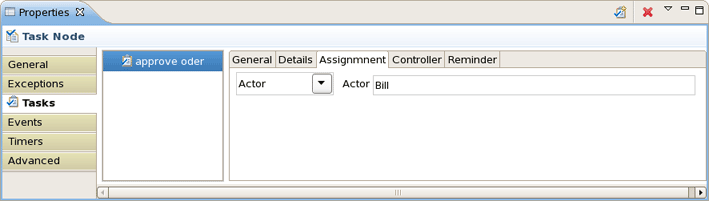
For our example, we specify the due date as 2 business days, choose the high priority and also check the Signalling and Notify attributes. It means that the Task should be accomplished in 2 business days and the assignee will be notified by email when the task is assigned. To specify how the Task should be assigned switch on to the Assignment page.
On the Reminder page you can specify whether the assignee will be reminded of the task that awaits him.
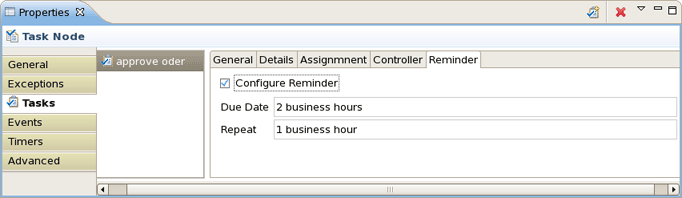
In our case, the assignee will be reminded by email after two business hours and continue to get reminding every business hour after that.
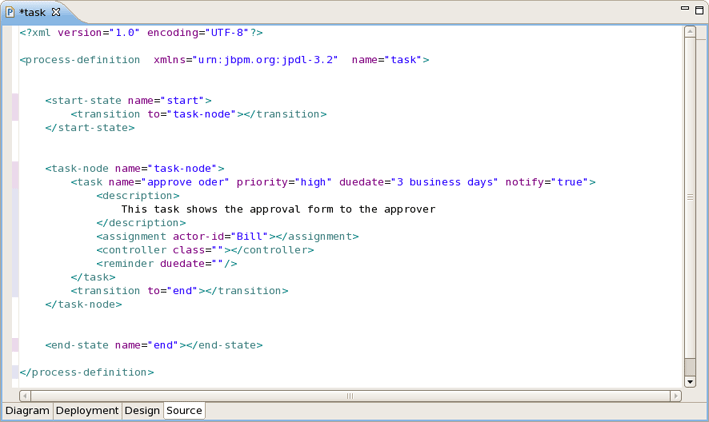
In the next figure you can see our configuring generated into XML.
We hope, our guide will help you to get started with the jPDL process language and jBPM workflow on the whole. Besides, for additional information you are welcome on our forum.