JBoss Tools provide the following functionality when working with Struts:
Create new Struts projects
Import (open) existing Struts projects. You can import any project structure
Add Struts capabilities to any existing Eclipse project
Import and add Struts capabilities to any existing project created outside Eclipse.
Now, we'll focus on all these points more fully.
JBoss Tools provides a New Struts Project Wizard that radically simplifies the process for getting started with a new Struts project. You just need to follow these steps:
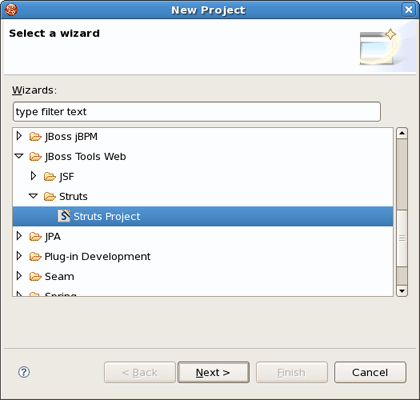
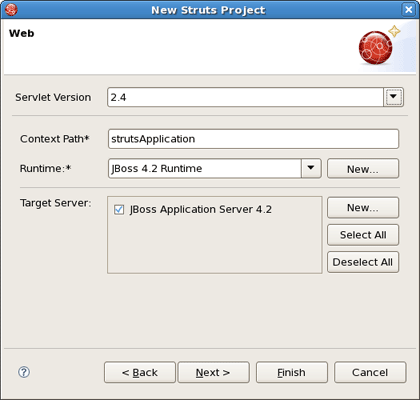
Select File > New > Project... from the menu bar. Then, select JBoss Tools Web > Struts > Struts Project in this dialog box. Click Next:
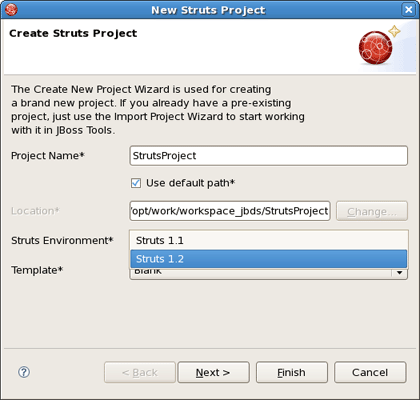
On this form, provide the Project Name. You can also select where to create the project or use the default path.
Next to Struts Environment set which Struts version to use.
Tip:
Don't put spaces in project names since some OS could experience problems with their processing and searching these files.
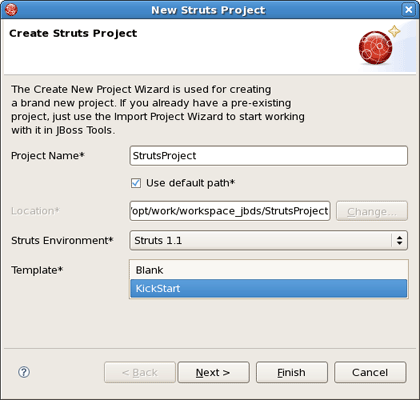
You can select the KickStart template, then the project created will include a simple Hello World type application that is ready to run.
Next, you register this application with the current servlet container defined for your workspace (JBoss AS, by default) in order to allow you to test your application more easily while still developing it. A new entry will be added in the servlet container configuration file to enable running the application in-place (called null deployment or link deployment). Uncheck the "Target Server" check box if for some reason you don't want to register your application at this point.
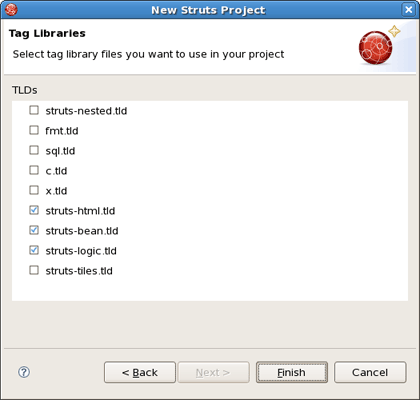
On the next form, you can select the TLD files to include in this project:
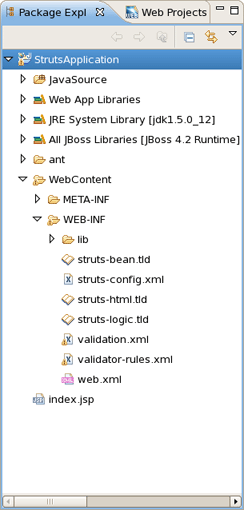
After the project is created, you should have the following project structure (if you used the KickStart template):
Tip:
If you want to hide the jar files from Web App Libraries in view, select the down-pointing arrow in the upper right corner, select Filters..., check the box next to Name filter patterns (matching names will be hidden), and type *.jar into the field. Then, click OK.
For detailed information on migration projects to JBoss Developer Studio see Migration Guide.
Here, we'll consider how to add Struts functionality (Struts libraries, tag libraries and a Struts configuration file) to any existing Web application project in your Eclipse workspace.
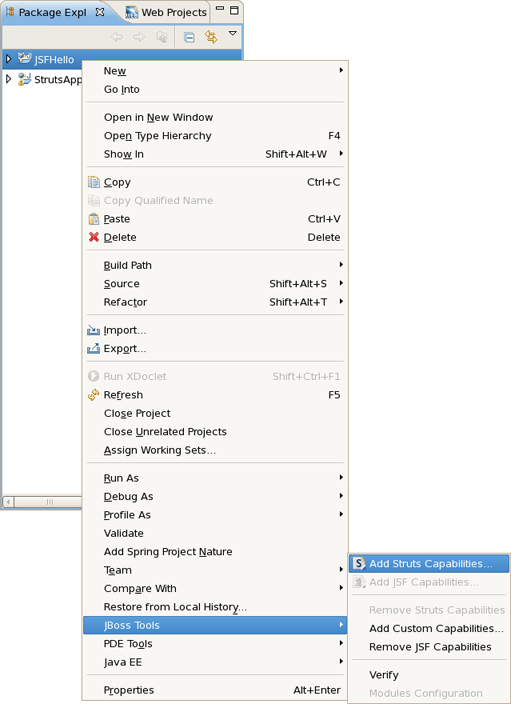
By adding a Struts Nature to your project, you can now edit files using JBoss Tools editors, such as the Struts configuration editor and the JBoss Tools JSP editor. To take advantage of this just right-click the project and select JBoss Tools > Add Struts Capabilities from the context menu. This will start the process of adding all necessary libraries and files to make a Web Struts project from your one.
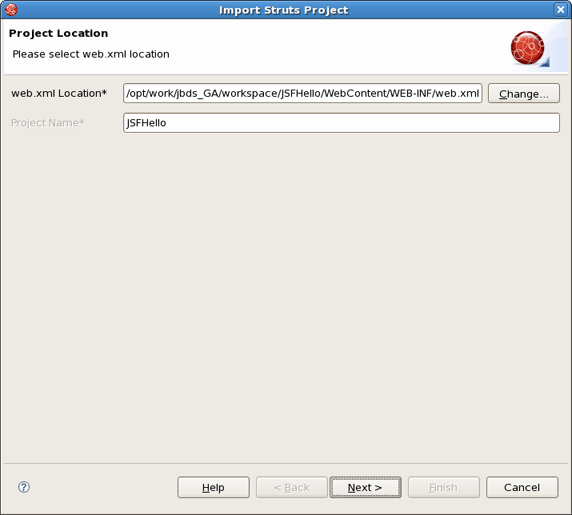
In the wizard you should point to location of your deployment descriptor file web.xml and name of the project.
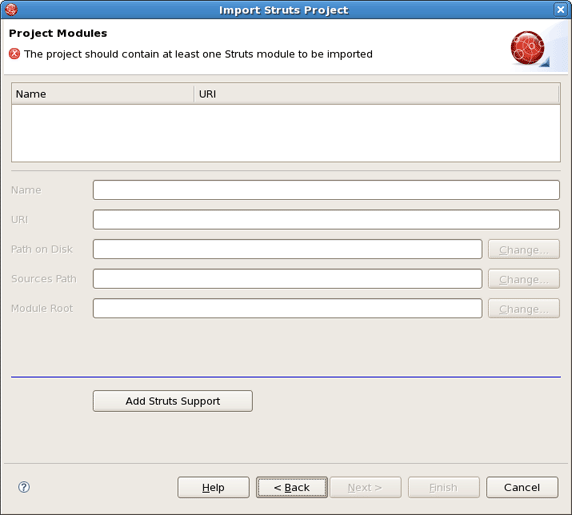
After hitting Next, you will see the following screen. This screen simply means that you need to add at least one Struts module to your project to make this project a Struts project. Adding a Struts module means that a new struts-config.xml will be added to your project and registered in the web.xml file. In addition, all required Struts libraries will be added. To add a Struts module, select the Add Struts Support button.
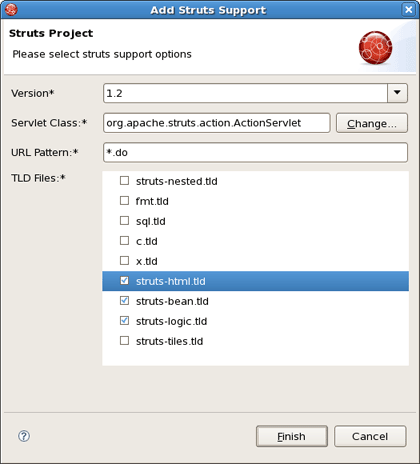
Here you can select what Struts Version, Servlet Class, URL Pattern and TLDs to add to this project.
When done, you will see the default Struts module configuration information. See how to Edit Struts modules.
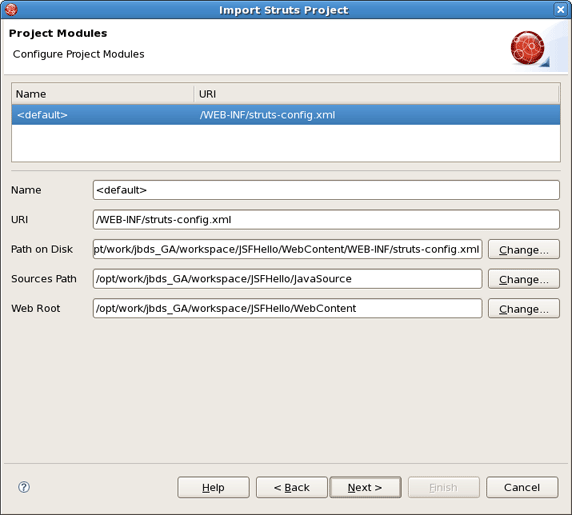
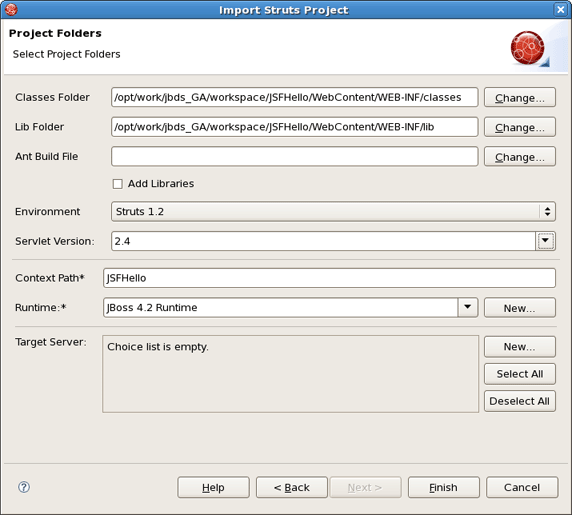
On the last screen you can set the different folders for your project as well as register this application with a servlet container. If you want the libraries (.jar files) will be automatically added to your project, click on the checkbox Add Libraries.
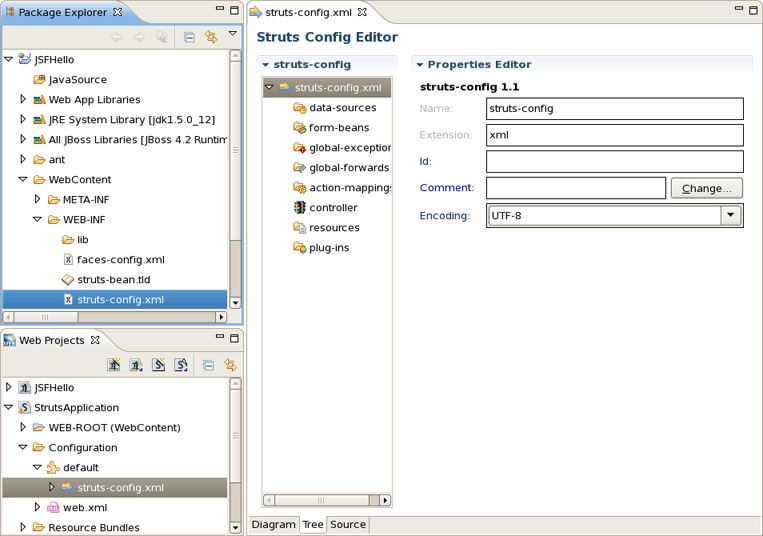
When done, you can open end edit the struts-config.xml file using usefull Struts configuration file editor provided by JBDS. (The Struts configuration is shown below in the Tree viewer).