
In this section we will focus on all concepts that JBoss Tools integrate for working with JBoss ESB.
This chapter will provide you with the information on how to install JBoss ESB plugin into Eclipse.
ESB Tools come as one module of JBoss Tools project. Since ESB Tools have a dependence on other JBoss Tools modules we recommend you to install a bundle of all JBoss Tools plug-ins. You can find all necessary installation instructions on JBoss Wiki in the InstallingJBossTools section.

In this chapter we suggest a step-by-step walk-through of creating a new ESB project. Let's try to create a new JBoss ESB project.
We will show you how to use the ESB Project Creation wizard for creating a new ESB project and setting basic ESB classpath.
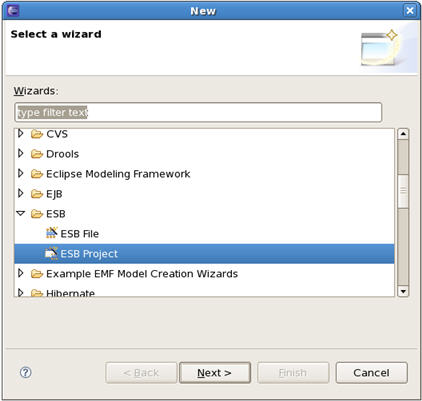
Select File >New > Project... in the main menu bar or context menu for selected project and then ESB > ESB Project in the dialog opened:
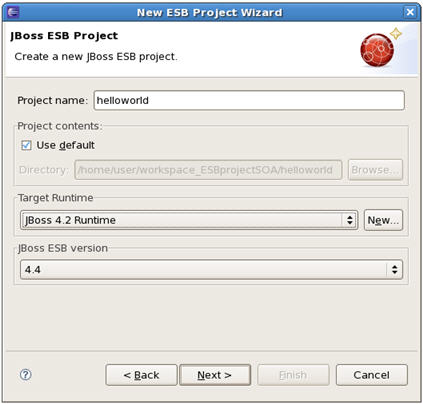
Clicking Next brings you to the JBoss ESB Project wizard page where a project name, ESB version and target JBoss Runtime are to be specified. Specify, for example, helloworld as a Project name and accept the default ESB version.
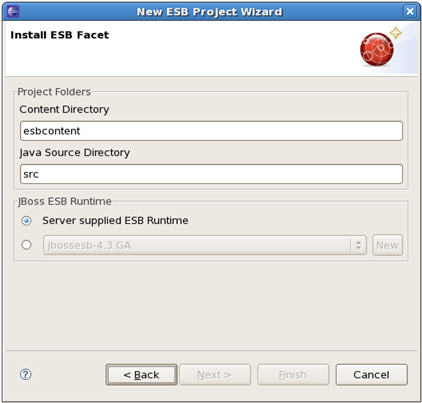
Clicking Next brings you to the ESB facet installation page where you can specify Java Source Directory and ESB Content Directory. ESB Content Directory is a folder that contains the most of artifacts that an ESB archive needs. You also can configure ESB libraries to the project by selecting a ESB runtime using one of the options:,
1. Use Server Supplied ESB Runtime
2. Select a ESB runtime from the JBoss ESB runtime list predefined in the preferences
If you choose the first option, make sure that the project has the Target JBoss Runtime set and this runtime has a ESB runtime installed.
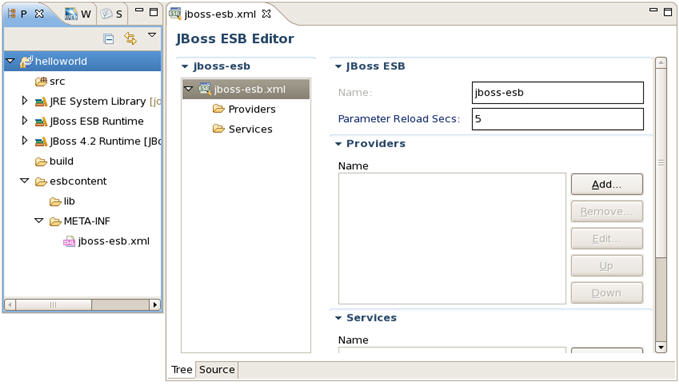
Click Finish and a ESB project with the default jboss-esb.xml will be created.
JBoss Tools provides a Project Example wizard that is an easy way for users to create some kinds of projects to be used as examples with some predefined structure. Let's start creating a ESB project using this wizard.
Before creating a ESB project example create JBoss Runtime with name JBoss 4.2 Runtime, it will be used by your ESB project example.
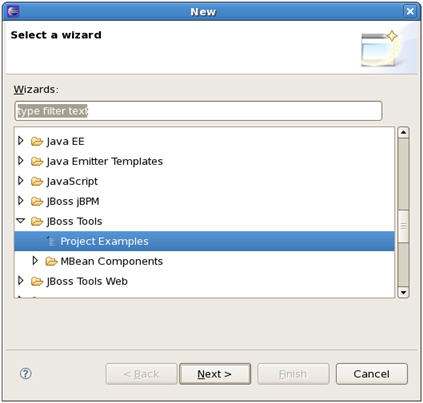
Select File >New > Others , in the main menu bar or context menu for selected project and then JBoss Tools > Project Examples in the New dialog:
Clicking Next brings you to the wizard page where you can select a ESB project example from the example list. Every ESB example has two projects, one is a ESB project and another is a Java project used to test the ESB project.
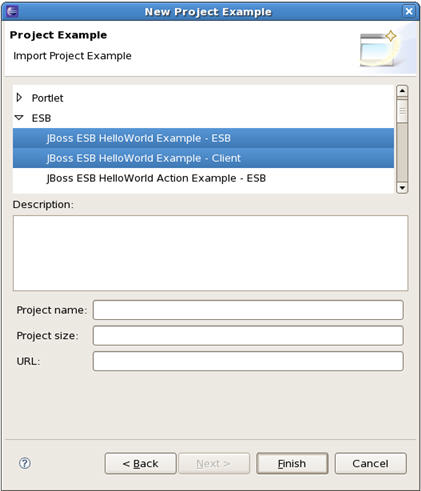
Select JBoss ESB HelloWorld Example ESB and Client project, and then click Finish, then you will get two projects created.
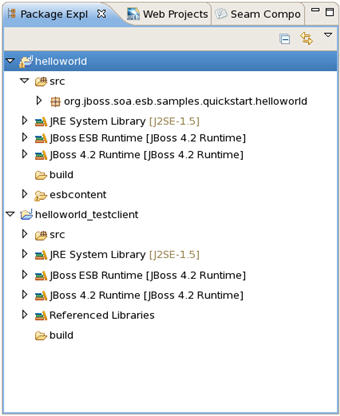
Deploy the HelloWorld ESB project and run a test class in the client Java project to see the test result in the Console view.
In this chapter youwill see how to deploy a ESB project using the WTP deployment framework.
Before deploying the project, open the JBoss Server View by selecting Window > Show View > Other > Server > JBoss Server View, create a JBoss Server in the Server view and start it, and then right click the created JBoss server, select Add and Remove Projects, and add the ESB projects you want to deploy from the left side to the right side in the opened dialog.

Click Finish to add the project to the server. You also can drag the ESB project from the Project View to the server.
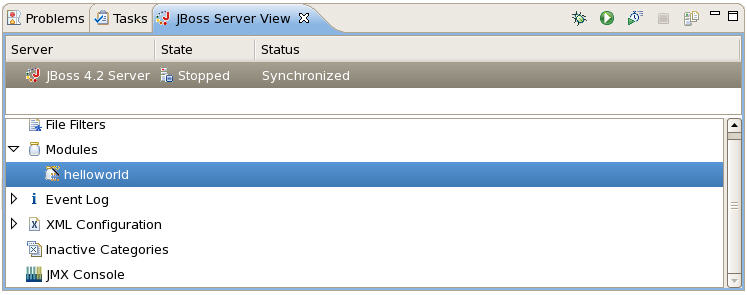
Thus, you have just added the ESB project to the JBoss server module list. Right click the JBoss Server and select Publish to publish the project on the server. You can check the deploying result in the Console view.
In this chapter we suggest a step-by-step walk-through of creating your own simple file. Let's try to organize a new ESB file.
We will show you how to use the Creation wizard for creating a new ESB file.
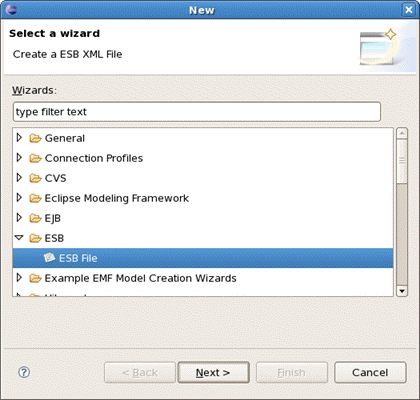
At first you should open any project. Select File >New > Other... in the main menu bar or context menu for selected project and then ESB > ESB File in the New dialog:
Clicking Next brings you to the wizard page where a folder, a name and a version for the file should be specified. Choose, for example, jboss-esb.xml as the name and accept the selected projects folder and the default version.
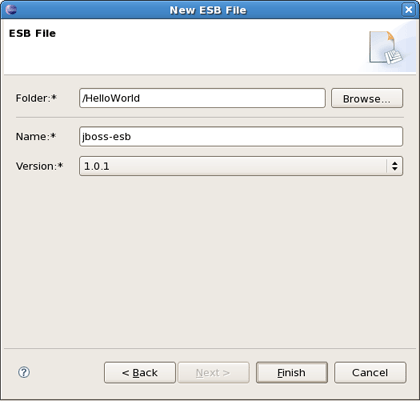
Thus, your file will be created in the selected projects folder by default. If you want to change the folder for your future file click Browse... button to set needed folder or simply type it.
Clicking on Finish results in the file being generated. The wizard creates one xml file.
In this chapter you will know how to predefine a JBoss ESB runtime on the Preferences page.
You may already know, there are two ways to set JBoss ESB runtime when creating a ESB project, one is to use the project target JBoss runtime, and another is to select a JBoss ESB runtime predefined in JBoss Tools preferences. Let's configure it.
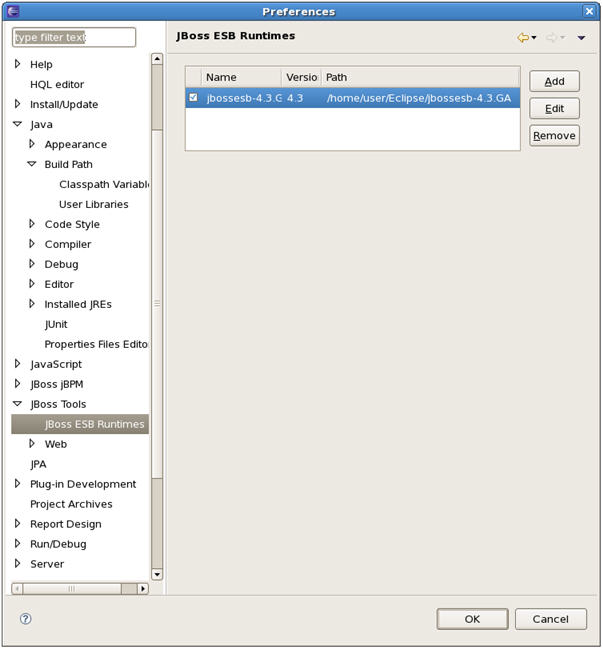
Select Window >Preferences > JBoss Tools > JBoss ESB Runtime , to open the JBoss ESB Runtime Preferences page where you can add, remove and Edit a JBoss ESB runtime.
Select Add to open a dialog where you can specify the JBoss ESB runtime location, name and version number. You also can customize the libraries of the runtime by checking the Customize JBoss ESB Runtime jars checkbox.
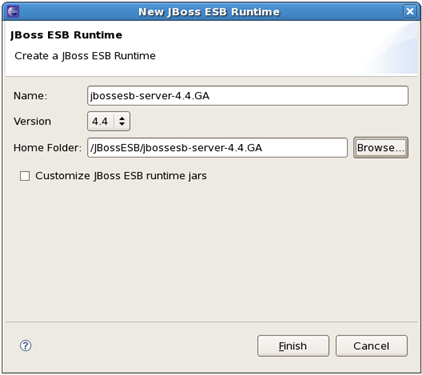
The new JBoss ESB Runtime will be configured. Click OK to finish and save the preferences. You can use the configuration when creating a JBoss ESB project.
When a ESB runtime is configured for your ESB project you are able to change it to any other using the classpath container page for ESB runtime. To do that, turn to the Package Explorer view and right-click the "JBoss ESB Runtime" library. Select Properties and a table listing all available JBoss ESB runtimes will appear:
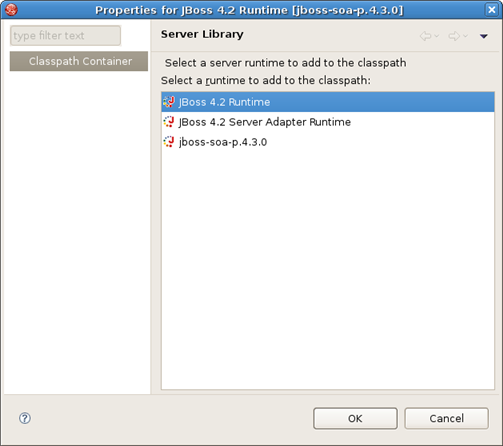
Choose one of them to set to the ESB project and click Ok.
In this chapter you will know what is JBoss Enterprise SOA Platform and how you can configure it to use for your ESB projects.
JBoss Enterprise SOA Platform delivers a flexible, standards-based platform to integrate applications, SOA services, business events and automate business processes. The SOA Platform integrates specific versions of JBoss ESB, jBPM, Drools and the JBoss Enterprise Application Platform that are certified to work together in a single supported enterprise distribution.
Having configured JBoss Enterprise SOA Platform for your ESB project you don't need to install and configure ESB server and runtime as they are already included.
Check here to find more details on the platform: JBoss Enterprise SOA Platform and JBoss Enterprise SOA Platform Component Details.
You can find out what is SOA here: Basics of SOA and SOA and EOA.
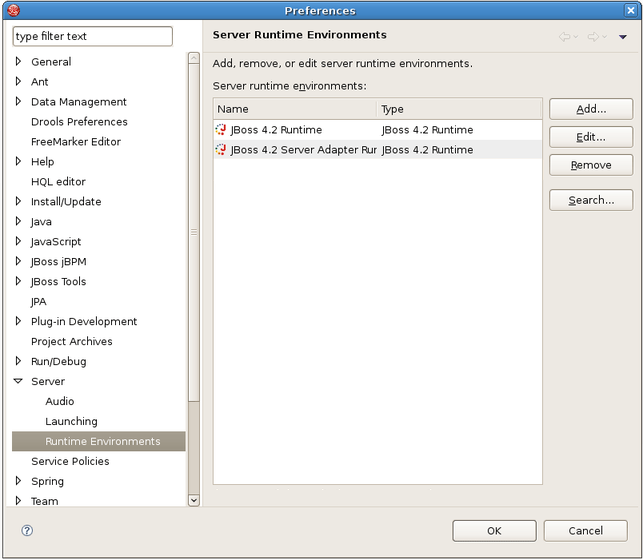
To configure the JBoss Enterprise SOA platform select Window > Preferences > Server > Runtime Enironments, that will open the Server Runtime Environments Preferences page where you can add, remove and edit a Server Runtime Environment.
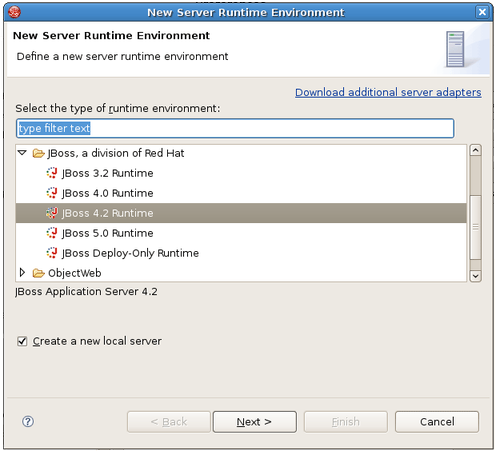
Select Add, choose JBoss 4.2 Runtime as a type of runtime environment, check the Create a new local server checkbox and click Next:
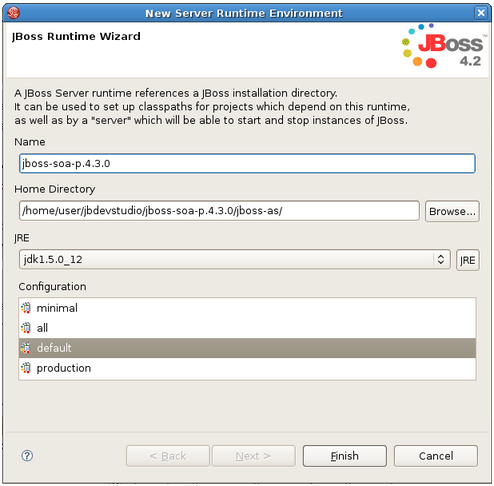
On the next step you can specify a name of the server runtime environement and browse to its location. Click Finish to add the server runtime environment.
Now you have your SOA platform configured. To check the configuration create a ESB Project using instructions described here. As a result you will have two projects created:

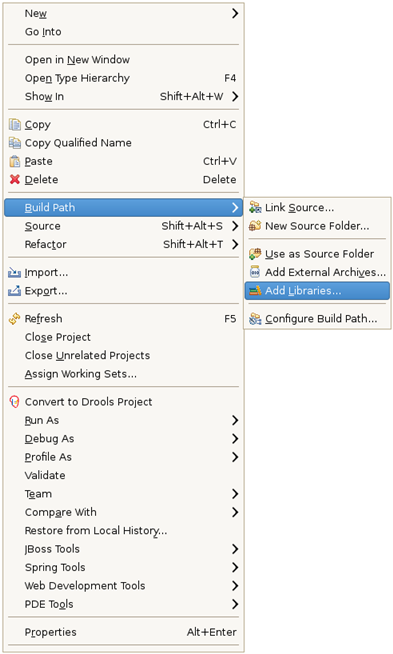
Then you will need to add JBoss ESB libraries to your projects to configure the SOA server runtime exactly for your projects. Right-click on your project, select Build Path > Add Libraries:
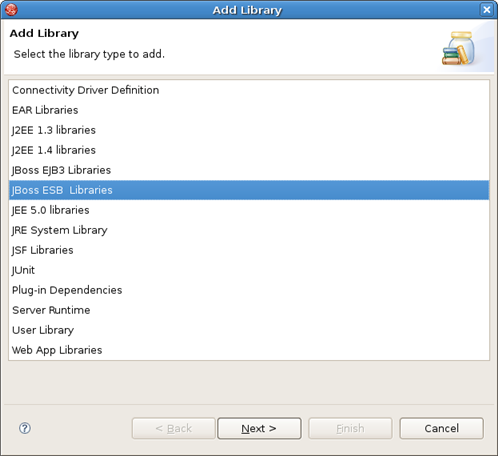
Choose JBoss ESB Libraries and click Next:
Select the necessary runtime to add to the project classpath:
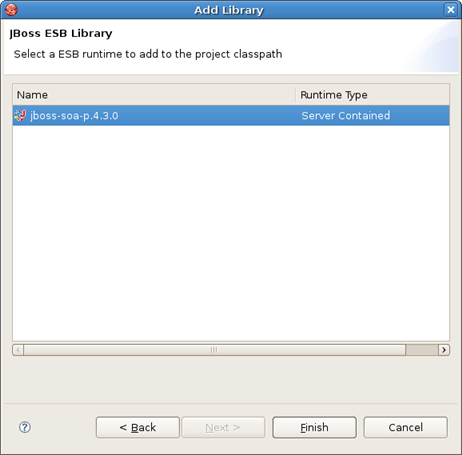
Click Finish.
Now you can deploy your Helloworld project to the server and run a test class in the client Java project to see the test result in the Console view.