In this chapter we describe the necessary steps to create a new BPEL project and edit the BPEL files. You can get the example source code from riftsaw/samples/quickstart/hello_world. In this guide we will create a simple echo example, used to respond to a message with a modified version of the request message.
The first step is to create a BPEL project.
Create the project by selecting → → → → from the menu bar. Then click the button.
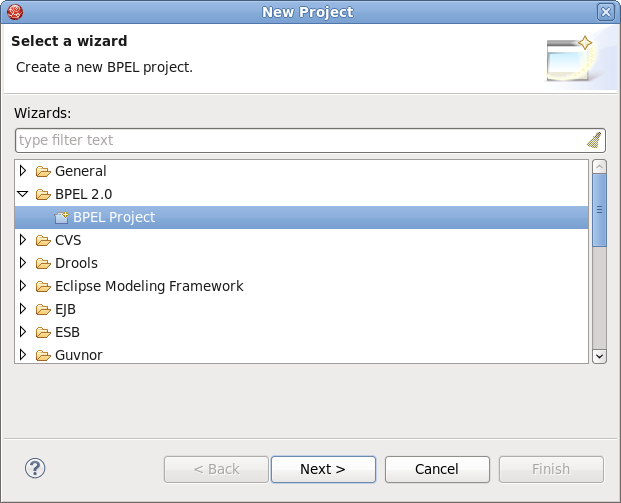
On this page of the New BPEL Project Wizard enter a project name in the Project Name field, e.g. enter HelloWorld.
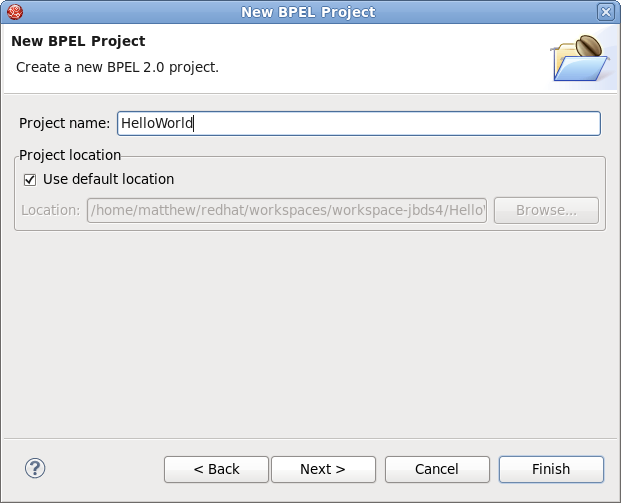
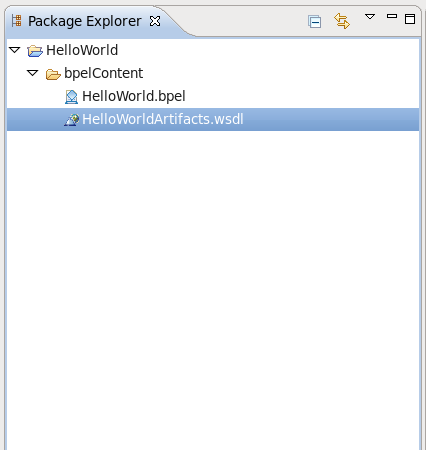
Click the button. So you have created the BPEL project named HelloWorld. Its structure is like this:
Now you should create a BPEL process. You can create it by selecting → → → → .
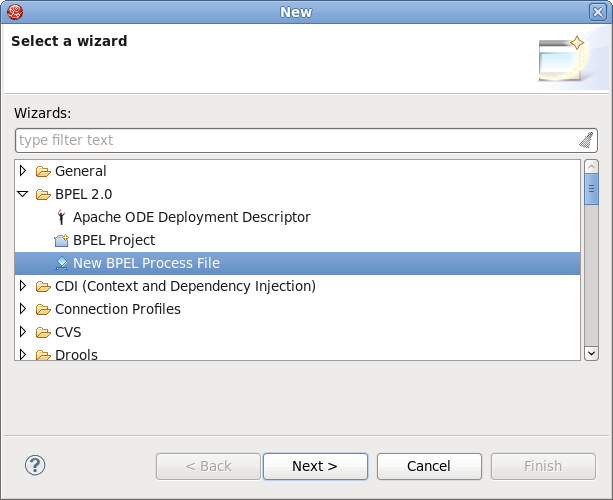
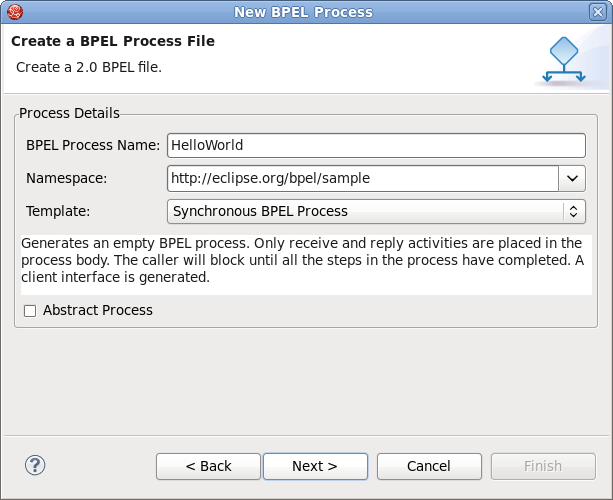
Click the button. Enter the following information:
Table 2.1. Fields and values
| Field | Value |
|---|---|
|
BPEL Process Name |
Enter a process name. For example, HelloWorld. |
|
Namespace |
Enter or select a namespace for the BPEL process. |
|
Template |
Select the appropriate template for the BPEL process. When you select the template, you will see the information about the template below on the page. In this case you should select Synchronous BPEL Process. |
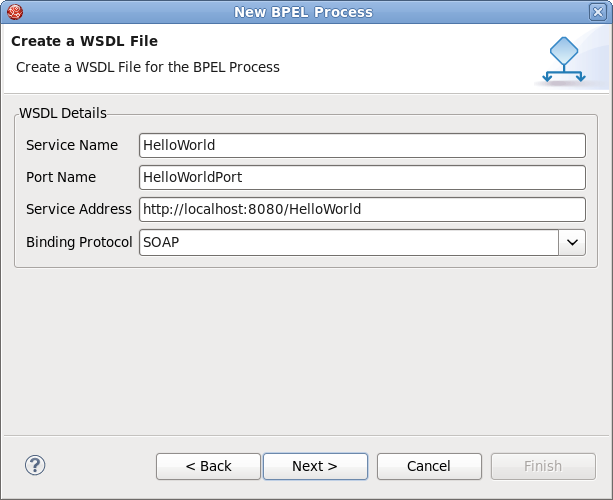
Click the button. On the second page, you can customize your WSDL service details. Enter the following information:
Table 2.2. Fields and values
| Field | Value |
|---|---|
|
Service Name |
A wsdl service name for the BPEL process. The default value is HelloWorld. |
|
Port Name |
A wsdl port name for the BPEL process. The default value is HelloWorldPort. |
|
Service Address |
An address of the WSDL service for the BPEL process. The default value is http://localhost:8080/HelloWorld. |
|
Binding Protocol |
The binding protocol that you use in the wsdl. You can choose SOAP or HTTP. The default value is SOAP. |
Click the button. On the third page, you can select a folder for the process file from the projects in your workspace. If a folder is not selected, the default folder HelloWorld/bpelContent will be used. Click the button.
Note
All of your files that are used in your BPEL project must be under the bpelContent folder of a BPEL project. Only in this case these files can be deployed to JBoss server.
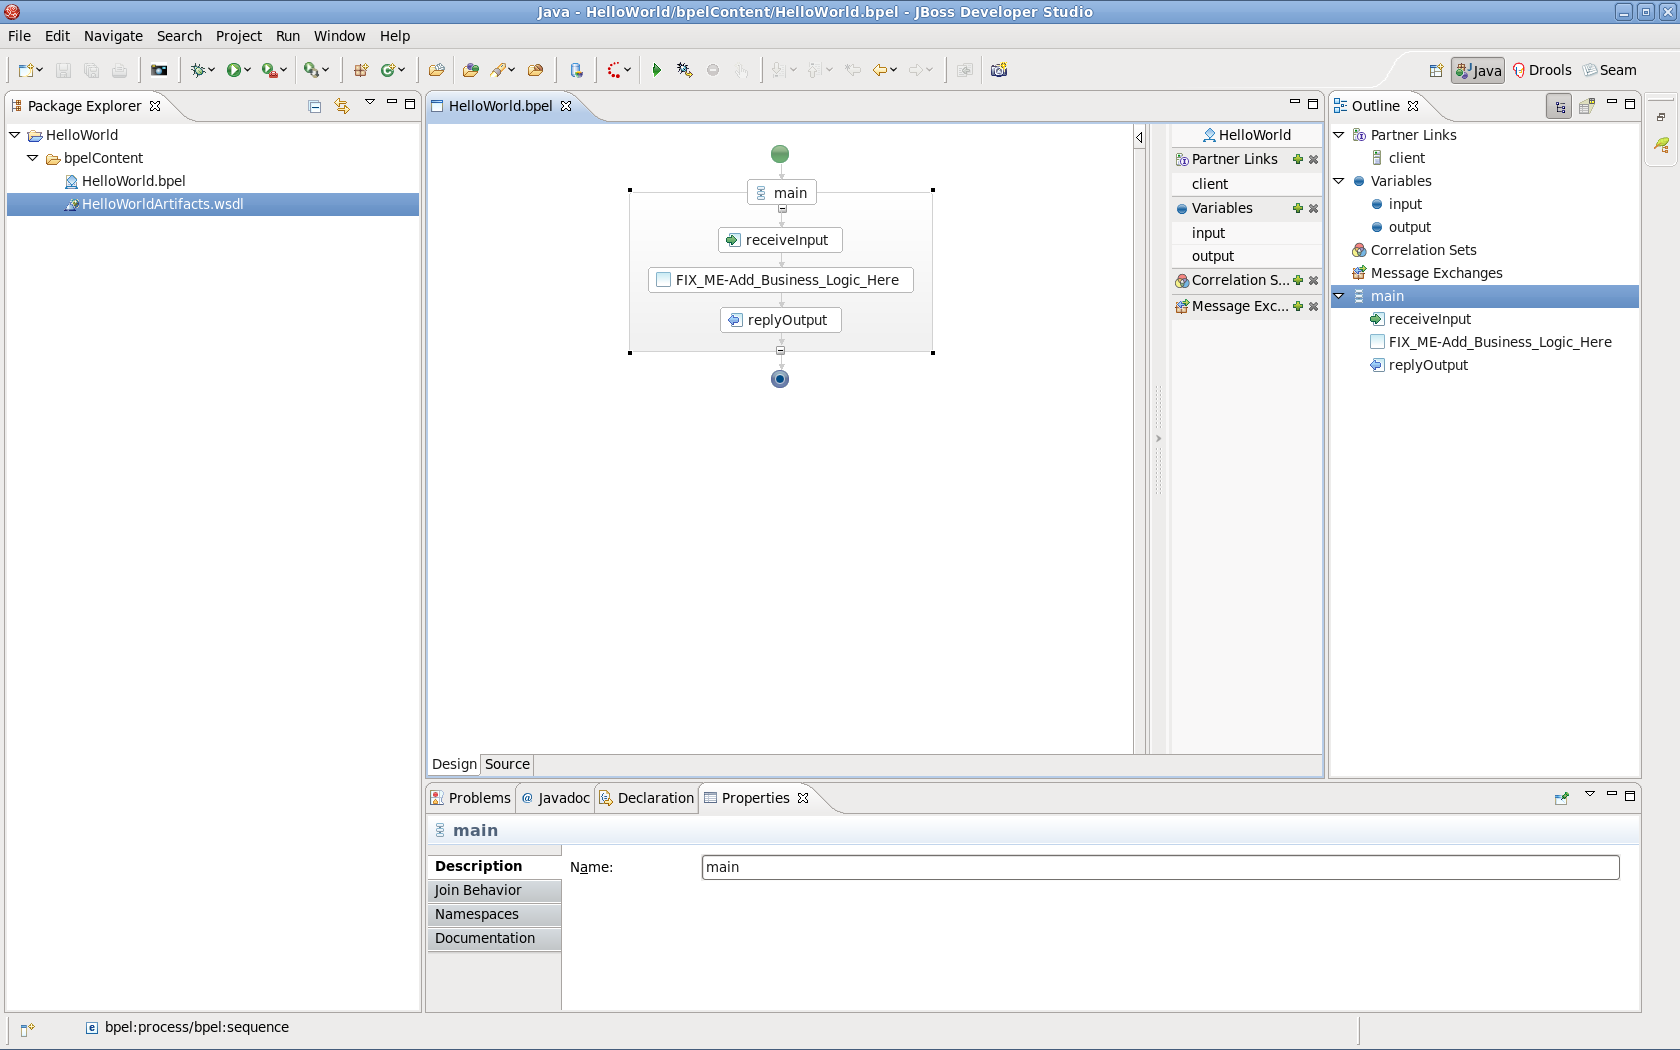
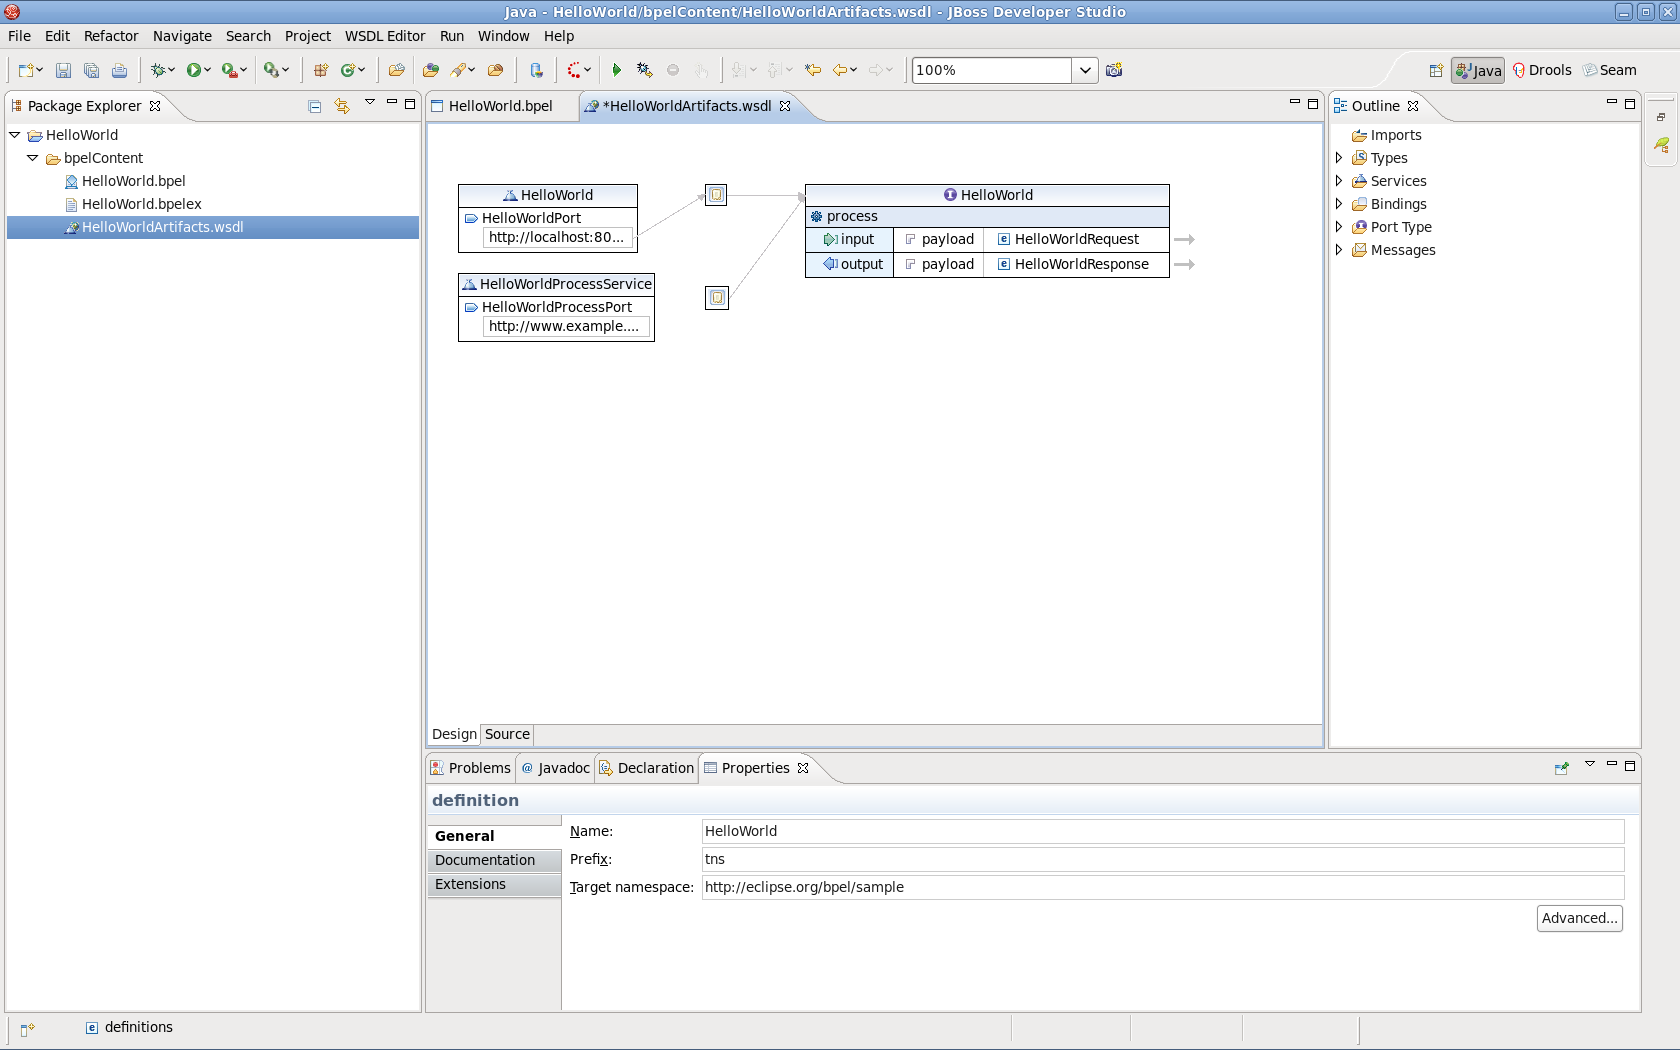
This will create a simple BPEL process as shown in the image below.
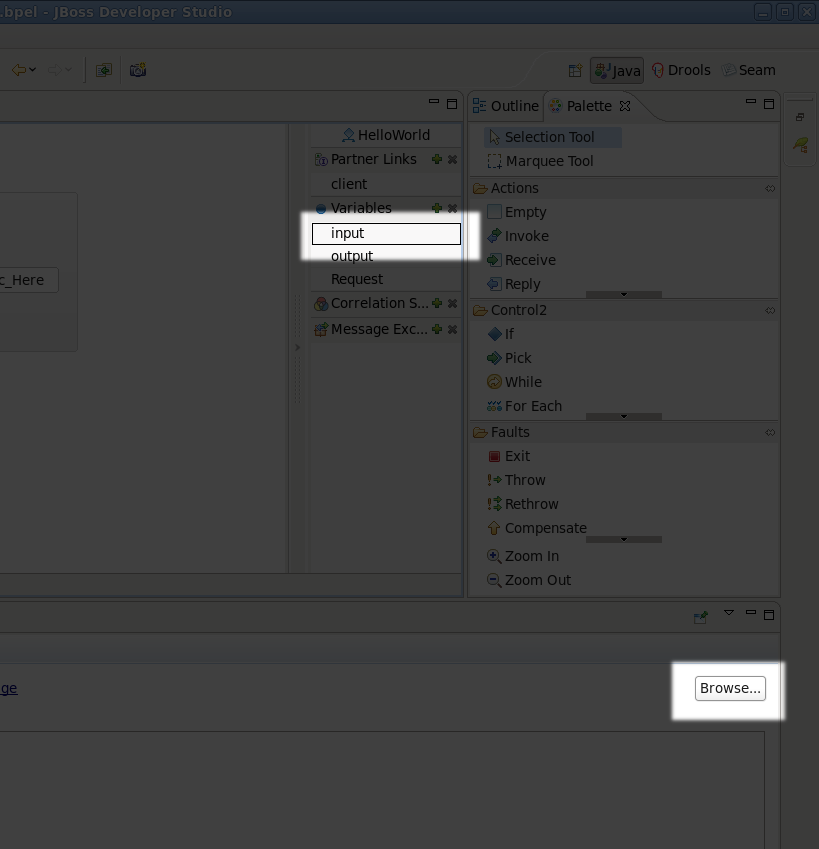
If the Properties view and Palette view are not opened, you can open the views by right-clicking the BPEL editor and selecting the Show in Properties or Show Palette in Palette view options. Then you should have the view like this:
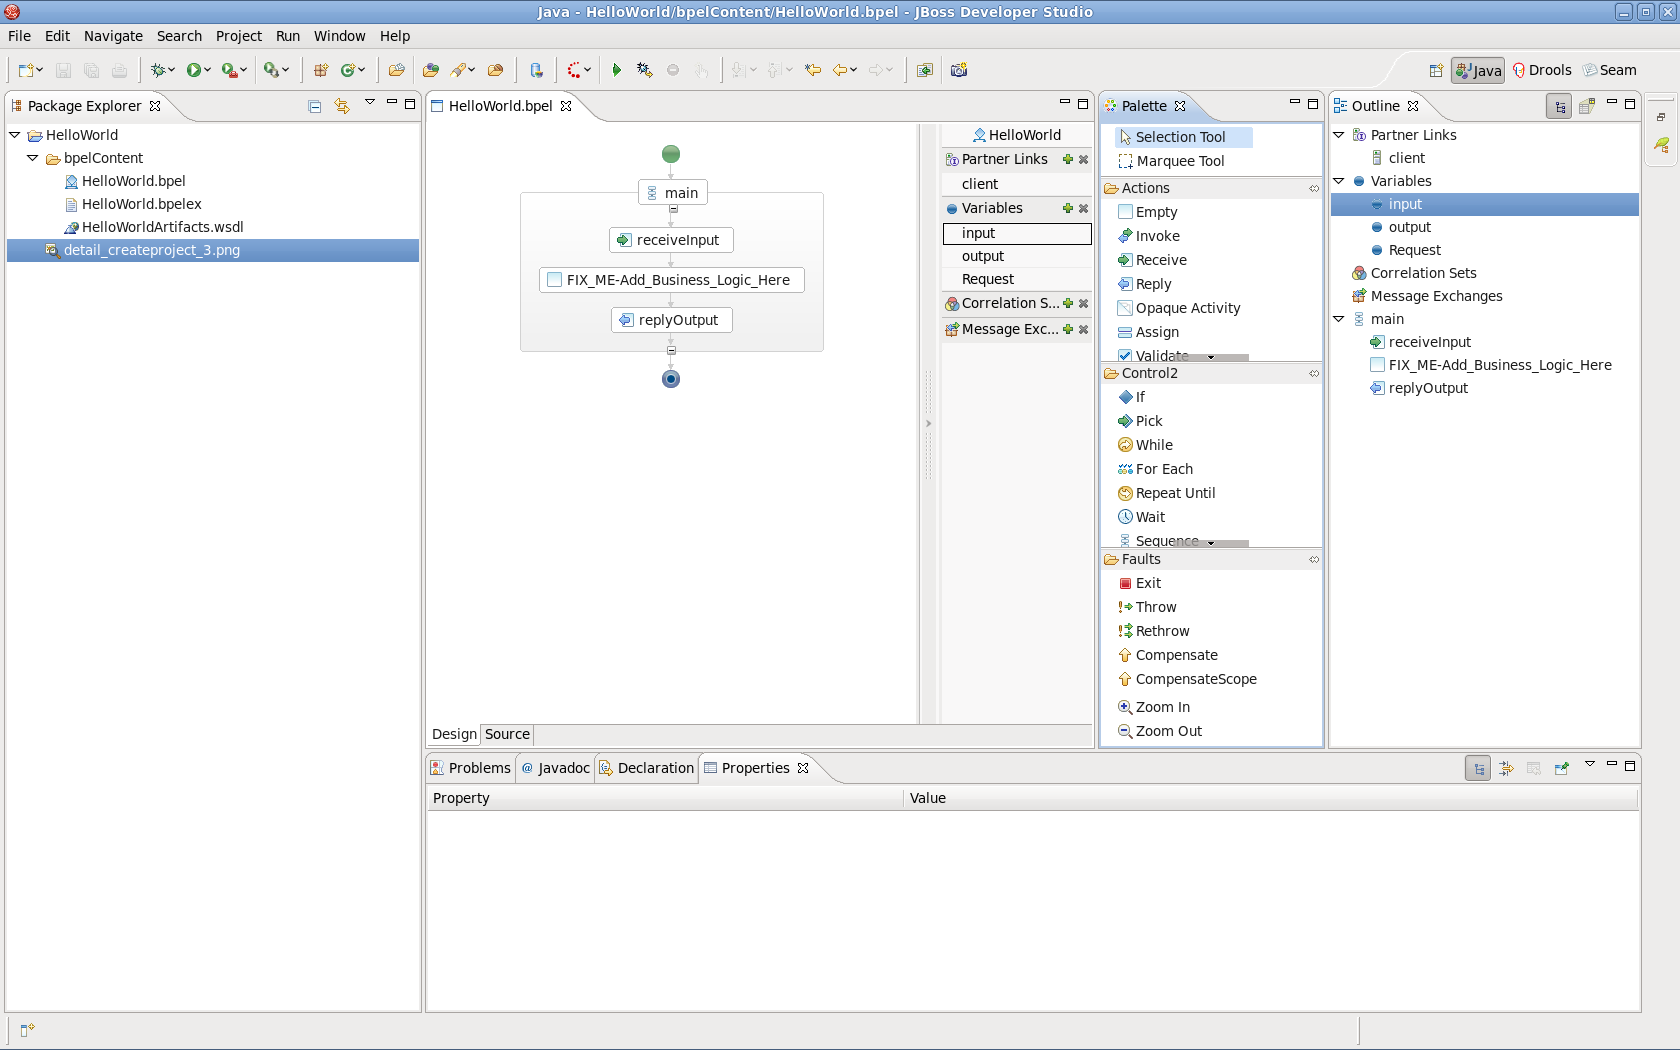
In the Palette view, you can drag a BPEL element to the BPEL editor and drop it in the place you want.
In the Properties view, you can view the information on every element in the BPEL process. The contents of the Properties view is automatically updated as elements are selected in the BPEL editor. The table below describes the tabs shown in the Properties view:
Table 2.3. Tabs of the Property view
| Tab | Description |
|---|---|
|
Description |
Shows the descriptive information about the element, e.g. Name of the element. |
|
Details |
Shows the detailed and important information about the element. It is the most important section of an element. Most of the properties of an element are set in this section. |
|
Join Behavior |
Shows the Join Failure property of the element. |
|
Documentation |
Shows the documentation sub-element of an element. |
|
Other |
Every BPEL element has its own sections: Correlation section, Message Exchange section, and so on. These sections will be covered in later sections. |
In order to see how a simple BPEL process works in action, you should do some steps as below:
Modify two variables of the process:
Add an Assign element between the receiveInput element and replyOutput element.
Click the Assign element in the BPEL editor in order to get the properties information of it in the Properties view.
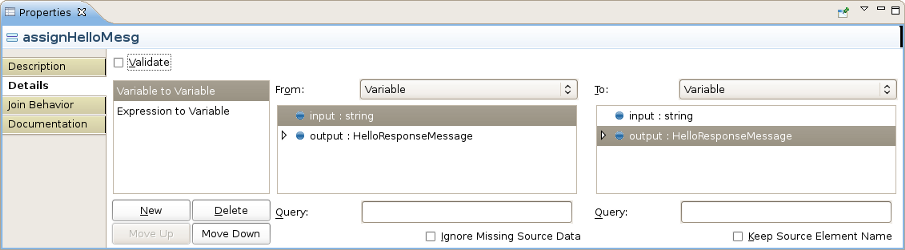
Set its name in the Description tab as assignHelloMesg.
In the Details section of Properties view, you should click the New button to add a copy sub-element to the element. Assign "Variable to Variable"(input:string to output). At this time, an "initializer" popup dialog appears. Click on the Yes button in the dialog.
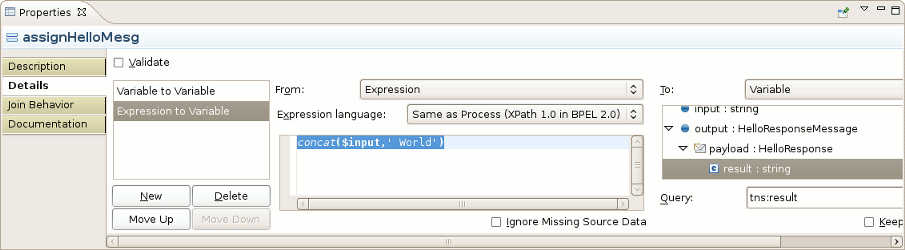
Then you should click the button once more and select Expression to Variable (assign
concat($input,' World')) to result:string.
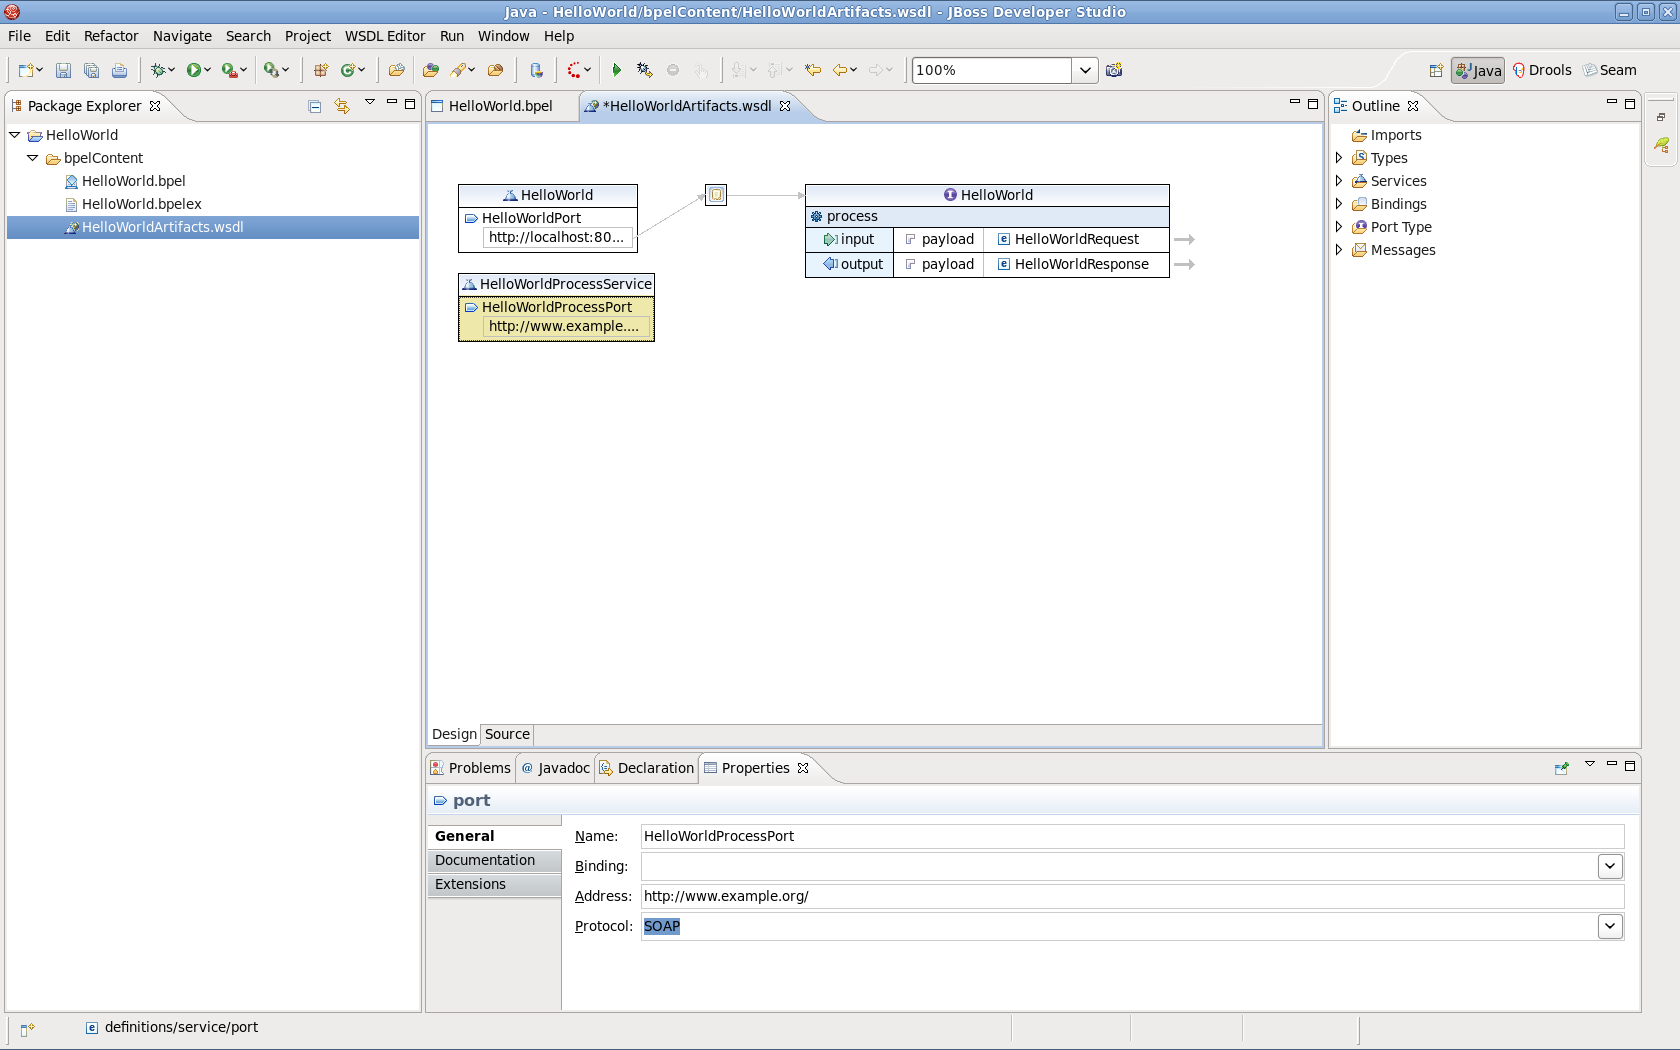
The HelloWorldArtifacts.wsdl file is added a service when you create a BPEL process file. A default service is already defined in this WSDL file. However, if you want to add your own service, follow the steps below:
Open the file
HelloWorldArtifacts.wsdlin the HelloWorld project by double-clicking the file. Right-click the WSDL editor and select the Add Service option. A new service should appear in the editor. Name it HelloWorldProcessService. It has the Port named NewPort. Select it, right-click on it and rename it to HelloWorldProcessPort in the Properties view.Right-click somewhere in the whitespace of the WSDL editor and select the Add Binding option. A new Binding component will appear in the editor. Name it HelloWorldSOAPBinding. Select it, and in the General tab of the Properties view and select HelloWorld as a port type in the PortType field. Then click on the button to open the Binding Wizard. In the wizard, select SOAP as the Protocol. Finally, click the button to close the wizard.
Click the HelloWorldProcessPort property in the General section of the Properties view, select HelloWorldSOAPBinding in the Binding combobox. Enter http://localhost:8080/bpel/processes/HelloWorld?wsdl in the Address field.

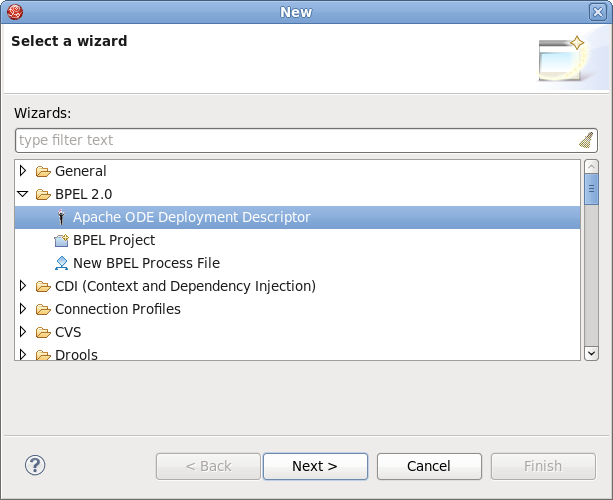
If you want to deploy a BPEL project to the JBoss BPEL Runtime, a deploy.xml file needs to be created. The steps below show you how to create this file:
Create the
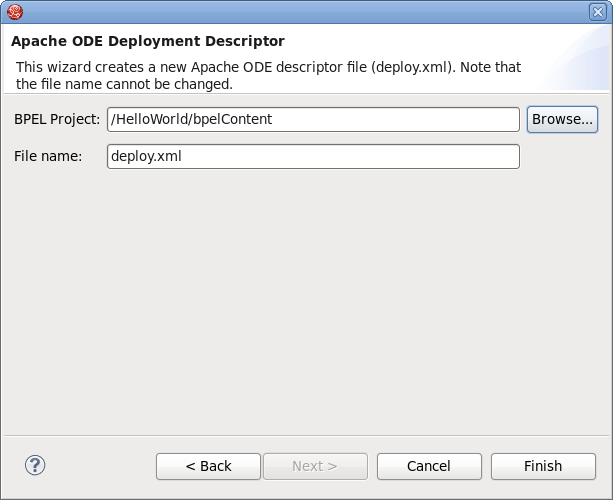
deploy.xmlfile by selecting → → → → . Click the button.On the next wizard page you should enter the following information:
BPEL Project : Click the button to select the BPEL project in your workspace where you want to deploy to the runtime. Please note that you should select the
bpelContentfolder in your new BPEL project for the BPEL Project field because this is the correct location for thedeploy.xmlfile.File name: The default value is
deploy.xml. This should not be changed.Click on the button to close the wizard and a new
deploy.xmlfile will be created.Double-click the
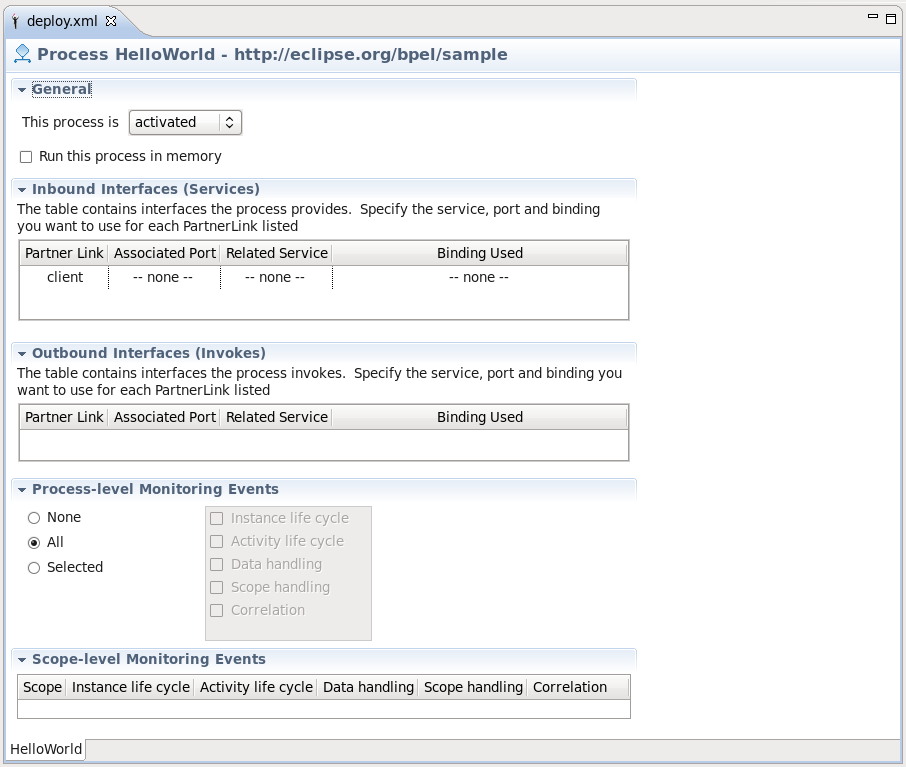
deploy.xmlfile to open it in ODE Descriptor Deployment Editor. In the Inbound Interfaces section, click the Associated Port column and select HelloWorldProcessPort in the combobox.The Related Service and Binding Used columns should be automatically filled in. Save the changes to thedeploy.xmlfile.
Once you have installed the JBoss BPEL Runtime-RiftSaw, you can create a server for JBoss BPEL runtime.
Open the Servers view by selecting → → → → .
Right-click the Servers view and select → to open the New Server wizard:
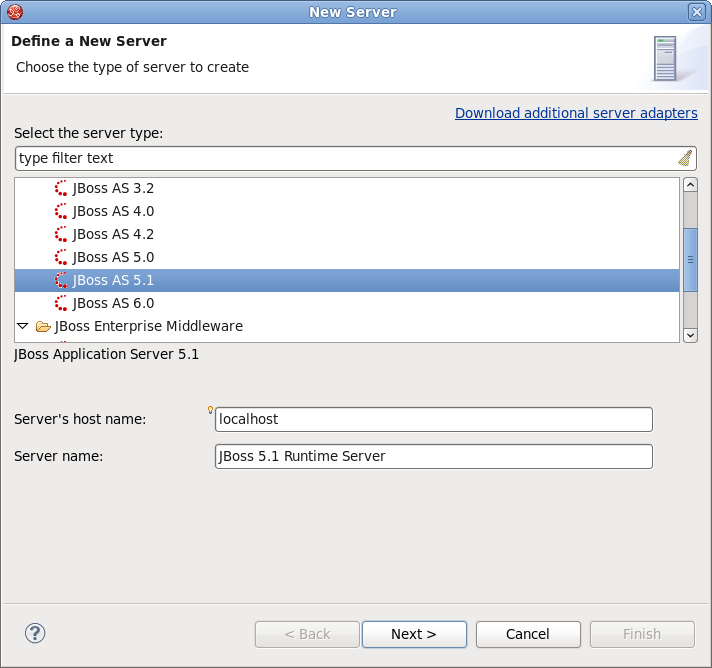
Select JBoss AS 5.1 as a server type.
Note
Please note, that only JBoss As 5.1 or higher version supports BPEL.
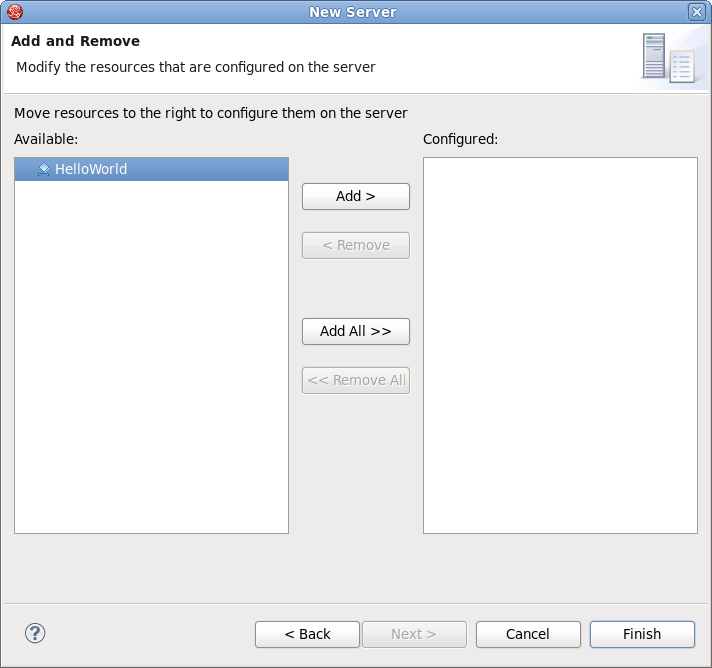
Click the button. On the next page, you should input your JBoss As™ location. Then click the button and you will get the page like this:
Select HelloWorld, then click the button to add the project to the server. Finally, click the button.
Start the server by right-clicking on the server and selecting the Start item.
Read the JBoss Server Manager Reference Guide for more detail on this process.
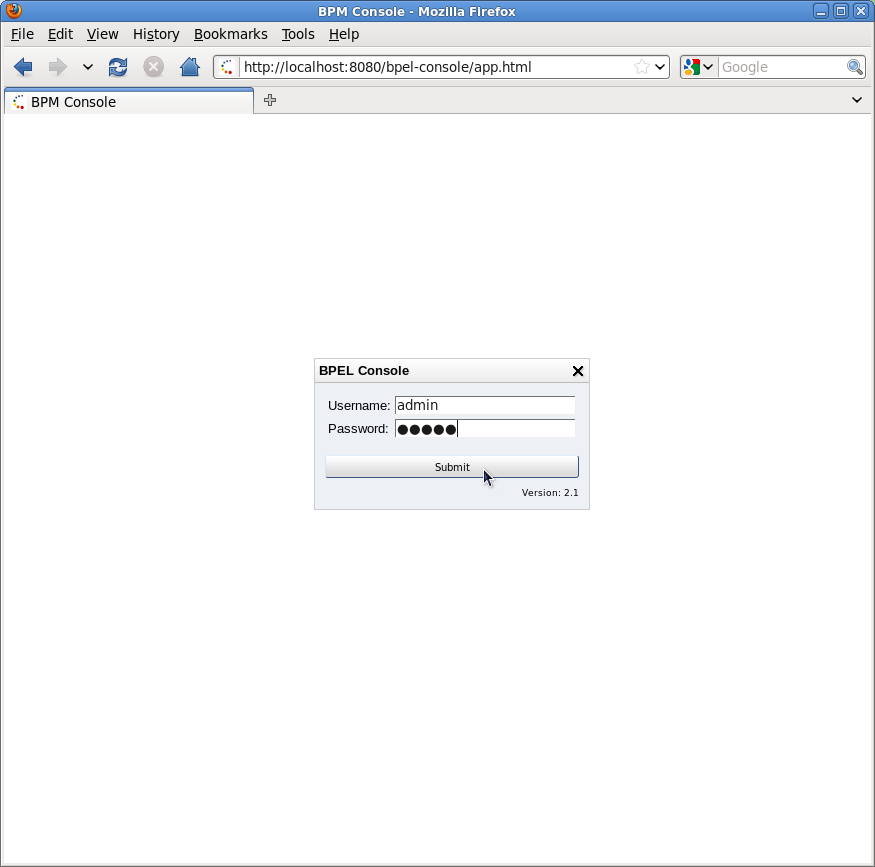
You can enter the link http://localhost:8080/bpel-console/app.html in your web browser to access the deployed processes.

Please visit the JBoss Tools Users Forum for more information and assistance.
Correlation sets are used to identify ongoing conversations between a client and the BPEL process. Typically, a correlation is an element in a message that uniquely identifies the conversation between client and service; for example, an Order ID or Social Security Number. This also identifies a specific process instance being managed by the BPEL engine.
In many cases a single element of a message is not enough to make it unique, so correlations can be defined as composites of several fields. Since a conversation can involve many different types of messages. Different correlations will need to be defined for each message type.
To create a correlation for a messaging activity (for example: Invoke, Receive, Reply), select the activity and then click on the Correlation Detail property tab. This will display the Select a Property dialog.
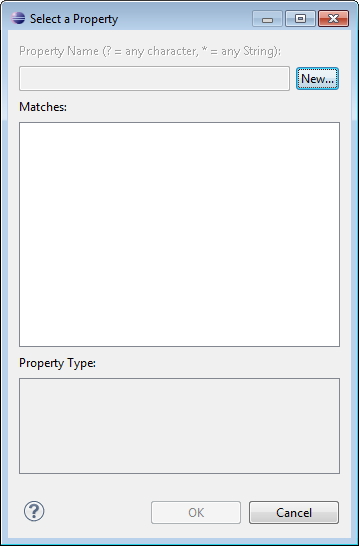
You canselect an existing property defined in the WSDL or click to create a new WSDL property, which will display the Create Message Property dialog.
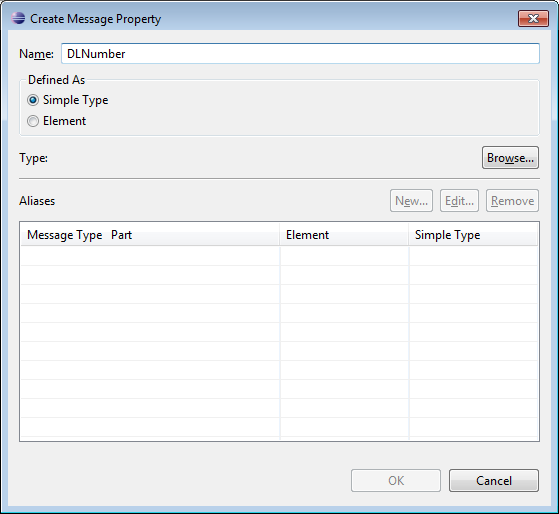
Enter a name for the new WSDL property and its type. Either an XSD simple type or an XML Schema element.
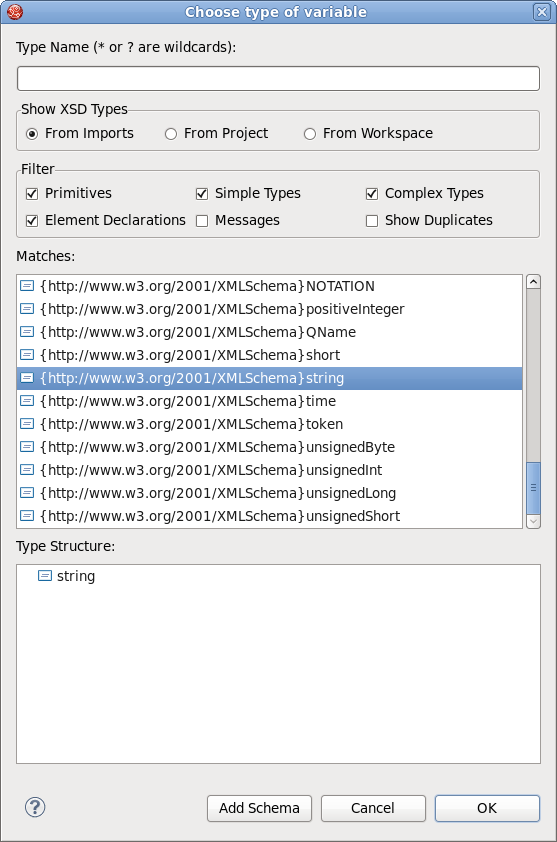
Next, click the button to select a type. This will display the Type Selection dialog.
Click New in the Aliases section to create a new WSDL property alias.
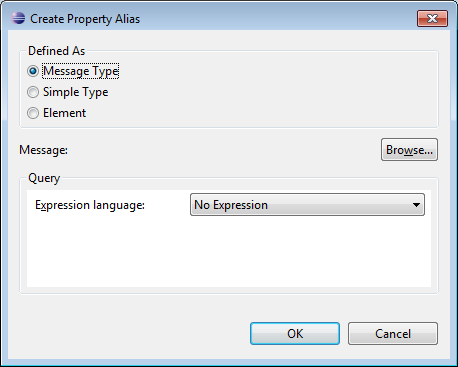
Select either the Message Type, XSD Simple Type or XML scheme Element radio button and click to select its type. Then click .