Web Beans viene sviluppato all'indirizzo the Seam project. Si può scaricare l'ultima release di Web Beans dalla pagina di download.
Web Beans viene distribuito con due applicazioni deployabili d'esempio, webbeans-numberguess, un esempio in formato war, che contiene solo bean semplici, e webbeans-translator, un esempio in formato ear, che contiene bean enterprise. Ci sono anche due varianti dell'esempio Indovina Numero, per Tomcat e con jsf2, che può essere usato con JSF2. Per eseguire gli esempi occorre fare le seguenti cose:
l'ultima release di Web Beans,
JBoss AS 5.0.1.GA, o
Apache Tomcat 6.0.x, e
Ant 1.7.0.
Occorre scaricare JBoss AS 5.0.1.GA da jboss.org, e scompattarlo. Per esempio:
$ cd /Applications
$ unzip ~/jboss-5.0.1.GA.zip
Scaricare Web Beans da seamframework.org, e scompattarlo. Per esempio
$ cd ~/
$ unzip ~/webbeans-$VERSION.zip
Quindi, occorre indicare a Web Beans dove è stato installato JBoss. Modificate il file jboss-as/build.properties e valorizzate la proprietà jboss.home. Per esempio:
jboss.home=/Applications/jboss-5.0.1.GA
Per installare Web Beans, occorre avere installato Ant 1.7.0, e avere valorizzato la variabile d'ambiente ANT_HOME. Per esempio:
Nota
JBoss 5.1.0 comes with Web Beans built in, so there is no need to update the server.
$ unzip apache-ant-1.7.0.zip
$ export ANT_HOME=~/apache-ant-1.7.0
Quindi, è possibile installare gli aggiornamenti. Lo script di aggiornamento userà Maven per scaricare automaticamente Web Beans.
$ cd webbeans-$VERSION/jboss-as
$ ant update
Ora, siete pronti a fare il deploy del primo esempio!
Suggerimento
Gli script di build degli esempio offrono una quantità di target per JBoss AS, quali:
ant restart- fa il deploy dell'esempio in formato esplosoant explode- aggiorna un esempio in formato esploso, senza riavviare il deployant deploy- fa il deploy dell'esempio in formato jar compressoant undeploy- rimuove l'esempio dal serverant clean- ripulisce l'esempio
Per fare il deploy dell'esempio Indovina Numero:
$ cd examples/numberguess
ant deploy
Avviare JBoss AS:
$ /Application/jboss-5.0.0.GA/bin/run.sh
Suggerimento
Se si usa Windows, si usi lo script run.bat.
Attendete che l'applicazione sia installata, e godetevi ore di divertimento all'indirizzo http://localhost:8080/webbeans-numberguess!
Web Beans include un secondo semplice esempio che tradurrà i vostri testi in Latino. L'esempio Indovina Numero è in formato war, e usa soltanto bean semplici; l'esempio col traduttore è in formato ear, e include dei bean enterprise, assemblati in un modulo EJB. Per provarlo:
$ cd examples/translator
ant deploy
Attendete che l'applicazione sia installata, e visitate l'indirizzo http://localhost:8080/webbeans-translator!
Scaricare Tomcat 6.0.18 o successivo da tomcat.apache.org, e scompattarlo. Per esempio
$ cd /Applications
$ unzip ~/apache-tomcat-6.0.18.zip
Scaricare Web Beans da seamframework.org, e scompattarlo. Per esempio
$ cd ~/
$ unzip ~/webbeans-$VERSION.zip
Quindi, occorre indicare a Web Beans dove è stato installato Tomcat. Modificate il file jboss-as/build.properties e valorizzate la proprietà tomcat.home. Per esempio:
tomcat.home=/Applications/apache-tomcat-6.0.18
Suggerimento
Gli script di build degli esempi offrono una quantità di target per Tomcat, quali:
ant tomcat.restart- esegue il deploy dell'esempio in formato esplosoant tomcat.explode- aggiorna un esempio in formato esploso, senza riavviare il deployant tomcat.deploy- esegue il deploy dell'esempio in formato jar compressoant tomcat.undeploy- rimuove l'esempio dal serverant tomcat.clean- ripulisce l'esempio
Per eseguire il deploy dell'esempio Indovina Numero per tomcat:
$ cd examples/tomcat
ant tomcat.deploy
Avviare Tomcat:
$ /Applications/apache-tomcat-6.0.18/bin/startup.sh
Suggerimento
Se si usa Windows, si usi lo script startup.bat.
Attendete che l'applicazione sia installata, e godetevi ore di divertimento all'indirizzo http://localhost:8080/webbeans-numberguess!
Nell'applicazione Indovina Numero avete a disposizione 10 tentativi per indovinare un numero tra 1 e 100. Dopo ciascun tentativo, siete informati se siete stati troppo alti o troppo bassi.
L'esempio Indovina Numero comprende un certo numero di Web Bean, file di configurazione e pagine JSF, assemblati in un war. Iniziamo dai file di configurazione.
Tutti i file di configurazione di questo esempio si trovano in WEB-INF/, che è situato in WebContent nell'albero dei sorgenti. Innanzitutto, c'è faces-config.xml, in cui JSF viene informata di usare Facelets:
<?xml version='1.0' encoding='UTF-8'?>

<faces-config version="1.2"

              xmlns="http://java.sun.com/xml/ns/javaee"

              xmlns:xsi="http://www.w3.org/2001/XMLSchema-instance"

              xsi:schemaLocation="http://java.sun.com/xml/ns/javaee http://java.sun.com/xml/ns/javaee/web-facesconfig_1_2.xsd">


    <application>

        <view-handler

>com.sun.facelets.FaceletViewHandler</view-handler>

    </application>


</faces-config

>
Vi è un file vuoto web-beans.xml, che identifica l'applicazione come applicazione Web Beans.
Infine c'è web.xml:
<?xml version="1.0" encoding="UTF-8"?>
<web-app version="2.5"
xmlns="http://java.sun.com/xml/ns/javaee"
xmlns:xsi="http://www.w3.org/2001/XMLSchema-instance"
xsi:schemaLocation="http://java.sun.com/xml/ns/javaee http://java.sun.com/xml/ns/javaee/web-app_2_5.xsd">
<display-name>Web Beans Numbergues example</display-name>
<!-- JSF -->
<servlet>  <servlet-name>Faces Servlet</servlet-name>
<servlet-class>javax.faces.webapp.FacesServlet</servlet-class>
<load-on-startup>1</load-on-startup>
</servlet>
<servlet-ma
<servlet-name>Faces Servlet</servlet-name>
<servlet-class>javax.faces.webapp.FacesServlet</servlet-class>
<load-on-startup>1</load-on-startup>
</servlet>
<servlet-ma pping>
<servlet-name>Faces Servlet</servlet-name>
<url-pattern>*.jsf</url-pattern>
</servlet-mapping>
<context-pa
pping>
<servlet-name>Faces Servlet</servlet-name>
<url-pattern>*.jsf</url-pattern>
</servlet-mapping>
<context-pa ram>
<param-name>javax.faces.DEFAULT_SUFFIX</param-name>
<param-value>.xhtml</param-value>
</context-param>
<session-co
ram>
<param-name>javax.faces.DEFAULT_SUFFIX</param-name>
<param-value>.xhtml</param-value>
</context-param>
<session-co nfig>
<session-timeout>10</session-timeout>
</session-config>
</web-app>
nfig>
<session-timeout>10</session-timeout>
</session-config>
</web-app> | Enable and load the JSF servlet |
| Configure requests to |
| Tell JSF that we will be giving our source files (facelets) an extension of |
| Configure a session timeout of 10 minutes |
Nota
Whilst this demo is a JSF demo, you can use Web Beans with any Servlet based web framework.
Let's take a look at the Facelet view:
<!DOCTYPE html PUBLIC "-//W3C//DTD XHTML 1.0 Transitional//EN" "http://www.w3.org/TR/xhtml1/DTD/xhtml1-transitional.dtd">
<html xmlns="http://www.w3.org/1999/xhtml"
xmlns:ui="http://java.sun.com/jsf/facelets"
xmlns:h="http://java.sun.com/jsf/html"
xmlns:f="http://java.sun.com/jsf/core"
xmlns:s="http://jboss.com/products/seam/taglib">
<ui:composition template="template.xhtml">
<ui:define name="content">
<h1>Guess a number...</h1>
<h:form id="NumberGuessMain">
<div style="color: red">
<h:messages id="messages" globalOnly="false"/>
<h:outputText id="Higher" value="Higher!" rendered="#{game.number gt game.guess and game.guess ne 0}"/>
<h:outputText id="Lower" value="Lower!" rendered="#{game.number lt game.guess and game.guess ne 0}"/>
</div>
<div>
I'm thinking of a number between #{game.smallest} and #{game.biggest}.
You have #{game.remainingGuesses} guesses.
</div>
<div>
Your guess:
<h:inputText id="inputGuess"
value="#{game.guess}"
required="true"
size="3"
disabled="#{game.number eq game.guess}">
 <f:validateLongRange maximum="#{game.biggest}"
minimum="#{game.smallest}"/>
</h:inputText>
<h
<f:validateLongRange maximum="#{game.biggest}"
minimum="#{game.smallest}"/>
</h:inputText>
<h :commandButton id="GuessButton"
value="Guess"
action="#{game.check}"
disabled="#{game.number eq game.guess}"/>
</div>
<div>
<h:commandButton id="RestartButton" value="Reset" action="#{game.reset}" immediate="true" />
</div>
</h:form>
</ui:define>
</ui:composition>
</html>
:commandButton id="GuessButton"
value="Guess"
action="#{game.check}"
disabled="#{game.number eq game.guess}"/>
</div>
<div>
<h:commandButton id="RestartButton" value="Reset" action="#{game.reset}" immediate="true" />
</div>
</h:form>
</ui:define>
</ui:composition>
</html> | Facelets is a templating language for JSF, here we are wrapping our page in a template which defines the header. |
| There are a number of messages which can be sent to the user, "Higher!", "Lower!" and "Correct!" |
| As the user guesses, the range of numbers they can guess gets smaller - this sentance changes to make sure they know what range to guess in. |
| This input field is bound to a Web Bean, using the value expression. |
| A range validator is used to make sure the user doesn't accidentally input a number outside of the range in which they can guess - if the validator wasn't here, the user might use up a guess on an out of range number. |
| And, of course, there must be a way for the user to send their guess to the server. Here we bind to an action method on the Web Bean. |
L'esempio consiste di 4 classi, delle quali le prime due sono tipi di binding. Innanzitutto, c'è il tipo di binding @Random, usato per iniettare un numero casuale:
@Target( { TYPE, METHOD, PARAMETER, FIELD })

@Retention(RUNTIME)

@Documented

@BindingType

public @interface Random {}
C'è anche il tipo di binding @MaxNumber, usato per iniettare il numero massimo iniettatabile:
@Target( { TYPE, METHOD, PARAMETER, FIELD })

@Retention(RUNTIME)

@Documented

@BindingType

public @interface MaxNumber {}
Alla classe Generator è affidata la generazione del numero casuale, per mezzo di un metodo produttore. Inoltre essa espone il massimo numero possibile attraverso un metodo produttore:
@ApplicationScoped

public class Generator {


   private java.util.Random random = new java.util.Random( System.currentTimeMillis() );


   private int maxNumber = 100;


   java.util.Random getRandom()

   {

      return random;

   }


   @Produces @Random int next() {

      return getRandom().nextInt(maxNumber);

   }


   @Produces @MaxNumber int getMaxNumber()

   {

      return maxNumber;

   }


}
E' possibile notare che Generator ha scope applicazione; quindi non si ottiene un diverso numero casuale ogni volta.
Il Web Bean finale nell'applicazione è Game avente scope di sessione.
Si noti anche che è stata usata l'annotazione @Named, in modo che sia possibile usare il bean in espressioni EL presenti nelle pagine JSF. Infine, si è utilizzata l'iniezione del costruttore per inizializzare il gioco con un numero casuale. E naturalmente, è necessario dire al giocatore se ha vinto, informazione di feedback che viene fornita con un FacesMessage.
package org.jboss.webbeans.examples.numberguess;


import javax.annotation.PostConstruct;

import javax.faces.application.FacesMessage;

import javax.faces.context.FacesContext;

import javax.webbeans.AnnotationLiteral;

import javax.webbeans.Current;

import javax.webbeans.Initializer;

import javax.webbeans.Named;

import javax.webbeans.SessionScoped;

import javax.webbeans.manager.Manager;


@Named

@SessionScoped

public class Game

{

   private int number;


   private int guess;

   private int smallest;

   private int biggest;

   private int remainingGuesses;


   @Current Manager manager;


   public Game()

   {

   }


   @Initializer

   Game(@MaxNumber int maxNumber)

   {

      this.biggest = maxNumber;

   }


   public int getNumber()

   {

      return number;

   }


   public int getGuess()

   {

      return guess;

   }


   public void setGuess(int guess)

   {

      this.guess = guess;

   }


   public int getSmallest()

   {

      return smallest;

   }


   public int getBiggest()

   {

      return biggest;

   }


   public int getRemainingGuesses()

   {

      return remainingGuesses;

   }


   public String check()

   {

      if (guess

>number)

      {

         biggest = guess - 1;

      }

      if (guess<number)

      {

         smallest = guess + 1;

      }

      if (guess == number)

      {

         FacesContext.getCurrentInstance().addMessage(null, new FacesMessage("Correct!"));

      }

      remainingGuesses--;

      return null;

   }


   @PostConstruct

   public void reset()

   {

      this.smallest = 0;

      this.guess = 0;

      this.remainingGuesses = 10;

      this.number = manager.getInstanceByType(Integer.class, new AnnotationLiteral<Random

>(){});

   }


}
The numberguess for Tomcat differs in a couple of ways. Firstly, Web Beans should be deployed as a Web Application library in WEB-INF/lib. For your convenience we provide a single jar suitable for running Web Beans in any servlet container webbeans-servlet.jar.
Suggerimento
Certamente occorre anche includere JSF e EL, e le annotazioni comuni (jsr250-api.jar) che un server JEE include di default.
Secondly, we need to explicitly specify the servlet listener (used to boot Web Beans, and control it's interaction with requests) in web.xml:
<listener>
   <listener-class>org.jboss.webbeans.environment.servlet.Listener</listener-class>
</listener>
Whilst JSR-299 specifies integration with Java ServerFaces, Web Beans allows you to inject into Wicket components, and also allows you to use a conversation context with Wicket. In this section, we'll walk you through the Wicket version of the numberguess example.
Nota
You may want to review the Wicket documentation at http://wicket.apache.org/.
Like the previous example, the Wicket WebBeans examples make use of the webbeans-servlet module. The use of the Jetty servlet container is common in the Wicket community, and is chosen here as the runtime container in order to facilitate comparison between the standard Wicket examples and these examples, and also to show how the webbeans-servlet integration is not dependent upon Tomcat as the servlet container.
These examples make use of the Eclipse IDE; instructions are also given to deploy the application from the command line.
To generate an Eclipse project from the example:
cd examples/wicket/numberguess
mvn -Pjetty eclipse:eclipse
Then, from eclipse, choose File -> Import -> General -> Existing Projects into Workspace, select the root directory of the numberguess example, and click finish. Note that if you do not intend to run the example with jetty from within eclipse, omit the "-Pjetty." This will create a project in your workspace called webbeans-wicket-numberguess
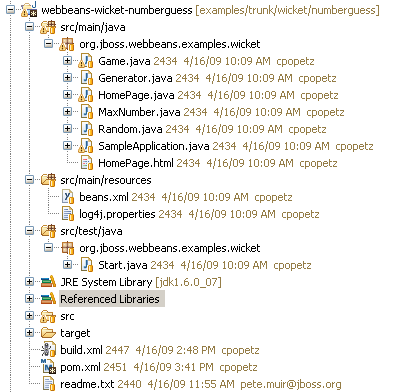
This project follows the wicket-quickstart approach of creating an instance of Jetty in the Start class. So running the example is as simple as right-clicking on that Start class in src/test/java in the Package Explorer and choosing Run as Java Application. You should see console output related to Jetty starting up; then visit able http://localhost:8080 to view the app. To debug choose Debug as Java Application.
This example can also be deployed from the command line in a (similar to the other examples). Assuming you have set up the build.properties file in the examples directory to specify the location of JBoss AS or Tomcat, as previously described, you can run ant deploy from the examples/wicket/numberguess directory, and access the application at http://localhost:8080/webbeans-numberguess-wicket.
JSF uses Unified EL expressions to bind view layer components in JSP or Facelet views to beans, Wicket defines it's components in Java. The markup is plain html with a one-to-one mapping between html elements and the view components. All view logic, including binding of components to models and controlling the response of view actions, is handled in Java. The integration of Web Beans with Wicket takes advantage of the same binding annotations used in your business layer to provide injection into your WebPage subclass (or into other custom wicket component subclasses).
The code in the wicket numberguess example is very similar to the JSF-based numberguess example. The business layer is identical!
Differences are:
Each wicket application must have a
WebApplicationsubclass, In our case, our application class isSampleApplication:public class SampleApplication extends WebBeansApplication { @Override public Class getHomePage() { return HomePage.class; } }This class specifies which page wicket should treat as our home page, in our case,
HomePage.classIn
HomePagewe see typical wicket code to set up page elements. The bit that is interesting is the injection of theGamebean:@Current Game game;
The
Gamebean is can then be used, for example, by the code for submitting a guess:final Component guessButton = new AjaxButton("GuessButton") { protected void onSubmit(AjaxRequestTarget target, Form form) { if (game.check()) {Nota
All injections may be serialized; actual storage of the bean is managed by JSR-299. Note that Wicket components, like the HomePage and it subcomponents, are not JSR-299 beans.
Wicket components allow injection, but they cannot use interceptors, decorators and lifecycle callbacks such as
@PostConstructor@Initializermethods.The example uses AJAX for processing of button events, and dynamically hides buttons that are no longer relevant, for example when the user has won the game.
In order to activate wicket for this webapp, the Wicket filter is added to web.xml, and our application class is specified:
<filter>
   <filter-name>wicket.numberguess-example</filter-name>
   <filter-class>org.apache.wicket.protocol.http.WicketFilter</filter-class>
   <init-param>
      <param-name>applicationClassName</param-name>
      <param-value>org.jboss.webbeans.examples.wicket.SampleApplication</param-value>
   </init-param>
</filter>

<filter-mapping>
   <filter-name>wicket.numberguess-example</filter-name>
   <url-pattern>/*</url-pattern>
</filter-mapping>

<listener>
   <listener-class>org.jboss.webbeans.environment.servlet.Listener</listener-class>
</listener>
Note that the servlet listener is also added, as in the Tomcat example, in order to boostrap Web Beans when Jetty starts, and to hook Web Beans into the Jetty servlet request and session lifecycles.
This example can be found in the examples/se/numberguess folder of the Web Beans distribution.
To run this example:
Open a command line/terminal window in the
examples/se/numberguessdirectoryEnsure that Maven 2 is installed and in your PATH
Ensure that the
JAVA_HOMEenvironment variable is pointing to your JDK installationexecute the following command
mvn -Drun
There is an empty beans.xml file in the root package (src/main/resources/beans.xml), which marks this application as a Web Beans application.
The game's main logic is located in Game.java. Here is the code for that class, highlighting the changes made from the web application version:
public class Game implements Serializable
{
private int number;
private int guess;
private int smallest;
@MaxNumber
private int maxNumber;
private int biggest;
private int remainingGuesses;
private boolean validNumberRange = true;
@Current Generator rndGenerator;
...
public boolean isValidNumberRange()
{
return validNumberRange;
}
public boolean isGameWon()
return guess == number;
}
public boolean isGameLost()
{
return guess != number && remainingGuesses <= 0;
}
public boolean check()
{
boolean result = false;
{
if ( guess > number )
{
biggest = guess - 1;
}
if ( guess < number )
{
smallest = guess + 1;
}
if ( guess == number )
{
result = true;
}
remainingGuesses--;
}
return result;
}
private boolean checkNewNumberRangeIsValid()
{
return validNumberRange = ( ( guess >= smallest ) && ( guess <= biggest ) );
}
@PostConstruct
{
this.smallest = 0;
...
this.number = rndGenerator.next();
}
}
| The bean is application scoped instead of session scoped, since an instance of the application represents a single 'session'. |
| The bean is not named, since it doesn't need to be accessed via EL |
| There is no JSF
This allows the Swing UI to query the state of the game, which it does indirectly via a class called |
| Validation of user input is performed during the |
| The |
The MessageGenerator class depends on the current instance of Game, and queries its state in order to determine the appropriate messages to provide as the prompt for the user's next guess and the response to the previous guess. The code for MessageGenerator is as follows:
public class MessageGenerator
{
{
StringBuilder challengeMsg = new StringBuilder( "I'm thinking of a number between " );
challengeMsg.append( game.getSmallest() );
challengeMsg.append( " and " );
challengeMsg.append( game.getBiggest() );
challengeMsg.append( ". Can you guess what it is?" );
return challengeMsg.toString();
}
{
if ( game.isGameWon() )
{
return "You guess it! The number was " + game.getNumber();
} else if ( game.isGameLost() )
{
return "You are fail! The number was " + game.getNumber();
} else if ( ! game.isValidNumberRange() )
{
return "Invalid number range!";
} else if ( game.getRemainingGuesses() == Game.MAX_NUM_GUESSES )
{
return "What is your first guess?";
} else
{
String direction = null;
if ( game.getGuess() < game.getNumber() )
{
direction = "Higher";
} else
{
direction = "Lower";
}
return direction + "! You have " + game.getRemainingGuesses() + " guesses left.";
}
}
}
| The instance of |
| The |
| And again to determine whether to congratulate, console or encourage the user to continue. |
Finally we come to the NumberGuessFrame class which provides the Swing front end to our guessing game.
public class NumberGuessFrame extends javax.swing.JFrame
{
{
java.awt.EventQueue.invokeLater( new Runnable()
{
public void run()
{
initComponents();
setVisible( true );
}
} );
}
buttonPanel = new javax.swing.JPanel();
mainMsgPanel = new javax.swing.JPanel();
mainLabel = new javax.swing.JLabel();
messageLabel = new javax.swing.JLabel();
guessText = new javax.swing.JTextField();
...
mainLabel.setText(msgGenerator.getChallengeMessage());
mainMsgPanel.add(mainLabel);
messageLabel.setText(msgGenerator.getResultMessage());
mainMsgPanel.add(messageLabel);
...
}
{
int guess = Integer.parseInt(guessText.getText());
game.setGuess( guess );
game.check();
refreshUI();
}
{
game.reset();
refreshUI();
}private void refreshUI()
{
mainLabel.setText( msgGenerator.getChallengeMessage() );
messageLabel.setText( msgGenerator.getResultMessage() );
guessText.setText( "" );
guessesLeftBar.setValue( game.getRemainingGuesses() );
guessText.requestFocus();
}
// swing components
private javax.swing.JPanel borderPanel;
...
private javax.swing.JButton replayBtn;
}
| The injected instance of the game (logic and state). |
| The injected message generator for UI messages. |
| This application is started in the usual Web Beans SE way, by observing the |
| This method initialises all of the Swing components. Note the use of the |
|
|
| |
| |
L'esempio Traduttore prende le frasi che vengono inserite e le traduce in latino.
L'esempio Traduttore è assemblato in un ear, e contiene EJB. Di conseguenza, la sua struttura è più complessa di quella dell'esempio Indovina Numero.
Nota
EJB 3.1 and Java EE 6 permettono di assemblare gli EJB in un war, cosa che rende questa struttura molto più semplice!
Innanzitutto, diamo un'occhiata all'aggregatore ear, che è situato nel modulo webbeans-translator-ear. Maven genera automaticamente il file application.xml:
<plugin>

   <groupId

>org.apache.maven.plugins</groupId>

   <artifactId

>maven-ear-plugin</artifactId>

   <configuration>

      <modules>

         <webModule>

            <groupId

>org.jboss.webbeans.examples.translator</groupId>

            <artifactId

>webbeans-translator-war</artifactId>

            <contextRoot

>/webbeans-translator</contextRoot>

         </webModule>

      </modules>

   </configuration>

</plugin

>
Qua viene impostato il context path, in modo da avere un url gradevole (http://localhost:8080/webbeans-translator).
Suggerimento
Se non si sta usando Maven per generare questi file, sarebbe necessario avere il file META-INF/application.xml:
<?xml version="1.0" encoding="UTF-8"?>

<application xmlns="http://java.sun.com/xml/ns/javaee"

             xmlns:xsi="http://www.w3.org/2001/XMLSchema-instance"

             xsi:schemaLocation="http://java.sun.com/xml/ns/javaee http://java.sun.com/xml/ns/javaee/application_5.xsd"

             version="5">

  <display-name

>webbeans-translator-ear</display-name>

  <description

>Ear Example for the reference implementation of JSR 299: Web Beans</description>


  <module>

    <web>

      <web-uri

>webbeans-translator.war</web-uri>

      <context-root

>/webbeans-translator</context-root>

    </web>

  </module>

  <module>

    <ejb

>webbeans-translator.jar</ejb>

  </module>

</application

>
Quindi, esaminiamo il war. Proprio come nell'esempio Indovina Numero, abbiamo un faces-config.xml (per abilitare Facelets) e un web.xml (per abilitare JSF) in WebContent/WEB-INF.
Più interessante è il facelet usato per tradurre il testo. Proprio come nell'esempio Indovina Numero c'è un template, che circoscrive la form (qui omessa per brevità):
<h:form id="NumberGuessMain">


   <table>

      <tr align="center" style="font-weight: bold" >

         <td>

            Your text

         </td>

         <td>

            Translation

         </td>

      </tr>

      <tr>

         <td>

            <h:inputTextarea id="text" value="#{translator.text}" required="true" rows="5" cols="80" />

         </td>

         <td>

            <h:outputText value="#{translator.translatedText}" />

         </td>

      </tr>

   </table>

   <div>

      <h:commandButton id="button" value="Translate" action="#{translator.translate}"/>

   </div>


</h:form

>
L'utente può inserire del testo nell'area di testo sulla sinistra e premere il pulsante di traduzione per vedere il risultato sulla destra.
Infine, si esamini il modulo ejb, webbeans-translator-ejb. In src/main/resources/META-INF si trova un file vuoto web-beans.xml, usato per marcare l'archivio come contenente Web Beans.
Abbiamo lasciato per ultimo il boccone più prelibato, il codice! Il progetto ha due bean semplici, SentenceParser e TextTranslator e due bean enterprise, TranslatorControllerBean e SentenceTranslator. Dovreste ormai essere piuttosto familiari all'aspetto di un Web Bean, così ci limiteremo a evidenziare le parti più interessanti.
Sia SentenceParser che TextTranslator sono bean dependenti, e TextTranslator usa l'inizializzazione via costruttore:
public class TextTranslator {

   private SentenceParser sentenceParser;

   private Translator sentenceTranslator;


   @Initializer

   TextTranslator(SentenceParser sentenceParser, Translator sentenceTranslator)

   {

      this.sentenceParser = sentenceParser;

      this.sentenceTranslator = sentenceTranslator;
TextTranslator è un bean stateless (con un'interfaccia business locale), dove avviene la magia - naturalmente, non potevamo sviluppare un traduttore completo, ma gli abbiamo dato un buon avvio!
Infine, vi è un controller orientato all'UI, che raccoglie il testo dall'utente, e lo invia al traduttore. Questo è un bean stateful di sessione, dotato di nome, con scope richiesta, in cui viene iniettato il traduttore.
@Stateful

@RequestScoped

@Named("translator")

public class TranslatorControllerBean implements TranslatorController

{


   @Current TextTranslator translator;
Il bean possiede pure dei metodi getter e setter per tutti i campi della pagina.
Poichè si tratta di un bean stateful di sessione, è necessario un metodo di rimozione (remove method):
   @Remove

   public void remove()

   {


   }
Il manager Web Beans chiamerà il metodo di rimozione quando il bean verrà distrutto; in questo caso al termine della richiesta.
Ciò conclude il nostro breve tour degli esempi della RI di Web Beans. Per saperne di più, o per trovare ulteriore aiuto, per favore visitate http://www.seamframework.org/WebBeans/Development.
Abbiamo bisogno di aiuto in tutte le aree - soluzione dei bug, scrittura di nuove caratteristiche ed esempi e traduzione di questa guida.